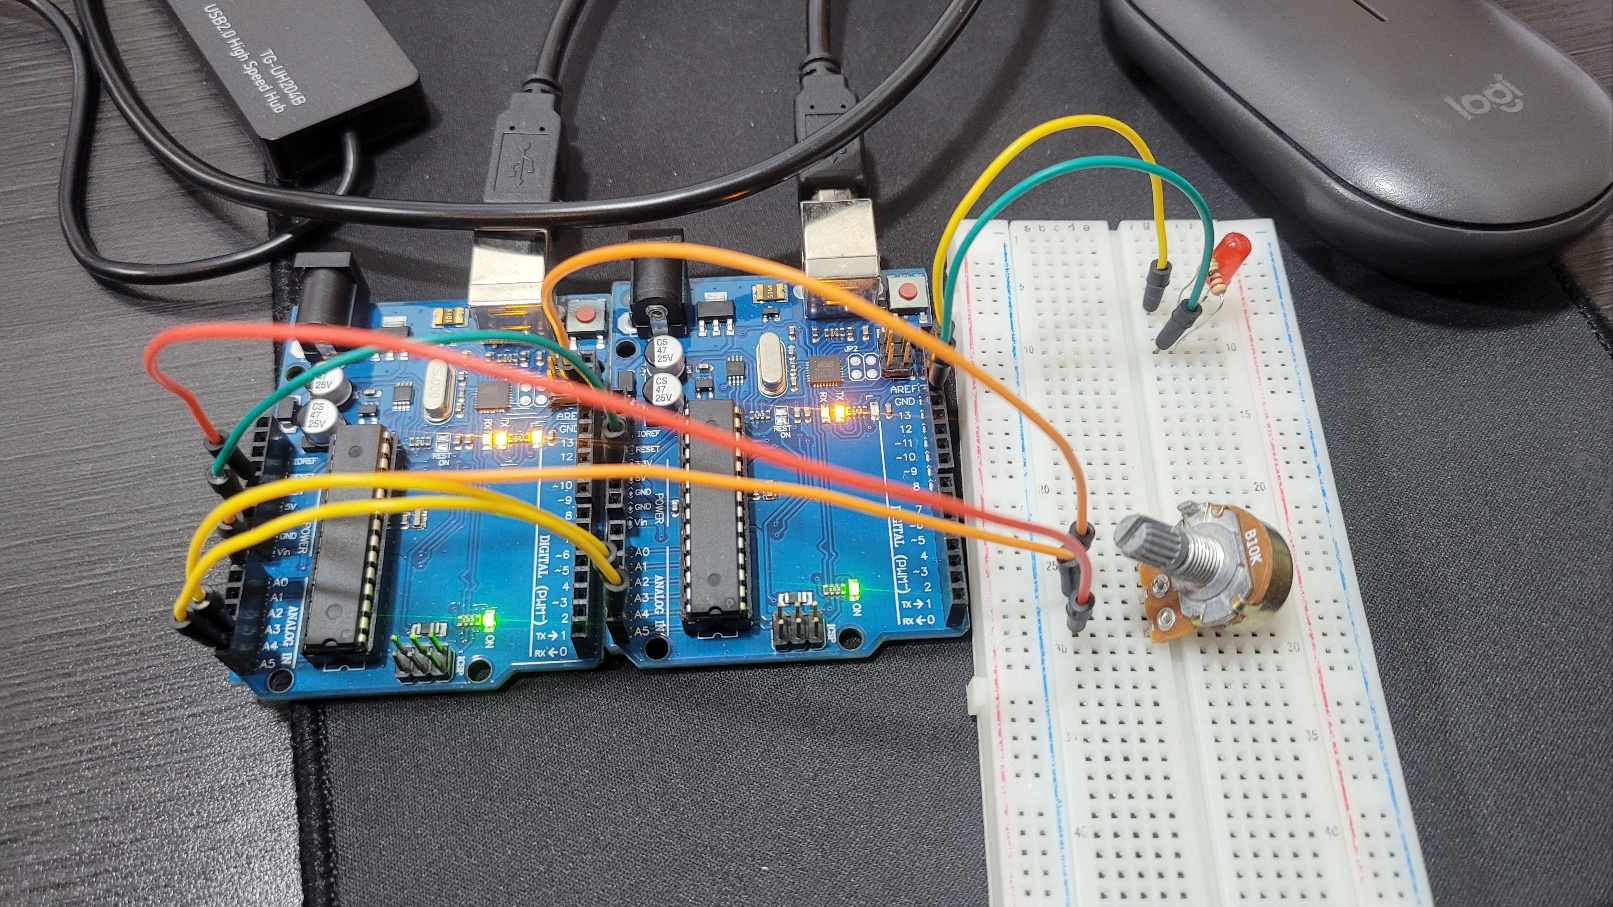
이번 실험은 가변저항기를 이영하여 원격지 LED의 ON/OFF 주기를 I2C 통신을 이용하여 실시한다.
회로설계
스케치 11-5 원격지 LED 깜박임 조절 시험 (마스터)
#include <Wire.h>
#define SLAVE_ADDR 9 // 슬레이브 ID 지정
int analogPin = 0;
int val = 0;
void setup() {
  Wire.begin(); // 마스터로써 I2C 통신 초기화
}

void loop() {
   delay(50);
   // 읽은 값을 1-255로 정규화 시킴
    val = map(analogRead(analogPin), 0, 1023, 255, 1);
   // 슬레이브로 값 보내기
   Wire.beginTransmission(SLAVE_ADDR);
   Wire.write(val);
   Wire.endTransmission();
}
스케치 11-5 원격지 LED 깜박임 조절 시험 (슬레이브)
// Slave 아두이노
#include <Wire.h>

#define SLAVE_ADDR 9		// 슬레이브 ID 지정
int LED = 13;	// Define LED Pin
int rd;	// Variable for received data
int br;	// Variable for blink rate
void setup() {
  pinMode(LED, OUTPUT);
  // Initialize I2C communications as Slave

  Wire.begin(SLAVE_ADDR);
  // Function to run when data received from master
  Wire.onReceive(receiveEvent);

  // Setup Serial Monitor
  Serial.begin(9600);
  Serial.println("I2C Slave Demonstration");
}
void receiveEvent() {
  rd = Wire.read(); // read one character from the I2C
  Serial.println(rd);   // Print value of incoming data
}
void loop() {
  delay(50);
  br = map(rd, 1, 255, 100, 2000); // 수신된 값을 이용하여 delay시간 계산
  digitalWrite(LED, HIGH);
  delay(br);
  digitalWrite(LED, LOW);
  delay(br);
}
스케치 11-5, 11-6 분석
수신된 데이터를 저장하는 변수와 깜박임 속도에 대한 시간 지연 값을 전달하는 변수가 정의 된다.
setup( )함수에서 LED의 I/O 핀을 출력으로 설정하고 I2C 버스를 초기화 한다.begin( )함수에서 슬레이브 주소를 사용할 때Wire 라이브러리는 우리가 슬레이브 역할을 하고 있음을 알고 있다.
여기서는onReceive함수만 정의하면 된다. 그리고 시리얼 모니터를 설정하여 들어오는 데이터를 화면에서 볼 수 있다.receiveEvent( )함수는 수신 데이터를 읽고rd 변수에 저장한다. 시리얼 모니터에 값을 나나낸다.
마지막으로loop( )에서 수신 데이터를 사용하여 LED를 깜박인다.Map 함수를 사용하여 1-255의 수신 값을 더 넓은 범위로 변경한다. 이 범위를 변경하여 가변 저항기를 이용하여 LED가 더 빠르게 또는 느리게 깜박이도록 실험할 수 있다.
스케치 11-5, 11-6 실행결과
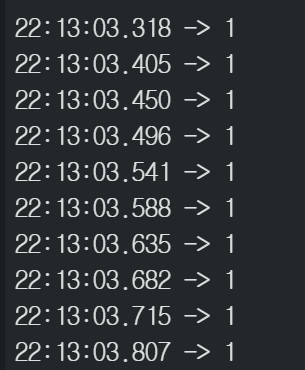
많이 깜박일 때
오른쪽으로 돌리면 점점 많이 깜박임
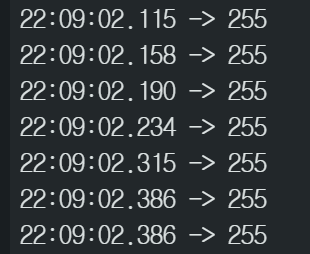
적게 깜박일 때
왼쪽으로 돌리면 점점 적게 깜박임

Shine like a star, Just like a star