
vagrant로 장고 프로젝트 환경 구축을 공유하고자 한다. python은 로컬(mac)이 아닌 vagrant로 생성한 가상머신내의 python을 사용한다. 이를 위해 PyCharm에서 어떻게 연동하는지 알아본다.
주의) PyCharm에서 Vagrant를 연동하기 위해서는 유료 버전을 사용해야 한다.
구축 순서
- vagrant 설치
- django 프로젝트 생성
- vagrant 인스턴스 생성
- PyCharm 환경설정
1. Vagrant 설치
각 운영체제 맞는 설치법을 검색해서 설치.
2. Django 프로젝트 생성
london ~/  $ mkdir ~/sample
london ~/  $ cd ~/sample
london ~/sample  $ python3 -m django startproject LondonProject
장고 설치는 django-admin으로 설치하거나 각자 선호하는 방법으로 프로젝트를 생성한다.
3. Vagrant 인스턴스 생성
Vagrant 관련 설정파일들은 작성자가 샘플로 git에 올렸으며 이를 활용하자. 각자 필요한 부분은 설정파일과 설치스크립트를 수정한다.
london ~/  $ cd ~/sample
london ~/sample $ git clone https://github.com/kim6515516/django_vagrant_template.git
london ~/sample $ cd LondonProject
london ~/sample/LondonProject  $ cp -rf ~/sample/django_vagrant_template/install ./
london ~/sample/LondonProject  $ cd install/vagrant/
london ~/sample/LondonProject/install/vagrant  $ vagrant up
가상머신 생성 // 삭제
vagrant up // vagrant destroy
가상머신 접속은
vagrant ssh
Vagrant 설정파일은 "install/vagrant/Vagrantfile"에서 수정 할 수 있다.
가상머신 네트워크 주소는 "192.168.10.10" 이다. 네트워크 주소를 변경하고자 하면 VagrantFile을 수정하면 된다.
가상머신 생성 후 실행되는 스크립트는 "vagrant_provisioning_18_04.sh"에서 확인 할 수 있다.
4. PyCharm 환경설정
-
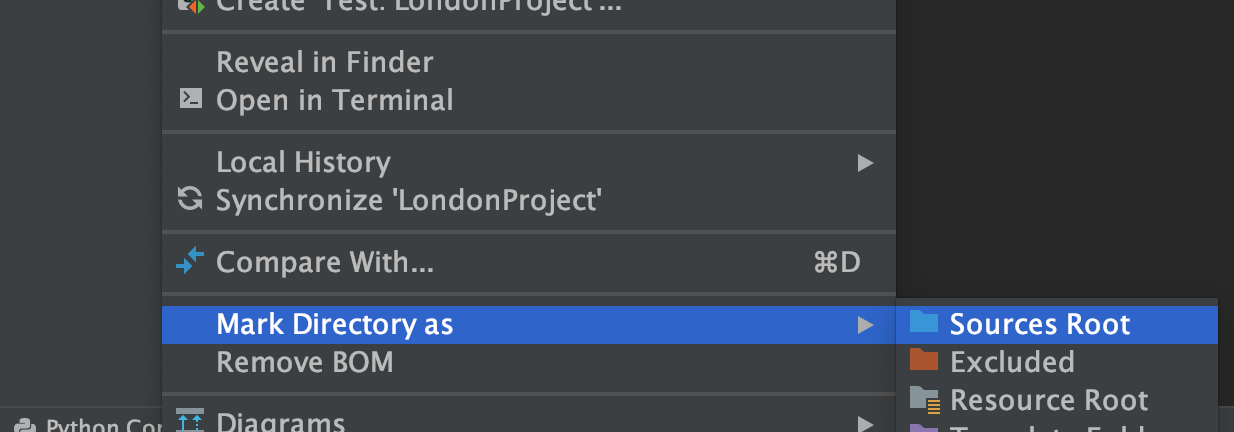
Source Root 설정
-
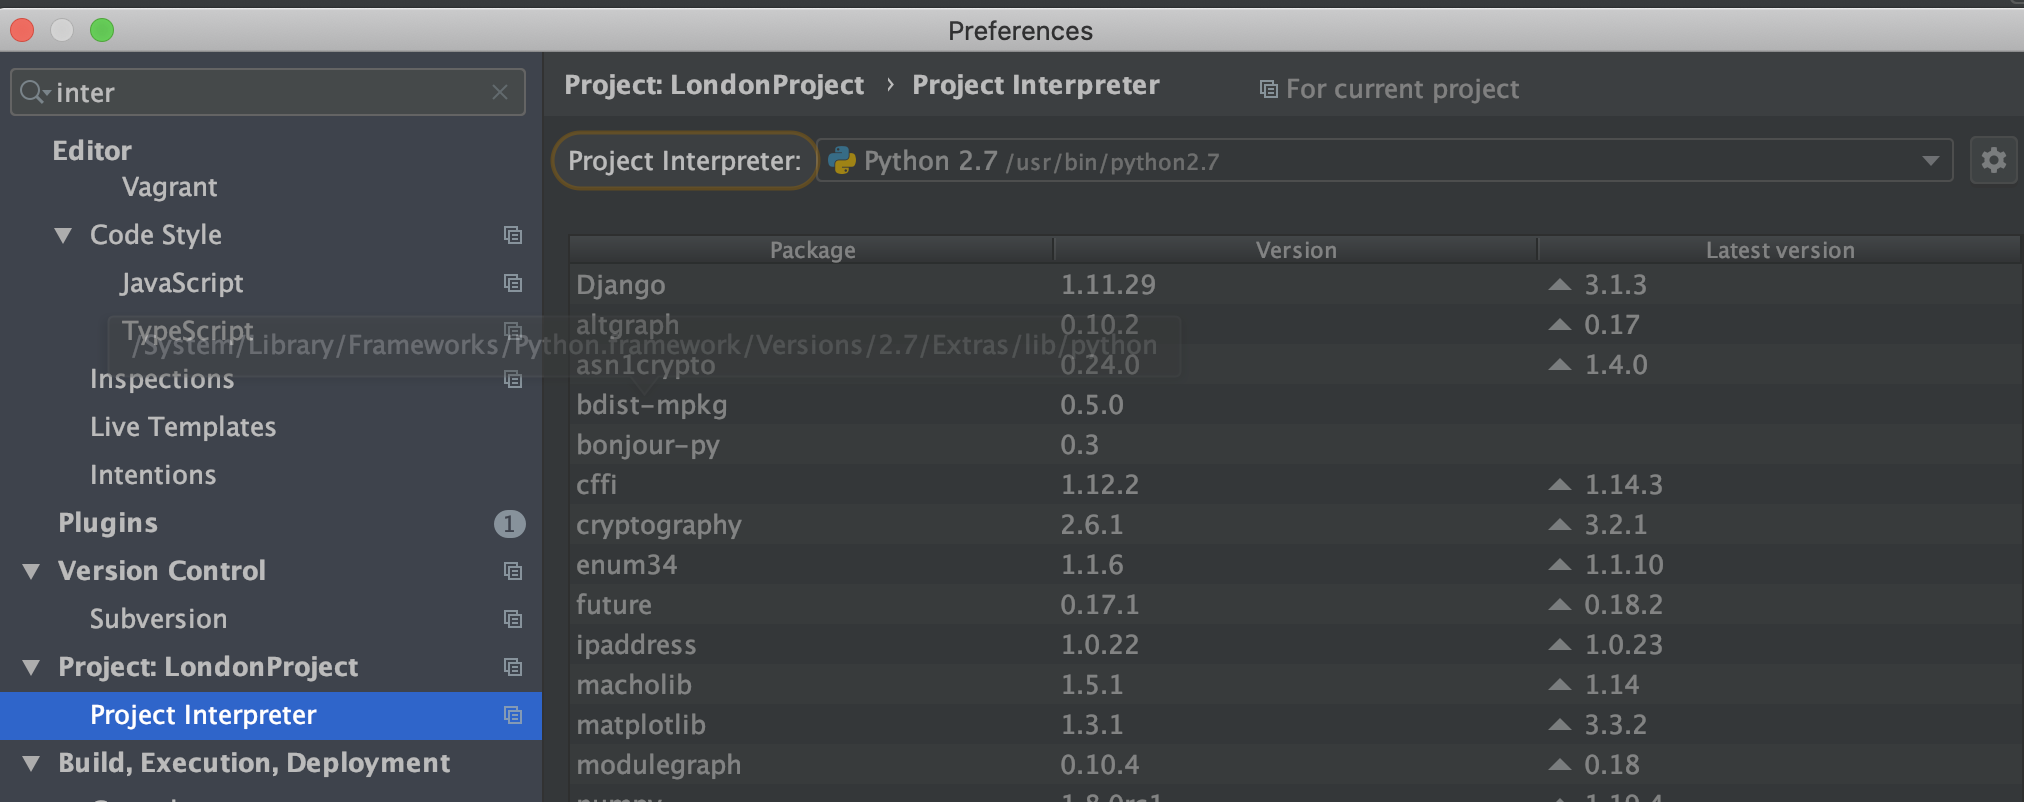
Proejct Interpreter
-
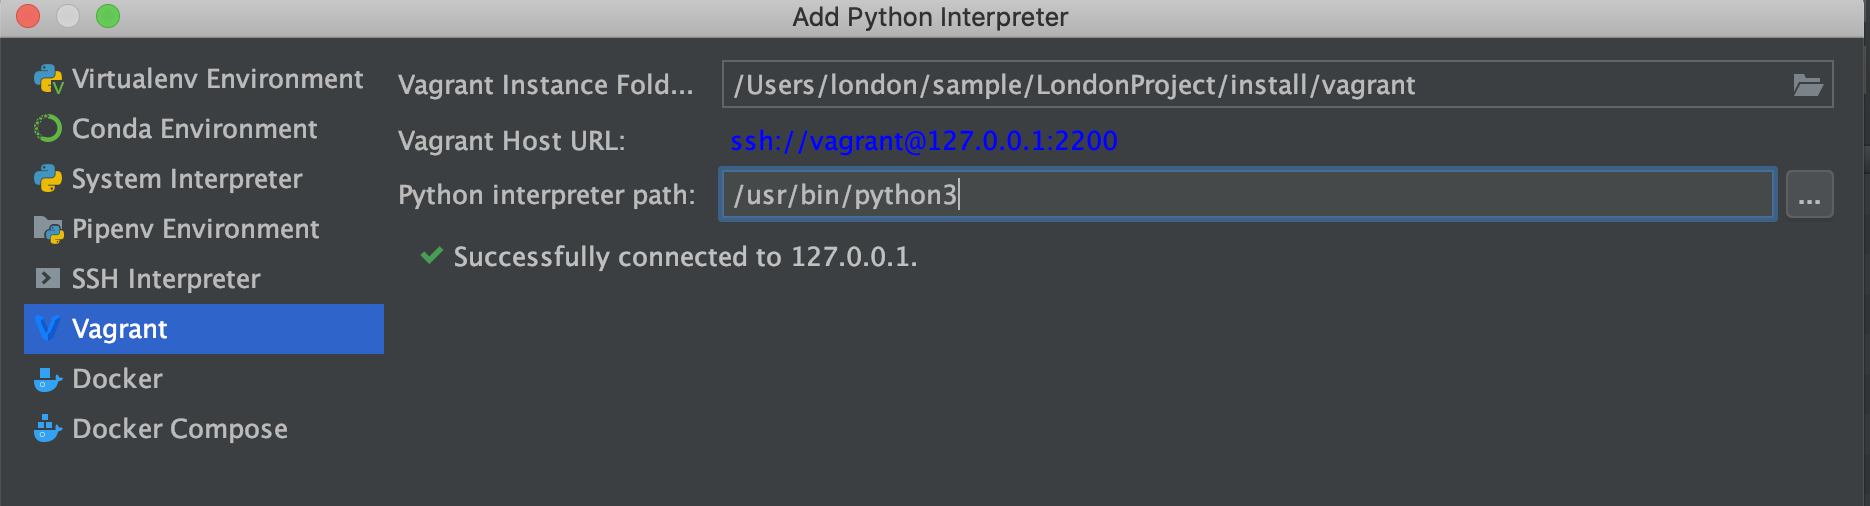
Proejct Interpreter >> Add >> Vagrant 선택
-
Enable Django Support

-
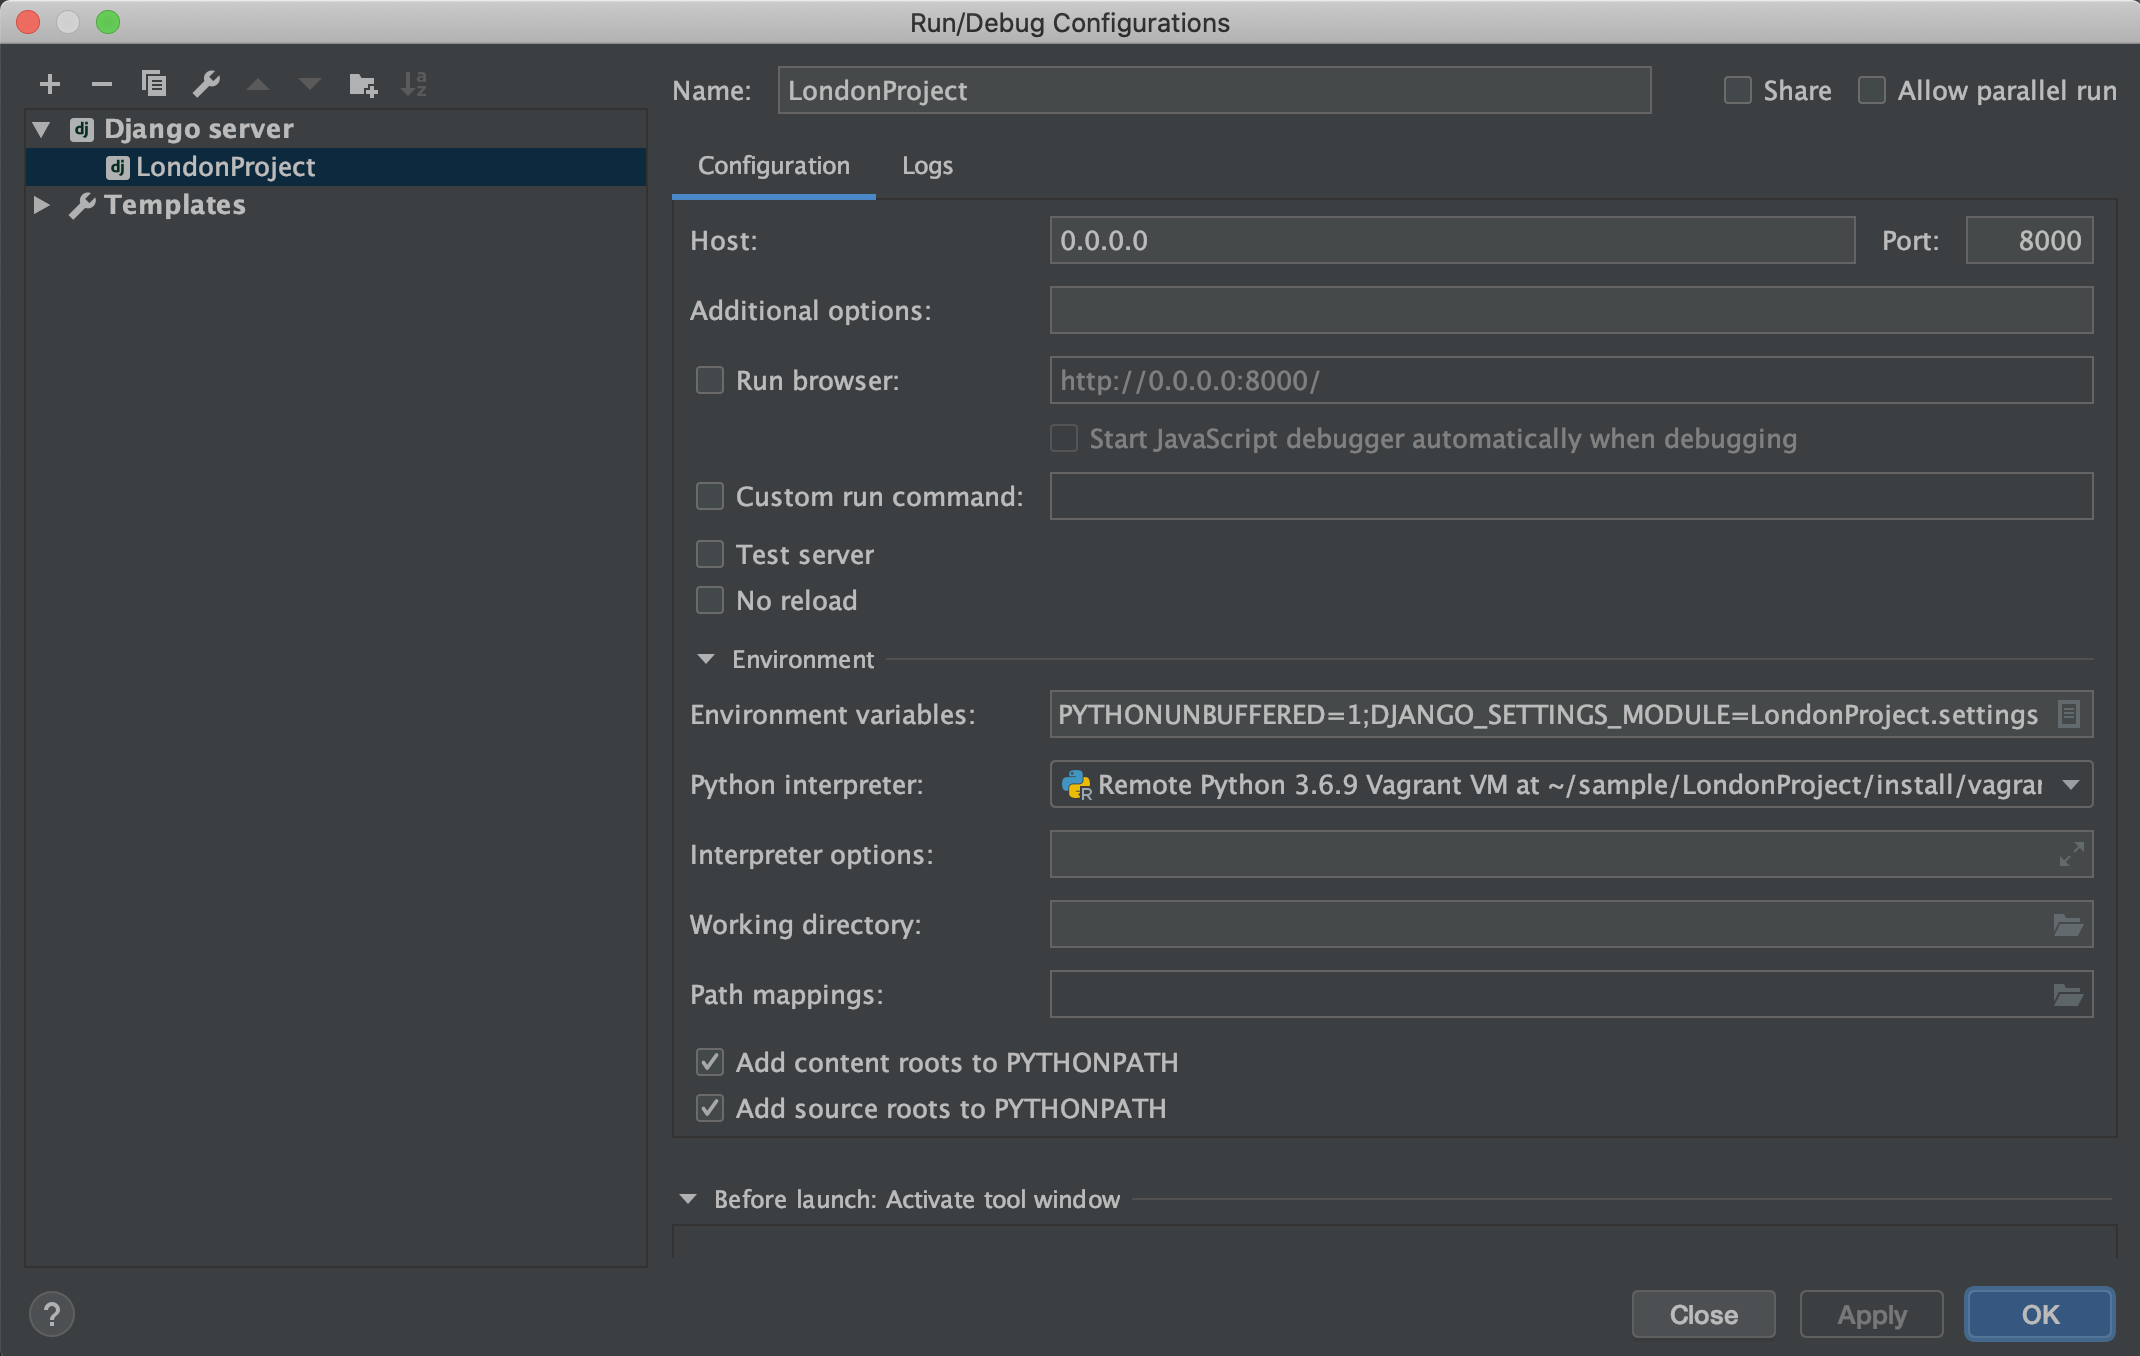
장고서버 추가
-
settings.py
ALLOWED_HOSTS = ['192.168.10.10']5. 접속확인


unit test, tdd, bdd, laravel, django, android native, vuejs, react, embedded linux, typescript