Log 검색 파트에서 DB에서 받아온 패킷 값을 날짜에 따라 출력되도록 해야 한다.
q-date를 활용하여 퍼블리싱을 먼저 해주고
<template>
    <div class="title flex items-center q-pl-md">
        <div>Log 검색 <strong> > 원하는 날짜 선택</strong></div>
    </div>
    <div class="q-pb-sm">
        <div class="row">
            <div>
                <q-date v-model="selectedDate" range />
            </div>
            <div class="col table-container">
                <q-table flat square :rows="records" :columns="columns" row-key="time" dense class="table"
                    :rows-per-page-options="[0]" hide-no-data hide-pagination />
            </div>
        </div>
    </div>
</template>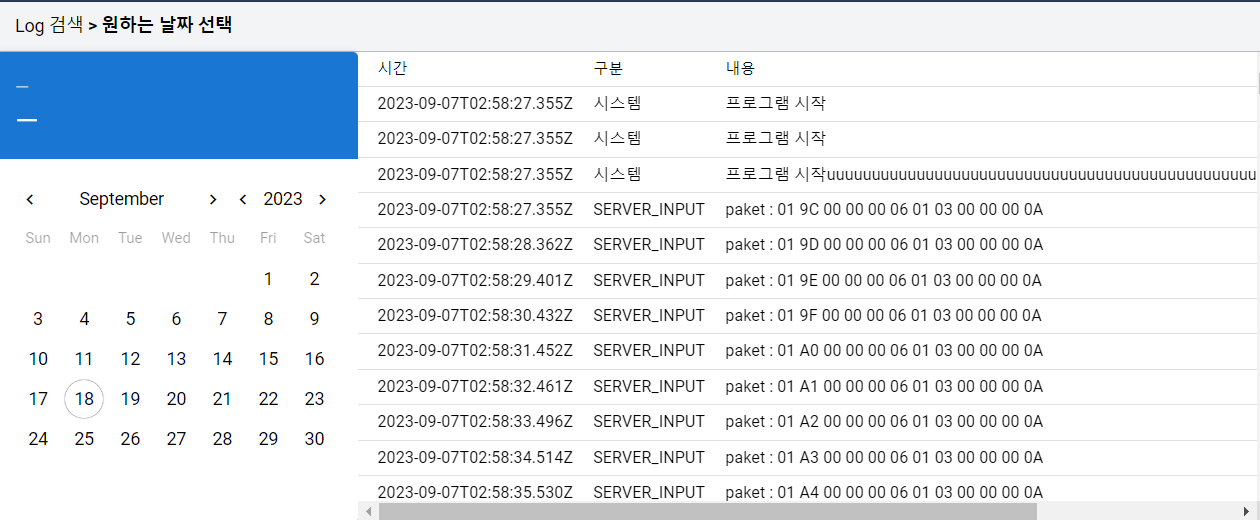
캘린더에서 선택하는 날짜에 따라 테이블 출력을 할 것이다.
<script setup lang="ts">
import { ref, onMounted, computed } from 'vue'
import axios from 'axios';
import type { QTableProps } from "quasar";

type LogType = {
    time: string;
    type: string;
    content: string;
};
const selectedDate = ref({});

const records = ref<LogType[]>([]);
records.value = [
    {
        time: "2023-09-07T02:58:27.355Z",
        type: "시스템",
        content: "프로그램 시작",
    },
    {
        time: "2023-09-07T02:58:27.355Z",
        type: "시스템",
        content: "프로그램 시작",
    },
    {
        time: "2023-09-07T02:58:27.355Z",
        type: "시스템",
        content:
            "프로그램 시작uuuuuuuuuuuuuuuuuuuuu",
    }
];

const columns: QTableProps["columns"] = [
    {
        name: "time",
        label: "시간",
        field: "time",
        sortable: true,
        align: "left",
        headerStyle: "width: 100px",
    },
    {
        name: "type",
        required: true,
        label: "구분",
        align: "left",
        sortable: true,
        field: "type",
        headerStyle: "width: 100px",
    },
    {
        name: "content",
        required: true,
        label: "내용",
        align: "left",
        field: "content",
        sortable: true,
    },
];
onMounted(() => {
    axios.get('http://localhost:4000/api/log')
        .then((response) => {
            const data = response.data.data
            for (let i = 0; i < data.length; i++) {
                const item = data[i];
                records.value.push({
                    time: item.Time,
                    type: item.Type,
                    content: item.Content,
                });
            }
        })
        .catch((error) => {
            console.error('Error fetching data:', error);
        });
});

const filteredRecords = computed(() => {
  const fromDate = new Date(selectedDate.value.from);
  const toDate = new Date(selectedDate.value.to);

  return records.value.filter((record) => {
    const recordDate = new Date(record.time);
    return recordDate >= fromDate && recordDate <= toDate;
  });
});
</script>

<template>
    <div class="title flex items-center q-pl-md">
        <div>Log 검색 <strong> > 원하는 날짜 선택</strong></div>
    </div>
    <div class="q-pb-sm">
        <div class="row">
            <div>
                <q-date v-model="selectedDate" range />
            </div>
            <div class="col table-container">
                <q-table flat square :rows="filteredRecords" :columns="columns" row-key="time" dense class="table"
                    :rows-per-page-options="[0]" hide-no-data hide-pagination />
            </div>
        </div>
    </div>
</template>
filteredRecords는 Computed 속성으로 정의하여 selectedDate나 records가 변경될 때마다 해당 날짜 범위 내의 레코드를 다시 계산하고 갱신한다.
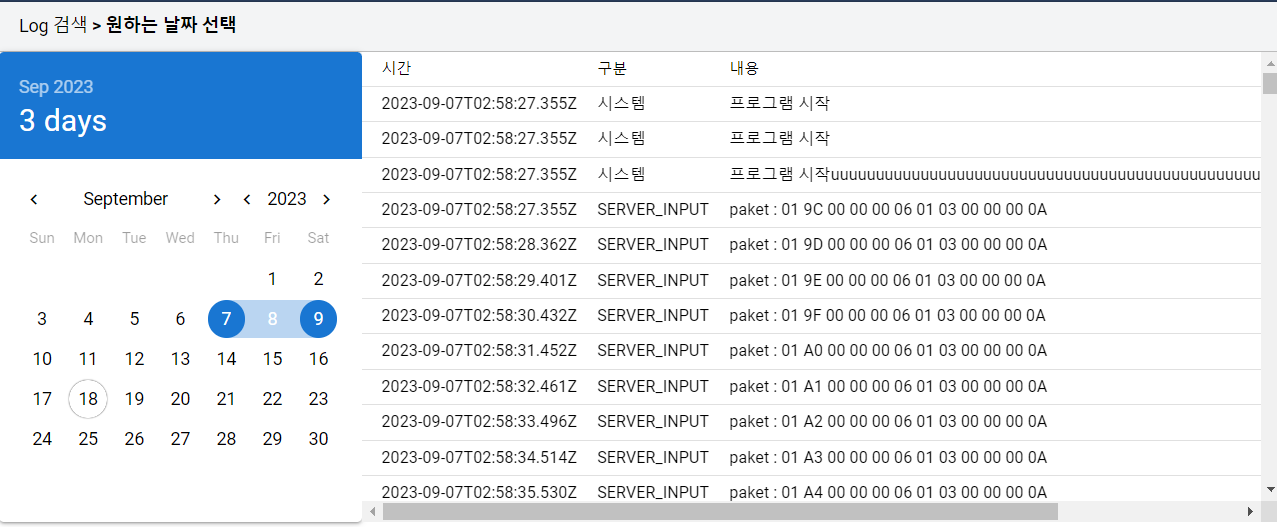 이로써 템플릿에서 filteredRecords를 사용하여 실시간으로 필터링된 결과를 얻을 수 있다.
