
이제 블로그도 끝났으니 인스타 클론코딩으로 달려봅시당…
그러니 새로운 프로젝트 생성 ㄱㄱ
vue create vuestagram
굿굿
이제는 대강 vue의 문법을 아는만큼
먼저 기획부터 하고 코드를 짜는 습관을 들이는게 바람직하다.
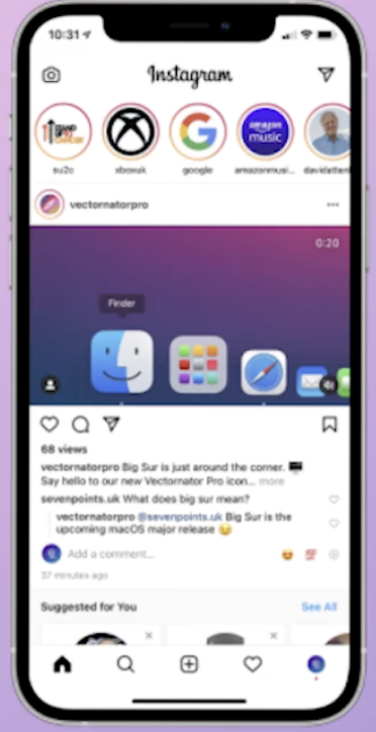
전반적으로 레이아웃은 이럼
사실 피그마 쓸줄 알면 혼자서 UI디자인도 해볼텐디;; 뭐 우짜노 못하는걸
쨋든
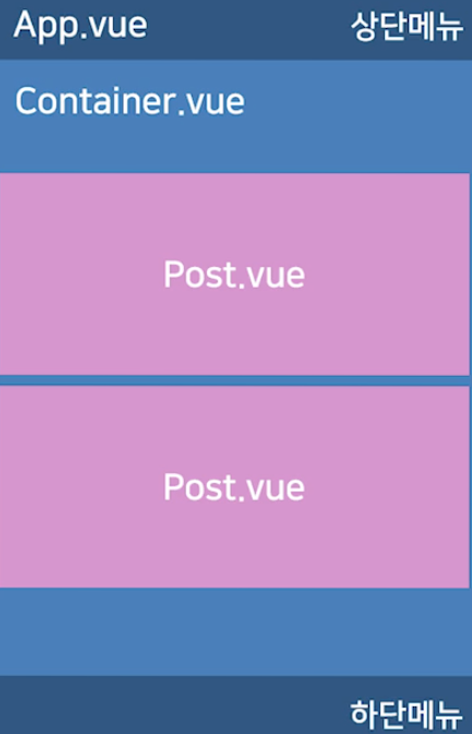 이런식으로 main과 container 와 post를 분리해서 제작을 하면 될듯
post → 우리가 흔히 생각하는 게시물 하나
container → post외의 감싸고 있는 화면
container을 사용함으로써 post 뿐만 아니라 main, 광고 등등 유기적으로 변할수 있는 UI로 제작
컴포넌트를 만드는 기준
- 재사용 한다?
- 라우터로 페이지를 나눈다?
- HTML 길이가 너무 길다?
이러면 그냥 컴포넌트화 하면 편하다고 생각하면됨
일단 파일 구분하고 가독성이 편하다는 거지 이게 항상 옳바른 방법은 아니니 잘 참고해서 하도록.
CSS 파일 분리후 갖다 쓰는법
@import '파일이름.css'

//그냥 CSS 파일 만들고 임포트 해주면 그만
일단 미리 준비된 html과 css 코드를 넣어서 디자인 ㄱㄱ
<template>
<div class="header">
    <ul class="header-button-left">
      <li>Cancel</li>
    </ul>
    <ul class="header-button-right">
      <li>Next</li>
    </ul>
    <img src="./assets/logo.png" class="logo" />
  </div>

  <Container />

  <div class="footer">
    <ul class="footer-button-plus">
      <input type="file" id="file" class="inputfile" />
      <label for="file" class="input-plus">+</label>
    </ul>
 </div>
</template>
<style>
body {
margin: 0;
}
ul {
padding: 5px;
list-style-type: none;
}
.logo {
width: 22px;
margin: auto;
display: block;
position: absolute;
left: 0;
right: 0;
top: 13px;
}
.header {
width: 100%;
height: 40px;
background-color: white;
padding-bottom: 8px;
position: sticky;
top: 0;
}
.header-button-left {
color: skyblue;
float: left;
width: 50px;
padding-left: 20px;
cursor: pointer;
margin-top: 10px;
}
.header-button-right {
color: skyblue;
float: right;
width: 50px;
cursor: pointer;
margin-top: 10px;
}
.footer {
width: 100%;
position: sticky;
bottom: 0;
padding-bottom: 10px;
background-color: white;
}
.footer-button-plus {
width: 80px;
margin: auto;
text-align: center;
cursor: pointer;
font-size: 24px;
padding-top: 12px;
}
.sample-box {
width: 100%;
height: 600px;
background-color: bisque;
}
.inputfile {
display: none;
}
.input-plus {
cursor: pointer;
}
#app {
box-sizing: border-box;
font-family: "consolas";
margin-top: 60px;
width: 100%;
max-width: 460px;
margin: auto;
position: relative;
border-right: 1px solid #eee;
border-left: 1px solid #eee;
}
</style>근데 html 코드를 자세히 보면 컨테이너를 볼수있다
뭐해 컴포넌트 안만들고.
contain.vue
네네 그래서 만들겠습니다.
컨테이너 컴포넌트는 그냥 말 그대로 포스트들을 담는 그릇이라고 생각하면 됨
<template>
  <div>
  <Post/>
  <Post/>
  <Post/>
</div>

</template>

<script>
export default {

}
</script>

<style>

</style>
근데 메인페이지에서 컴포넌트를 갖다 쓸때 임포트를 해줘야 하니 ㄱㄱ
import하고 등록하고 갖다쓰기 ㄱㄱ
import Container from './components/Container.vue';export default {
name: 'App',
components: {
Container,
}
}
</s <Container />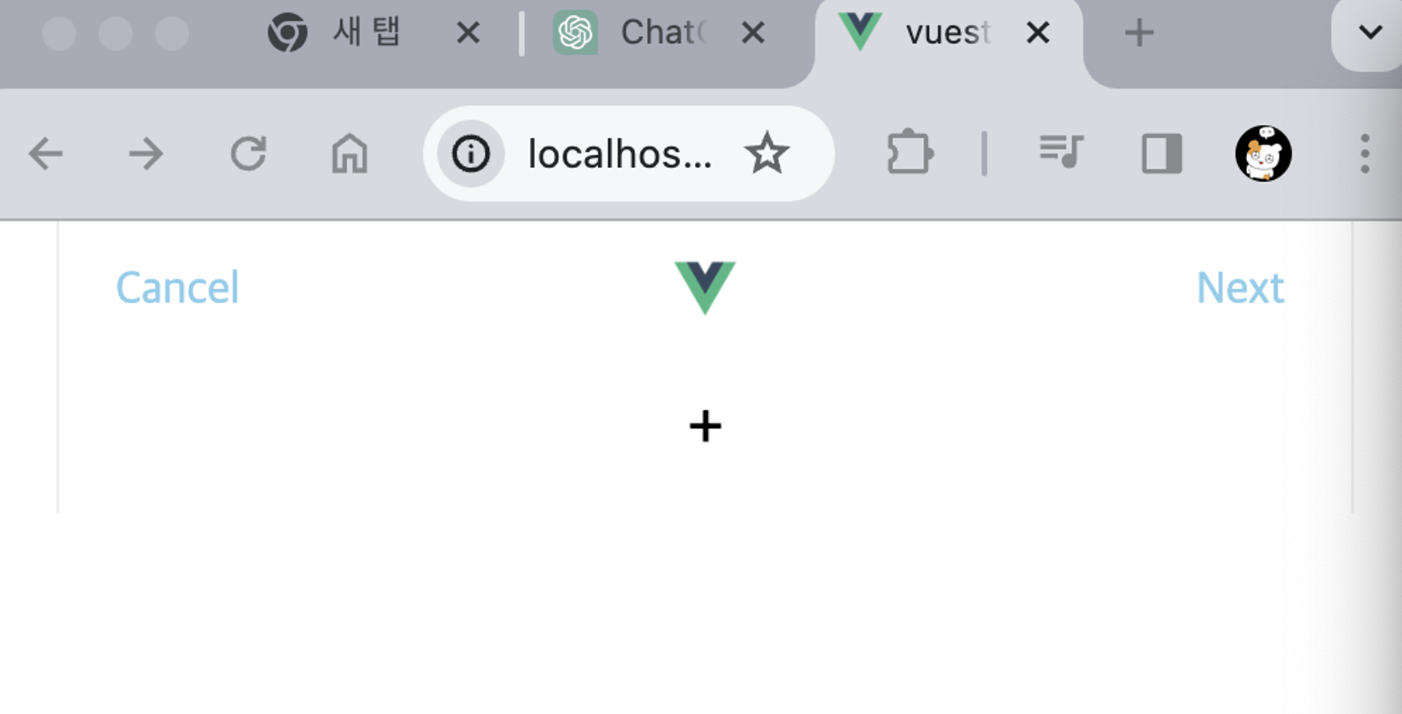
응응 완…
이제 post 컴포넌트 맹들러 ㄱㅂㅈㄱ~
post.vue
- code
<template>
  <div class="post">
    <div class="post-header">
      <div class="profile"></div>
      <span class="profile-name">ChanKim</span>
    </div>
    <div class="post-body"></div>
    <div class="post-content">
      <p>43 Likes</p>
      <p><strong>글쓴이아이디</strong> 임시내용</p>
      <p class="date">May 15</p>
    </div>
</div>
</template>

<script>
export default {
    name : InstaPost
}
</script>

<style>
    .post {
  width: 100%;
}
.profile {
  background-image: url("https://picsum.photos/100?random=0");
  width: 30px;
  height: 30px;
  background-size: 100%;
  border-radius: 50%;
  float: left;
}
.profile-name {
  display: block;
  float: left;
  padding-left: 10px;
  padding-top: 7px;
  font-size: 14px;
}
.post-header {
  height: 30px;
  padding: 10px;
}
.post-body {
  background-image: url("https://picsum.photos/600?random=0");
  height: 450px;
  background-position: center;
  background-size: cover;
}
.post-content {
  padding-left: 15px;
  padding-right: 15px;
  font-size: 14px;
}
.date {
  font-size: 11px;
  color: grey;
  margin-top: -8px;
}
</style>
응응 디자인 된 코드 그냥 박아버려
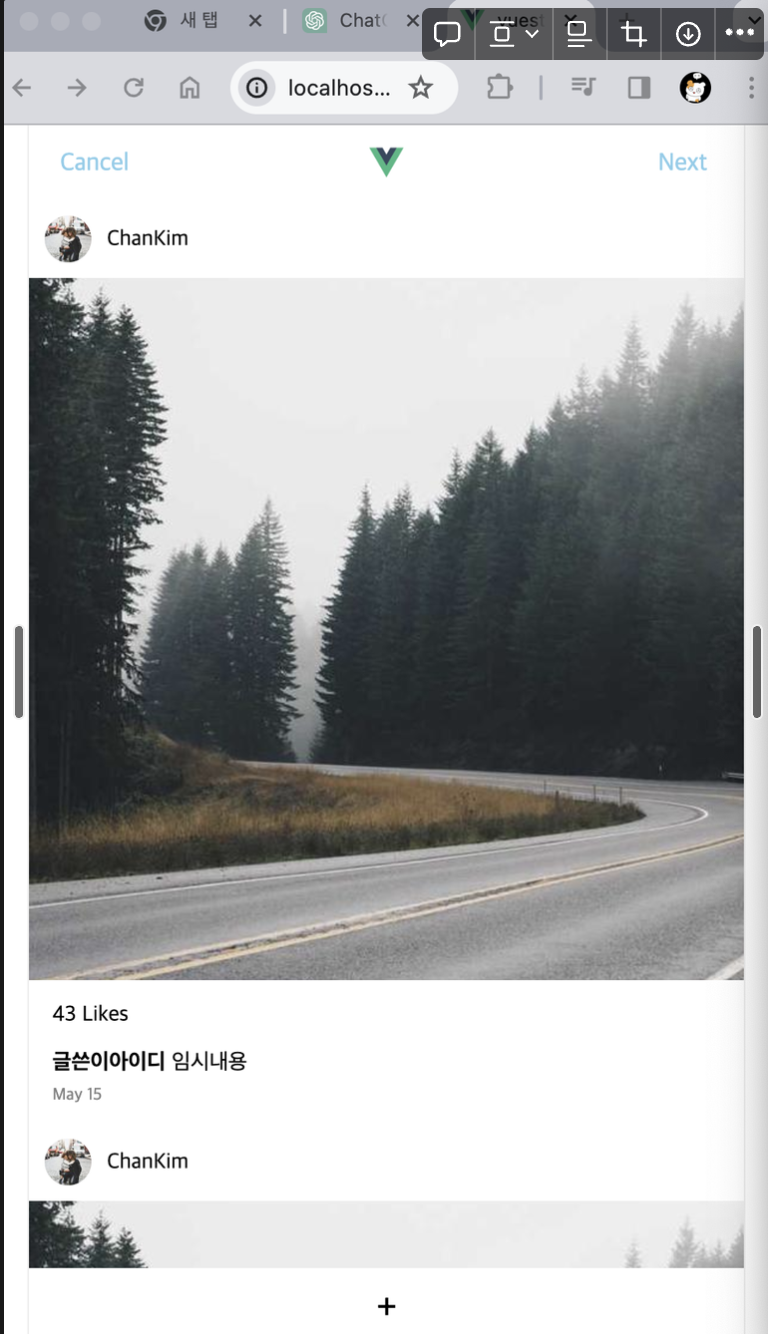
어라어라… 난 한게 없는데 완성되버림
느낀점
진짜 프론트는 css js를 잘 디자인 하기만해도 있어보이는구나를 느낌.

PM과 서비스 기획자를 희망합니다.