이번 시간에는 가격 수정 기능을 구현해보았다. 구현할 때마다 항상 프론트쪽과 데이터를 통신하는 부분에서 오류가 자주 나는 것 같다. 좀더 익숙해질 필요가 있어보인다.
초기 데이터베이스는 다음과 같다.

판매자가 가격 수정하기 버튼을 통해 해당 상품의 가격을 수정할 수 있도록 하였다.
먼저, 가격변경을 상품 정보 창에서 팝업을 통해 진행하고 싶어 gpt의 도움을 조금 빌려 다음과 같은 프론트 코드를 구현했다
<!DOCTYPE html>
<html lang="ko" xmlns:th="http://www.thymeleaf.org">
<head>
    <meta charset="UTF-8">
    <title>Fast Mall - 판매한 상품 정보</title>
    <link rel="stylesheet" href="/css/sellerStatus.css">
    <script src="https://code.jquery.com/jquery-3.7.0.js"></script>
    <script>
        document.addEventListener('DOMContentLoaded', function() {
            /*<![CDATA[*/
            var isSeller = [[${isSeller}]];
            /*]]>*/

            if (!isSeller) {
                var proceed = confirm("판매자가 아닙니다. 판매자 회원가입 페이지로 이동하시겠습니까?");
                if (proceed) {
                    window.location.href = '/sellerSignup';
                }else{
                    window.location.href = '/';
                }
            }

            const popup = document.getElementById("modPopup");
            const mod = document.querySelectorAll(".mod");
            const closePopup = document.getElementById('close-popup');
            const popupContent = document.getElementById('popup-content');
            const postButton = document.getElementById('mod_submit');
            const modPrice = document.getElementById("modPrice");

            let currentId = null;
            mod.forEach(button => {
                button.addEventListener('click', function() {
                    const row = button.closest('tr');
                    const name = row.cells[0].innerText;
                    const price = row.cells[3].innerText;
                    currentId = row.getAttribute('data-product-id');

                    popupContent.innerText = `상품 명: ${name}, 현재 가격: ${price}`;
                    popup.style.display = 'block';
                });
            });

            postButton.addEventListener('click', function() {
                if (currentId) {
                    const url = new URL('http://localhost:8080/products/modPrice');
                    url.searchParams.append('product_id', currentId);
                    url.searchParams.append('modPrice', modPrice.value);

                    fetch(url, {
                        method: 'POST',
                        headers: {
                            'Content-Type': 'application/x-www-form-urlencoded',
                            'Accept': 'application/json'
                        }
                    })
                        .then(response => response.text())
                        .then(data => {
                            alert(data);
                            popup.style.display = 'none';
                            modPrice.value = ''; // 입력 필드를 초기화
                            window.location.href = "/sellerStatus";
                        })
                        .catch(error => {
                            console.error('Error:', error);
                            alert('There was an error with the post request.');
                        });
                }
            });

            closePopup.onclick = function() {
                modPrice.value = ''; // 입력 필드를 초기화
                popup.style.display = "none";
            }

            window.onclick = function(event) {
                if (event.target == popup) {
                	modPrice.value = ''; // 입력 필드를 초기화
                    popup.style.display = "none";
                }
            }


        });
    </script>
</head>
<body>
<div class="header">
    <a href="/" id="home_logo">
        <img src="/images/icons/logo.png" alt="Home Logo"/>
    </a>
</div>
<table>
    <thead>
    <tr>
        <th>상품명</th>
        <th>가격 수정하기</th>
        <th>배송비</th>
        <th>판매 가격</th>
        <th>상품 판매 종료</th>
    </tr>
    </thead>
    <tbody>
    <tr class="clickable-row" th:each="product : ${products}" th:data-product-id="${product.id}">
        <td id="product"><img th:src="@{'/images/uploads/' + ${product.photo}}" alt="Product Image" height="80" width="80">
            <span id="name" th:text="${product.product_name}"></span></td>
        <td><button>최저가 적용</button><button class="mod">가격 수정하기</button></td>
        <td>배송비</td>
        <td th:text="${product.price}"></td>
        <td><button>판매 종료</button></td>
    </tr>
    </tbody>
</table>

<div id="modPopup" class="popup">
    <div class="popup-content">
        <button id="close-popup">Close</button>
        <h2>Settings</h2>
        <!-- Add your settings options here -->
        <p id="popup-content"></p>
        <div id="productForm">
            <label for="modPrice">변경할 가격 :</label>
            <input id="modPrice" type="number" name="modPrice" placeholder="Product Price" step="1" required>
            <button id="mod_submit">변경하기</button>
        </div>
    </div>
</div>

</body>
</html>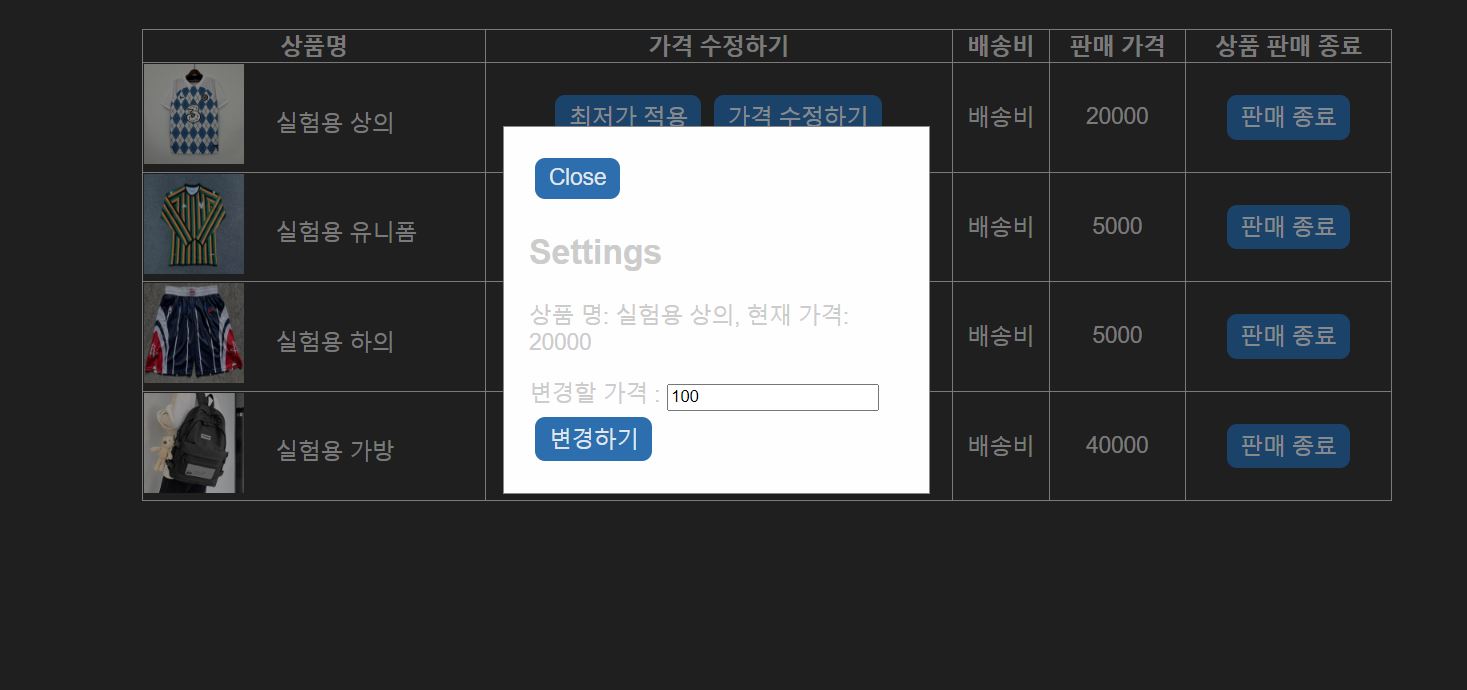
팝업이 숨겨져있다가 버튼을 클릭하면 보이게되는 구조로 만들어지는 것이다. 개인적으로는 팝업이 보통의 사이트들 처럼 하나의 창으로 구성되길 바라긴했다... 이건 나중에 시간이 남으면 수정하도록하자. 중요한건 백엔드의 기능 구현과 스프링에 익숙해지는 것이니까
아무튼 팝업을 통하여 값을 입력 받아서 해당 값을 post하여 데이터베이스를 수정하는 방식이다.
이제 백엔드 코드를 구현해보자. 백엔드 코드에는 update코드가 없었으므로, update기능부터 새로 만들어주었다.
ProductRepository
@Override
    public boolean updatePrice(int id, int price) {
        Products product = em.find(Products.class, id);
        if (product != null) {
            product.setPrice(price);
            // `merge` 메서드를 사용하여 업데이트 수행
            em.merge(product);
            return true;
        }
        return false;
    }
ProductService
public boolean updatePrice(int id, int price) { return productRepository.updatePrice(id, price); };ProductController
@PostMapping("/products/modPrice")
    public ResponseEntity<String> modPrice(@RequestParam(name = "product_id") int product_id, @RequestParam(name = "modPrice") int modPrice){
        ResponseEntity response = null;
        try {
            if(productService.updatePrice(product_id, modPrice)) {
                response = ResponseEntity
                        .status(HttpStatus.CREATED)
                        .body("가격이 변경되었습니다.");
            } else{
                response = ResponseEntity
                        .status(HttpStatus.CREATED)
                        .body("업데이트 실패");
            }
        } catch (Exception ex) {
            response = ResponseEntity
                    .status(HttpStatus.INTERNAL_SERVER_ERROR)
                    .body("An exception occured due to " + ex.getMessage());
        }
        return response;
    }
여기서 고민을 좀 했다. 가격을 수정하는 주체는 Seller이니 SellerController에 넣을까 하다가 결국 가격이 수정되는건 Product이니 일단 ProductController에 넣어두었다.
이제 코드를 실행해보면
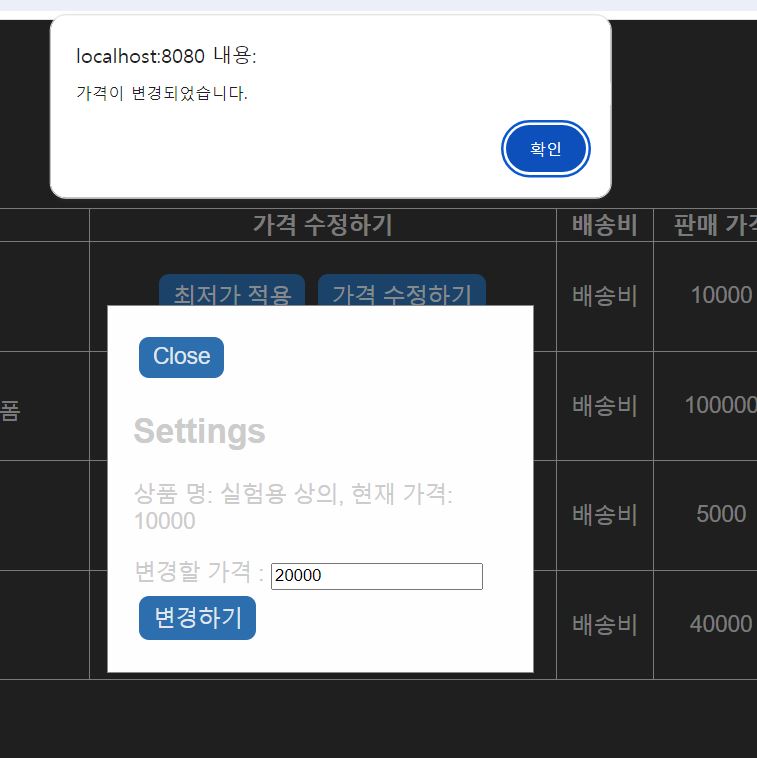
가격 변경에 성공 시 다음과 같은 알림이 뜬다. 확인을 누르면 자동으로 새로고침되어 값이 갱신되는 것을 확인할 수 있다.

이걸 2번 상품으로 다시 한번 해보면 다음과 같다
데이터베이스도 제대로 수정되었음을 확인할 수 있었다.

가격 수정버튼을 만들었으니 비슷하게 판매 종료 버튼도 구현해보자.
구현은 간단한데, 한가지 문제가 있다. 현재 product_id가 cart의 외래키로 사용되고 있어서 삭제가 안된다.
즉, 누군가가 장바구니에 해당 상품을 추가해두면 삭제가 안된다는 것이다.
이럴땐 방침을 정하고 그에 맞게 코드를 수정하는 것이 맞는 것 같다.
- 장바구니에 있다면, 장바구니에 추가되어있는 해당 상품들을 모두 제거하고 상품도 제거하기
- 장바구니에 존재하는 사람들이 모두 구매하거나 장바구니에서 삭제할 때 까지 기다리기
2번은 장바구니에 넣어두고 일부러 빼지않아버리면 상품을 영영 못내릴 것이라 판단하여 1번 방법이 맞다고 생각했다. 물론 소비자들이 억울할 수는 있으나 모든 물품 판매의 갑은 판매자라고 생각하기 때문이다.
따라서 상품 삭제 시, cart에서도 product_id로 모두 찾아내어 제거하고 product도 제거하는 것으로 하자.
최종적으로 구현한 코드이다.
프론트 코드에 삭제 post명령 추가
//상품 삭제 코드
            const del = document.querySelectorAll(".del");

            del.forEach(button => {
                button.addEventListener('click', function() {
                    const shouldRedirect = confirm('정말로 해당 상품을 판매 종료 하시겠습니까?');
                    if (shouldRedirect) {
                        const row = button.closest('tr');
                        currentId = row.getAttribute('data-product-id');

                        if (currentId) {
                            const url = new URL('http://localhost:8080/products/delete');
                            url.searchParams.append('product_id', currentId);

                            fetch(url, {
                                method: 'POST',
                                headers: {
                                    'Content-Type': 'application/x-www-form-urlencoded',
                                    'Accept': 'application/json'
                                }
                            })
                                .then(response => response.text())
                                .then(data => {
                                    alert(data);
                                    window.location.href = "/sellerStatus";
                                })
                                .catch(error => {
                                    console.error('Error:', error);
                                    alert('There was an error with the post request.');
                                });
                        }
                    }
                });
            });
//상품 종료 버튼에 class="del" 추가 작성
ProductRepository
 @Override
    public boolean deleteProduct(int id) {
        Products product = em.find(Products.class, id);
        if (product != null) {
            em.remove(product); // 엔티티 삭제
            return true;
        }
        return false;
    }
ProductService
public boolean deleteProduct(int id) { return productRepository.deleteProduct(id); }CartRepository
public boolean deleteCart(int product_id) {
        List<Cart> cart = getCartByProductId(product_id);
        for(int i = 0; i<cart.size(); i++){
            em.remove(cart.get(i));
        }
        return true;
    }
CartService
public boolean deleteAllProductById(int product_id) { return cartRepository.deleteCart(product_id); }ProductController
@PostMapping("/products/delete")
    public ResponseEntity<String> modPrice(@RequestParam(name = "product_id") int product_id){
        ResponseEntity response = null;
        try {
            cartService.deleteAllProductById(product_id);
            if(productService.deleteProduct(product_id)) {
                response = ResponseEntity
                        .status(HttpStatus.CREATED)
                        .body("상품이 성공적으로 판매 종료 되었습니다.");
            } else{
                response = ResponseEntity
                        .status(HttpStatus.CREATED)
                        .body("삭제 실패");
            }
        } catch (Exception ex) {
            response = ResponseEntity
                    .status(HttpStatus.INTERNAL_SERVER_ERROR)
                    .body("An exception occured due to " + ex.getMessage());
        }
        return response;
    }

//cartService 빈 추가해주기
테스트결과
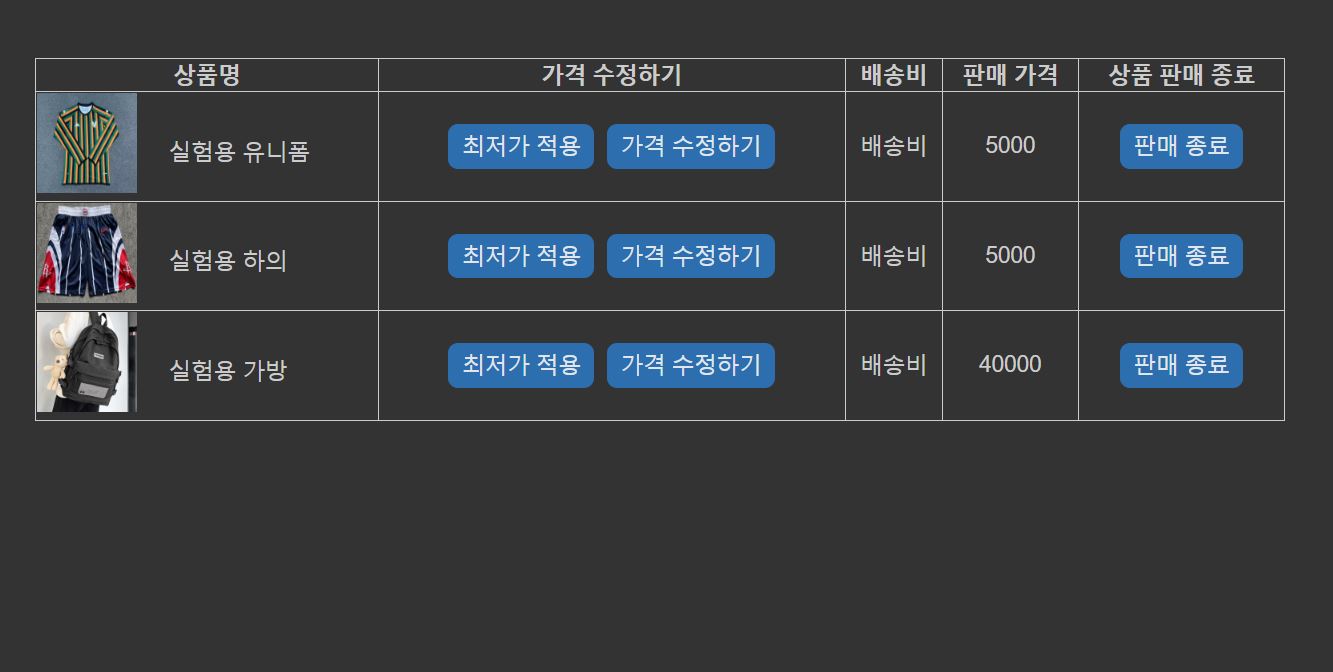

다음과 같이 성공적으로 삭제됨을 확인할 수 있었다.
이로서 처음으로 CRUD기능을 모두 구현해본 것이 되었다! 그동안은 Update와 Delete기능이 없었는데 회원 탈퇴, 장바구니 물품 삭제, 회원정보 수정 등을 만들 때 다시 한번 만들어봐야겠다.
이제 다음 글에서는 할인율을 다루면 될 것같다. 여기서도 고민이 조금 있는데
- 할인율을 사이트 담당자가 정함. 담당자가 할인율을 책정하여 적용하면 해당 상품이 퍼센트치 만큼 할인됨.
- 판매자가 원래 올린가격에서 가격 변경시, 그것의 비율적 차이를 이용하여 할인율을 책정하기
둘중 어떤 방법을 선택하냐에따라 코드의 구현방식이 달라질 것 같다.
여기서는 1번방법이 맞는 것같다. 2번은 수정할 것이 적어 편하겠지만 일부러 높은 가격으로 올려두고 가격을 내리면 할인율로 항상 최상단에 있을 것이며, 그것은 괴리감이 있는 것이라 생각했기 때문이다.
따라서 다음 글에서는 1번 방법을 채택하여 할인율을 적용해보도록하자