docker lecture(Container images, Where to find them and how to build them)
오성님 자료: https://velog.io/@monsterkos/TIL2020.12.05
준수님 자료: https://www.notion.so/kljopuu/Creating-Using-Conteainer-Like-Boss-b053aee3543f40919ad6e75e1d240c14
docker container top: process list in one container
docker container inspect: details of one container config
docker container stats: performance stats for all containers
docker container run -it: start new container interactively
docker container run exec -it: run additional command in existing container
-bash shell: if run with -it, it will give you a terminal inside the running container
36. what's in an image(and what isn't)
-App binaries and dependencies
-Metadata about the image data and how to run the image
Official definition: "An Image is and ordered collection of root filesystem changes and the coreesponding execution parameters for use whthin a container runtime.
-not a complete OS. No Kernel, kernel modules
이게 docker와 VM과의 결정적 차이다. full OS를 돌리는게 아니라 하나의 appication을 실행할뿐이다.
-Small as one file like a golang static binary
-Big as a Ubuntu distro with apt, and Apache, PHP, and more installed
37. The mighty Hub: Using Docker Hub Registry Images
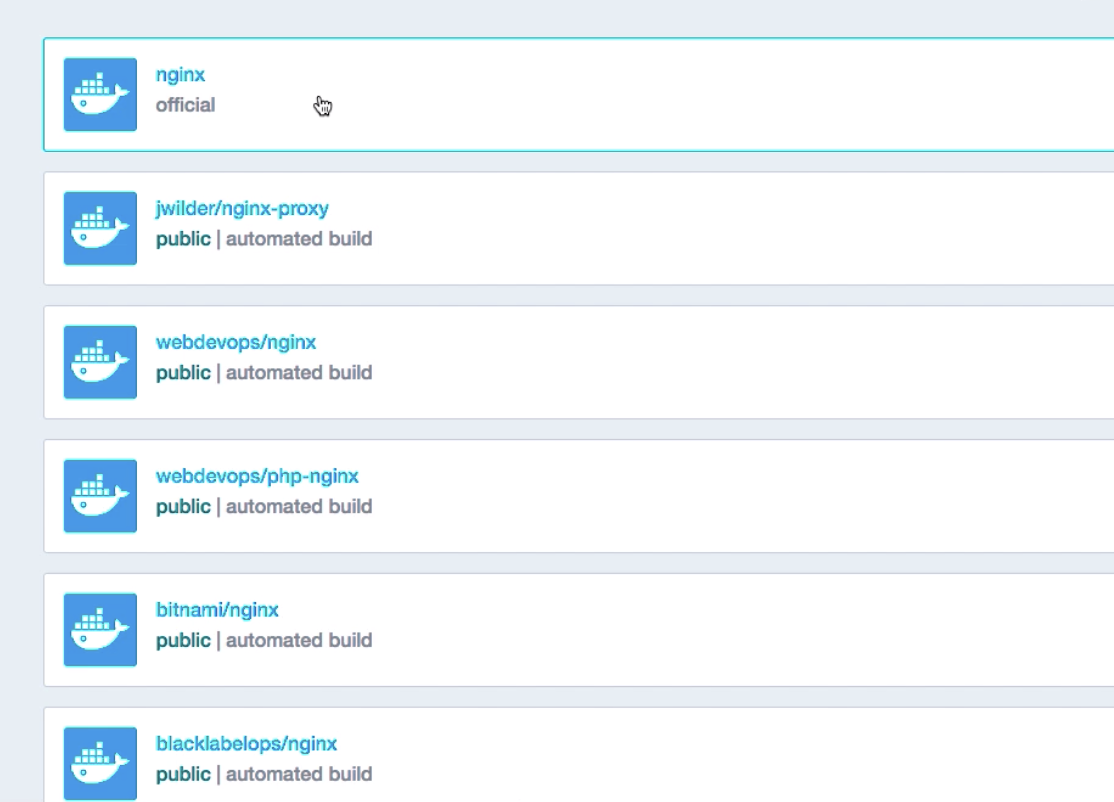
Docker-hub에 Nginx라 검색해보자.
-15283개의 이미지가 나온다.
-what's the right image?
-특별한 이유가 없다면 official 써진걸로 쓰면 된다!
official의 특징은 이름에 슬래쉬('/)가 없다는 것이다. 슬래쉬는 보통 만든 기관이름 써있다.
docker pull ningx
위 명령어처럼 버전 없이 이미지만 pull하면 default로 latest version을 받아온다.
개발모드일땐 저렇게 해도 상관없고, production일 땐 버전을 명시해주는 편이 좋고 안전하다.
alpine
알파인 버전은 경령화 버전이다.
prod모드에선 비추, 개발 모드에서 사용하면 될듯하다.
38. Images and Their Layers: Discover the Image Cache
강의 키워드
Image layers
union file system
history and inspect commands
copy on write
docker image history
-docker history(old way)
: show layers of changes made in image
예시: docker image history nginx:latest
-처음 이미지를 만들면 one layer로 시작한다. 레이어는 고유한 SHA값을 갖고, 이는 시스템이 해당 레이어가 다른 레이어를 구분하게 해준다. 또한, 같은 레이어를 더이상 다운 받지 않도록 해준다.
-계속 레이어를 더해갈 수 있다.
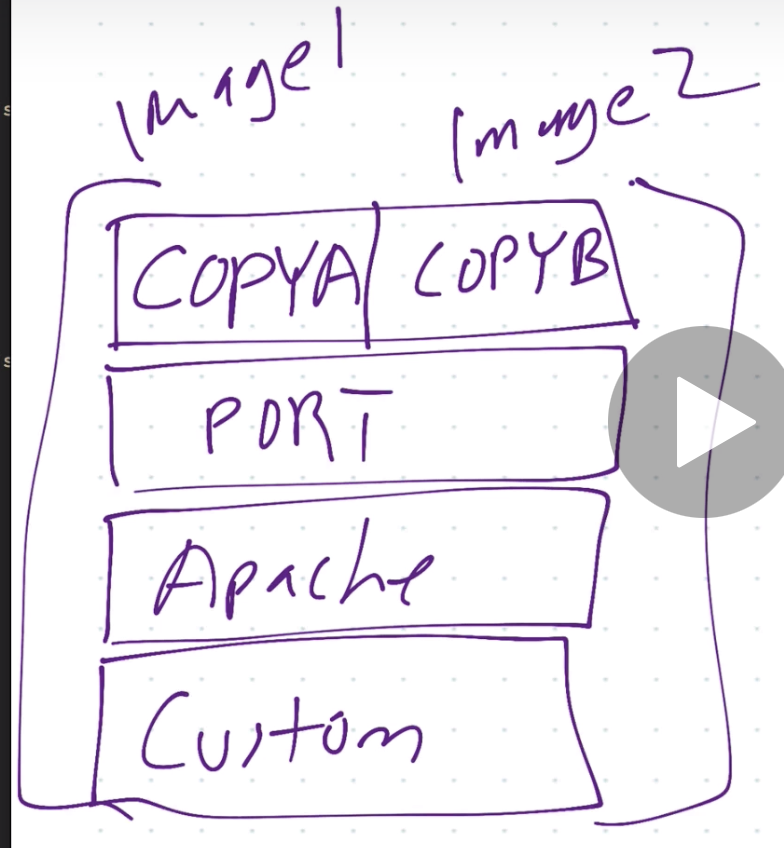
-A라는 이미지를 만든다 가정하자. 맨 아래 layer부터 1, 2, 3 layer가 쌓였다.
이 layer를 기반으로 하는 B라는 image를 또 만든다 치자. 이땐 1,2,3을 다시 다운받지 않고, 그 위에 쌓아갈 수 있다. 이렇게 해서 하나의 FS안에 중복되지 않는 장점이 생긴다.
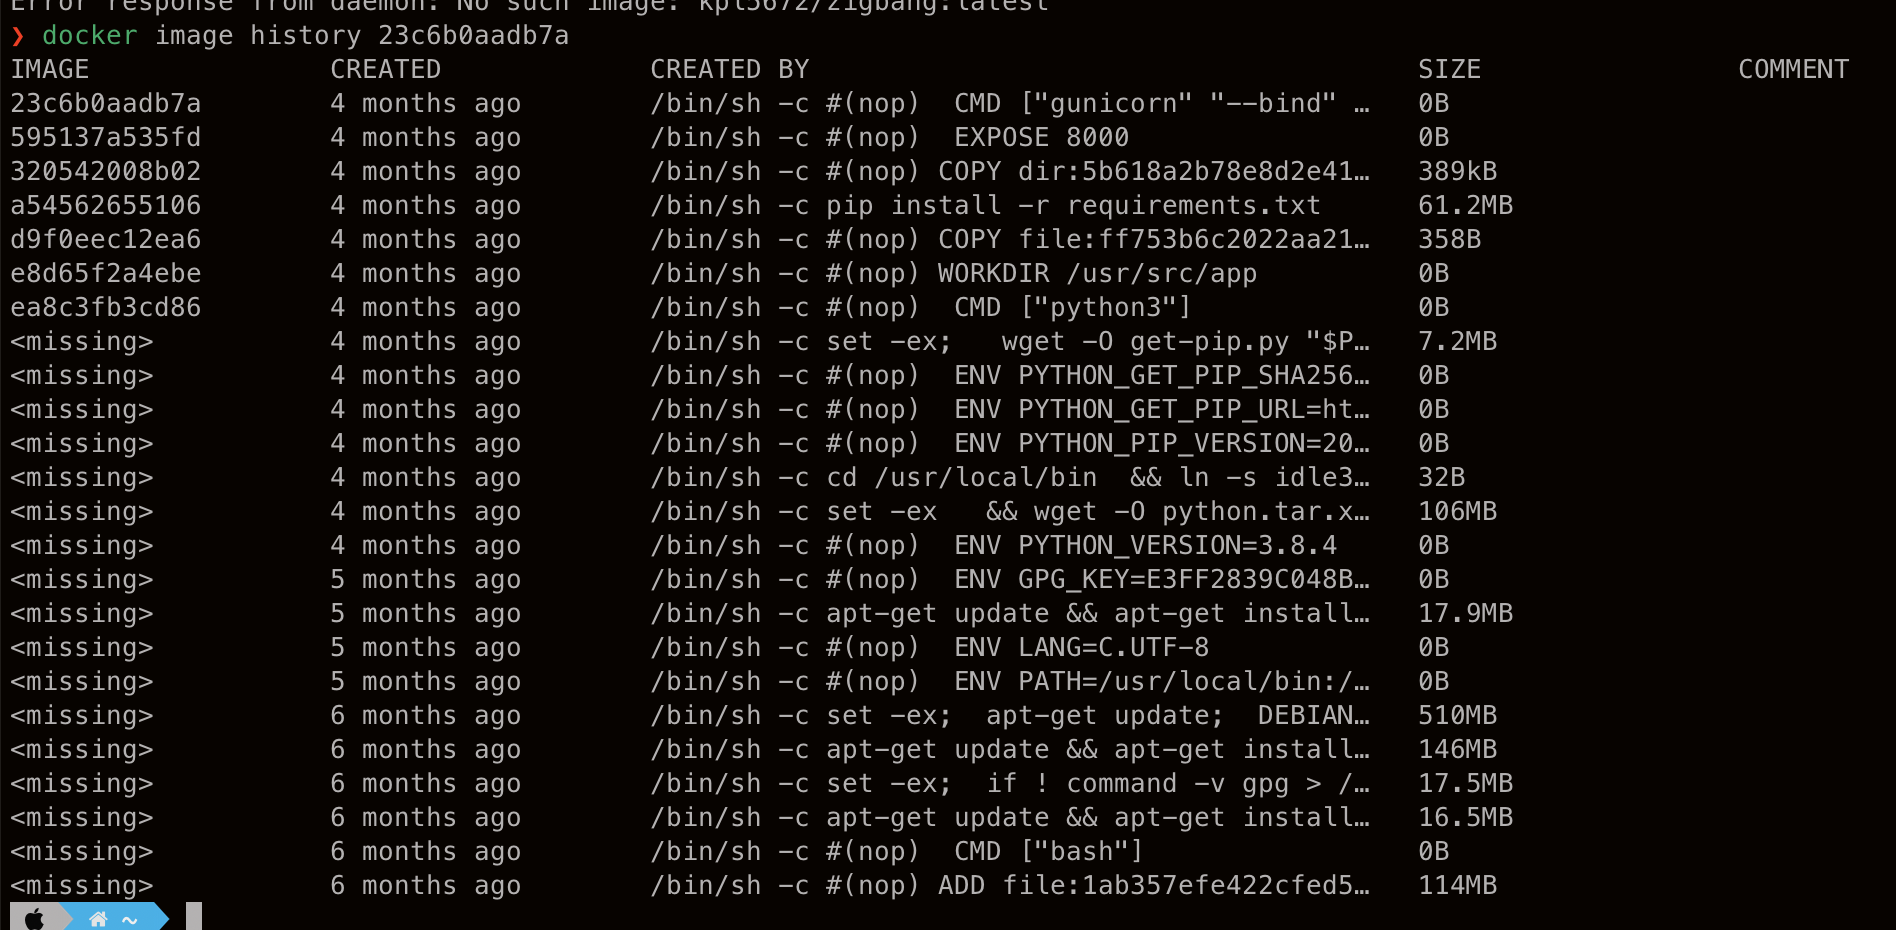
-missing은 이게 독립된 이미지는 아니고, 이미지의 layer라는 뜻이다
docker image inspect
-docker inspect(old way)
:returns JSON metadata about the image
Conclusion
- Images are made up of file system changes and metadata
- Each layer is uniquely identified and only stored once on a host
- This saves storage space on host and transfer time on push/pull
- A container is just a single read/write layer on top of image
- docker image history and inspect comands can teach us
39. Image Tagging and Pushing to Docker Hub
학습내용
- all about image tags
- How to upload to Docker hub
- Image ID vs Tag
TAG
-tag는 {user}/{repo}:{tag} 요 형식으로 적는게 기본이다.
-Default tag is 'latest' if not specified
-official repo는 repo 이름 앞에 account/안쓴다.
becuase they live at the "root namespace" of the registry.
-TAG는 git으로 치면 각각 커밋의 이름이다. 버전 명시해 놓은것임.
docker image tag
=docker tag(old way)
: assign one or more tags to an image
활용예시: docker image tag nginx hihi/nginx
"latest" tag에 대해 더 알아보자.
it's just the default tag, but image owners should assign it to the newest table version.
latest라고 진짜 최신이 아니다. default의미에 더 가깝다.
docker image push
: uploads changed layers to a image registry(default is Hub)
예시: docker image push my/nginx
1) docker image push hi/nginx
2) docker image tag hi/nginx hi/nginx:testing
3) docker image push hi/nginx:testing
위 세 명령으로 순차적으로 치면, 이미 존재하는 layer라는 코드가 나온다.
당연한 결과다.

docker login
:로그인.
docker logout
40. Building Images: The Dockerfile Basics
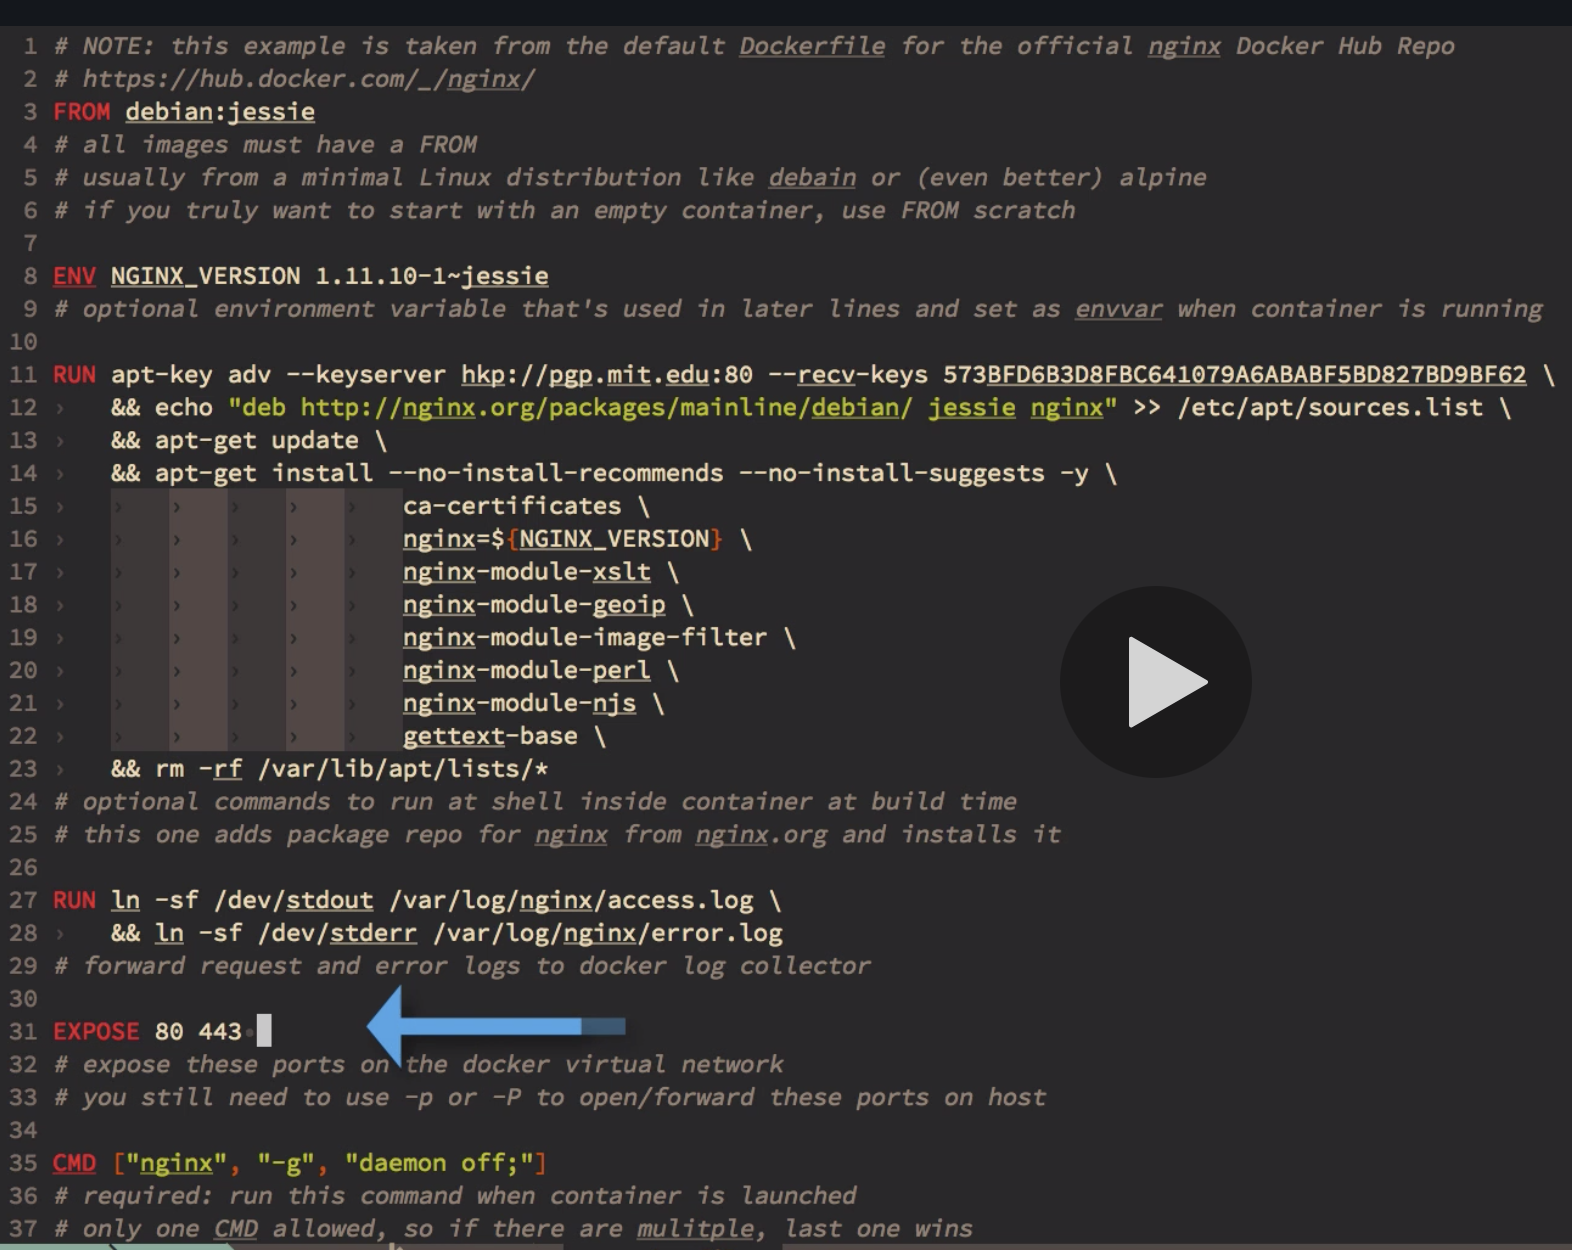
도커파일에 적힌 명령어 각각은 하나의 layer를 의미한다. 이 layer들은 top-down방식으로 작동하기에, 순서가 중요하다.
FROM : base image를 명시해준다. 모든 dockerfile은 이 명령어가 필요하다.
-PM's(package manager) like apt and yum are one of the reasons to build containers FROM Debian, Ubuntu, Fedora or CentOS
ENV: 환경변수 설정해준다.
RUN: 컨테이너 안에서 돌아갈 shell script등을 적어준다. 보통 컨테이너 실행에 필요한 package들을 설치하는 내용이 많다.
&&기호는 서로 다른 명령어들을 일련의 순차적인 명령어그룹으로 엮어준다.
*참고로 도커는 필요한 로그들을 자동으로 생성해준다. 이를 stdout으로 적합한 곳으로 보내주면 된다.
EXPOSE: 도커의 포트를 열어준다. 여기에 썼다고 호스트 서버의 포트가 열리는건 아니다. 컨테이너 실행할 때 -p명령어로 따로 열어줘야 한다.
CMD: 컨테이너가 실행될 떄(중단되었다가 재실행 되는 것 포함)마다 이 명령어가 실행된다. CMD명령은 꼭 하나야여만 한다. 여러개가 올 경우, last one wins!
41. Building Images: Running Docker Builds
docker image build -t customimage .
-'.'은 현재 디렉토리(하위 디릭토리 포함)를 이미지화 하라는 명령이다.
42. Building Images: Extending Official Images
nginx 이미지의 index.html 커스텀하기!
실행해서 official nginx와 비교해보기
참고: WORKDIR은 cd같은 명령어.

-만든 이미지의 tag를 바꾸도보자. IMAGE ID는 같고 tag만 달라진다.
43. Assignment: Build Your Own Dockerfile and Run Containers From ii
1) run {command 1} && {command 2}
2) run {command 1}; {command 2}
둘 다 command를 chaining해주지만, ;는 이전 명령어의 성공 여부없이 실행되고, &&은 이전 명령어에 의존한다.
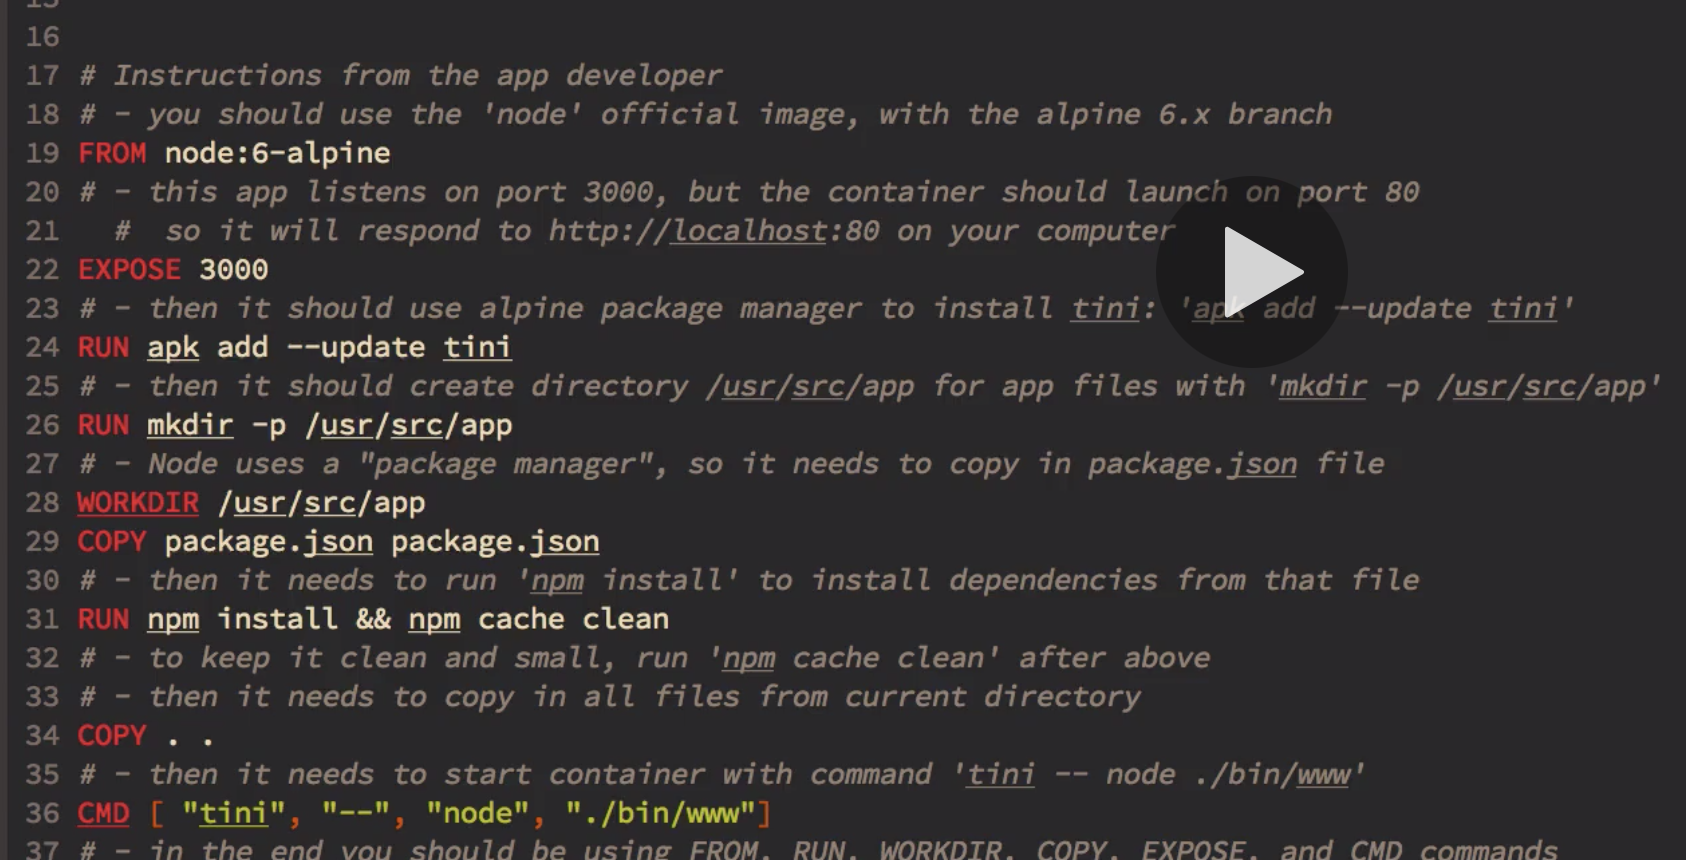
과제 정답
prune command
docker image pruneto clean up just "dangling" imagesdocker system prunewill clean up everything- The big one is usually docker image prune -a which will remove all images you're not using. Use docker system df to see space usage.
