elasticsearch 1
Lecture 2. Getting Started
설치
- https://www.elastic.co/kr/downloads/elasticsearch 에서 운영체제에 맞게 다운로드
tar -zxf 파일명으로 설치.cd elasticsearch-7.13.2명령으로 이동 (버전은 다를 수 있음)bin/elasticsearch명령어로 실행
- 4의 명령어로 치면 elastic search가 foreground로 돌아간다. 터미널을 끄면 꺼짐.
- curl명령어로 잘 동작하는지 확인.
curl http://localhost:9200
{
  "name" : "Hwanils-MacBook-Pro.local",
  "cluster_name" : "elasticsearch",
  "cluster_uuid" : "pNh3CaPDR2SrmAPeYws87g",
  "version" : {
    "number" : "7.13.2",
    "build_flavor" : "default",
    "build_type" : "tar",
    "build_hash" : "4d960a0733be83dd2543ca018aa4ddc42e956800",
    "build_date" : "2021-06-10T21:01:55.251515791Z",
    "build_snapshot" : false,
    "lucene_version" : "8.8.2",
    "minimum_wire_compatibility_version" : "6.8.0",
    "minimum_index_compatibility_version" : "6.0.0-beta1"
  },
  "tagline" : "You Know, for Search"
}
디렉토리 overview
bin
- binary파일들이 모여있음. 실행파일인 bin/elasticsearch도 있음.
config
- configuration파일들이 모여있음
lib
- elasticsearch의 dependancy가 모여있음
modules
- 빌트인 모듈이 모여있는 곳.
plugins
- 플러그인의 장소. 처음엔 비어있음.
kibana 설치
- https://www.elastic.co/downloads/kibana 에서 운영체제에 맞게 다운로드
tar -zxf 방금 다운로드받은 파일명으로 압축 해제 후 해당 디렉토리로 이동bin/kibana로 실행- localhost:5601로 접속해 정상 동작 여부 확인
Understanding the basic architecture
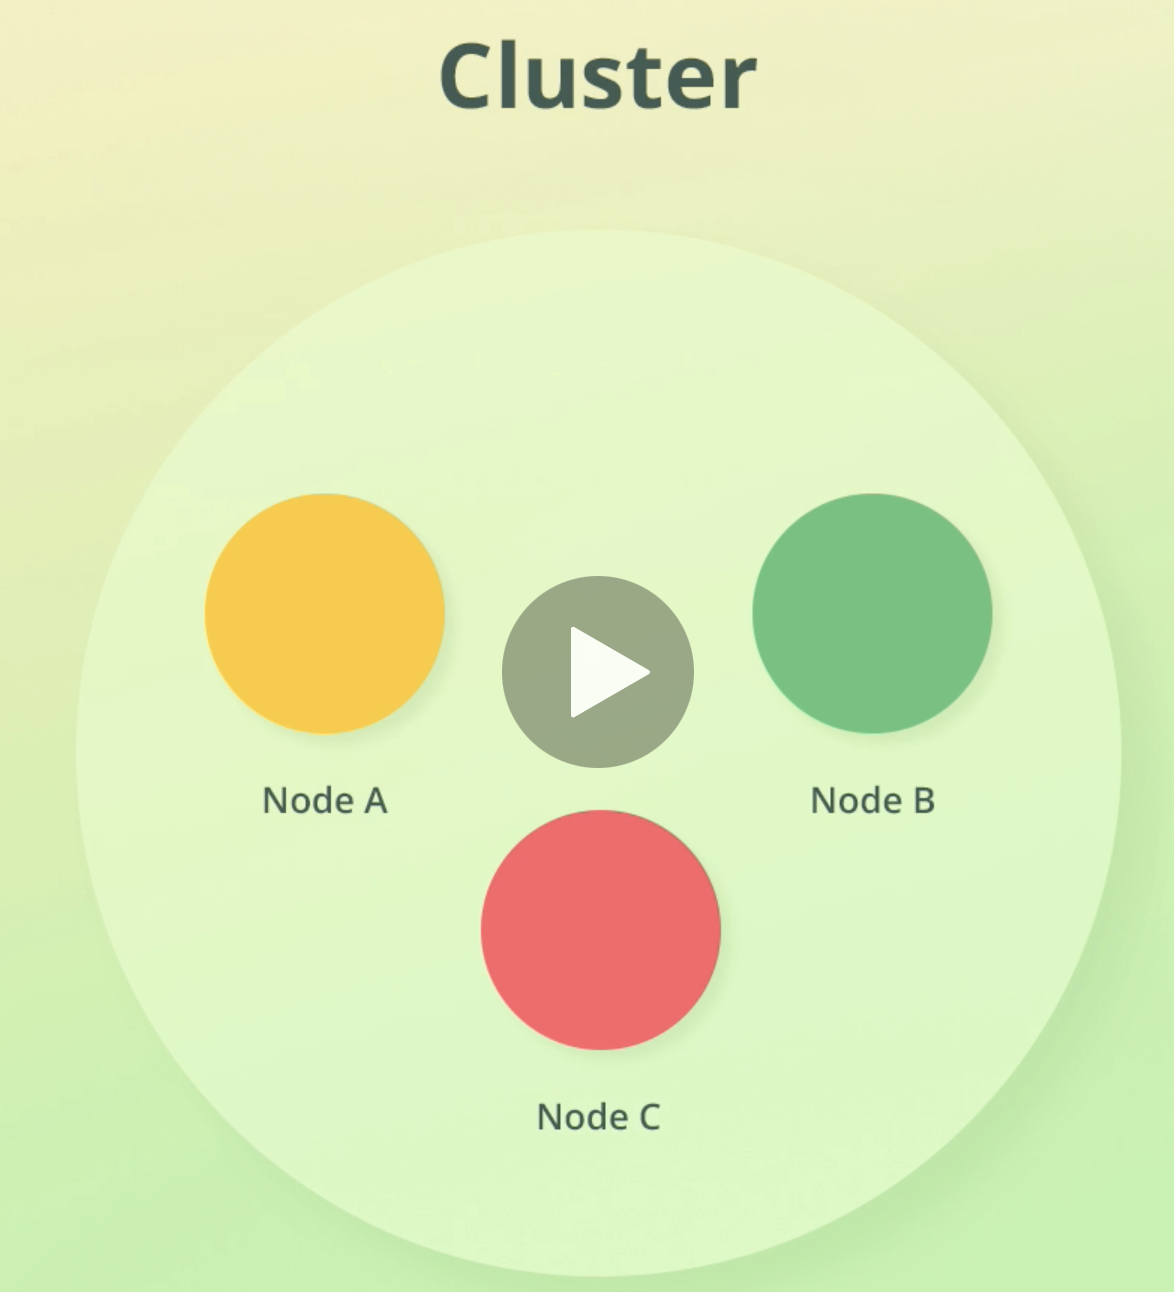
- 클러스터는 연관된 노드들의 collection이다.
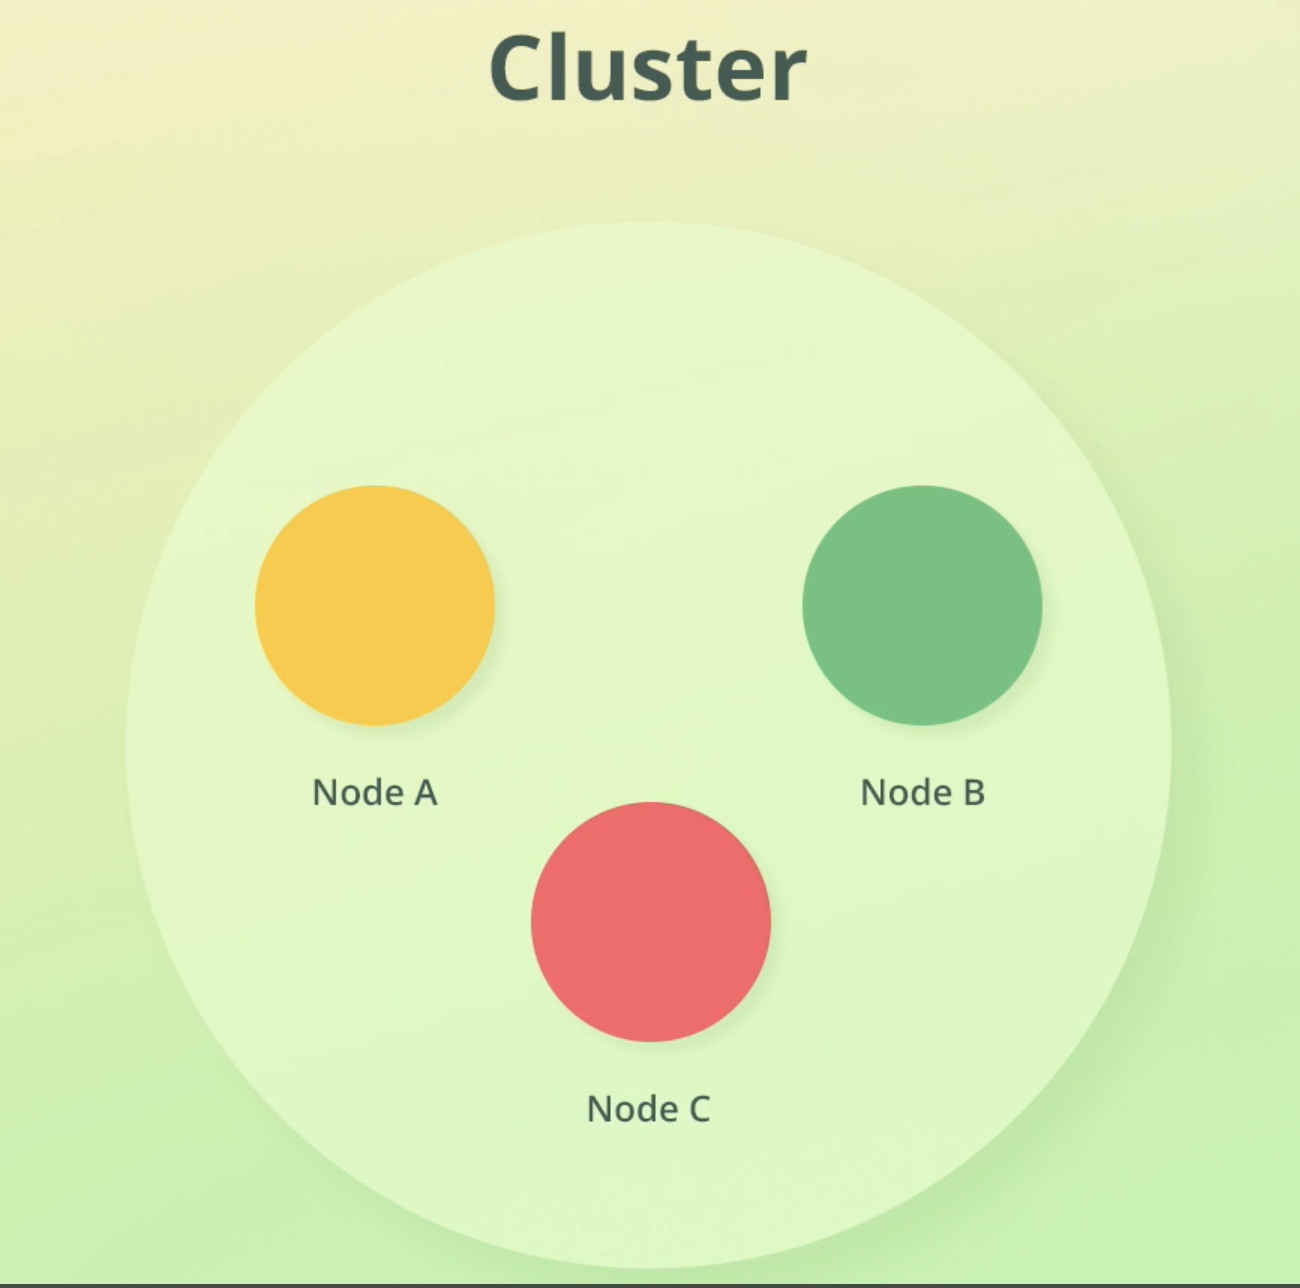
Cluster, Node
- 노드는 항상 cluster에 속한다.(노드가 단 1개만 있더라도)
- 노드가 1나면 확장성, 가용성에 문제가 있겠지만, Dev용으로는 전혀 문제없다.
Document, Index
-
cluster안에 저장된 each unit of data를 document라고 부른다.
-
document는 JSON object형태다.
-
document에 인덱스 과정을 거치면 데이터는 메타데이터를 포함하여 저장된다.
-
아래 예시에서 보듯이 찐데이터는 _source라는 키값안에 저장된다.

-
document들은 index를 통해 organize된다.
-
ES안의 모든 document들은 index안에 저장된다.
-
index에 엮이는 document 개수에는 LImit가 없다.

an index is therefore a collection of documents that have similar characteristics and are logically related
Summary
- Nodes store the data that we add to Elasticsearch
- A cluster is a collection of nodes
- Data is stored as documents, which are JSON objects
- Documents are grouped together with indices
Inspecting the cluster
- Kibana를 통해 ES에 request를 보내보자.
- localhost:5601에 접속해서 Dev tools에 들어간다.
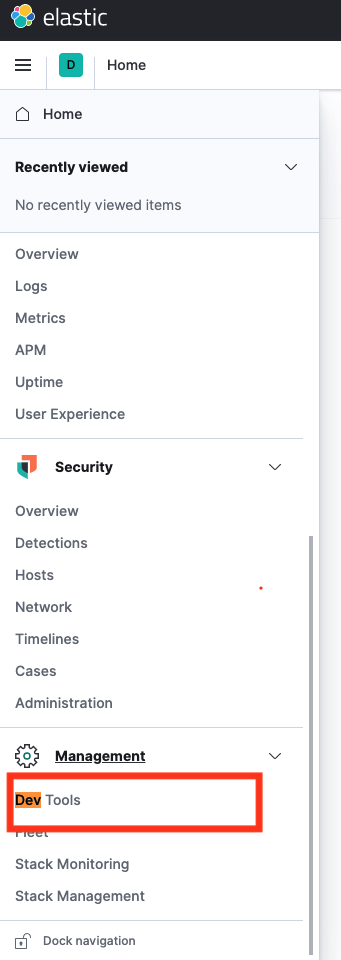
- ES는 REST API로 통신한다.
- GET, POST, PUT, DELETE등의 HTTP VERB를 지원. GET /_cluster/health로 request를 보낸다.
- cluster의 health check하는 과정이다.- console에선 맨 앞의 /를 안붙여도 자동으로 /를 붙여 request를 보내준다. 하지만 정석대로 하기 위해 /를 붙이는걸 추천.
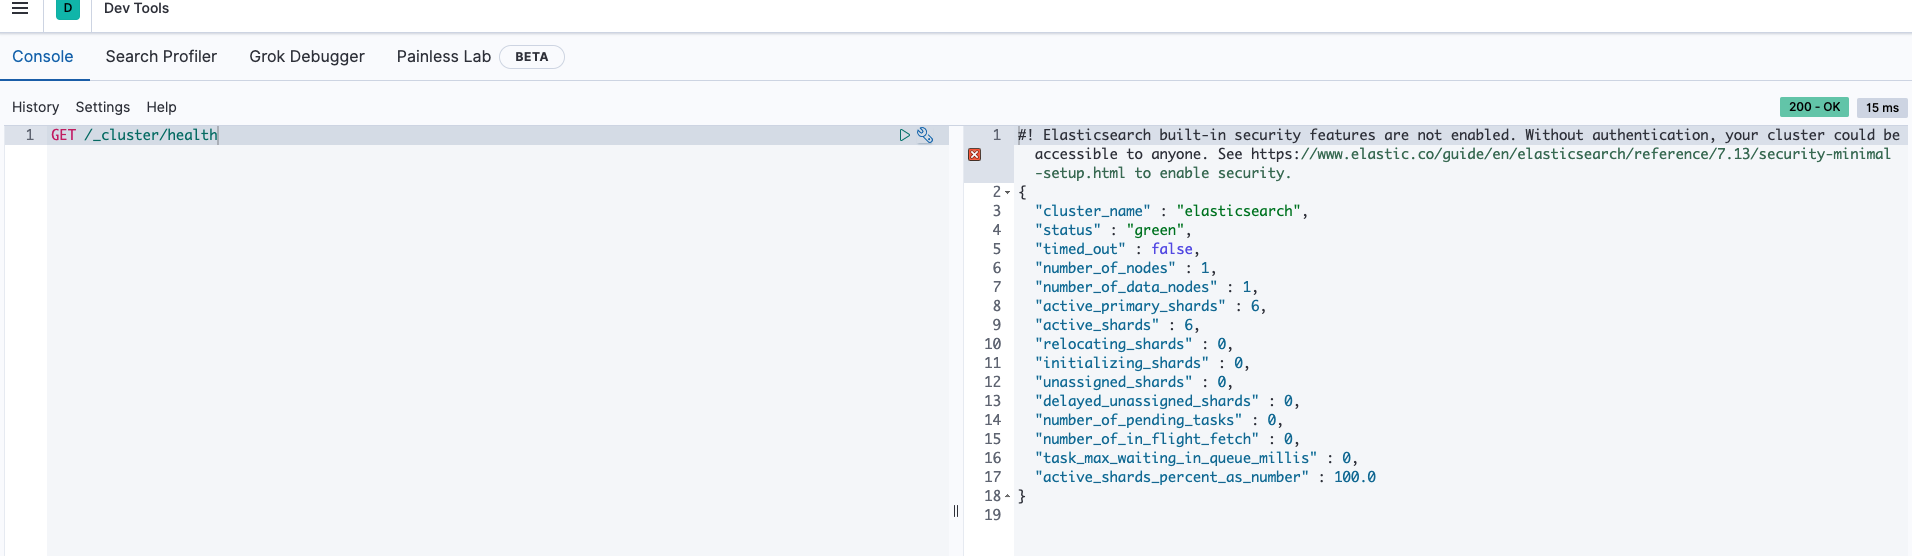
결과값을 보자
- cluster_name이 "elasticsearch"로 되어있는데 이건 디폴트 값이다.
- status green은 건강하다는 뜻이다.
listing the nodes that are part of a cluster
GET /_cat/nodes?v- V파라미터는 descriptive header를 결과값에 포함해달라는 쿼리스트링이다.
- 아래는 결과값이다.

cluster 내의 index들 조회
-
GET /_cat/indices?v -
결과화면

-
kibana 인덱스를 볼 수 있다. 키바나가 데이터를 ES에 저장하기 때문에 그렇다.
-
kibana 인덱스 앞에 '.'이 붙어있는 이유는 키비나 인터페이스에서 인덱스를 숨기기 위함이다. linux에서 .파일이 숨김파일인 것과 같은 원리
Sending queries wit cURL
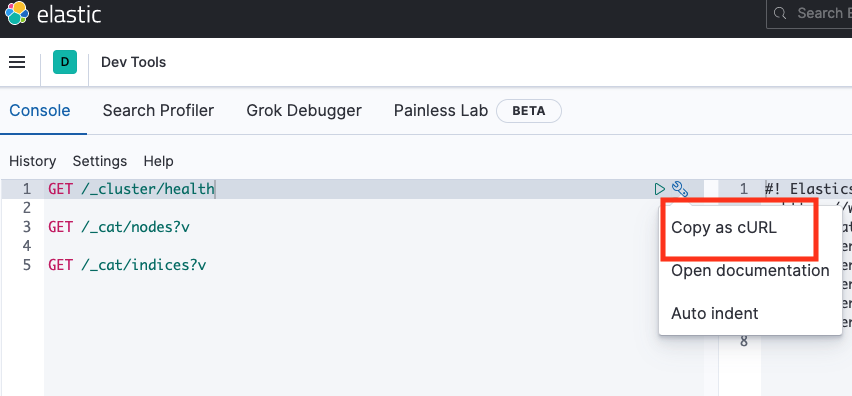
- kibana콘솔로 쿼리치면 자동완성도 지원해주고 엄청 편하다.
- 이젠 curl로 쿼리를 날려보자.
- 콘솔 렌치모양 누르고 Copy as cURL누르면 컬 명령어 복사된다.
- 결과값:
curl -XGET "http://localhost:9200/_cluster/health"
- 결과값:
- 이번엔 search query를 날려보자. 콘솔과 curl의 코드는 각각 아래와 같다.
콘솔

GET /.kibana/_search
{
  "query": {
    "match_all": {}
  }
}
curl -XGET "http://localhost:9200/.kibana/_search" -H 'Content-Type: application/json' -d' { "query": { "match_all": {} } }'
Sharding and Scalability
- 1 TB를 저장하고 싶은데 500GB짜리 노드 1개밖에 없는 상황이면 노드를 하나 더 추가하면 된다.
- ES는 Sharding을 써서 위 기능을 구현한다.
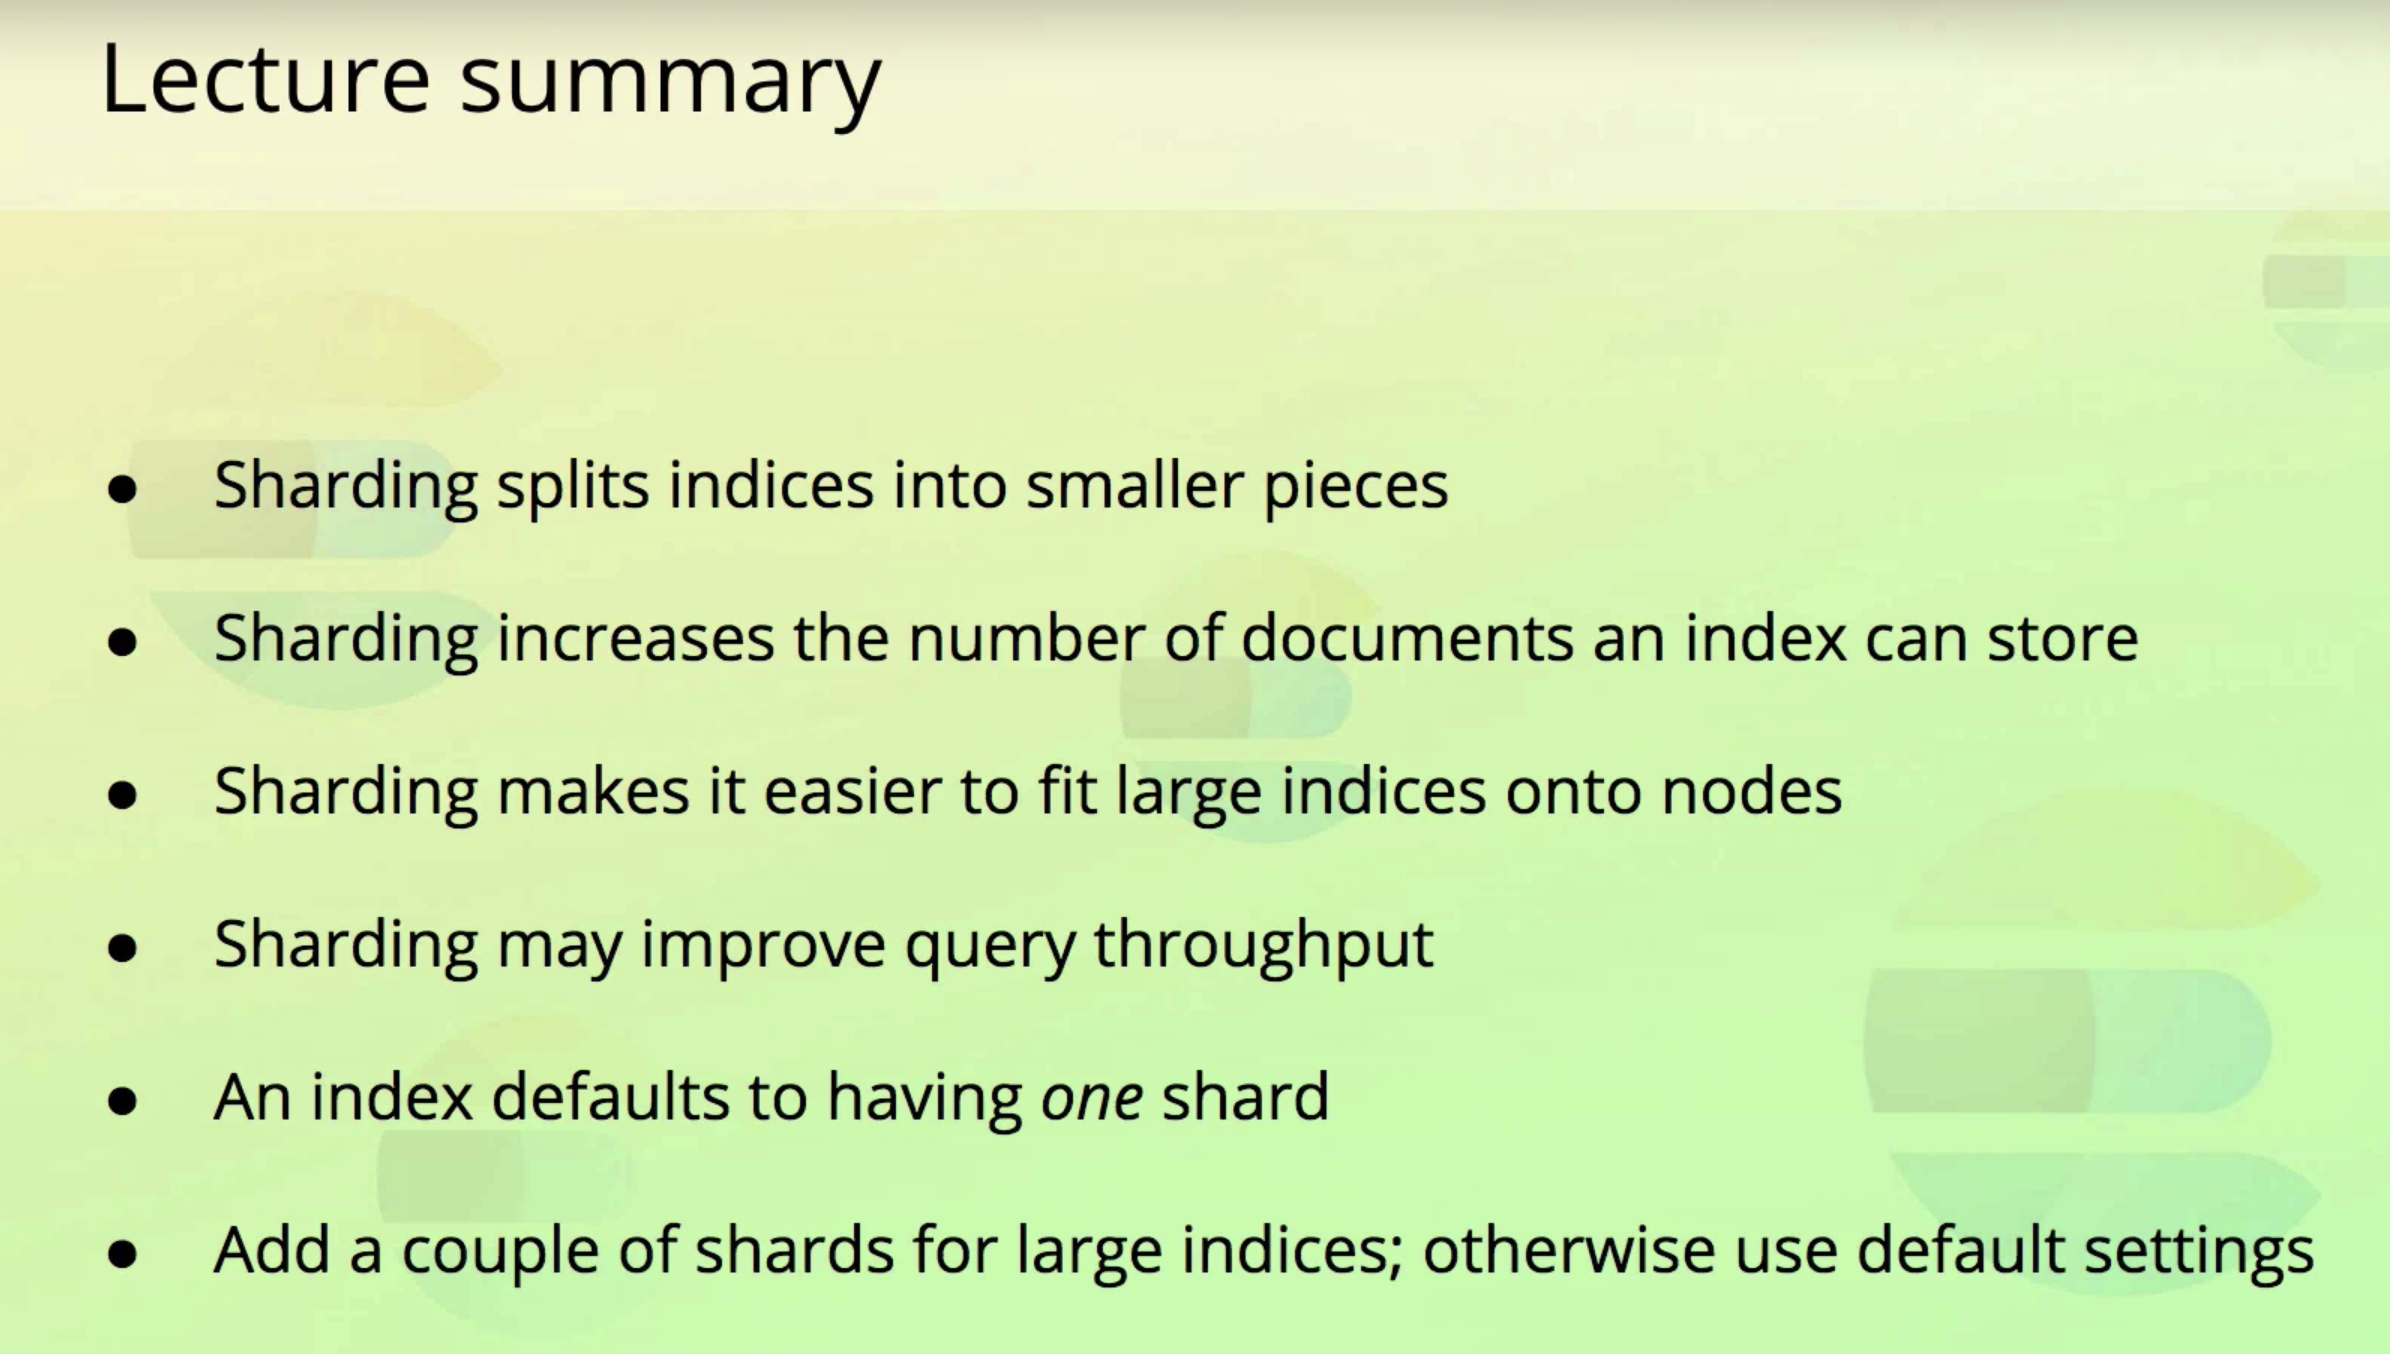
- Sharding is a way to divide indices into smaller pieces
- Each piece is referred to as a shard
- Sharding is done at the index level
- The main purpose is to horizontally scale the data volume
- 하나의 shard는 하나의 node에 위치해야 한다.
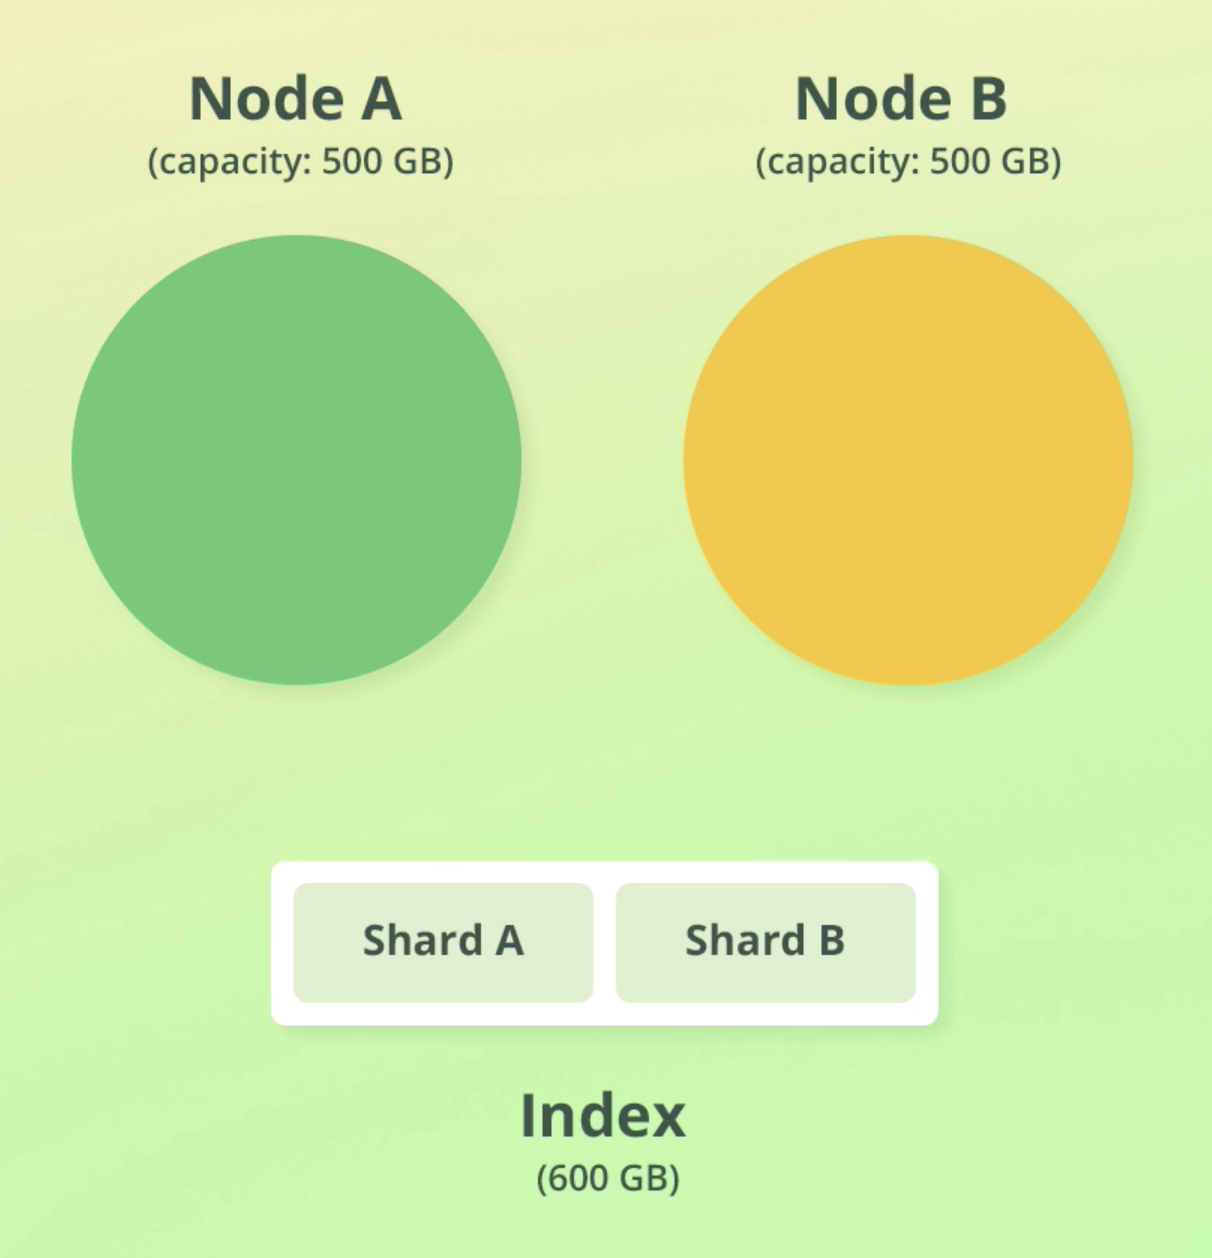
예시 상황
- 크기가 각각 500GB인 노드 2개가 있다.
- 크기가 600GB인 Index가 있다.
- 인덱스 크기 > 노드 1개 크기 이므로 인덱스를 두개의 shard로 나눈다(각각 300GB)
- 이를 두 노드에 할당한다.

let's dive a bit deeper
- A shard is an independent index ...kind of
- Each shard is an Apache Lucene index
- An Elasticsearch index consists of one or more Lucene indices
- A shard has no predefined size; it grows as documents are added to it
- A shard may store up to about two billoin documents
The purpose of sharding
- Mainly to be able to store more documents
- To easier fit large indices onto nodes
- Improved performance
- Parallelization of queries increases the throughput of an index
- index를 조회했을 때 나오는 컬럼 pri는 primary shard를 의미한다.
- 나중가서 더 자세히 설명한단다. 일단은 저 컬럼은 shard 개수라고 알고 있으면 된다.
health status index                           uuid                   pri rep docs.count docs.deleted store.size pri.store.size
green  open   .kibana_7.13.2_001              08rag9n_TOC4k7D4eQUe-w   1   0         31           24      2.1mb          2.1mb
green  open   .apm-custom-link                dMpoukvrTmiVpwBHe1lj4g   1   0          0            0       208b           208b
green  open   .kibana-event-log-7.13.2-000001 pWU1ONPESLKbVUcLhK_lAA   1   0          1            0      5.6kb          5.6kb
green  open   .apm-agent-configuration        A-cKaIyMTUejePkKuBNQOg   1   0          0            0       208b           208b
Configuring the number of shards
- 인덱스 하나는 샤드 하나에 저장된다. 이게 디폴트설정임.
- ES < 7.0.0버전에서는 인덱스 하나당 5개 샤드가 디폴트였음
- this often led to over-sharding
- 이게 많은 문제를 초래해서 지금은 디폴트 1개
- Increase the number of shards with the Split API
- Reduce the number of shards with the Shrink API
Shards를 몇개로 설정하는게 Best일까?
- 많은 ES유저들이 하는 고민이란다.
- 정답은 it depends다.
- node의 수와 capacity, index의 수와 size, query 수 등등 변수가 많기 때문.
- 수백만건의 Document가 쌓일 것으로 예상하면 shards 5개로 출발하는 것을 강사는 권한다고 한다
summary
-
Q: How does Elasticsearch scale the volume of data?
-
A: By using sharding. Sharding enables us to scale the data volume. Adding more nodes to the cluster helps too, but only to a certain extent (unless there are no very large indices).
-
Q: What is a shard?
-
A: A subset(part) of and index' data
Understanding Replication
- 노드의 hard drive가 고장나면?
- 실제 hard drive는 언제나 고장날 수 있다. 이걸 대비해야 한다.
- 실제 DB replication하는게 엄청 고된 작업인데,
- ES는 fault tolerance를 위해 replication을 디폴트로, 엄청 쉽게 제공한다. (엄지척)
replication 작동 방법
- replication은 index level에서 설정된다.
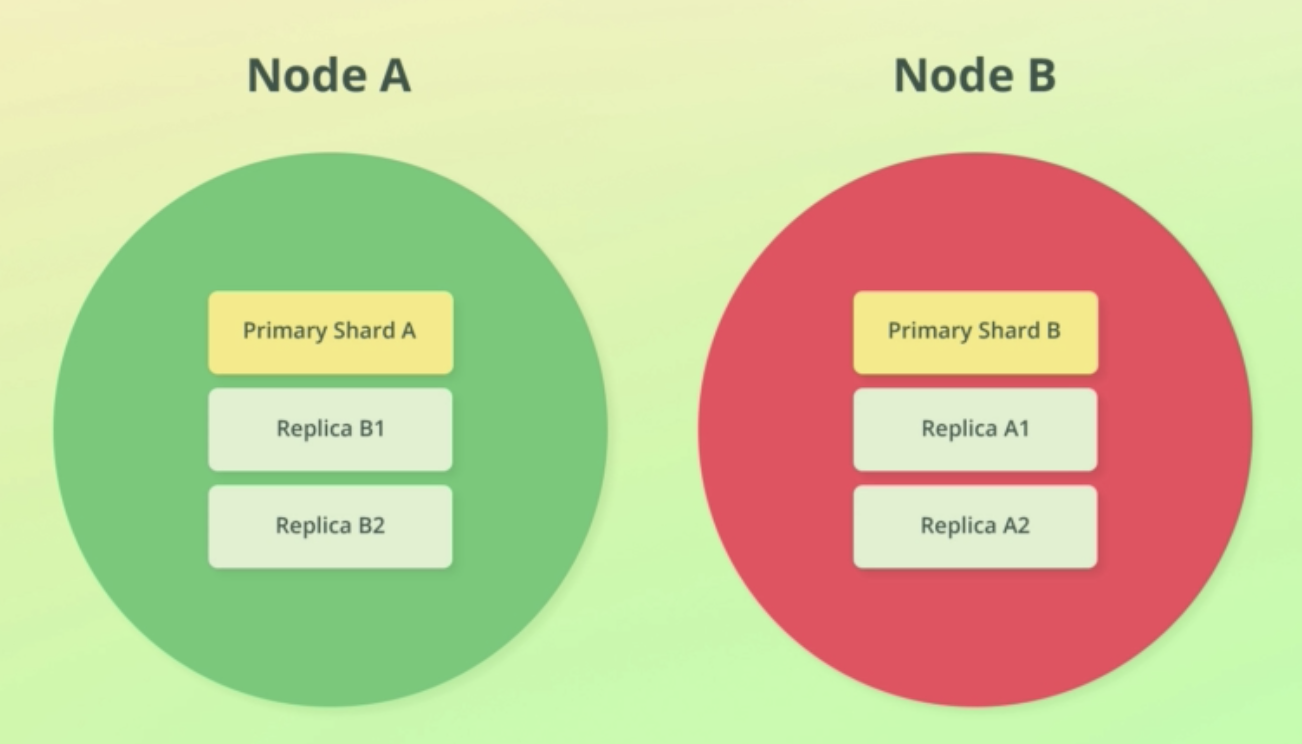
- shard 복사본을 만들어서 replication을 구현하고, 복사된 shard를 replica shards라 부른다.
- 복사 당한 shard를 primary shard라고 부른다.
- primary shard와 replica shards를 묶어 replication group이라고 부른다.
- replica shards는 complete copy of a shard이다.
- replica shards는 primary shard와 똑같이 search requests에 쓰일 수 있다.
- replica수는 index를 만들 때 설정할 수 있다.

- replica shard는 서로 다른 노드에 저장된다. 애초에 그래야 말이 됨. 한 노드에 둘 수가 없다.
- 노드가 2개 이상일 때부터 replication을 할 수 있다.
replica shards의 개수 정하기
- 몇개의 replica shard를 둬야 하는지도 케바케다.
- 예를 들어 해당 데이터가 RDB같은 곳에 동시에 저장되고 있는지 여부도 고려해야 한다.
- 복구시간 동안 잠깐 downtime이 있어도 되는지, 아니면 절대 안되는지?
- data loss가 치명적이지는 않다면 replica를 하나만 둬도 괜찮고.
- 아주 치명적이라면 최소 두개는 둬야한다..
Snapshots
- ES는 백업용으로 snapshot도 지원한다. (롤백 가능)
- 스냅샷은 index level, or 전체 cluster 단위로 가능하다.
- 스냅샷은 백업용으로, replication은 HA와 performance를 위해 사용한다.
purpose of replication
- increase availability
- increase throughput
새로운 인덱스를 생성
PUT /pages
-
결과

-
디폴트 세팅이 적용됐기 때문에 shard 1개, replica shard 1개가 생성됐다.
-
이제
GET /_cluster/health로 cluster의 health를 체크해보자. status가 green에서 yellow로 바뀐걸 볼 수 있다.
{
  "cluster_name" : "elasticsearch",
  "status" : "yellow",
  "timed_out" : false,
  "number_of_nodes" : 1,
  "number_of_data_nodes" : 1,
  "active_primary_shards" : 7,
  "active_shards" : 7,
  "relocating_shards" : 0,
  "initializing_shards" : 0,
  "unassigned_shards" : 1,
  "delayed_unassigned_shards" : 0,
  "number_of_pending_tasks" : 0,
  "number_of_in_flight_fetch" : 0,
  "task_max_waiting_in_queue_millis" : 0,
  "active_shards_percent_as_number" : 87.5
}-
GET /_cat/indices?v로 index를 봐보자. 방금 만든 pages의 상태가 yellow다. 이유는?
replica 1개가 생성됐는데 노드는 1개 밖에 없어서 할당이 안됐기 때문이다. 현재 replica는 pending상태고, 노드 1개를 더하면 그제서야 생성된다. -
인덱스는 잘 작동하지만 노드 하나가 뻑나면 pages인덱스가 down될거기 때문에 yellow 경고를 주는 것이다.
-
kibana노드들은 replica가 0이다. 이러면 위험한거 아닌가?
-
대신 kibana는 'auto_expand_replicas' 옵션이 붙어있다.
-
디폴트 노드가 1개니, 처음엔 replica도 0으로 설정되있다가, node가 2개가 되면 replica도 1개 늘어난다.
health status index                           uuid                   pri rep docs.count docs.deleted store.size pri.store.size
green  open   .kibana_7.13.2_001              08rag9n_TOC4k7D4eQUe-w   1   0         33            5      2.1mb          2.1mb
yellow open   pages                           ENzeDkDsSDmAtnkkIT3SDQ   1   1          0            0       208b           208b
green  open   .apm-custom-link                dMpoukvrTmiVpwBHe1lj4g   1   0          0            0       208b           208b
green  open   .kibana-event-log-7.13.2-000001 pWU1ONPESLKbVUcLhK_lAA   1   0          1            0      5.6kb          5.6kb
green  open   .apm-agent-configuration        A-cKaIyMTUejePkKuBNQOg   1   0          0            0       208b           208b
green  open   .kibana_task_manager_7.13.2_001 n7IVamyFRIqICjZs3sGgUg   1   0         10         2191    262.6kb        262.6kb
shard 정보를 확인해보자
GET /_cat/shards?v- pages의 r(Replica)의 상태가unassigned인걸 볼 수 있다.
index                               shard prirep state      docs   store ip        node
.kibana_7.13.2_001                  0     p      STARTED      33   2.1mb 127.0.0.1 Hwanils-MacBook-Pro.local
.apm-agent-configuration            0     p      STARTED       0    208b 127.0.0.1 Hwanils-MacBook-Pro.local
pages                               0     p      STARTED       0    208b 127.0.0.1 Hwanils-MacBook-Pro.local
pages                               0     r      UNASSIGNED
.ds-ilm-history-5-2021.07.02-000001 0     p      STARTED                 127.0.0.1 Hwanils-MacBook-Pro.local
.apm-custom-link                    0     p      STARTED       0    208b 127.0.0.1 Hwanils-MacBook-Pro.local
.kibana-event-log-7.13.2-000001     0     p      STARTED       1   5.6kb 127.0.0.1 Hwanils-MacBook-Pro.local
.kibana_task_manager_7.13.2_001     0     p      STARTED      10 350.8kb 127.0.0.1 Hwanils-MacBook-Pro.local
summary

cluster에 node 추가하기
- sharding을 통해 index를 split하고, 이를 통해 index가 저장할 수 있는 documents를 늘릴 수 있었다.
- 하지만 이 방법만으로는 한계가 있다. 샤딩만 계속 하면 결국 디스크 공간이 바닥난다.
- 결국은 노드를 추가해야 한다.
- 이번에는 노드를 추가하는 방법 두 가지를 살펴 볼건데, 하나는 정석, 하나는 야매 방법이다. 하지만
둘다 production에는 적합하지 않음을 참고하자.
only for dev
방법 1. the "right" way
-
ES를 새로 다운받아 다른 폴더에 넣고 실행시킨다. (그냥 ES 두개를 실행하는 거임)
-
대신 이때 새로운 ES의 이름을 바꿔줘야 한다. 이름이 중복되면 안됨.
-
이름은 /config/elasticsearch.yml에서 바꿀 수 있다.
node.name: node-2이런 식으로 바꿔주면 됨.
-
이때 best practice는 노드가 속할 cluster의 이름도 적어주는 것이다.
- production때는 필수! 꼭 이렇게 해주자!!!!
-
GET /_cluster/health로 조회해보면 노드 2개가 된 것을 볼 수 있다.
  "cluster_name" : "elasticsearch",
  "status" : "green",
  "timed_out" : false,
  "number_of_nodes" : 2,
  "number_of_data_nodes" : 2,
  "active_primary_shards" : 8,
  "active_shards" : 16,
  "relocating_shards" : 0,
  "initializing_shards" : 0,
  "unassigned_shards" : 0,
  "delayed_unassigned_shards" : 0,
  "number_of_pending_tasks" : 0,
  "number_of_in_flight_fetch" : 0,
  "task_max_waiting_in_queue_millis" : 0,
  "active_shards_percent_as_number" : 100.0
}
GET /_cat/shards?v로 샤드를 조회해보면 샤드들이 primany, replica노드에 고르게 배정됨을 볼 수 있다. 이건 "auto_expand_replicas" 덕분이다.
index                               shard prirep state   docs   store ip        node
.apm-custom-link                    0     p      STARTED    0    208b 127.0.0.1 Hwanils-MacBook-Pro.local
.apm-custom-link                    0     r      STARTED    0    208b 127.0.0.1 node-2
.tasks                              0     p      STARTED    4  27.2kb 127.0.0.1 Hwanils-MacBook-Pro.local
.tasks                              0     r      STARTED    4  21.2kb 127.0.0.1 node-2
.kibana_task_manager_7.13.2_001     0     p      STARTED   10 118.6kb 127.0.0.1 Hwanils-MacBook-Pro.local
.kibana_task_manager_7.13.2_001     0     r      STARTED   10 148.1kb 127.0.0.1 node-2
.ds-ilm-history-5-2021.07.02-000001 0     p      STARTED              127.0.0.1 Hwanils-MacBook-Pro.local
.ds-ilm-history-5-2021.07.02-000001 0     r      STARTED              127.0.0.1 node-2
.kibana-event-log-7.13.2-000001     0     p      STARTED    3  16.3kb 127.0.0.1 Hwanils-MacBook-Pro.local
.kibana-event-log-7.13.2-000001     0     r      STARTED    3  16.3kb 127.0.0.1 node-2
.apm-agent-configuration            0     p      STARTED    0    208b 127.0.0.1 Hwanils-MacBook-Pro.local
.apm-agent-configuration            0     r      STARTED    0    208b 127.0.0.1 node-2
.kibana_7.13.2_001                  0     p      STARTED   39   4.2mb 127.0.0.1 Hwanils-MacBook-Pro.local
.kibana_7.13.2_001                  0     r      STARTED   39   2.1mb 127.0.0.1 node-2
pages                               0     p      STARTED    0    208b 127.0.0.1 Hwanils-MacBook-Pro.local
pages                               0     r      STARTED    0    208b 127.0.0.1 node-2
방법2. overwriting settings
- 기존 ES 디렉토리 설정을 변경하여 노드를 늘린다. ES를 실행하고 command line에서 수정해야 한다.
- cluster.name
- node.name
- path.data
bin/elasticsearch -Enode.name=node-3 - node 데이터와 로그 파일의 저장경로로 설정해줘야 한다. 안하면 things are gonna get messed up. path.data, path.logs 이 두가지다. node-3라는 경로에 저장해주자.
-Epath.data=./node-3/data -Epath.logs=./node-3/logs
이제 위 두 명령어를 합쳐서 터미널에 입력하자. 명령어는 ES의 루트 디렉토리에서 때린다.
bin/elasticsearch -Enode.name=node-3 -Epath.data=./node-3/data -Epath.logs=./node-3/logs
GET /_cluster/health명령어로 노드가 3개가 됨을 볼 수 있다.
{
  "cluster_name" : "elasticsearch",
  "status" : "green",
  "timed_out" : false,
  "number_of_nodes" : 3,
  "number_of_data_nodes" : 3,
  "active_primary_shards" : 8,
  "active_shards" : 16,
  "relocating_shards" : 1,
  "initializing_shards" : 0,
  "unassigned_shards" : 0,
  "delayed_unassigned_shards" : 0,
  "number_of_pending_tasks" : 1,
  "number_of_in_flight_fetch" : 0,
  "task_max_waiting_in_queue_millis" : 0,
  "active_shards_percent_as_number" : 100.0
}
Overview of node roles
- data는 shard에, shard는 node에 저장된다.
- 지금까지는 노드가 하나 이상의 shard를 가졌다. 하지만 노드의 role에 따라 그렇지 않은 경우도 있다.
- 노드의 role을 살펴보자
1. Master-eligible role
- The node may be elected as the cluster's master node
- A master node is responsible for creating and deleting indices, among others.
- A node with this role will not automatically become the master node
- unless there are no other master-eligible nodes)
- May be used for having dedicated master nodes
- Useful for large clusters
- Configuration: node.master: true | false
2. Data role
- Enables a node to store data
- 데이터 저장에 더해 search queries같은 데이터와 연관된 쿼리를 위한 기능도 한다.
- 비교적 작은 클러스터에서는 이 역할이 항상 enabled되어있다.
- dedicated master nodes를 하기에 유용하다 ( 특정 노드가 data롤을 맡아주면, 다른 노드 하나가 안심하고 master node가 될 수 있음)
- Used as part of configuring a dedicated master node
- Configurations: node.data: true | false
3. Ingest role
- ingest란 index에 document를 add하는 것이다.
- enables a node to run ingest pipelines
- Ingest pipelines are a series of steps(processors) that are performed when indexing documents
- Processors may manipulate documents. 예를 들어 IP주소를 위도, 경도로 가공하는 작업 가능
- Logstash의 경량화 버전이라고 할 수 있다.
- 간단한 document를 처리할 땐 이걸로 할 수 있지만, 복잡하고 대량의 데이터를 처리할 땐 Logstash를 써자. 그렇지 않고 이걸로 하면 하드웨어 리소스를 엄청 잡아먹는다.
- This role is mainly useful for having dedicated ingest nodes
- Configuration: node.inget: true | false
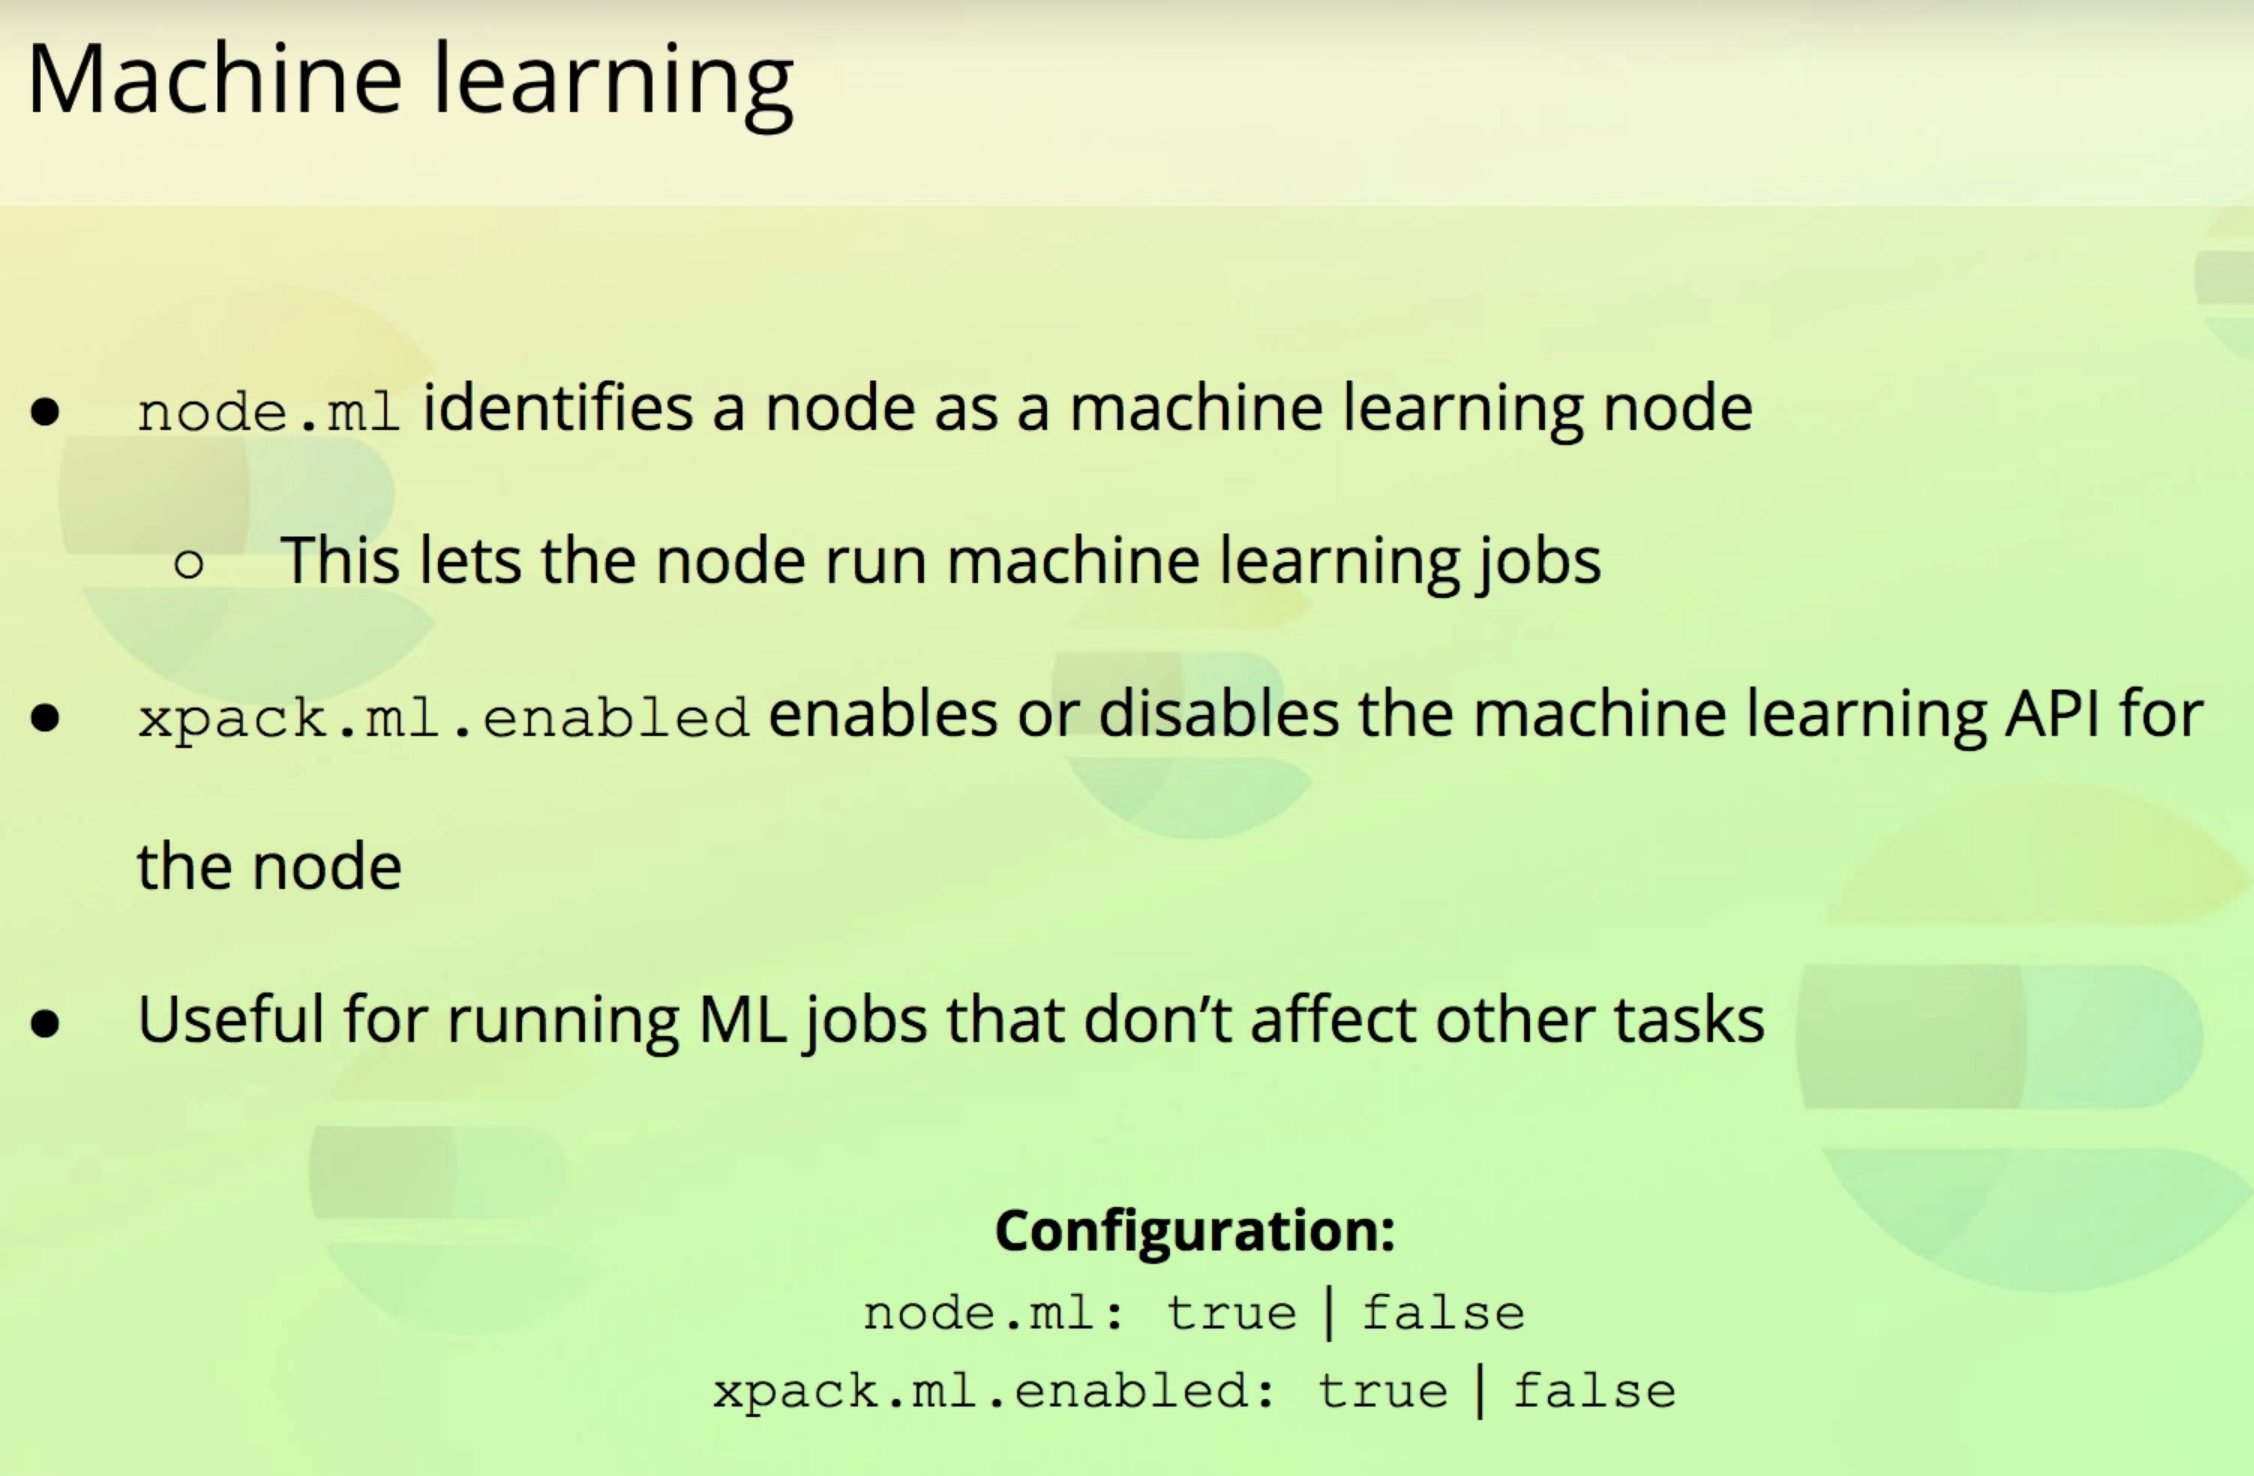
4. Machine learning
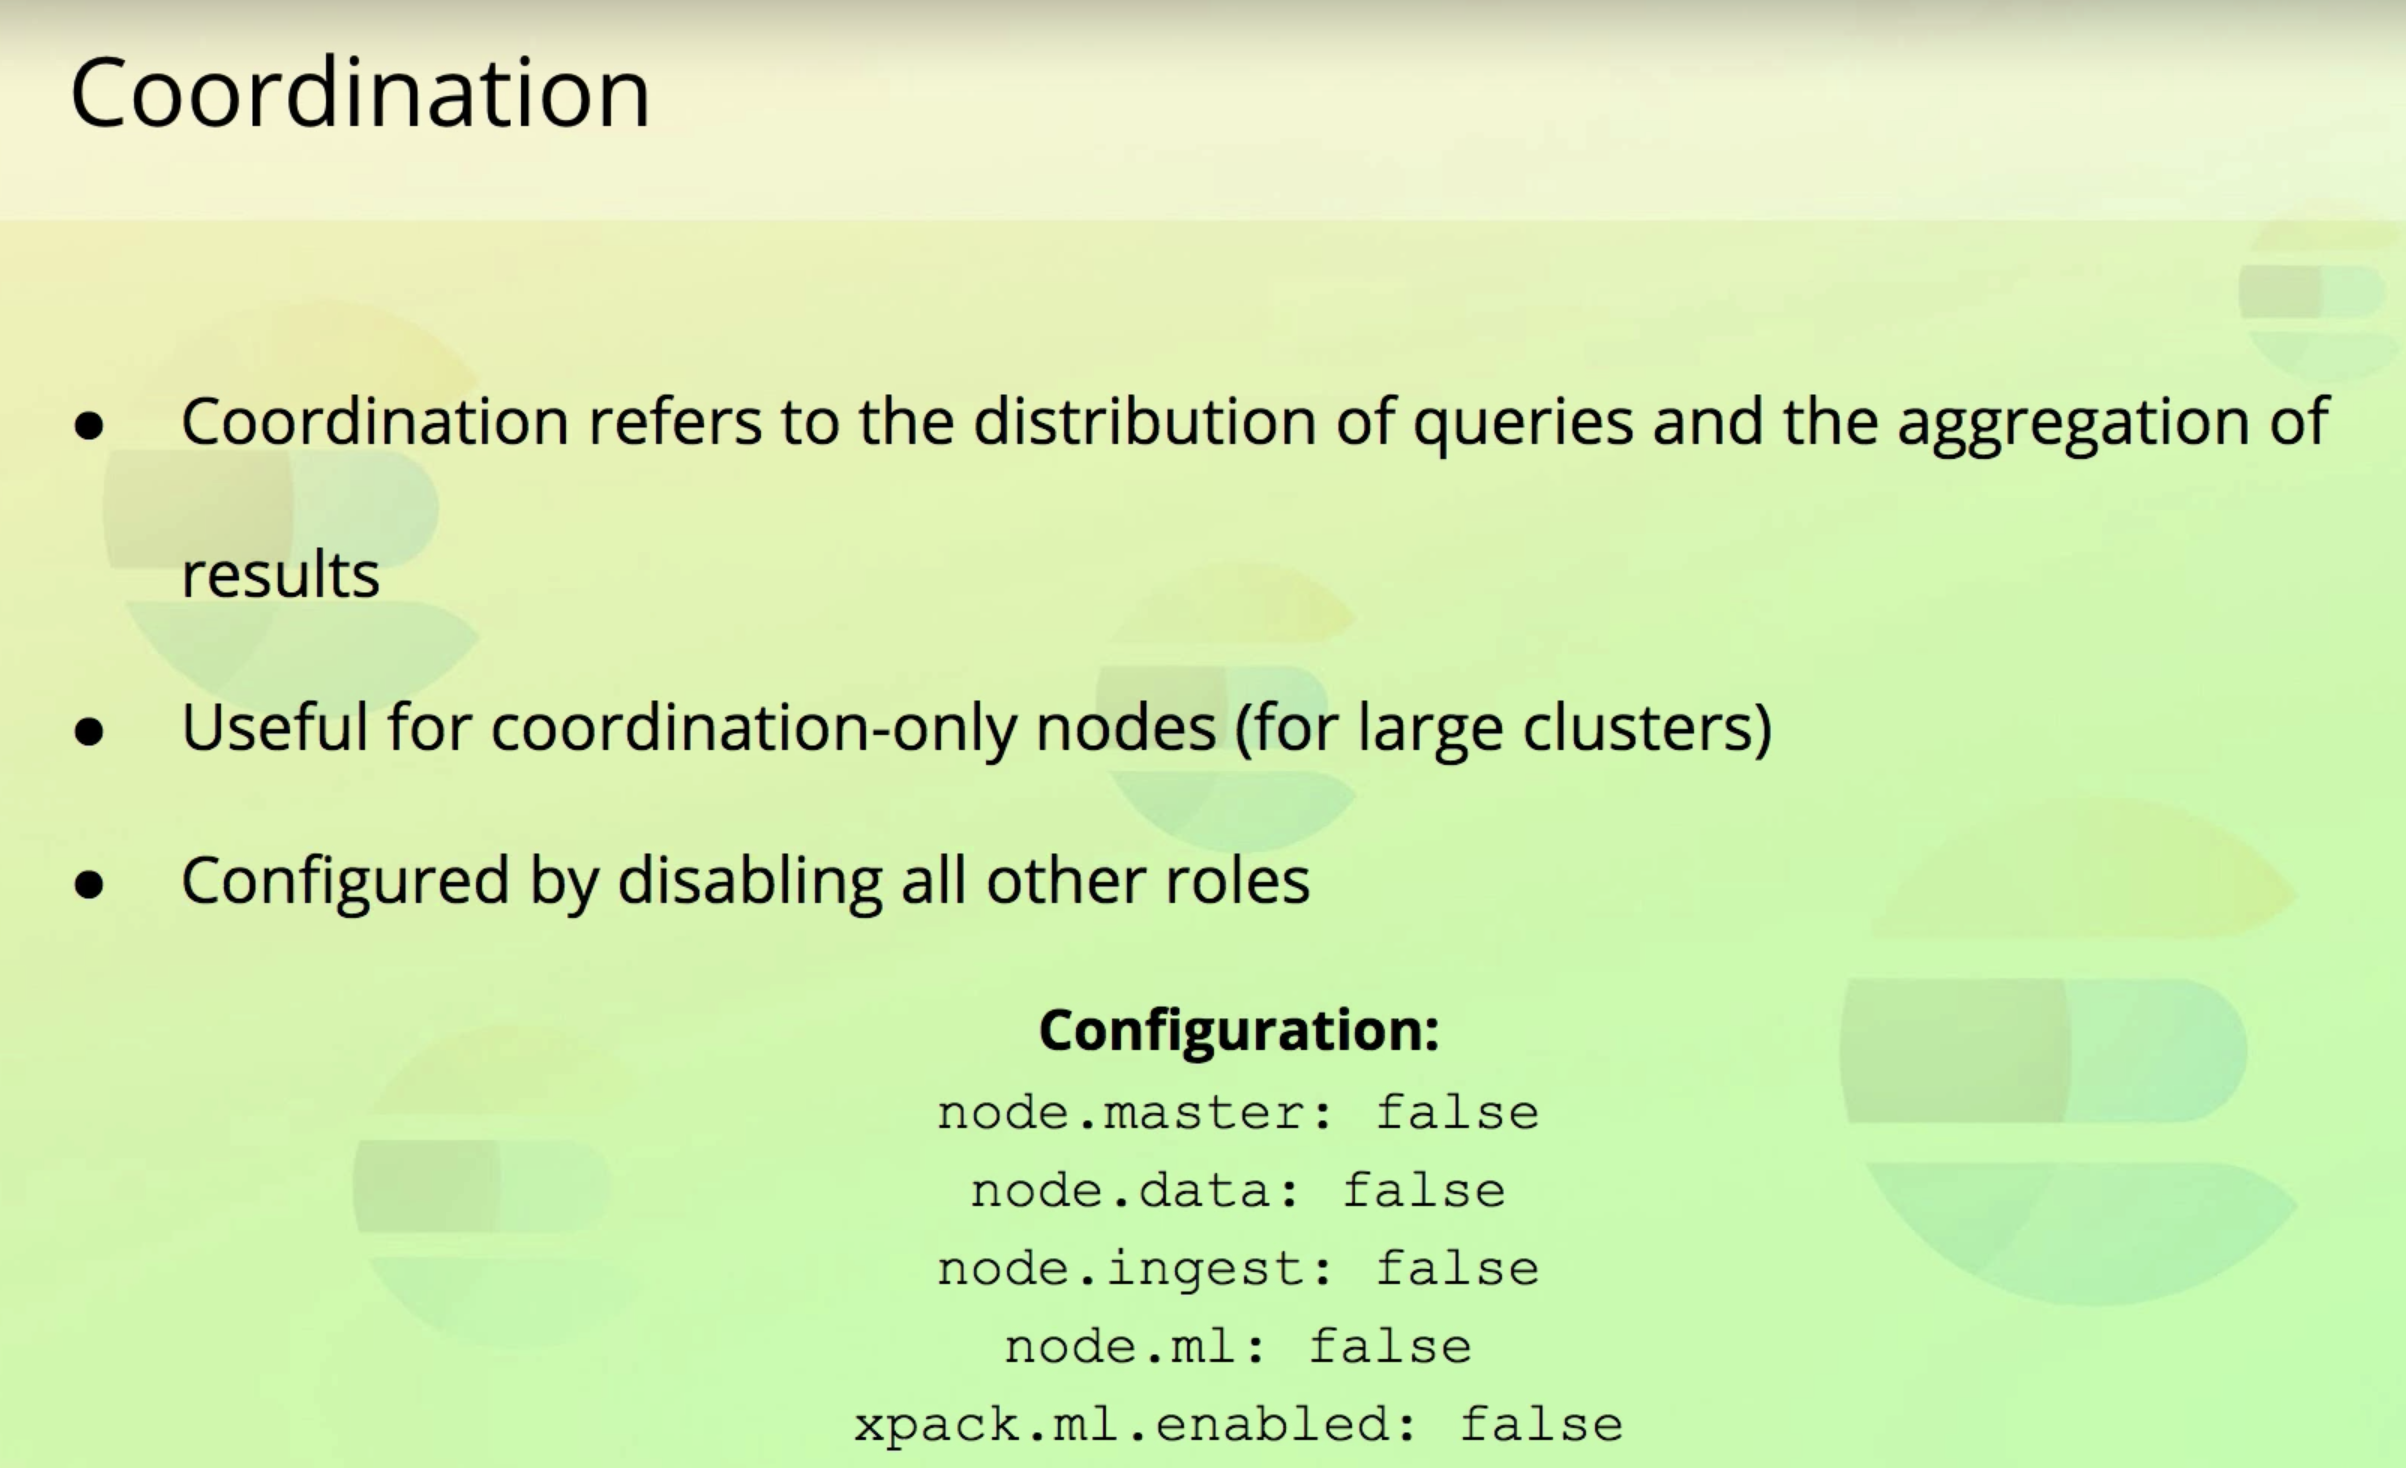
5. Coordination
- 엄청 큰 클러스터에서 유용하다.
- 로드밸런서 같은 역할을 수행할 수 있다.
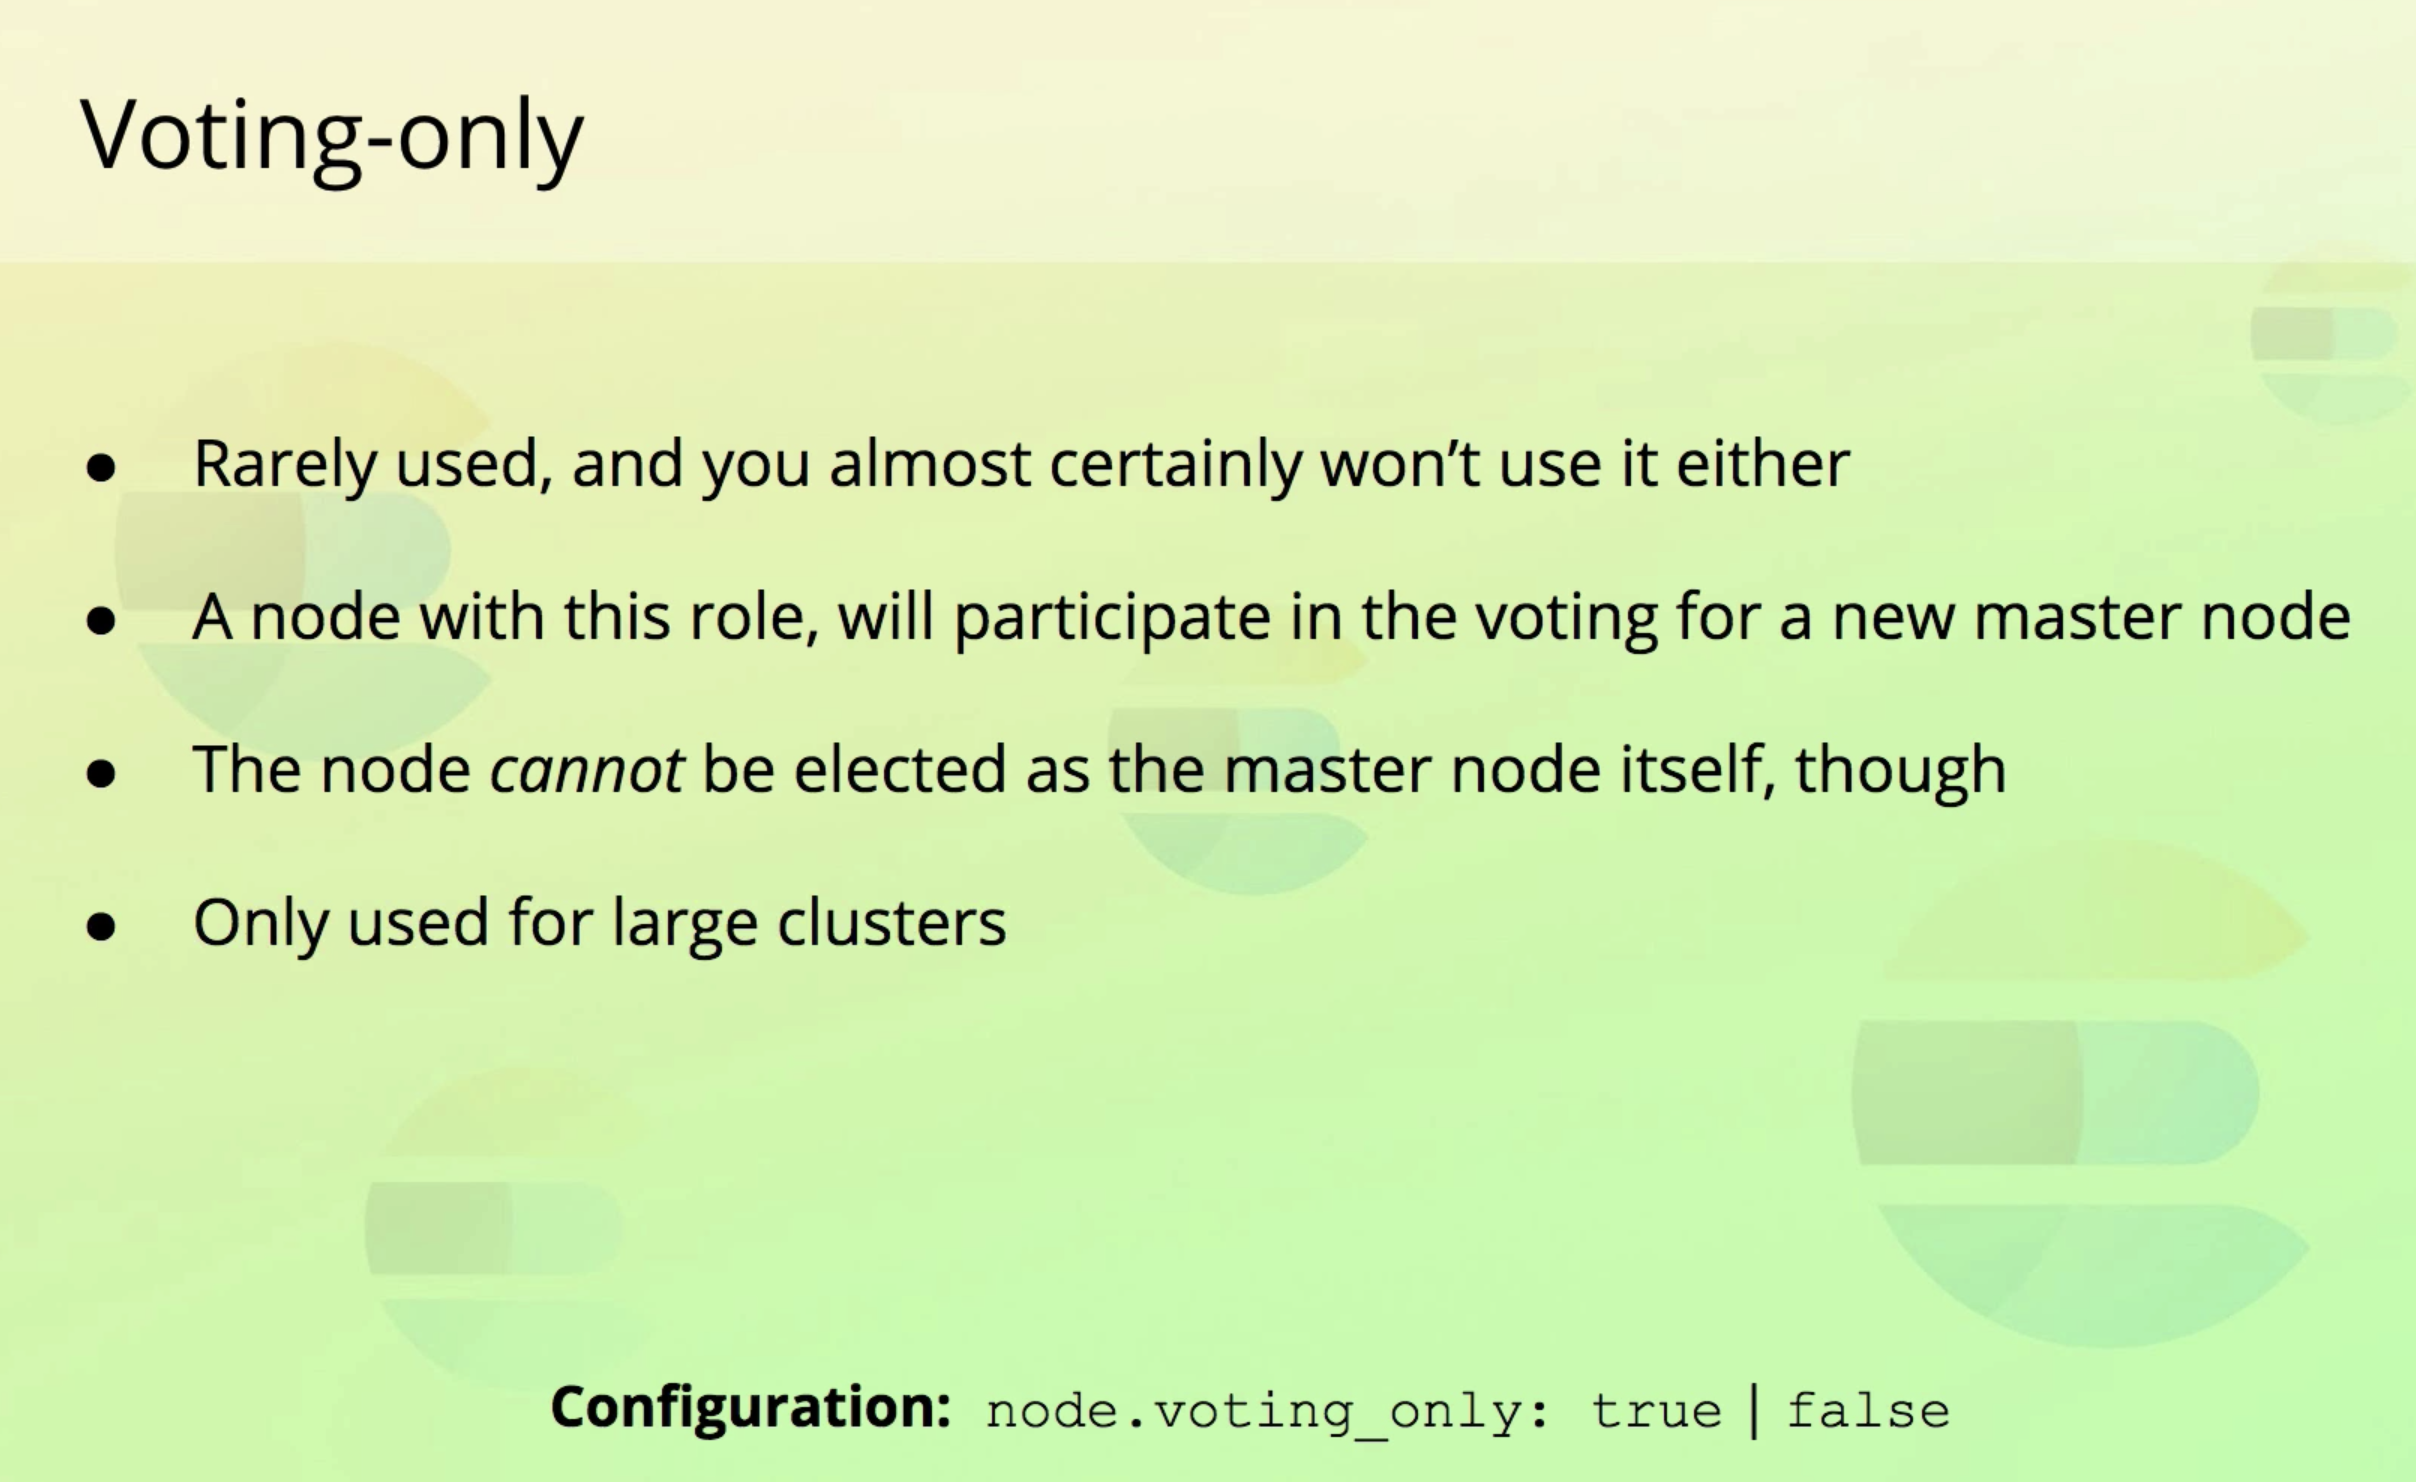
6. Voting-only
- 거의 안쓴다. 엄청 큰 클러스터에서만 쓰임. 투표용
이제 우리가 만든 노드를 살펴보자.
강사 화면을 보면 node.role 값이 dim이다. "data", "ingest", "master"을 뜻한다.

- 근데 이상하게 내 로컬은 cdfhilmrstw이다. 뭐지...
ip        heap.percent ram.percent cpu load_1m load_5m load_15m node.role   master name
127.0.0.1           31          99  20    2.78                  cdfhilmrstw *      Hwanils-MacBook-Pro.local
127.0.0.1           42          99  20    2.78                  cdfhilmrstw -      node-2
127.0.0.1 28 99 20 2.78 cdfhilmrstw - node-3- 검색해보니 아래 역할이라고 한다. 전부 다 가지고 있는듯. 왜지?
master
data
data_content
data_hot
data_warm
data_cold
data_frozen
ingest
ml
remote_cluster_client
transform - 좀 더 검색해보니 ES최신 버전의 디폴트롤이 위의 내용으로 바꼈다고 한다.
- 여튼, m이 붙어있는 건 모두 master역할을 할 수 있다. 그중에 master로 뽑힌 노드에 *이 붙어있다.
When to change node roles
- "It depends"
- Useful for large clusters, not for small one.
- Typically done when optimizing the cluster to scale the number of requests
- throughput늘릴 때 사용.( hardware usage가 high일 때)
- 어떤 하드웨어 리소스가 쓰이는지 명확히 하기 위해서 역할을 분리하기도 한다.
lecture 3. Managing Documents
index 생성, 삭제
인덱스 삭제
DELETE /pages로 위에서 만든 pages 인덱스를 삭제한다.
리턴값은 아래와 같다.
{
  "acknowledged" : true
}
인덱스 생성
PUT /products로 products라는 인덱스를 생성한다.- 초기 세팅값을 주기 위해 settings라는 키값을 사용한다.
- shard와 replica 수를 각각 2개로 설정해주자.
- 실행문은 아래와 같다.
PUT /products
{
  "settings": {
    "number_of_shards": 2,
    "number_of_replicas": 2
  }
}- response문은 아래와 같다.
{
  "acknowledged" : true,
  "shards_acknowledged" : true,
  "index" : "products"
}
indexing documents
index에 document 넣기
- 아래 명령어로 products인덱스에 데이터를 넣어준다.
POST /products/_doc
{
  "name": "Coffe Maker",
  "price": 65,
  "in_stock": 10
}- 결과값을 살펴보자
{
  "_index" : "products",
  "_type" : "_doc",
  "_id" : "UvRcanoBgN9YOgNagpR5",
  "_version" : 1,
  "result" : "created",
  "_shards" : {
    "total" : 3,
    "successful" : 3,
    "failed" : 0
  },
  "_seq_no" : 0,
  "_primary_term" : 1
}- 두 가지 점을 짚고 넘어가자.
- 자동생성된 _id는 수동으로 넣어줄 수도 있다.
- shards가 3개인 이유는 위에서 index만들 때 샤드 2개를 더해줬기 때문이다. 기본 샤드 + 추가 2개로 총 3개가 한 그룹이다.
id를 수동으로 추가해주기
- 메서드는 PUT을 써야한다.
- 아래 쿼리문으로 아이디를 수동으로 부여한 doc를 추가한다.
PUT /products/_doc/100
{
  "name": "Toaster",
  "price": 60,
  "in_stock": 5
}- 아래는 결과문이다. 수동으로 부여된 아이디를 확인할 수 있다.
{
  "_index" : "products",
  "_type" : "_doc",
  "_id" : "100",
  "_version" : 1,
  "result" : "created",
  "_shards" : {
    "total" : 3,
    "successful" : 3,
    "failed" : 0
  },
  "_seq_no" : 0,
  "_primary_term" : 1
}
action.auto_create_index
- 인덱스 없이 document를 삽입하면, 인덱스가 자동으로 생기는데 이 옵션 때문에 가능한 일이다.
- 이 옵션은 cluster level에서 설정 가능하다. default=True
- best practice는 인덱스를 미리 생성하는 것이다.
retrieving documents by ID
GET /products/_doc/100로 아이디가 100인 doc을 조회한다.- 아래는 결과문
{
  "_index" : "products",
  "_type" : "_doc",
  "_id" : "100",
  "_version" : 1,
  "_seq_no" : 0,
  "_primary_term" : 1,
  "found" : true,
  "_source" : {
    "name" : "Toaster",
    "price" : 60,
    "in_stock" : 5
  }
}
- _source키 안에 데이터가 들어있다.
- 아래처럼 없는 키값 101로 조회하면 found가 false로 리턴된다.
GET /products/_doc/101 - 결과문
{
  "_index" : "products",
  "_type" : "_doc",
  "_id" : "101",
  "found" : false
}
Updating documents
- id 100 doc의 in_stock값을 1로 변경시키고, tags라는 키를 추가해보자.
POST /products/_update/100
{
  "doc": {
    "in_stock": 1,
    "tags": ["electronics"]
  }
}- 아래는 결과문
{
  "_index" : "products",
  "_type" : "_doc",
  "_id" : "100",
  "_version" : 4,
  "result" : "updated",
  "_shards" : {
    "total" : 3,
    "successful" : 3,
    "failed" : 0
  },
  "_seq_no" : 3,
  "_primary_term" : 1
}
GET을 조회해보면 데이터 변경을 확인할 수 있다.
- 아래처럼 업데이트된 데이터가 없다면 result에 "noop"이 리턴된다.
POST /products/_update/100
{
  "doc": {

  }
}- 아래는 결과문
{
  "_index" : "products",
  "_type" : "_doc",
  "_id" : "100",
  "_version" : 1,
  "result" : "noop",
  "_shards" : {
    "total" : 0,
    "successful" : 0,
    "failed" : 0
  },
  "_seq_no" : 0,
  "_primary_term" : 1
}
update 내부 과정
- the current doc is retrieved
- The field values are chaged
- The existing doc is replaced with the modified doc
- ES document는 immutable이다.
- 즉, 업데이트가 되는게 아니라 내부적으론 replace되는 것이다.
- The Update API did some things for us, making it look like we updated documents
- The Update API is simpler and saves some network traffic
- 우리가 이걸 직접 하려면 사실상 api를 두 번 호출해야 되는데, update API가 이 작업을 대신 해줌.
Scripted update
case 1
- script로 쿼리를 날려보자.
- 현재 in_stock값에서 -1을 하려면 다음과 같이 하면 된다. (참고로 현재 in_stock값은 1임)
POST /products/_update/100
{
  "script": {
    "source": "ctx._source.in_stock--"
  }
}- ctx: context
- _source로 데이터에 접근
- 현재 값에서 1개 줄이려면 --, 1개 늘리려면 ++
- 여러 줄일 경우 """ 세개를 사용하여 스크립트 작성.
-결과문은 아래와 같다.
{
  "_index" : "products",
  "_type" : "_doc",
  "_id" : "100",
  "_version" : 5,
  "result" : "updated",
  "_shards" : {
    "total" : 3,
    "successful" : 3,
    "failed" : 0
  },
  "_seq_no" : 4,
  "_primary_term" : 1
}
case 2
- in_stock값을 10으로 할당
POST /products/_update/100
{
  "script": {
    "source": "ctx._source.in_stock = 10"
  }
}
case 3
- query params를 통해 in_stock을 update해보자. api로 쏠때 유용한 방법이다.
POST /products/_update/100
{
  "script": {
    "source": "ctx._source.in_stock -= params.quantity",
    "params": {
      "quantity": 5
    }
  }
}
중요사항
-
script 업데이트의 result는 항상 "updated"다. non script update는 실제 값이 변경되야 "updated"로 리턴되지만, script는 값 변경 여부와 상관없이 result가 updated다.
-
아래 세 케이스를 보자.
-
case 1. 아래는 in_stock이 0일 경우는 result를 noop으로 뱉어달라는 script
POST /products/_update/100
{
  "script": {
    "source": """
      if (ctx._source.in_stock == 0)  {
        ctx.op = 'noop';
      }

      ctx._source.in_stock--;
    """
  }
}- case 2. in_stock이 0보다 클 때만 in_stock을 1 빼달라는 쿼리문
- 아래 쿼리문은 0보다 클때만 -1이 되긴 하지만, 0보다 작든 크든 항상 result는 updated다.
POST /products/_update/100
{
  "script": {
    "source": """
      if (ctx._source.in_stock > 0) {
        ctx._source.in_stock--;
      }

    """
  }
}- case 3. in_stock <=1경우 delete 결과를 뱉어달라는 명령문
POST /products/_update/100
{
  "script": {
    "source": """
      if (ctx._source.in_stock <= 1) {
        ctx.op = 'delete';
      }

      ctx._source.in_stock--;

    """
  }
}
upserts
- 없으면 insert, 있으면 update한다.
POST /products/_update/101
{
  "script": {
    "source": "ctx._source.in_stock++"
  },
  "upsert": {
    "name": "TV",
    "price": "500",
    "in_stock": 5
  }
}- 기존에 없던 doc이므로 result는 created다.
{
  "_index" : "products",
  "_type" : "_doc",
  "_id" : "101",
  "_version" : 1,
  "result" : "created",
  "_shards" : {
    "total" : 3,
    "successful" : 3,
    "failed" : 0
  },
  "_seq_no" : 31,
  "_primary_term" : 1
}- GET 해보면 현재 in_stock이 5다.
이제 다시 똑같은 upsert 쿼리문을 쳐보자. result는 updated이고, in_stock은 6이 되었다.
Replacing doduments
GET /products/_doc/101 으로 확인했을 때 아래와 같은 데이터가 있다.
{
  "_index" : "products",
  "_type" : "_doc",
  "_id" : "101",
  "_version" : 2,
  "_seq_no" : 32,
  "_primary_term" : 1,
  "found" : true,
  "_source" : {
    "name" : "TV",
    "price" : "500",
    "in_stock" : 6
  }
}- 위 데이터를 PUT을 사용해서 replace해보자.
PUT /products/_doc/101
{
  "name" : "TV",
  "in_stock" : 10
}- 다시 GET으로 확인하면 데이터가 잘 변한걸 볼 수 있다.
- 보다 시피 price필드가 사라졌다. doc이 완전히 replace되었기 때문이다.
{
  "_index" : "products",
  "_type" : "_doc",
  "_id" : "101",
  "_version" : 4,
  "_seq_no" : 34,
  "_primary_term" : 3,
  "found" : true,
  "_source" : {
    "name" : "TV",
    "in_stock" : 10
  }
}
Deleting documents
- GET과 똑같고 동사만 바꾸면 된다.
DELETE /products/_doc/101
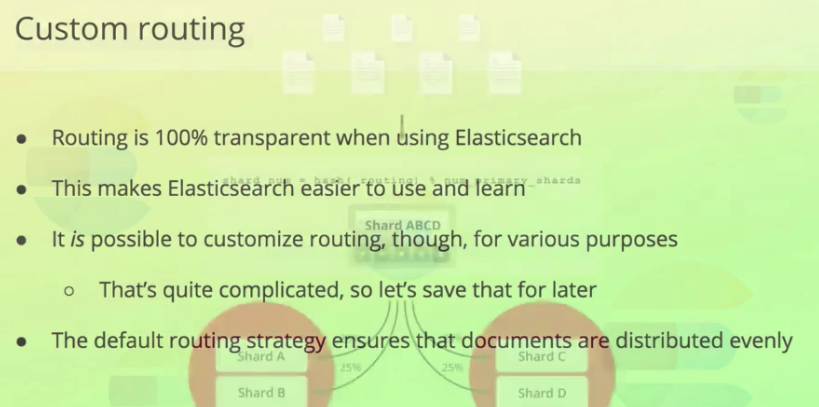
Understanding routing
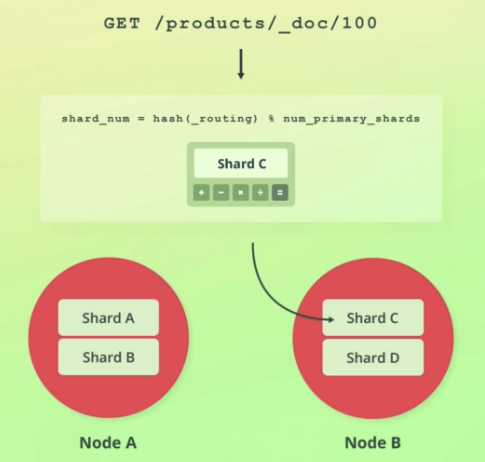
- 특정 데이터를 어디에 저장할지, 또 특정 데이터가 어떤 shard에 저장되있는지 어떻게 알까?
- routing에 정답이 있다.
- Routing is the process of resolving a shard for a document
- 데이터가 어떤 샤드에 저장되어야 하는지는 아래 공식을 통해 계산된다.
- _routing의 디폴트값은 document's id와 같다.
shard_num = hash(_routing) % num_primary_shards
- GET의 결과 중 메타데이터가 있는데 이 중 _id는 document의 id다.
- _routing값도 있는데, 디폴트값이 _id와 같기 때문에 따로 표시가 안된다. 이 값을 커스텀하면 그땐 표시된다.
{
  "_index" : "products",
  "_type" : "_doc",
  "_id" : "101",
  "_version" : 4,
  "_seq_no" : 34,
  "_primary_term" : 3,
  "found" : true,
  "_source" : {
    "name" : "TV",
    "in_stock" : 10
  }
}- index가 create된 후론 shard 수가 바뀔 수 없다고 했는데, 바로
shard_num = hash(_routing) % num_primary_shards이 공식에 shard수가 쓰이기 때문이다. - 샤드 수를 조정하면 공식 output이 달라지기 때문에 기존 인덱스에 문제가 생긴다.
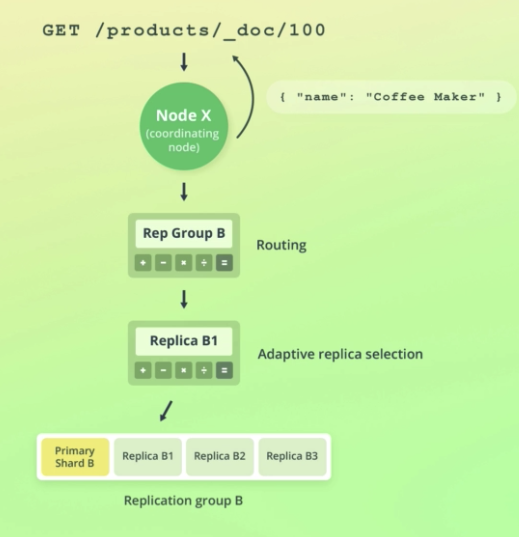
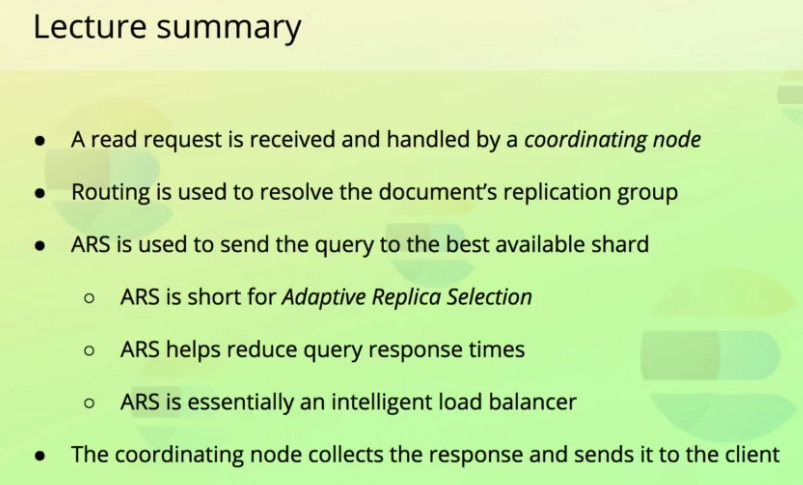
How Elasticsearch reads data
-
이번 설명은 도큐먼트 하나를 찾는 것에 관한 설명이지, search queries자체가 어떻게 동작하는지에 관한 것은 아니다.
-
처음으로 특정 노드가 read request를 받는다.
-
이 노드 is responsible for coordinating the request. coordinating node라 불린다.
-
이 노드의 첫 역할은 찾고자 하는 document가 어디에 있는지 알아내는 것이다.
-
이건 라우팅을 통해 이뤄진다.
-
좀 더 복잡한 설명이 있긴한데 for now, just know that ES tries to select the shard copy that it believes can yield the best performance.
-
Once a shard has been selected, the coordinating node sends the read request to that shard.
-
When the shard responds, the coordinating node collects the response and sneds it to the client
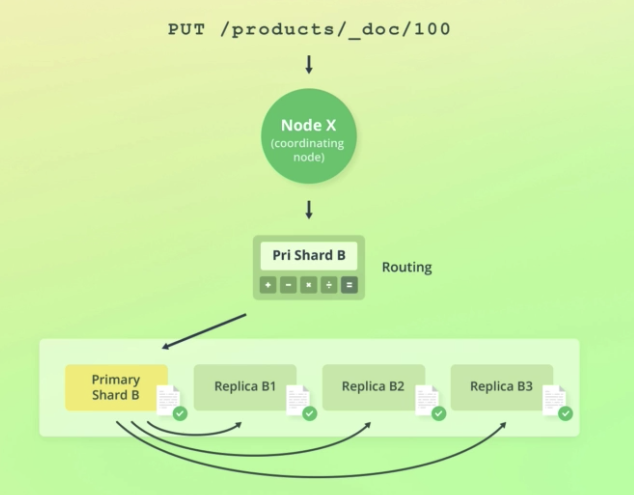
How ES writes data
- 일단 처음엔 위에서 말한 것과 비슷한 과정을 거친다.
- The request is resolved to the replication group that stores or shold store the document.
- Instead of routing the request to any of the shards within the replication group, write requests are alyways routed to the primary shard.
- The primary shard is first of all responsible for validating the request.
(validating the structure of the request, field values.)
The primary shard then performs the write operation locally, before forwarding it to the replica shards to keep those up to date as well. - To imporve performance, the primary shard forwards the operation to its replica shards in parallel
- Note that the operation will succeed even if the operation cannot be replicated to the replica shards.
how ES handles failures in regareds to data replication
- 비동기 작업이고, 분산구조기 때문에 failure가 발생할 경우가 있다.
Primary terms and sequence number(3:55~)
- 집중이 잘 안된다. 나중에 여기부터 다시 들으면 됨.
Understanding document versioning
- ES는 documents 버저닝을 한다.
- 단순 버저닝일 뿐, 이전 버전의 데이터를 보거나 돌아갈 수는 없다.
- metadata중 _version에서 확인 가능하다.
- the value is an int
- document를 수정, 삭제할 때마다 1씩 증가한다. (초기값 1)
- 삭제 후 60초 동안 버전이 유지된다. (configured with the index.gc_deletes setting)
- 60 초 안에 다시 수정하면 버전이 +1되고, 시간이 지나면 1로 초기화된다.
- search query에는 version이 포함 안되어있지만, 간단한 설정으로 표시할 수 있다(나중에 알려줌).

Optimistic concurrency control
- prevent overwriting documents inadvertently due to concurrent operations
- Mutual exclusion같은 개념이다.
- 예를 들어 재고가 5개인 상품을 두 thread가 -1 업데이트 연산을 하려고 한다.
- A, B가 재고 5를 retrieve했고, A가 먼저 -1연산을 해 현재 값은 4가 되었다. 이때 B가 -1 연산을 하는데 5값을 retrieve했기 때문에 또다시 결과값 4를 덮어 씌운다(원랜 3이 되어야함.)
- 이런걸 막는 개념.
old way
- 원랜 Version으로 했었다.
POST /products/_update_100?version=1- 이런 식으로 버전이 일치할 때만 업데이트 하도록 했었다. 하지만 이 방법도 결함이 있고, 이보다 더 좋은 방법이 있는데, primary terms와 sequence number를 사용한다.
new way
- primary terms와 sequence number 사용
-POST /products/_update/100?if_primary_term=1&if_seq_no=71 - 이런 식으로 메타데이터에 포함된 저 두 값이 일치할 때만 연산을 하는 것이다.

Update by query
-
doc하나 업데이트 하는건 이미 배웠다.
-
여러개 doc 업데이트 하는 법 알아보자.
-
SQL의 UPDATE문과 비슷하다.
-
세가지 개념이 사용된다.
- Primary terms
- Sequence numbers
- Optimistic concurrency control
-
아래 쿼리문은 products인덱스에 속한 모든 doc들의 in_stock을 1 감소시킨다.
POST /products/_update_by_query
{
  "script": {
    "source": "ctx._source.in_stock--"
  },
  "query": {
    "match_all": {}
  }
}- 아래는 위 쿼리문의 response
{
  "took" : 272,
  "timed_out" : false,
  "total" : 2,
  "updated" : 2,
  "deleted" : 0,
  "batches" : 1,
  "version_conflicts" : 0,
  "noops" : 0,
  "retries" : {
    "bulk" : 0,
    "search" : 0
  },
  "throttled_millis" : 0,
  "requests_per_second" : -1.0,
  "throttled_until_millis" : 0,
  "failures" : [ ]
}
심화지식
- update 쿼리가 날라오면 제일 먼저 index의 snapshot이 생성된다.
- 그 후 쿼리에 맞는 doc을 찾기 위해 search query가 각 index의 shard에 전달된다.
- 해당하는 것을 찾으면 그 doc을 업데이트 하기 위해 bulk request가 전달된다.
- bulk request는 하나의 reuqest로 많은 doc을 처리하기 위해 쓰인다.(주로 index, update, delete)
- batches는 doc을 retrieve하기 위해 사용된 batch의 수를 나타낸다.
- 쿼리는 내부적으로 Scroll API를 사용한다.(which is a way to scroll through result set)
- each pair of search and bulk requests are sent sequentially, one at a time.
- simutaneousy하지 않은 이유는 error handling때문이다.
- search query, bulk query중 에러가 발생하면 ES는 자동으로 10번까지 retry한다.
- 쿼리가 실패하면 the whole query is aborted.
- 그 후 failures키와 함께 리턴된다.
- It's important to note that the query is aborted, and not rolled back.
- fail발생했을 때 이미 update된 doc들은 그상태로 유지된다. 롤백 안됨.
- 즉 query는 transaction보장이 안된다.
- 아래 그림처럼 A에서 성공, B는 실패했을 때 A의 업데이트는 롤백되지 않는다.


- version conflict이 나도 강제로 업데이트 하려면
"conflicts": "proceed"를 명시해주면 된다.
POST /products/_update_by_query
{
  "conflicts": "proceed",
  "script": {
    "source": "ctx._source.in_stock--"
  },
  "query": {
    "match_all": {}
  }
}
Delete by query
- doc 하나 지우는 건 이미 배웠다.
- single query로 doc 여러개 지우는 법 알아보자.
- 기본 메커니즘은 바로 위 설명 update by query와 같다.
- 아래 쿼리문은 products인덱스에 있는 모든 doc을 지운다. (왜 DELETE말고 POST를 쓸까?)
POST /products/_delete_by_query
{
  "query": {
    "match_all": {}
  }
}- 아래는 Response
{
  "took" : 158,
  "timed_out" : false,
  "total" : 2,
  "deleted" : 2,
  "batches" : 1,
  "version_conflicts" : 0,
  "noops" : 0,
  "retries" : {
    "bulk" : 0,
    "search" : 0
  },
  "throttled_millis" : 0,
  "requests_per_second" : -1.0,
  "throttled_until_millis" : 0,
  "failures" : [ ]
}
Batch processing
- 한 번에 index, update, delete를 하는 방법
- Bulk API가 사용된다.

- This format is based on a specification called NDJSON.
- 아래는 bulk 예시다.
POST /_bulk
{"index": {"_index": "products", "_id": 200}}
{"name": "Espresso Machine", "price": 199, "in_stock": 5}
{"create": {"_index": "products", "_id": 201}}
{"name": "Milk Frother", "price": 149, "in_stock": 14}- index, create, update, delete 총 네가지가 가능하다.
- _id is optional. 안적으면 작동으로 생긴다.
- create action은 이미 document가 있다면 실패한다.
- index action은 이미 document가 있으면 replace한다.
- 위 bulk에 대한 response
{
  "took" : 87,
  "errors" : false,
  "items" : [
    {
      "index" : {
        "_index" : "products",
        "_type" : "_doc",
        "_id" : "200",
        "_version" : 1,
        "result" : "created",
        "_shards" : {
          "total" : 3,
          "successful" : 2,
          "failed" : 0
        },
        "_seq_no" : 3,
        "_primary_term" : 3,
        "status" : 201
      }
    },
    {
      "create" : {
        "_index" : "products",
        "_type" : "_doc",
        "_id" : "201",
        "_version" : 1,
        "result" : "created",
        "_shards" : {
          "total" : 3,
          "successful" : 2,
          "failed" : 0
        },
        "_seq_no" : 4,
        "_primary_term" : 3,
        "status" : 201
      }
    }
  ]
}- 아래 쿼리문으로 products 인덱스를 모두 찾아보자.
GET /products/_search
{
  "query": {
    "match_all": {}
  }
}- 결과
{
  "took" : 171,
  "timed_out" : false,
  "_shards" : {
    "total" : 2,
    "successful" : 2,
    "skipped" : 0,
    "failed" : 0
  },
  "hits" : {
    "total" : {
      "value" : 2,
      "relation" : "eq"
    },
    "max_score" : 1.0,
    "hits" : [
      {
        "_index" : "products",
        "_type" : "_doc",
        "_id" : "200",
        "_score" : 1.0,
        "_source" : {
          "name" : "Espresso Machine",
          "price" : 199,
          "in_stock" : 5
        }
      },
      {
        "_index" : "products",
        "_type" : "_doc",
        "_id" : "201",
        "_score" : 1.0,
        "_source" : {
          "name" : "Milk Frother",
          "price" : 149,
          "in_stock" : 14
        }
      }
    ]
  }
}- update, delete를 해보자.
- 아래 쿼리문은 위에서 생성한 201인덱스의 가격을 129로 바꾸고, 200을 지운다.
- delete는 유일하게 다음 줄이 필요없다.
POST /_bulk
{"update": {"_index": "products", "_id": 201} }
{"doc": {"price": 129 } }
{"delete": {"_index": "products", "_id": 200} }- index 이름이 같으므로 아래처럼 해도 똑같은 결과가 된다.
POST /products/_bulk
{"update": {"_id": 201} }
{"doc": {"price": 129 } }
{"delete": {"_id": 200} }- response
{
  "took" : 86,
  "errors" : false,
  "items" : [
    {
      "update" : {
        "_index" : "products",
        "_type" : "_doc",
        "_id" : "201",
        "_version" : 2,
        "result" : "updated",
        "_shards" : {
          "total" : 3,
          "successful" : 2,
          "failed" : 0
        },
        "_seq_no" : 5,
        "_primary_term" : 3,
        "status" : 200
      }
    },
    {
      "delete" : {
        "_index" : "products",
        "_type" : "_doc",
        "_id" : "200",
        "_version" : 2,
        "result" : "deleted",
        "_shards" : {
          "total" : 3,
          "successful" : 2,
          "failed" : 0
        },
        "_seq_no" : 6,
        "_primary_term" : 3,
        "status" : 200
      }
    }
  ]
}
주의사항 1
- Content-Type header는
Content-Type: application/x-ndjson으로 해야한다. application/json도 되긴 하는데, 정석은 아니다.- 콘솔, SDK는 알아서 헤더 설정해줌.
주의사항 2
- 각 줄은 무조건 newline character로 끝나야한다.(\n or \r\n)
- 마지막 줄도 1줄 빈줄이어야 한다.
- 텍스트 에디터에서는 그냥 엔터치면 된다. 텍스트 에디터에서 \n or \r\n 쓰지 말자.
- 콘솔에선 내가 신경 안써도 알아서 해줌.
주의사항 3
- bulk에서 하나가 fail해도 다른 action에는 영향이 없다.
-response에 상세하게 어떤게 성공했고 실패했는지 나온다. (inspect the "items" key) - 쿼리문 위에서부터 action이 실행된다. (순서)
importing data with cURL
- products-bulk.json파일은 강의 첨부파일에.
curl -H "Content-Type: application/x-ndjson" -XPOST http://localhost:9200/products/_bulk --data-binary "@products-bulk.json"
출처
출처: udemy Bo Andersen의 Complete Guide to Elasticsearch 강의.
https://www.udemy.com/course/elasticsearch-complete-guide/learn/lecture/7585356#overview