
v-bind
class, style, value 등 속성(attribute)을 표현식에 동적으로 바인딩한다. 축약하여 ":"로 표현한다. class attribute를 바인딩하는 경우를 살펴보자.
<div
  class="static"
  :class="{ active: isActive, 'text-danger': hasError }"
></div>
data() {
return {
isActive: true,
hasError: false
}
}static은 항상 적용되고, active는 isActive가 true일 경우 적용된다.
- 렌더링 결과
<div class="static active"></div>v-on
해당 element에 event listener를 연결한다. 축약하여 "@"로 표현한다. button element에 click event를 연결한 경우를 살펴보자.
<div id="event-with-method">
  <!-- `greet`는 메소드 이름으로 아래에 정의되어 있습니다 -->
  <button @click="greet">Greet</button>
</div>
Vue.createApp({
data() {
return {
name: 'Vue.js'
}
},
methods: {
greet(event) {
// 메소드 안에서 사용하는 `this` 는 Vue 인스턴스를 가리킵니다.
alert('Hello ' + this.name + '!')
// `event` 는 네이티브 DOM 이벤트입니다
if (event) {
alert(event.target.tagName)
}
}
}
}).mount('#event-with-method')button을 click하면 greet 메소드가 실행된다.
네이티브 DOM event에 접근할 필요가 있을 경우, "$event"를 인자로 넣어준다.
<button @click="warn('Form cannot be submitted yet.', $event)">
  Submit
</button>
methods: {
warn(message, event) {
// 네이티브 이벤트에 접근 할 수 있습니다.
if (event) {
event.preventDefault()
}
alert(message)
}
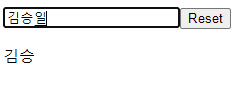
}지금까지 배운 내용만으로 내가 input 태그에 입력한 내용을 화면에 그대로 띄워주고, 리셋 버튼을 누르면 사라지는 기능을 만들어보자.
<div id="ex">
<input type="text" :value="myInput" @input="changeInputText" />
<button @click="resetInputText">Reset</button>
<p>{{ myInput }}</p>
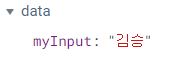
</div>const app = Vue.createApp({
data() {
return {
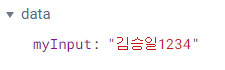
myInput: "김승일",
};
},
methods: {
changeInputText(event) {
this.myInput = event.target.value;
},
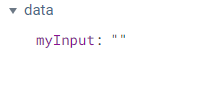
resetInputText() {
this.myInput = "";
},
},
});
app.mount("#ex");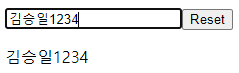
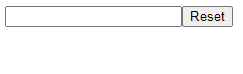
"input" event가 발생하면 changeInputText 메서드가 실행되고, "click" event가 발생하면 resetInputText 메서드가 실행된다.
resetInputText 메서드는 myInput만 초기화시키지만 버튼을 눌러보면 input 안에 적힌 내용도 함께 초기화된다. input element의 value attribute를 myInput에 바인딩했기 때문이다.
myInput이 바뀌면 input element의 value가 바뀌고, input element의 value가 바뀌면 myInput이 바뀐다. 양방향으로 바인딩이 된 것이다. 이제 양방향 바인딩을 손쉽게 하는 방법을 알아보자.
v-model
<input type="text" v-model="myInput" />v-model은 input, textarea, select element에 양방향 데이터 바인딩을 생성해준다. 이 때 input type 요소를 변경하는 올바른 방법을 자동으로 선택해준다. 예를 들어, text와 textarea는 value attribute, input event를 사용하고, radio, checkbox는 checked attribute, change event를 사용한다.
따라서 맨 처음 썼던 :value, @input 대신 v-model 하나만 써도 똑같이 작동하는 것을 확인할 수 있다.
단점
한글이 이상하게 나온다.
한글을 꼭 써야하는 경우라면 v-model 대신 :value, @input을 사용하도록 하자.