서론
예전에 실시간 채팅 웹을 만들다가 포기해버린 웹소켓 프로젝트..
그래도 게시판이랑 이런저런 실습하다가 뭔가 다시 도전해볼까? 생각이 들어서 gpt를 등에 업고 재도전!
websocket 이란?
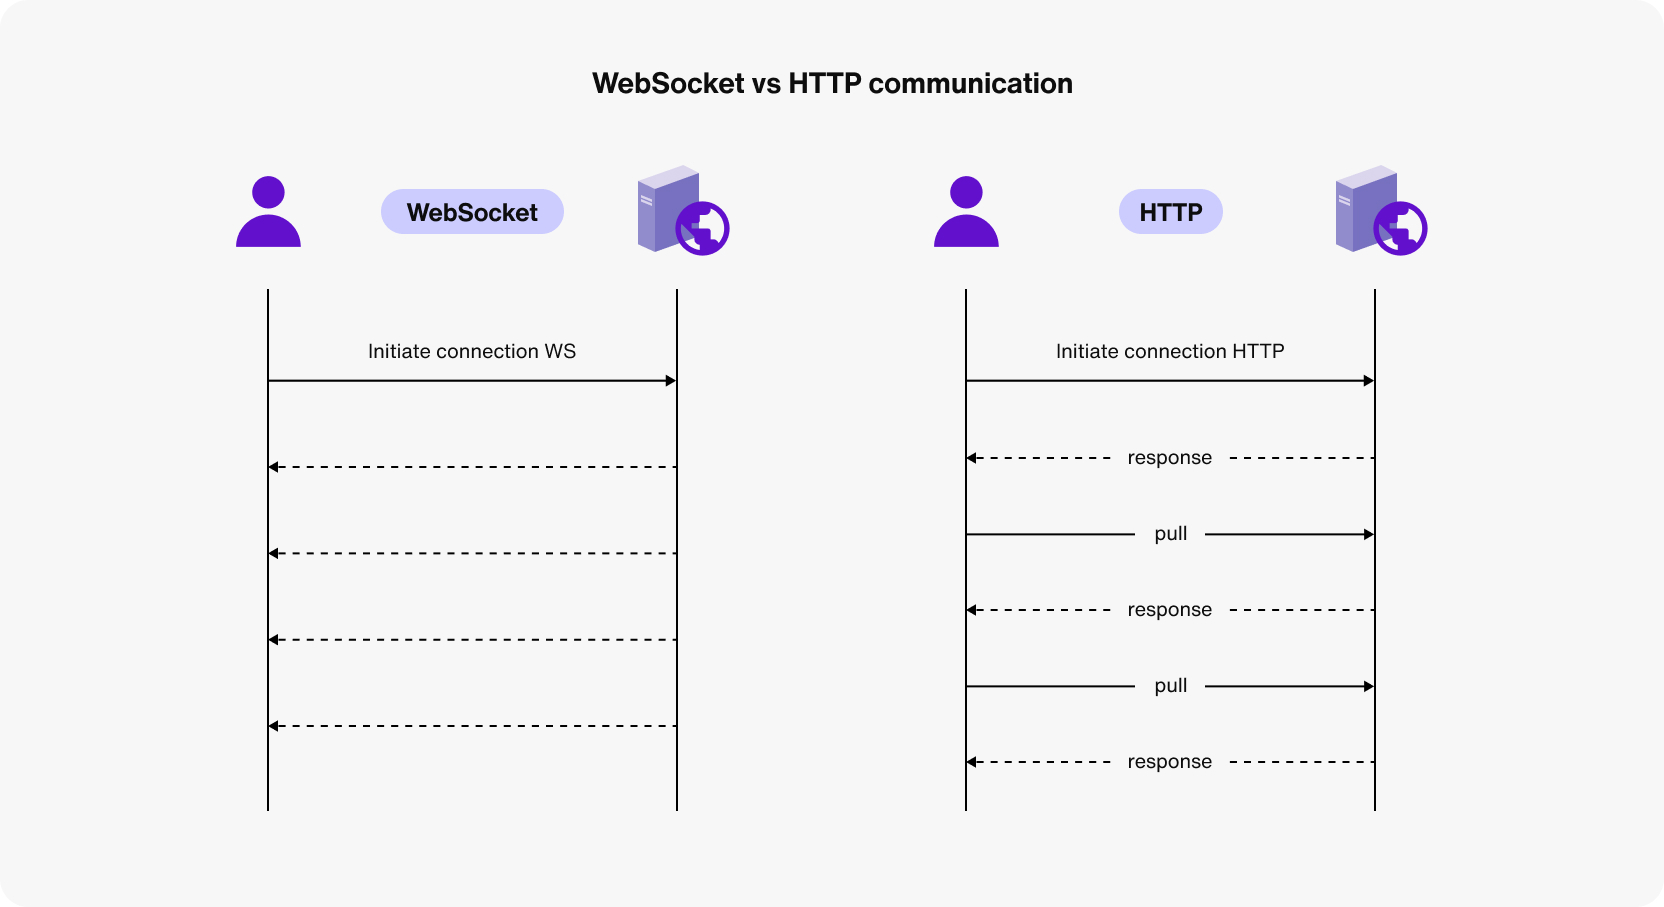
우리가 사용하는 일반적인 http 는 사용자가 요청을 하고, 서버에서 응답을 하는 구조이다.
그런데 실시간 채팅에서는 실시간으로 채팅이 생성되기 때문에 http의 계속 요청을 하는 구조는 지속적으로 확인을 요청해야 하기 때문에 비효율적이다.
이런 한계점을 웹소켓의 양방향 통신으로 해결할 수 있다.
양쪽에서 정보를 전달하기 때문에 시스템의 요청을 기다리지 않고, 문자가 수신된 것을 요청없이 확인할 수 있다.
실습
이론으로는 이해했을지라도 실제 코드를 구현해야 내 것이 된다.
gpt와 만든 간단한 코드로 실습을 해보자.
이론에서는 없었던 '웹소켓 핸드쉐이킹' 이라는 코드를 알아야 한다.
뭐지? 웹소켓 악수? 맞다.
구조가 http와 다르기 때문에 웹소켓 서버를 따로 만들어줘야 한다.
그리고 그 서버에 유저들이 접속 성공했을 때 handshaking, 악수를 한다.
그것을 코드에서는 hanlder라는 단어로 관리한다.
handler의 코드는 다음과 같다.
import org.springframework.web.socket.TextMessage;
import org.springframework.web.socket.WebSocketSession;
import org.springframework.web.socket.handler.TextWebSocketHandler;

import com.fasterxml.jackson.databind.ObjectMapper;

public class ChatHandler extends TextWebSocketHandler {
    private final Set<WebSocketSession> sessions = new HashSet<>();

    @Override
    public void afterConnectionEstablished(WebSocketSession session) throws Exception {
        sessions.add(session);
    }

    @Override
    protected void handleTextMessage(WebSocketSession session, TextMessage message) throws Exception {
        // 클라이언트에서 JSON 메시지를 받음
        String payload = message.getPayload();
        ObjectMapper mapper = new ObjectMapper();
        Map<String, String> data = mapper.readValue(payload, Map.class);

        String userId = data.get("userId"); // 사용자 ID
        String chatMessage = data.get("message"); // 채팅 메시지

        System.out.println("[" + userId + "] " + chatMessage); // 서버 로그 출력

        // 모든 세션에 ID와 메시지를 전송
        for (WebSocketSession s : sessions) {
            if (s.isOpen()) {
                s.sendMessage(new TextMessage("[" + userId + "]: " + chatMessage));
            }
        }
    }

    @Override
    public void afterConnectionClosed(WebSocketSession session, org.springframework.web.socket.CloseStatus status) throws Exception {
        sessions.remove(session);
    }

}
간단히 설명하면, connection이 성공했을 때, 세션을 연다.
그리고 message를 받으면 userid와 메시지를 열린 세션에 전송하여 양방향 통신이 가능하게 한다. (이때 로그를 찍어서 터미널에서도 확인할 수 있게 했다.)
그러면 다음 handler를 봤을 때 우리에게 필요한 것은 사용자 id를 입력하고 메시지를 전송할 수 있는 페이지이다.
id를 입력할 수 있는 index.html과 id를 입력한 후 채팅을 보낼 수 있는 chatweb.html 두개로 작성했다.
[index.html]
<html lang="en">
<head>
    <meta charset="UTF-8">
    <title>Enter ID</title>
    <script>
        // ID를 입력한 후 로컬 스토리지에 저장하고 채팅 페이지로 이동
        function enterChat() {
            const userId = document.getElementById("userId").value;
            if (userId.trim() === "") {
                alert("Please enter a valid ID.");
                return;
            }
            localStorage.setItem("userId", userId); // ID를 로컬 스토리지에 저장
            window.location.href = "/chatweb"; // 채팅 페이지로 이동
        }
    </script>
</head>
<body>
    <h1>Enter Your ID</h1>
    <input type="text" id="userId" placeholder="Enter your ID" />
    <button onclick="enterChat()">Join Chat</button>
</body>
</html>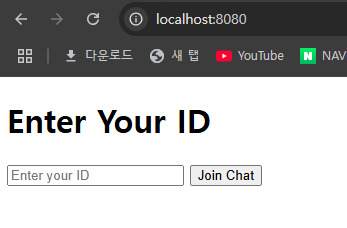
[chatweb.html]
<!DOCTYPE html>
<html lang="en">
<head>
    <meta charset="UTF-8">
    <title>Chat</title>
    <script>
        let socket;
        let userId;

        // WebSocket 연결 및 ID 포함 메시지 전송
        function connect() {
            // 로컬 스토리지에서 ID 가져오기
            userId = localStorage.getItem("userId");
            if (!userId) {
                alert("No user ID found. Redirecting to login page.");
                window.location.href = "/localhost:8080"; // ID가 없으면 로그인 페이지로 이동
                return;
            }

            socket = new WebSocket("ws://localhost:8080/chat");

            // WebSocket 연결 이벤트
            socket.onopen = function() {
                console.log("Connected to WebSocket as " + userId);
            };

            // 서버에서 받은 메시지를 화면에 출력
            socket.onmessage = function(event) {
                const log = document.getElementById("log");
                log.innerHTML += event.data + "<br>";
            };
        }

        // 메시지 전송
        function sendMessage() {
            const message = document.getElementById("message").value;
            if (!message.trim()) {
                alert("Message cannot be empty.");
                return;
            }
            // 사용자 ID와 메시지를 JSON 형태로 전송
            const payload = JSON.stringify({ userId, message });
            socket.send(payload);
            document.getElementById("message").value = "";
        }
    </script>
</head>
<body>
    <button onclick="connect()">Connect</button>
    <div id="log"></div>
    <input type="text" id="message" />
    <button onclick="sendMessage()">Send</button>
</body>
</html>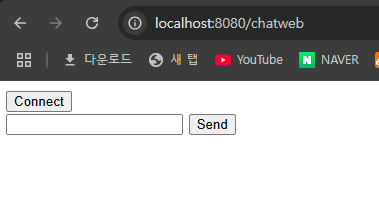
간단한 동작 구조는 index.html로 작성했기 때문에 localhost url로 호출이 되는 id입력 페이지에서 id를 입력한다.
그러면 chatweb으로 넘어가게 되고, connect버튼을 눌러 세션을 오픈한다.
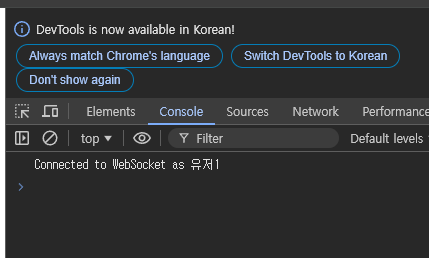
그러면 다음과 같이 로그가 출력된다.
추가로 websocket을 사용할 때 @configuration 설정을 해주어야한다.
package com.example.demo;

import org.springframework.context.annotation.Configuration;
import org.springframework.web.socket.config.annotation.EnableWebSocket;
import org.springframework.web.socket.config.annotation.WebSocketConfigurer;
import org.springframework.web.socket.config.annotation.WebSocketHandlerRegistry;

@Configuration
@EnableWebSocket
public class WebSocketConfig implements WebSocketConfigurer {
    @Override
    public void registerWebSocketHandlers(WebSocketHandlerRegistry registry) {
        registry.addHandler(new ChatHandler(), "/chat").setAllowedOrigins("*");
    }
}
그리고 페이지를 호출할 때 쓸 controller도 따로 만들었다.
package com.example.demo.Controller;

import org.springframework.web.bind.annotation.GetMapping;
import org.springframework.stereotype.Controller;

@Controller
public class Hellocontroller {

    @GetMapping("/chatweb")
    public String chatweb() {
        return "chatweb";
    }
}
실습 결과
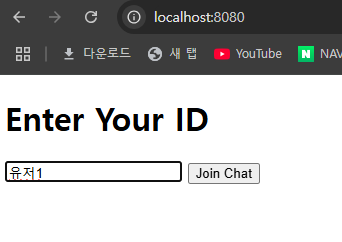
이렇게 id 입력 페이지에서 id를 입력한 후
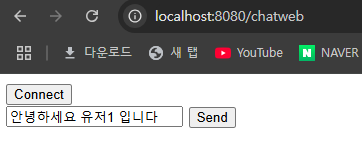
connection을 누르고 메시지를 보낸다.
같은 방식으로 페이지를 여러개 만들어서 유저2, 유저3 을 만들어서 id와 문자가 잘 출력되는지 확인한다.
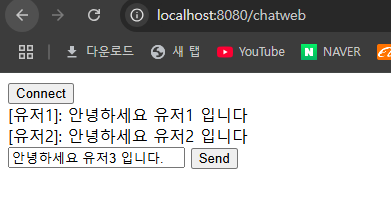
전송한 내용은 다른 유저 페이지에서도 볼 수 있고, id가 구분되어 누가 보냈는지도 알 수 있다.
마무리하며
이렇게 웹 소켓을 사용해서 실시간 채팅 웹을 간단하게 만들어 보았다.
예전에는 실패했을 때는 controller가 뭐야? configration이 뭐야? 이런 기초부터 몰라서 gpt 가 주는 코드들을 활용할 줄 몰랐다.
하지만 공부량이 점점 찰수록 gpt의 코드를 어디다가 복붙해야할지 알 수 있었고(농담), 내가 무엇을 원하는지도 설명하기도 쉬웠다.
그리고 코드를 뜯어보며 websocket에 대한 공부도 효율적으로 할 수 있었다.
구글링해서 이해하고 타이핑해서 코드를 치고.. 하면 비효율적이었을 것 같다.
또 이렇게 간단한 것이라도 구현했을 때 느끼는 재미와 성취감이 다른 것도 구현해보고 싶은 마음을 만든다.
차근차근 쌓아서 개발자로 취직하는 그날까지..!
이미지 출처
https://sendbird.com/ko/developer/tutorials/websocket-vs-http-communication-protocols