
terraform.tfstate란?
terraform apply command를 통해 infra를 배포하면, 해당 디렉토리에 terraform.tfstate라는 파일이 생긴다.

이 파일을 현재 배포된 infrasturcture의 상태를 저장해놓은 파일로, 이후 terraform을 수정하여 배포 시 terraform.tfstatedhk 비교하여, 어떤 리소스가 추가/삭제되어야 하는 지 판단해주는 매우 중요한 파일이다.
한 번 파일 내용을 살펴보자.
terraform.tfstate
{
  "version": 4,
  "terraform_version": "1.3.3",
  "serial": 3,
  "lineage": "18eebaa2-5fc3-3ec9-3e25-0c2054009ab8",
  "outputs": {
    "public_ip": {
      "value": "xxxxxxxxxxxxxx",
      "type": "string"
    }
  },
  "resources": [
    {
      "mode": "managed",
      "type": "aws_instance",
      "name": "example",
      "provider": "provider[\"registry.terraform.io/hashicorp/aws\"]",
      "instances": [
        {
          "schema_version": 1,
          "attributes": {
            "ami": "ami-0e9bfdb247cc8de84",
            "arn": "arn:aws:ec2:ap-northeast-2:<aws account id>:instance/i-093aecac254a372df",
            "associate_public_ip_address": true,
            "availability_zone": "ap-northeast-2a",
            "capacity_reservation_specification": [
              {
                "capacity_reservation_preference": "open",
                "capacity_reservation_target": []
              }
            ],
            "cpu_core_count": 1,
            "cpu_threads_per_core": 1,
            "credit_specification": [
              {
                "cpu_credits": "standard"
              }
            ],
            "disable_api_stop": false,
            "disable_api_termination": false,
            "ebs_block_device": [],
            "ebs_optimized": false,
            "enclave_options": [
              {
                "enabled": false
              }
            ],
            "ephemeral_block_device": [],
            "get_password_data": false,
            "hibernation": false,
            "host_id": null,
            "host_resource_group_arn": null,
            "iam_instance_profile": "",
            "id": "i-093aecac254a372df",
            "instance_initiated_shutdown_behavior": "stop",
            "instance_state": "running",
            "instance_type": "t2.micro",
            "ipv6_address_count": 0,
            "ipv6_addresses": [],
            "key_name": "",
            "launch_template": [],
            "maintenance_options": [
              {
                "auto_recovery": "default"
              }
            ],
            "metadata_options": [
              {
                "http_endpoint": "enabled",
                "http_put_response_hop_limit": 1,
                "http_tokens": "optional",
                "instance_metadata_tags": "disabled"
              }
            ],
            "monitoring": false,
            "network_interface": [],
            "outpost_arn": "",
            "password_data": "",
            "placement_group": "",
            "placement_partition_number": null,
            "primary_network_interface_id": "eni-03fe6636808c47cfb",
            "private_dns": "ip-172-31-12-197.ap-northeast-2.compute.internal",
            "private_dns_name_options": [
              {
                "enable_resource_name_dns_a_record": false,
                "enable_resource_name_dns_aaaa_record": false,
                "hostname_type": "ip-name"
              }
            ],
            "private_ip": "172.31.12.197",
            "public_dns": "ec2-xxxxxxxxxxx.ap-northeast-2.compute.amazonaws.com",
            "public_ip": "xxxxxxxxxxxxx",
            "root_block_device": [
              {
                "delete_on_termination": true,
                "device_name": "/dev/sda1",
                "encrypted": false,
                "iops": 100,
                "kms_key_id": "",
                "tags": {},
                "throughput": 0,
                "volume_id": "vol-038a8211905eedb23",
                "volume_size": 8,
                "volume_type": "gp2"
              }
            ],
            "secondary_private_ips": [],
            "security_groups": [
              "terraform-my-instance"
            ],
            "source_dest_check": true,
            "subnet_id": "subnet-c4f2fcac",
            "tags": {
              "Name": "Single-MyWebSrv"
            },
            "tags_all": {
              "Name": "Single-MyWebSrv"
            },
            "tenancy": "default",
            "timeouts": null,
            "user_data": "xxxxxxxxxxxx",
            "user_data_base64": null,
            "user_data_replace_on_change": true,
            "volume_tags": null,
            "vpc_security_group_ids": [
              "sg-0bfbd719e778eb759"
            ]
          },
          "sensitive_attributes": [],
          "private": "XXXXXXXXXXXXXXXXXX",
          "dependencies": [
            "aws_security_group.instance"
          ]
        }
      ]
    },
    {
      "mode": "managed",
      "type": "aws_security_group",
      "name": "instance",
      "provider": "provider[\"registry.terraform.io/hashicorp/aws\"]",
      "instances": [
        {
          "schema_version": 1,
          "attributes": {
            "arn": "arn:aws:ec2:ap-northeast-2:<aws account id>:security-group/sg-0bfbd719e778eb759",
            "description": "Managed by Terraform",
            "egress": [],
            "id": "sg-0bfbd719e778eb759",
            "ingress": [
              {
                "cidr_blocks": [
                  "0.0.0.0/0"
                ],
                "description": "",
                "from_port": 50000,
                "ipv6_cidr_blocks": [],
                "prefix_list_ids": [],
                "protocol": "tcp",
                "security_groups": [],
                "self": false,
                "to_port": 50000
              }
            ],
            "name": "terraform-my-instance",
            "name_prefix": "",
            "owner_id": "<aws account id>",
            "revoke_rules_on_delete": false,
            "tags": null,
            "tags_all": {},
            "timeouts": null,
            "vpc_id": "vpc-eb180583"
          },
          "sensitive_attributes": [],
          "private": "xxxxxxxxxxxxxxx"
        }
      ]
    }
  ],
  "check_results": []
}
terraform을 통해 AWS에 생성한 리소스들이 기록되어 있다. 아까 설명했듯이 terraform apply 시 현재 infra 상태의 기준이 되는 파일이므로 절대 직접 수정하거나 작성해서는 안된다.
terraform.tfstate 관리하기
기본적으로 아무런 세팅을 하지 않은 경우, 로컬에 terrafor.tfstate 파일이 생성되는데, 팀단위로 terraform을 관리할 때는 공유 저장소에 올려둬야 한다.
보통 이렇게 팀원들이 소스코드를 공유하는 경우는 github, gitlab과 같은 버전관리툴을 사용하는데, terraform.tfstate의 경우 infra 상태를 관리하는 파일이므로 버전관리툴을 권장하지 않는다.
버전관리툴 사용 시, Locking 기능이 없어 충돌이 일어날 수 도 있고, 누군가 terraform을 업데이트 한 후 반영을 하지 않을 경우 곧바로 장애로 이어질 수 있기 때문이다.
그러면 어떻게 관리하는가?! 바로 S3와 DynamoDB를 연동해야한다.

- 상태관리: 버저닝이 되는 S3
- 파일잠금: Locking 기능을 제공하는 DynamoDB
출처: https://github.com/binbashar/terraform-aws-tfstate-backend
terraform에서는 이렇게 terraform.tfstate를 backend를 통해 원격으로 관리한다.
실습하기
1. S3, DynamoDB 생성
현재 작업중인 디렉토리에서 backend 디렉토리를 새로 생성해준다.
$ mkdir tfstate-backend
$ cd tfstate-backend

# backend.tf 생성 (S3는 고유 이름으로..)

provider "aws" {
  region = "ap-northeast-2"
}

resource "aws_s3_bucket" "mys3bucket" {
  bucket = "kimchigood-t101study-tfstate-week3"
}

# Enable versioning so you can see the full revision history of your state files
resource "aws_s3_bucket_versioning" "mys3bucket_versioning" {
  bucket = aws_s3_bucket.mys3bucket.id
  versioning_configuration {
    status = "Enabled"
  }
}

resource "aws_dynamodb_table" "mydynamodbtable" {
  name         = "terraform-locks-week3"
  billing_mode = "PAY_PER_REQUEST"
  hash_key     = "LockID"

  attribute {
    name = "LockID"
    type = "S"
  }
}

output "s3_bucket_arn" {
  value       = aws_s3_bucket.mys3bucket.arn
  description = "The ARN of the S3 bucket"
}

output "dynamodb_table_name" {
  value       = aws_dynamodb_table.mydynamodbtable.name
  description = "The name of the DynamoDB table"
}
배포 및 확인하기
# 배포
$ terraform init && terraform plan && terraform apply -auto-approve
# DynamoDB 테이블 확인
$ aws dynamodb list-tables --output text
   TABLENAMES      terraform-locks-week3
위에서 세팅해준 S3이름과 DynamoDB 테이블 이름을 기억해두자.
2. main.tf에 backend 세팅하기
다시 기존에 사용하던 디렉토리로 이동해서, backend 값을 세팅해보자.
# main.tf

provider "aws" {
  region = "ap-northeast-2"
}

resource "aws_instance" "example" {
  ami           = "ami-0c76973fbe0ee100c"
  instance_type = "t2.micro"
  tags = {
    Name = terraform.workspace == "default" ?  "default-t101-week3" : "t101-week3"
  }
}

terraform {
  backend "s3" {
    bucket = "kimchigood-t101study-tfstate-week3"
    key    = "workspaces-default/terraform.tfstate"
    region = "ap-northeast-2"
    dynamodb_table = "terraform-locks-week3"
  }
}
terraform block 안에 backend를 추가해준다. 위에서 생성한 S3, DynamoDB table 이름으로 세팅 후 배포한다.
*주의 : tfstate-backend 디렉토리가 아닌 main.tf 가 있는 기존 디렉토리이다.
# 배포하기
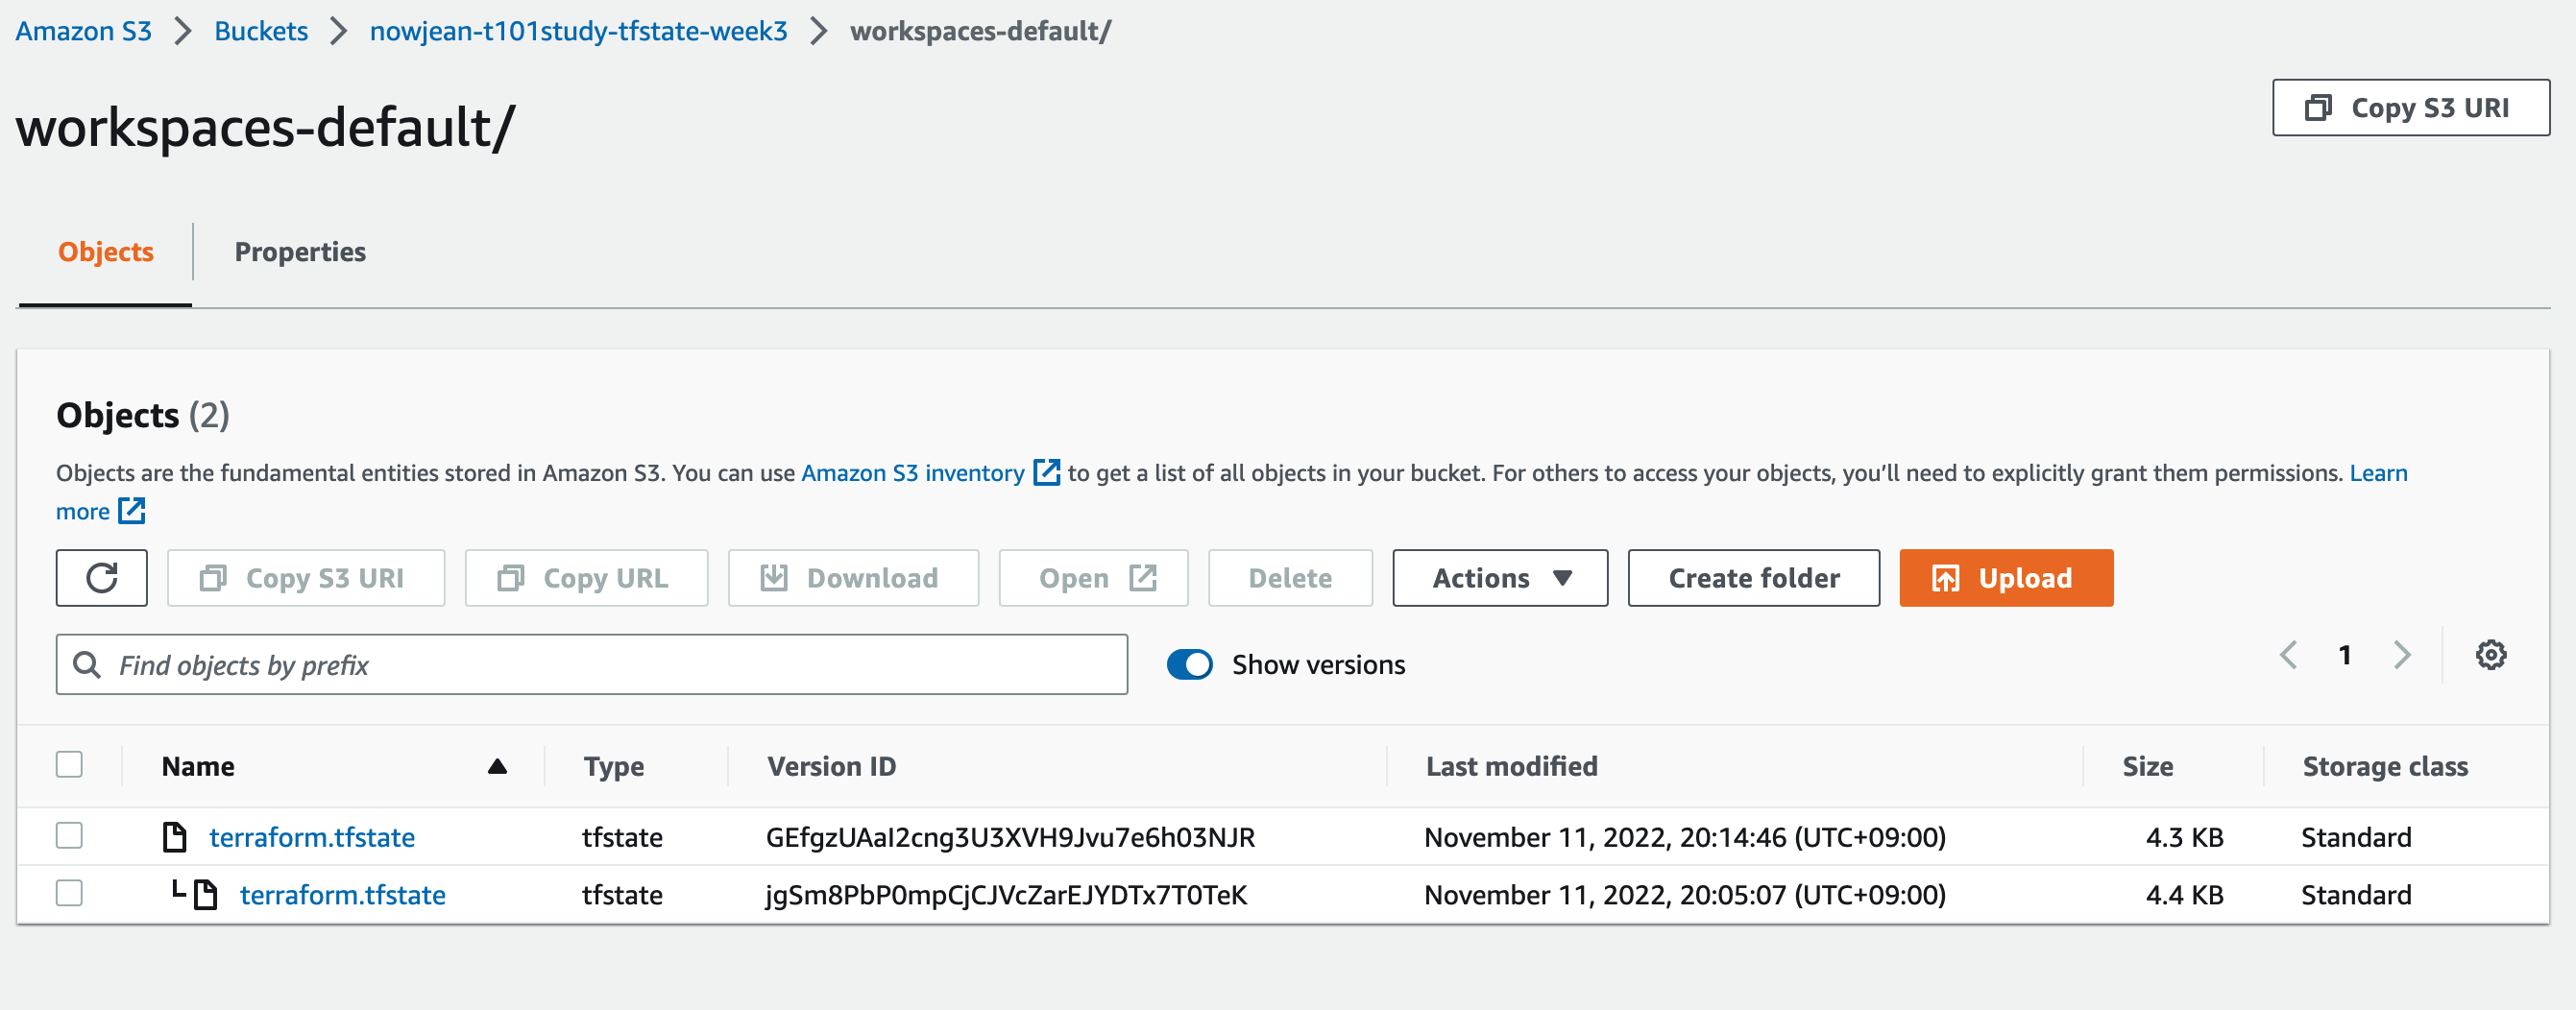
$ terraform init && terraform plan && terraform apply -auto-approveAWS Console에서 DynamoDB table과 S3 버킷을 확인해보자.
-
S3 bucket
S3는 버전관리가 되기 때문에 main.tf가 변경, 배포가 되면 버전관리가 된다.
-
DynamoDB table
LockID를 보면 S3 경로의 terraform.tfstate 파일이 지정되어 있는 것을 볼 수 있다.

Wrap up
terraform.tfstate 파일은 terraform으로 배포된 infra에 대한 형상을 관리해주는 파일이다. 여러명이서 terraform을 관리하는 경우, S3와 DynamoDB를 연계하여 terraform.tfstate의 버저닝과 Lock 기능을 활성화 해준다.