script setup
기존에는 스크립트에 state와 함수를 표현할 때 아래와 같이 했다
<script>

data() {
    return {
      name: "홍길동",
      age: 29,
    }
  },
methods: {
    test_click() {
      alert(this.name + " 입니다!!");
    }
}

</script>
Vue 3에서는 Composition API 와 setup 함수의 등장으로 컴포넌트 객체에 setup 함수를 사용할 수 있다.
<script>

setup() {
	const name = ref("홍길동");
	const age = reactive({count: 29});

    function test_click() {
    	alert(name + " 입니다!!");
	}

    function test_click2() {
    	alert("나이 : " + age.count);
	}

    return {name, age, test_click}

}

</script>
setup은 아래와같이 사용해서 더 간결하게 사용할 수 있다.
<script setup>

const name = ref("홍길동");
const age = reactive({count: 29});

function test_click() {
   	alert(name + " 입니다!!");
}

function test_click2() {
	alert("나이 : " + age.count);
}

</script>
setup을 쓰게되면 state를 ref(), reactive()를 사용해 정의 해야한다.
reactive
reactive는 반응형 데이터를 생성할 수 있는 방식 중 한개이다.
특징으로는 함수 안에 Object, array, Map, Set과 같은 타입만 가능하다.
<!-- App.js -->
<template>
<div>count : {{ state.count }}</div>
</template>
<script setup>
import { reactive } from 'vue'
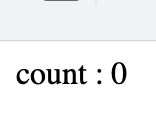
const state = reactive({ count: 0 });
</script>실행을 해보면 화면에 0이라는 state.count가 표기된것을 볼 수 있다.
함수또한 동일하게 선언해 사용할 수 있다.
<!-- App.js -->
<template>
  <div>count : {{ state.count }}</div>
  <button @click="increment">Count Button</button>
</template>

<script setup>
import { reactive } from 'vue'
const state = reactive({ count: 0 });

function increment() {
  state.count++
}
</script>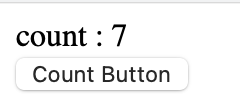
ref
reactive는 반응형 데이터를 생성할 수 있는 방식 중 한개이다.
특징으로는 함수 안에 String, Number, Object 등 어떠한 타입도 사용할 수 있다.
<!-- App.js -->
<template>
  <div>count : {{ state.count }}</div>
  <button @click="increment">Count Button</button>
  <div>count2 : {{ count2 }}</div>
</template>

<script setup>
import {reactive, ref} from 'vue'
const state = reactive({ count: 0 });
const count2  = ref(0);

function increment() {
  state.count++
}
</script>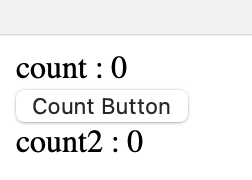
reactive와 동일하게 함수를 사용할 수 있다.
<!-- App.js -->
<template>
  <div>count : {{ state.count }}</div>
  <button @click="increment">Count Button</button>
  <div>count2 : {{ count2 }}</div>
  <button @click="increment2">Count2 Button</button>
</template>

<script setup>
import {reactive, ref} from 'vue'
const state = reactive({ count: 0 });
const count2  = ref(0);

function increment() {
  state.count++
}

function increment2() {
  count2.value++
}
</script>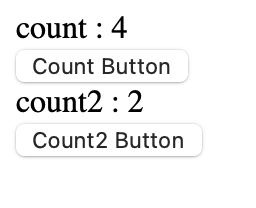
obj 안에 ref를 맵형식으로 넣을수도 있고, const에 한번에 대입할 수도 있다.
const obj = {
  foo: ref(1),
  bar: ref(2)
}

function callSomeFunction(param) {
  console.log("param1 : " + param.value)
  console.log("param2 : " + param.value)
}

callSomeFunction(obj.foo)

const { foo, bar } = obj

console.log("1: " + foo.value);
console.log("1: " + bar.value);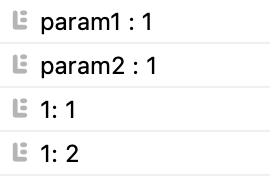
Ref Unwrapping in Templates
Ref로 만든 데이터를 templates에서 아래와 같이하면 정상적으로 동작하지 않을것이다.
<template>
	<div>obj.foo : {{ obj.foo + 1}}</div>
</template>
<script>
const obj = {
  foo: ref(1),
  bar: ref(2)
}
</script>
obj.foo는 참조객체이기 때문이다. 여기서 foo를 최상위 속성으로 만들기 위해 다음과같이 수정할 수 있다.
<template>
	<div>foo : {{ foo + 1}}</div>
    <div>bar : {{ bar + 1}}</div>
</template>
<script>
const obj = {
  foo: ref(1),
  bar: ref(2)
}
const { foo, bar } = obj
</script>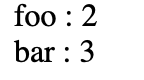
Ref Unwrapping in Reactive Objects
ref가 reactice 객체의 속성으로 액세스 되거나 변형되면 자동으로 언래핑이 되어버린다.
const count2  = ref(0)
const state = reactive({ count: 0 , count2})

const obj = {
  foo: ref(1),
  bar: ref(2)
}

console.log("ref : " + count2.value)
console.log("언래핑 : " + state.count2)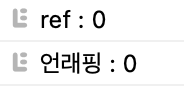
Ref Unwrapping in Arrays and Collections
독특하게 Reactice의 obj일때만 자동으로 언래핑이되고 Reactive의 Array나 Collection에서는 자동으로 언래핑이 이루어지지 않는다.
reactive vs ref
두 함수의 차이는 위에 기술한 것 처럼 사용할 수 있는 타입에 제한이 있다.
접근방식 또한 차이가 있다.
ref에서는 .value property를 붙여 접근하고 템플릿에서는 .value를 사용하지 않는다.
reactive에서는 .value를 붙일 필요가 없이 템플릿과 동일하게 사용한다.
ref의 장점은 템플릿에서 .value를 안붙이고 타입에 제한이 없다는점이고,
reactive의 장점은 탬플릿과 스크립트의 통일성에 있다.
DOM 업데이트 타이밍(nextTick)
스크립트에서 값을 바꾼 뒤 템플릿의 값을 바로 읽으면 반영이 되어있지 않다.
값을 변화시키고 DOM에 반영하고 싶다면 비동기 함수 nextTick을 이용해야한다.
function increment() {
state.count++
// DOM not yet updated
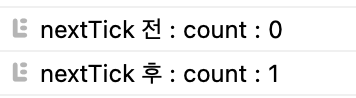
console.log("nextTick 전 : " + document.getElementById("count").textContent);
// DOM is now updated
nextTick().then(
function () {
console.log("nextTick 후 : " + document.getElementById("count").textContent);
}.bind(this)
);
}count를 ++ 하고 count에 해당하는 값을 읽어오면 아직 변하지 않았다.
하지만 nextTick 함수를 사용하면 반영된 값을 바로 읽을 수 있다.