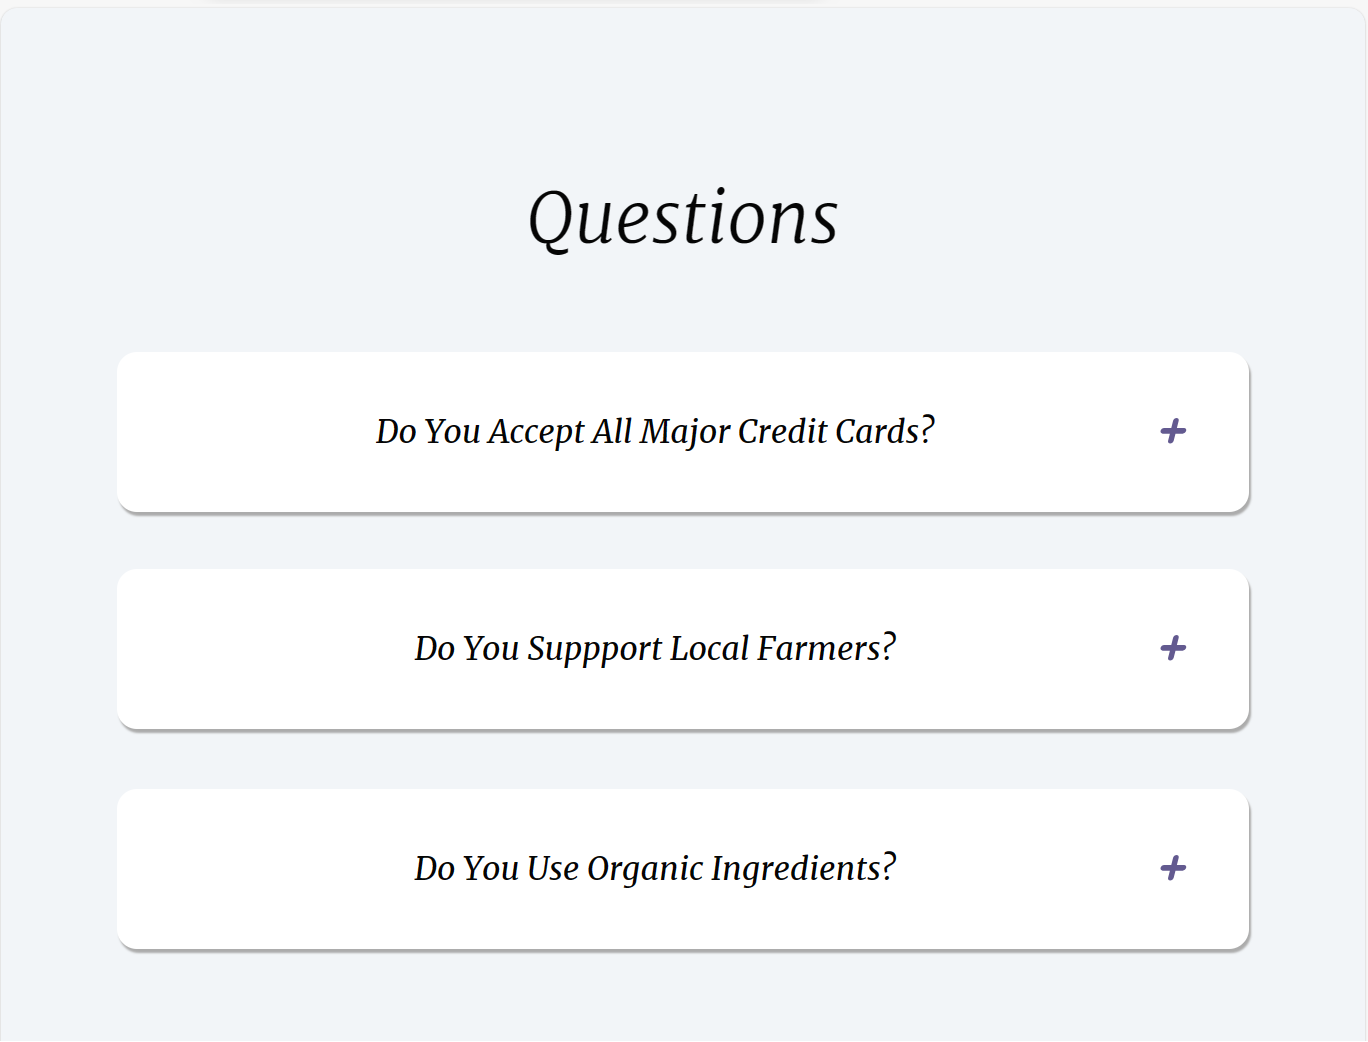
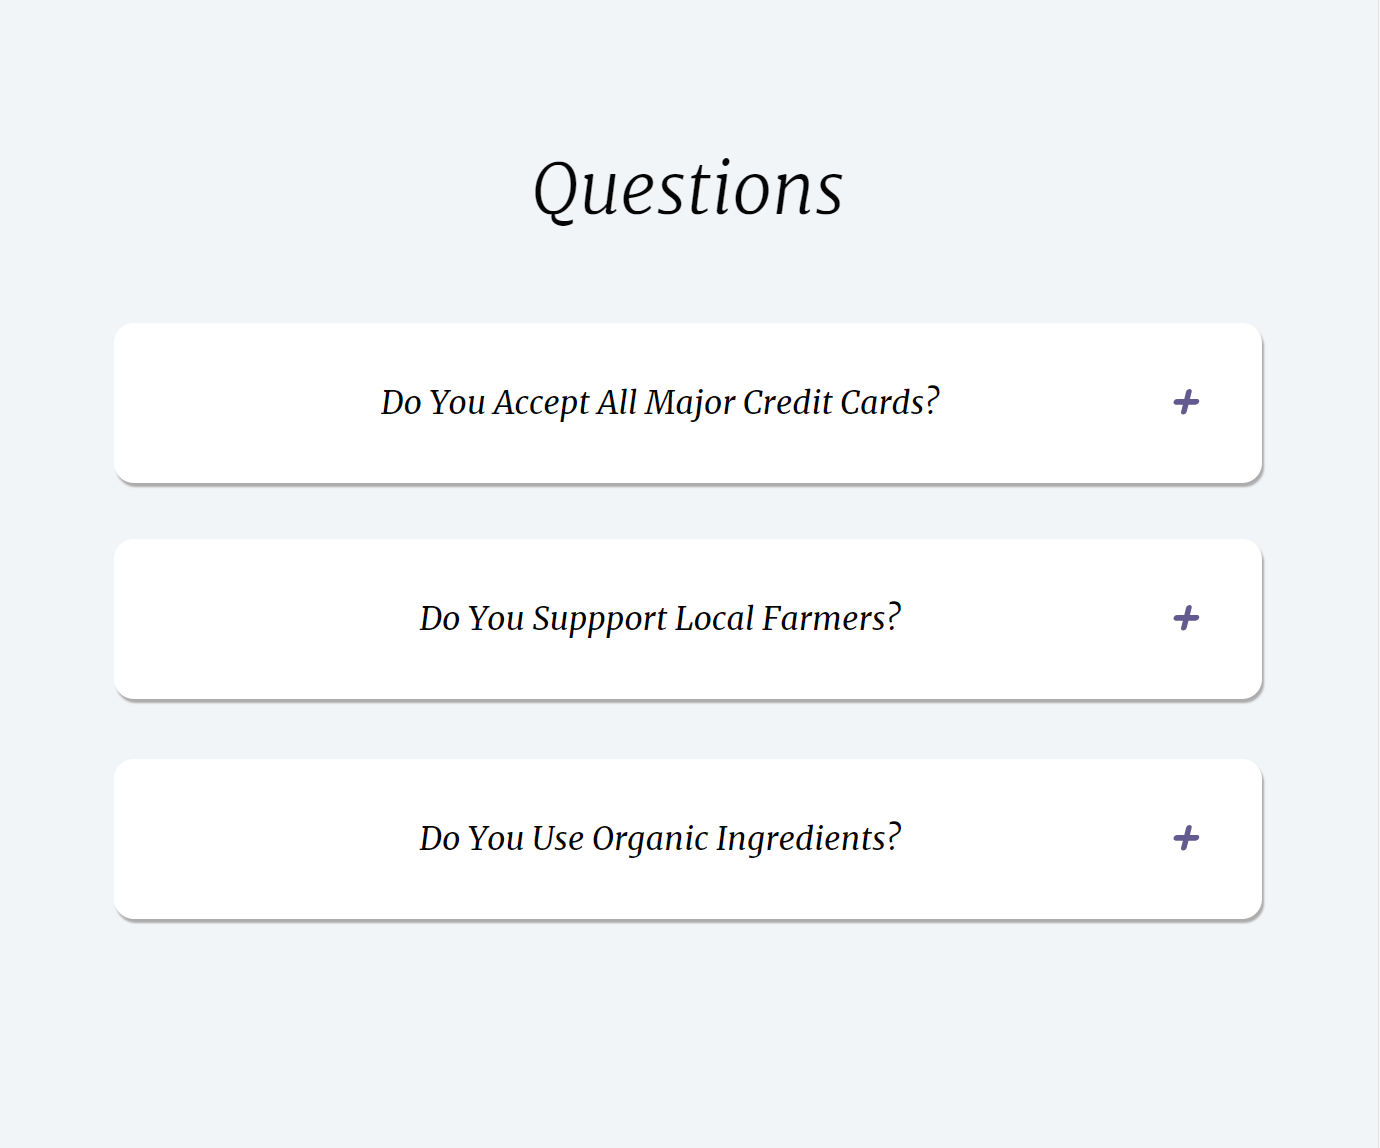
Question
: 질문 상자(box)를 누르면 내용(content)을 보여주는 바가 내려간다.
사용 언어
- HTML
- CSS
- Javascript
구조

- index.html: 메인 구조
- main.css: 버튼, 내용 바 디자인
- main.js: 버튼 기능 구현
코드
구현 계획
- 버튼 html, css 생성
- 버튼 누르면 서브 메뉴 열리게 구현 (js)
- 버튼 누르면 서브 메뉴 열고 닫히게 토글 생성
- 서브 메뉴가 열려있으면 (if(max-height)) 서브메뉴 닫고(max-height == null) 닫혀있으면 (max-height + "px")
- css에서 transition에 시간 설정
기능 구현
- for문을 이용하여 3개의 버튼에 토글 기능 부여
- 버튼의 다음 요소(=내용
content)를 가지고 온다. (nextElementSibling) - 요소의 최대 높이를 통해 열려있는지 확인한다.(
.style.maxHeight)
(1) 내용이 열려있으면(content.style.maxHeight)
내용을 닫는다. (content.style.maxHeight = null;)
(2) 내용이 닫혀있으면
내용을 연다. (= 내용의 최대 높이를 스크롤 높이로 만든다.
maxHeight = content.scrollHeight + "px")
for (let i = 0; i < button.length; i++) {
    button[i].addEventListener("click", function () {
        this.classList.toggle("show");

        let content = this.nextElementSibling;
        if (content.style.maxHeight) {
            content.style.maxHeight = null;
        } else {
            content.style.maxHeight = content.scrollHeight + "px";
        }
    });
}
index.html
<!DOCTYPE html>
<html lang="en">
<head>
    <meta charset="UTF-8">
    <meta name="viewport" content="width=device-width, initial-scale=1.0">
    <title>Document</title>
    <link rel="stylesheet" href="main.css">

    <style>
        @import url('https://fonts.googleapis.com/css2?family=Merriweather:ital,wght@0,300;0,400;0,700;0,900;1,300;1,400;1,700;1,900&display=swap');
    </style>
</head>

<body style="background-color: hsl(210, 36%, 96%)">

    <div id="question">
        <p>Questions</p>
    </div>

    <div class="container">
        <button type="button" class="btn">Do You Accept All Major Credit Cards?</button>
        <div class="content">
            <p>Lorem ipsum dolor sit amet, consectetur adipisicing elit. </p>
        </div>
    </div>
    <div class="container2">
        <button type="button" class="btn">Do You Suppport Local Farmers?</button>
        <div class="content">
            <p>Lorem ipsum dolor sit amet, consectetur adipisicing elit.</p>
        </div>
    </div>
    <div class="container3">
        <button type="button" class="btn">Do You Use Organic Ingredients?</button>
        <div class="content">
            <p>Lorem ipsum dolor sit ametLorLorem ipsum dolor sit ametem ipsum dolor sit ametLorem ipsum dolor sit ametLorem ipsum dolor sit amet, consectetur adipisicing elit. </p>
        </div>
    </div>
    <script src="main.js">
    </script>
</body>
</html>
main.js
let button = document.getElementsByClassName("btn"); // 버튼 변수 생성

for (let i = 0; i < button.length; i++) {
    button[i].addEventListener("click", function () {
        this.classList.toggle("show");

        let content = this.nextElementSibling;
        if (content.style.maxHeight) {
            content.style.maxHeight = null;
        } else {
            content.style.maxHeight = content.scrollHeight + "px";
        }
    });
}
main.css
#question {
    color: #050505;
    font-family: "Merriweather", serif;
    font-weight: 400;
    font-style: italic;
    font-size: 35px;
    text-align: center;
    font-weight: 360;

    padding-top: 100px;
    margin: -60px;
}

/* 버튼 */
.btn {
    background-color: #ffffff;
    color: #050505;

    font-size: 16px;
    font-family: "Merriweather", serif;
    font-weight: 400;
    font-style: italic;

    cursor: pointer;
    padding: 30px;

    width: 100%;

    border-radius: 10px;
    border: none;
    text-align: center;
    outline: none;
    box-shadow: 1px 2px 1px rgb(172, 172, 172), 1px 1px 0px rgb(237, 237, 237);

  }

/* 버튼에 마우스 오버 시 색상 변경 */
.btn:hover {
    background-color: #ededed;
}

/* 버튼 토글 */
.show {
    display: block;
}

/* 내용 */
.content {
    background-color: white;
    font-family: "Merriweather", serif;
    font-weight: 400;
    font-style: italic;
    font-size: 13px;
    text-align: center;

    max-height: 0;
    overflow: hidden;

    box-shadow: 1px 2px 1px rgb(172, 172, 172), 1px 1px 0px rgb(237, 237, 237);
    border-radius: 10px;
    transition: max-height 0.2s ease-out;
}

  /* 버튼 위치 */
  .container {
    /* padding: top, right, bottom, left */
    padding: 70px 50px 8px 50px;
  }

  .container2 {
    padding: 20px 50px 20px 50px;
  }

  .container3 {
    padding: 10px 50px 30px 50px;
  }


  /* 버튼 옆에 아이콘(+, -) */
  .btn::after {
    content: '\02795'; /* (+) 유니코드 */
    font-size: 13px;
    color: rgb(157, 23, 23);
    float: right;
    margin-left: 10px;
  }

  .show::after {
    content: "\2796"; /* (-) 아이콘 유니코드 */
  }
배운 것
가상 요소 :before / :after
: 컨텐츠 앞 뒤를 장식한다.
-
inline 요소 (너비(width), 높이(height) 조정 X)
크기 값을 바꾸려면 inline-block 옵션을 주어야 함 -
content: '들어갈 컨텐츠 내용';형식으로 시작함
아이콘 사용 시 아이콘의 유니코드를 이용 -
margin 값은 좌우(left, right)는 가질 수 있으나
위 아래(top, bottom)은 가질 수 없음
  /* 버튼 옆에 아이콘(+, -) */
  .btn::after {
    content: '\02795'; /* (+) 유니코드 */
    font-size: 13px;
    color: rgb(157, 23, 23);
    float: right;
    margin-left: 10px;
  }

  .show::after {
    content: "\2796"; /* (-) 아이콘 유니코드 */
  }
다음 요소 가져오기
nextSibling: 다음에 있는 것을 (공백, 텍스트 등 상관없이) 가져온다.nextElementSibling: 다음에 있는 요소(Element)만 가져온다.
let content = this.nextElementSibling;css 폰트 적용하기
-
구글 폰트에서 원하는 폰트 선택
https://fonts.google.com/ -
<link>나@import중 원하는 코드를 html의<head>태그 안에 붙여넣기
<head>
    <style>
        @import url('https://fonts.googleapis.com/css2?family=Merriweather:ital,
      wght@0,300;0,400;0,700;0,900;1,300;1,400;1,700;1,900&display=swap');
    </style>
</head>- css에 사용
#question {
    font-family: "Merriweather", serif;
    font-style: italic;
    font-size: 35px;
}
CSS의 Transition
: CSS 프로퍼티의 값이 변화할 때, 프로퍼티 값의 변화가 일정 시간(duration)에 걸쳐 일어나도록 하는 것
transition-timing-function
: 트랜지션 효과의 변화 흐름, 시간에 따른 변화 속도 등을 지정
- 키워드
ease: 느리게 시작하여 점점 빨라졌다가 느리지면서 종료 (기본값)
linear: 시작부터 종료까지 일정하게 운동
ease-in: 느리게 시작한 후 일정한 속도에 다다르면 그 상태로 일정하게 운동
ease-out: 일정한 속도로 시작해서 점점 느려지면서 종료
ease-in-out: 느리게 시작하여 느리지면서 종료 (ease와 비슷)
transition: max-height 0.2s ease-out;
<!--최대 높이가 0.2초로 시작해서 점점 느려지면서 닫힘ㄴ-->
Javascript에서 this
-
단독으로 쓴 this → object Window
-
함수 안에서 쓴 this → object Window
-
메서드 안에서 쓴 this → 해당 메서드를 호출한 객체
-
이벤트 안에서 쓴 this → 이벤트를 받는 HTML 요소
아쉬운 점
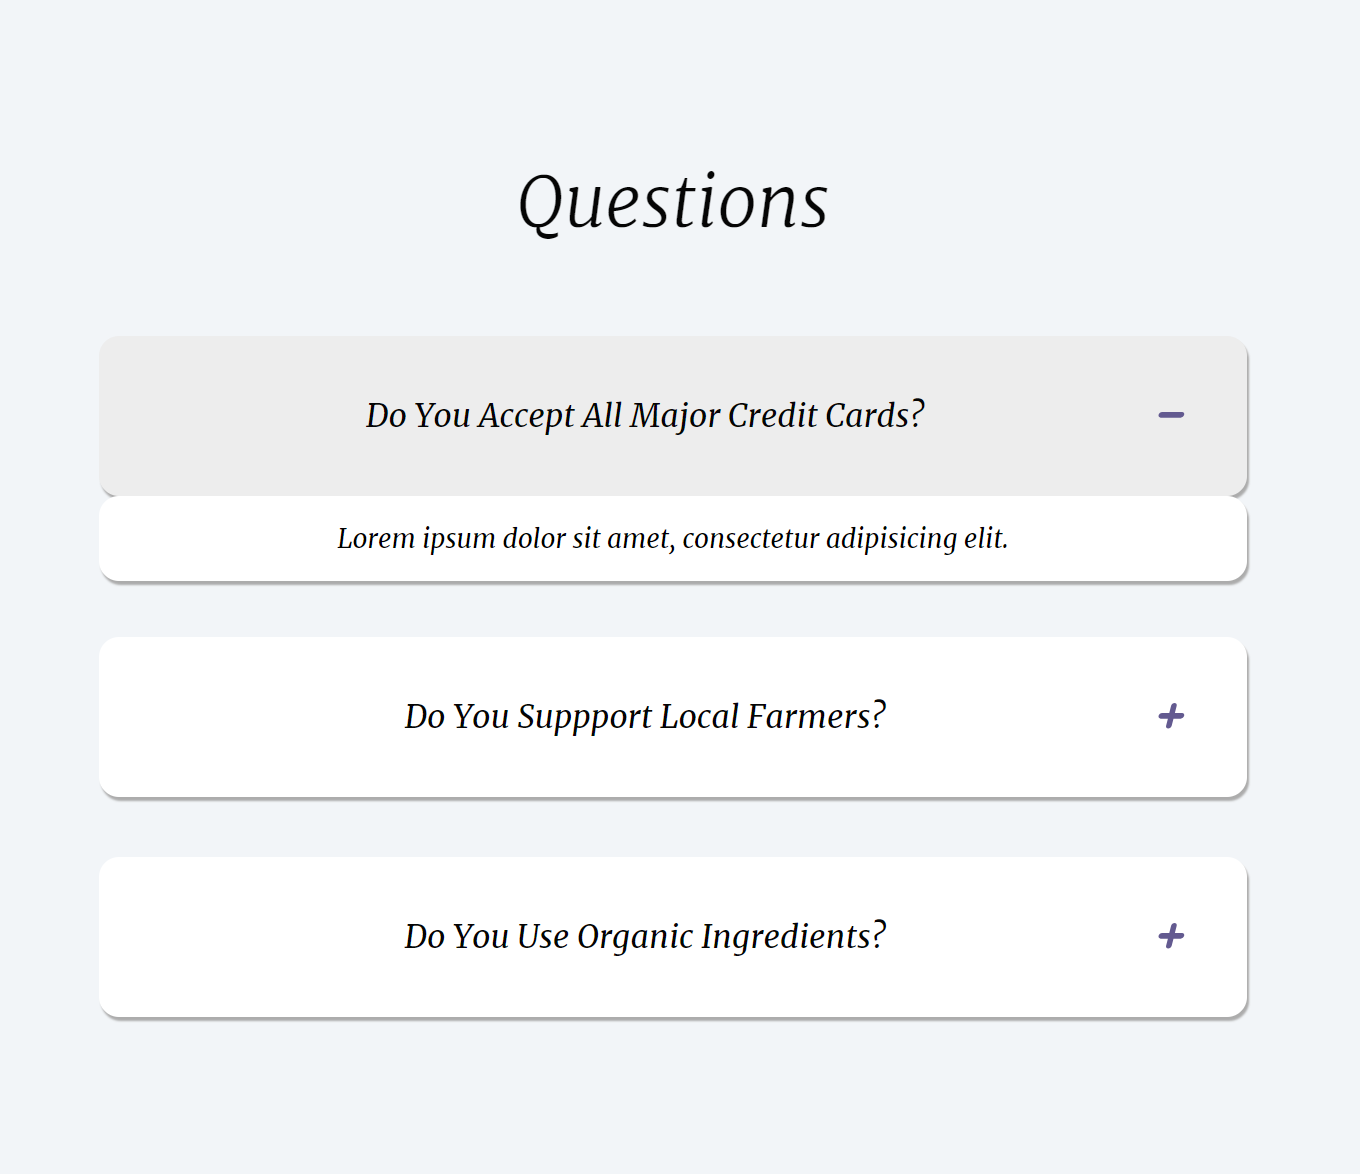
- 하단의 내용 바가 내려가는 모양이 이상하다.
- 버튼 박스의 높이가 조절되며 열리는 것이 아니라 내용 박스가 따로 버튼 박스 아래에 생기는 방식으로 구현되었다.
- 버튼의 height를 기본값 → 결과값(내용 바가 내려간 값)으로 변경하면 되지 않을까 싶었으나 시간이 부족하여 구현하지 못했다.
- 이로 인해 버튼 박스 안에 버튼과 하단 내용 바를 구분하는 구분선을 넣지 못했다.
- 아래 링크를 참고해서 다시 만들어보고 싶다. https://kasterra.github.io/making-performant-collapsing-animation/
- 박스 너비가 고정된 상태가 아닌 창 크기에 따라 달라진다.
- 전체 창에서 보면 너비가 너무 넓어진다.
- 박스 아무 곳을 눌러도 하단 바가 열린다.
- 버튼 박스가 아닌 오른쪽의 (+)아이콘만 선택해서 하단 내용 바를 열 수 있게 해야 한다.
깃허브
https://github.com/kwonboryong/study_of_FE/tree/main/Question
참고
https://www.w3schools.com/howto/howto_js_collapsible.asp
https://kasterra.github.io/making-performant-collapsing-animation/
배운것
https://limsw.tistory.com/m/108
https://aljjabaegi.tistory.com/m/548
https://nykim.work/71
https://poiemaweb.com/css3-transition