리덕스 툴킷과 청크 그리고 axios를 학습하면서 가장기본적인 POST, PUT, GET, DELETE를 테스트 해보았다. 지금까지는 내가 직접 data배열을 만들어서 프론트에서 직접 사용하였지만 이번에는 json파일에서 직접 보내고 받아오는 과정이다.
1.기본 아웃풋 만들기
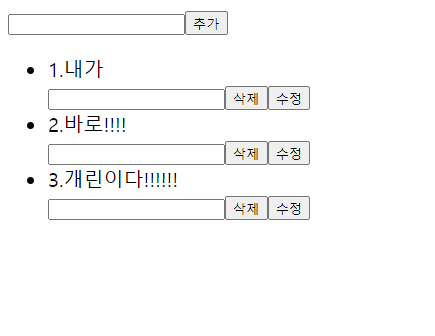
기본개념을 빠르게 파악하기 위하여 스타일없이 기본 html태그들로 구성을 해보았다.
2. json 파일 만들기
폴더 가장 바깥환경에서 data.json파일을 만든 후
//data.json
{
  "list": [
    {
      "content": "내가",
      "id": 1
    },
    {
      "content": "바로!!!!",
      "id": 2
    },
    {
      "content": "개린이다!!!!!!",
      "id": 3
    }
  ]
}
terminal창에
npx json-server ./data.json --port 8000
라고 작성하면 json파일이 http://localhost:8000/list에 생성되어 테스트가 가능하다.
3.첫 리스트값 받아오기
3-1. reducer만들기
//store/todoReducer.js
import axios from "axios";
import { createAsyncThunk, createSlice } from "@reduxjs/toolkit";

export const getList = createAsyncThunk("GET_TODO", async () => {
  const response = await axios.get("http://localhost:8000/list");
  return response.data;
});


export const todoReducer = createSlice({
  name: "todoList",
  initialState: [],
  reducers: {},
  extraReducers: {
    [getList.fulfilled]: (state, { payload }) => [...payload],
  },
});
createSlice와 createAsyncThunk 그리고 axios를 이용하여 기본리스트 받아오기 구조를 짜보았다.
3-2. store만들기
//store/index.js
import {
  combineReducers,
  configureStore,
  getDefaultMiddleware,
} from "@reduxjs/toolkit";
import { todoReducer } from "./TodoReducer";
import logger from "redux-logger";

const reducer = combineReducers({ todoReducer: todoReducer.reducer });

export default configureStore({
  reducer,
  middleware: [...getDefaultMiddleware(), logger],
});
store폴더 안에index.js파일에서 combine과 store를 만들었다.
3-3. react-redux 연결하기
//index.js
import React from "react";
import ReactDOM from "react-dom";
import App from "./App";
import { Provider } from "react-redux";
import store from "./store/index";

ReactDOM.render(
  <Provider store={store}>
    <App />
  </Provider>,
  document.getElementById("root")
);
가장바깥 파일인 index.js파일에 Provider를 연결하였다.
4.리스트 받아오기
//components/Todo.jsx
import React, { useState, useEffect } from "react";
import TodoList from "./TodoList";
import { useDispatch, useSelector } from "react-redux";
import { getList} from "./../store/TodoReducer";

const Todo = () => {
  const [inputValue, setInputValue] = useState("");

  const dispatch = useDispatch();
  const todoList = useSelector((state) => state.todoReducer);

  useEffect(() => {
    dispatch(getList());
  }, []);

  return (
    <form action=''>
      <input
        type='text'
        onChange={(e) => setInputValue(e.target.value)}
        value={inputValue}
      />
      <button type='submit'>추가</button>
      <ul>
        {todoList.map((list) => (
          <TodoList key={list.id} listId={list.id} content={list.content} />
        ))}
      </ul>
    </form>
  );
};

export default Todo;
useSelector를 이용하여 initialState값을 받아와 map함수로 뿌려주었다.
그리고 useEffect로 첫 렌더링시 json파일에서
리스트를 받아올수 있게 하였다.
5. 리스트 추가하기
//components/Todo.jsx
const Todo = () => {
  const [inputValue, setInputValue] = useState("");

  const dispatch = useDispatch();
  const todoList = useSelector((state) => state.todoReducer);

  useEffect(() => {
    dispatch(getList());
  }, []);

  const onCreate = (e) => {
    e.preventDefault();
    if (inputValue) {
      const newList = { content: inputValue };
      dispatch(addList(newList));
      setInputValue("");
    } else {
      console.log("적으세요!");
    }
  };

  return (
    <form action='' onSubmit={onCreate}>
      <input
        type='text'
        onChange={(e) => setInputValue(e.target.value)}
        value={inputValue}
      />
      <button type='submit'>추가</button>
      <ul>
        {todoList.map((list) => (
          <TodoList key={list.id} listId={list.id} content={list.content} />
        ))}
      </ul>
    </form>
  );
};
추가버튼 클릭시 dispatch하여 새로운 newList를 reducer로 보내주었다.
//store/todoReducer.js
import axios from "axios";
import { createAsyncThunk, createSlice } from "@reduxjs/toolkit";

export const getList = createAsyncThunk("GET_TODO", async () => {
  const response = await axios.get("http://localhost:8000/list");
  return response.data;
});

export const addList = createAsyncThunk("ADD_TODO", async (newList) => {
  const response = await axios.post("http://localhost:8000/list", newList);
  return response.data;
});

export const todoReducer = createSlice({
  name: "todoList",
  initialState: [],
  reducers: {},
  extraReducers: {
    [getList.fulfilled]: (state, { payload }) => [...payload],
    [addList.fulfilled]: (state, { payload }) => [...state, payload],
  },
});
axios의 post로 새로운 리스트를 추가하였고, UI에서의 리스트도 payload로 받아서 추가하였다.
6. 리스트 삭제하기
//components/TodoList.jsx
const TodoList = ({ listId, content }) => {
  const dispatch = useDispatch();

  const onDelete = (e) => {
    e.preventDefault();
    dispatch(deleteList(listId));
  };

  return (
    <>
      <li>
        {listId}.{content}
      </li>
      <button type='button' onClick={onDelete}>
        삭제
      </button>
    </>
  );
};
삭제버튼 클릭시 dispatch로 클릭한 id번호를 넘겨주었다.
//store/todoReducer.js
import axios from "axios";
import { createAsyncThunk, createSlice } from "@reduxjs/toolkit";

export const getList = createAsyncThunk("GET_TODO", async () => {
  const response = await axios.get("http://localhost:8000/list");
  return response.data;
});

export const addList = createAsyncThunk("ADD_TODO", async (newList) => {
  const response = await axios.post("http://localhost:8000/list", newList);
  return response.data;
});

export const deleteList = createAsyncThunk("DELETE_TODO", async (listId) => {
  const response = await axios.delete(`http://localhost:8000/list/${listId}`);
  return listId;
});

export const todoReducer = createSlice({
  name: "todoList",
  initialState: [],
  reducers: {},
  extraReducers: {
    [getList.fulfilled]: (state, { payload }) => [...payload],
    [addList.fulfilled]: (state, { payload }) => [...state, payload],
    [deleteList.fulfilled]: (state, { payload }) =>
      state.filter((list) => list.id !== payload),
  },
});
axios의 delete로 id를 넘겨 삭제되도록 하였고, fulfilled시에 UI에서는 filter함수로 삭제하였다.
7. 수정하기
//components/TodoList.jsx
const TodoList = ({ listId, content }) => {
  const [inputValue, setInputValue] = useState("");
  const dispatch = useDispatch();

  const onDelete = (e) => {
    e.preventDefault();
    dispatch(deleteList(listId));
  };

  const onUpdate = (e) => {
    e.preventDefault();
    if (inputValue) {
      dispatch(updateList({ listId, content: inputValue }));
      setInputValue("");
    } else {
      console.log("다시 적으세요!");
    }
  };

  return (
    <>
      <li>
        {listId}.{content}
      </li>
      <input
        value={inputValue}
        onChange={(e) => setInputValue(e.target.value)}
      ></input>
      <button type='button' onClick={onDelete}>
        삭제
      </button>
      <button type='button' onClick={onUpdate}>
        수정
      </button>
    </>
  );
};
input창에 작성된 value값과 선택된 id값을 dispatch로 보내는 로직을 구현하였다.
//store/TodoReducer.js
import axios from "axios";
import { createAsyncThunk, createSlice } from "@reduxjs/toolkit";

export const getList = createAsyncThunk("GET_TODO", async () => {
  const response = await axios.get("http://localhost:8000/list");
  return response.data;
});

export const addList = createAsyncThunk("ADD_TODO", async (newList) => {
  const response = await axios.post("http://localhost:8000/list", newList);
  return response.data;
});

export const deleteList = createAsyncThunk("DELETE_TODO", async (listId) => {
  const response = await axios.delete(`http://localhost:8000/list/${listId}`);
  return listId;
});

export const updateList = createAsyncThunk(
  "UPDATE_LIST",
  async ({ listId, content }) => {
    const response = await axios.put(`http://localhost:8000/list/${listId}`, {
      content: content,
    });
    return { listId, content };
  }
);

export const todoReducer = createSlice({
  name: "todoList",
  initialState: [],
  reducers: {},
  extraReducers: {
    [getList.fulfilled]: (state, { payload }) => [...payload],
    [addList.fulfilled]: (state, { payload }) => [...state, payload],
    [deleteList.fulfilled]: (state, { payload }) =>
      state.filter((list) => list.id !== payload),
    [updateList.fulfilled]: (state, { payload }) => {
      return state.map((list) => {
        if (list.id === payload.listId) {
          return { ...list, content: payload.content };
        } else {
          return list;
        }
      });
    },
  },
});
axios의 put을 이용하여 id값으로 선택된 리스트를 새로보낸 {content:content}로 수정하였다.
또한 fulfilled시 map에서 id를 비교하는 if문을 사용하여 수정하였다.

5개의 댓글

안녕하세요 :) 포스팅 잘봤습니다. 외람된 질문일 수 있지만.. (?)
toolkit 으로 충분히 리덕스에 대한 처리가 가능한데 청크를 따로 사용하신 이유가 있을까요..? :)


thunk 패턴 재미있네요
자료 감사합니다 👍