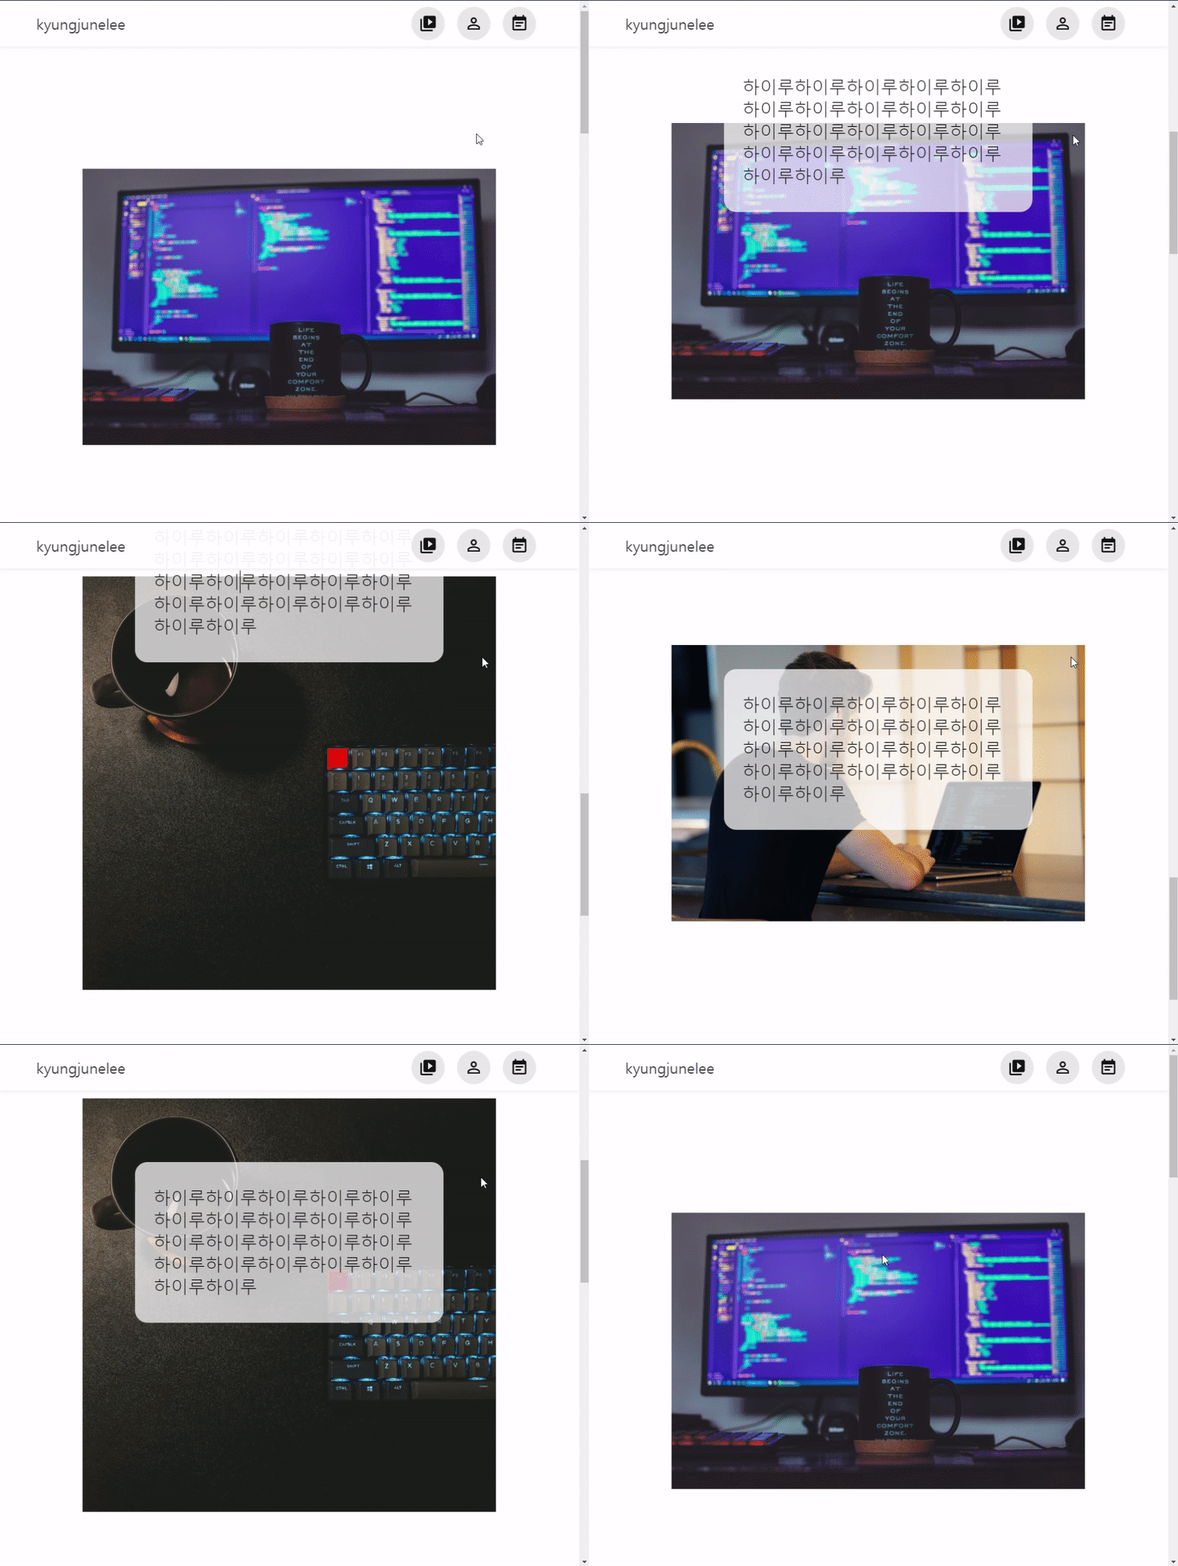
리액트를 이용하여 포트폴리오를 만들는 중이었다. 뭔가 내 이야기를 그림으로 표현하고 싶었는데 BBC에서 코로나가 바꿀 미래라는 기사를 보고 아이디어를 얻었다.
1. 스크롤 이벤트 테스트하기
//CartoonContent.jsx (글자박스 컴포넌트)
function CartoonContent({ content }) {

  const imageScrollHandeler = throttle(() => {
    console.log('스크롤 되는중')
  }, 0);

  useEffect(function () {
    window.addEventListener("scroll", imageScrollHandeler);
    return () => {
      window.removeEventListener("scroll", imageScrollHandeler);
    };
  });

  return (
    <>
      <Styled.ContentContainer>
        <Styled.Content>{content}</Styled.Content>
      </Styled.ContentContainer>
    </>
  );
}

export default CartoonContent;
현재 파일은 움직이는 글자만 나눈 컴포넌트 파일이다. 스크롤이 잘 작동하는지 먼저 테스트 하기위하여 console.log()로 테스트를 해보았다. 또한 남아있는 scroll이벤트 작업을 제거하기 위한 cleanup함수도 만들어 주었다.
2. content위치 파악하기
//CartoonContent.jsx (글자박스 컴포넌트)
function CartoonContent({ content }) {
  const contentRef = useRef();
  const boundingRef = useRef();

  const imageScrollHandeler = throttle(() => {
    boundingRef.current = contentRef.current.getBoundingClientRect();
    if (
      boundingRef.current.top < window.innerHeight * 0.5 &&
      boundingRef.current.top > window.innerHeight * 0.4
    ) {
      console.log('여기다')
    }
  }, 0);

  useEffect(function () {
    window.addEventListener("scroll", imageScrollHandeler);
    return () => {
      window.removeEventListener("scroll", imageScrollHandeler);
    };
  });

  return (
    <>
      <Styled.ContentContainer ref={contentRef}>
        <Styled.Content>{content}</Styled.Content>
      </Styled.ContentContainer>
    </>
  );
}
useRef를 이용하여 글자 박스의 태그를 불러왔으며, getBoundingClientRect()의 top으로 화면과 글자박스상단의 사이 간격 사이즈를 알 수 있었다.
innerHeight와 boundingRef사이의 값을 맞추어서 대략 중앙에 위치할때 콘솔이 찍히는 것을 확인 할 수 있었다.
3. 이미지 슬라이더 로직 만들기
//CartoonContent.jsx (글자박스 컴포넌트)
function CartoonContent({ content, index }) {
  const contentRef = useRef();
  const boundingRef = useRef();
  const [contentIndex, setContentIndex] = useState(index);

  const dispatch = useDispatch();

  const imageScrollHandeler = throttle(() => {
    boundingRef.current = contentRef.current.getBoundingClientRect();
    if (
      boundingRef.current.top < window.innerHeight * 0.5 &&
      boundingRef.current.top > window.innerHeight * 0.4
    ) {
      dispatch(slider({ id: contentIndex + 1 }));
    }
  }, 0);

  useEffect(() => {
    window.addEventListener("scroll", imageScrollHandeler);
    return () => {
      window.removeEventListener("scroll", imageScrollHandeler);
    };
  });

  return (
    <>
      <Styled.ContentContainer ref={contentRef}>
        <Styled.Content>{content}</Styled.Content>
      </Styled.ContentContainer>
    </>
  );
}
//reducer.jsx
const initialState = [
{
id: 1,
pic: image1,
displayImage: true,
content:
"하이루하이루하이루하이루하이루하이루하이루하이루",
},
{
id: 2,
pic: image2,
displayImage: false,
content:
"하이루하이루하이루하이루하이루하이루하이루",
},
{
id: 3,
pic: image3,
displayImage: false,
content:
"하이루하이루하이루하이루하이루하이루",
},
];
const cartoonReduce = createSlice({
name: "cartoonSlider",
initialState,
reducers: {
slider: (state, { payload }) =>
state.map((list) =>
list.id === payload.id
? { ...list, displayImage: true }
: { ...list, displayImage: false }
),
},
});부모 컴포넌트에서 map으로 반복문을 돌렸기 때문에 props로 index를 받아왔으며, redux/toolkit의 createSlice를 테스트해보고 싶어서 상태관리를 다른페이지로 빼놓았다. 그리고 스크롤 시 원하는 위치에 글자 박스가 도착했을때 dispatch()를 써서 reducer가 작동되게 하였으며, index+1을 넘겨서 이미지의 id넘버와 동일하게 하였다. 결론은 id넘버와 index+1이 동일 할 시에 display가 true가 되는 방식이다.
4. 스타일 넣기
//image.style.jsx
import Styled, { css } from "styled-components";

export const PicContainer = Styled.li`
  position: absolute;
  opacity: 1;
  width: 70vw;
  transition: 0.3s;

  ${({ displayImage }) =>
    !displayImage &&
    css`
      opacity: 0;
    `}
  `;

export const Image = Styled.img`
  width: 100%;
`;
image태그에서 display boolean값을 받아서 false일시에는 opacity가 0이고 true일때는 1로 하도록 만들었다.