
📌 연습문제
- 신규 라우트 3개 만들기 : '/meals', '/meals/share', '/community'
// app/meals/page.js
export default function MealsPage() {
  return <h1>Meals Page</h1>;
}

// app/meals/share/page.js
export default function ShareMealPage() {
  return <h1>Share Page</h1>;
}

// app/community/page.js
export default function CommunityPage() {
  return <h1>Community</h1>;
}

// app/meals/[mealSlug]/page.js
export default function MealDetailPage({ params }) {
  return <h1>Meal Details {params.mealSlug}</h1>;
}
📌 어플리케이션 구현하기
📖 레이아웃 개념 다시보기
// app/meals/layout.js
export default function MealsLayout({ children }) {
  return (
    <>
      <p>Meals Layout</p>
      {children}
    </>
  );
}- children을 통해 중첩 레이아웃 또는 페이지에 접근할 수 있다.
- 이 말인 즉, 중첩 레이아웃이 있어도 root 레이아웃의 children 속성을 받아들여 감싸진 내용을 출력한다.
- 감싸진 내용에는 페이지와 기타 레이아웃(중첩 레이아웃)을 포함한다.

📖 레이아웃에 커스텀 컴포넌트 추가
import Link from "next/link";
import Image from "next/image";
import logoImg from "@/assets/logo.png";
import styles from "./main-header.module.css";

export default function MainHeader() {
  return (
    <header className={styles.header}>
      <Link href="/" className={styles.logo}>
        <Image src={logoImg} alt="A plate with food on it" priority />
        NextLevel Food
      </Link>

      <nav className={styles.nav}>
        <ul>
          <li>
            <Link href="/meals">Browse Meals</Link>
          </li>
          <li>
            <Link href="/community">Foodies Community</Link>
          </li>
        </ul>
      </nav>
    </header>
  );
}<Image>: 더 최적화된 방법으로 이미지를 출력.- 페이지에서 실제로 보이는 경우에만 이미지가 표시되도록 이미지를 지연 로딩하여 구현.
- 대응적인 이미지를 설정하는 프로세스 등을 단순화한다.
- Next.js에 의해 생성된
logoImg객체는 이미지를 임포트할 떄 최적화된 방법으로 image 컴포넌트를 띄울수 있도록 하는 유용한 정보를 포함하므로src={logoImg.src}가 아니라src={logoImg}로 작성했다. priority속성을 추가하여 이미지가 깜빡임 없이 우선적으로 로딩되도록 함.- 🔗 NextJS |
<Image>
📖 기타 커스텀 컴포넌트 사용
// components/main-header/main-header-background.js
import styles from "./main-header-background.module.css";

export default function MainHeaderBackground() {
  return (
    <div className={styles["header-background"]}>
      <svg xmlns="http://www.w3.org/2000/svg" viewBox="0 0 1440 320">
        <defs>
          <linearGradient id="gradient" x1="0%" y1="0%" x2="100%" y2="0%">
            <stop
              offset="0%"
              style={{ stopColor: "#59453c", stopOpacity: "1" }}
            />
            <stop
              offset="100%"
              style={{ stopColor: "#8f3a09", stopOpacity: "1" }}
            />
          </linearGradient>
        </defs>
        <path
          fill="url(#gradient)"
          d="M0,256L48,240C96,224,192,192,288,181.3C384,171,480,181,576,186.7C672,192,768,192,864,181.3C960,171,1056,149,1152,133.3C1248,117,1344,107,1392,101.3L1440,96L1440,0L1392,0C1344,0,1248,0,1152,0C1056,0,960,0,864,0C768,0,672,0,576,0C480,0,384,0,288,0C192,0,96,0,48,0L0,0Z"
        ></path>
      </svg>
    </div>
  );
}

// components/main-header/main-header.js
import Link from "next/link";
import Image from "next/image";
import logoImg from "@/assets/logo.png";
import styles from "./main-header.module.css";
import MainHeaderBackground from "./main-header-background";

export default function MainHeader() {
  return (
    <>
      <MainHeaderBackground />
      <header className={styles.header}>
        <Link href="/" className={styles.logo}>
          <Image src={logoImg} alt="A plate with food on it" priority />
          NextLevel Food
        </Link>

        <nav className={styles.nav}>
          <ul>
            <li>
              <Link href="/meals">Browse Meals</Link>
            </li>
            <li>
              <Link href="/community">Foodies Community</Link>
            </li>
          </ul>
        </nav>
      </header>
    </>
  );
}
📖 시작 페이지 내용 채우기
// app/page.js
import Link from "next/link";
import styles from "./page.module.css";
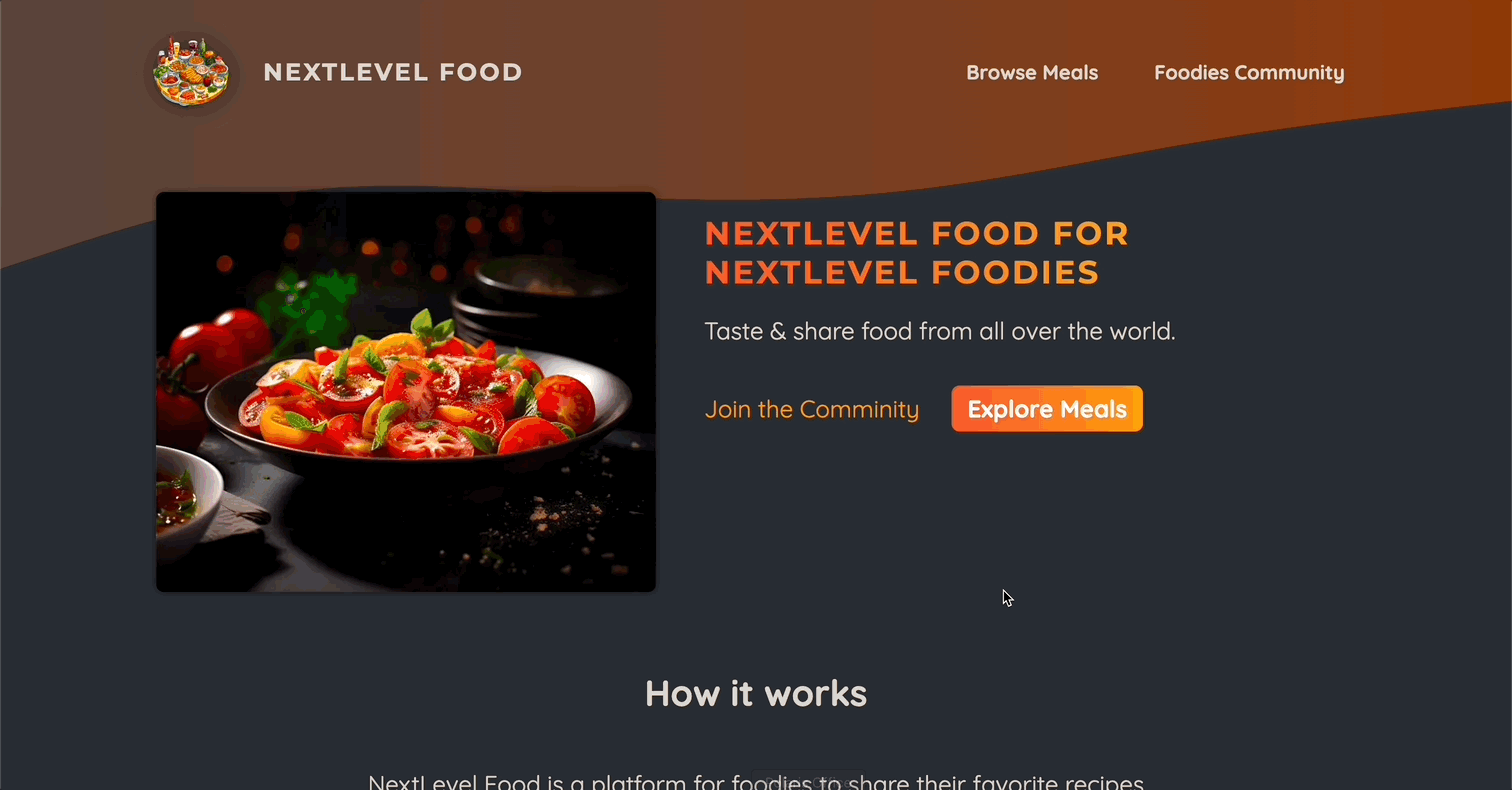
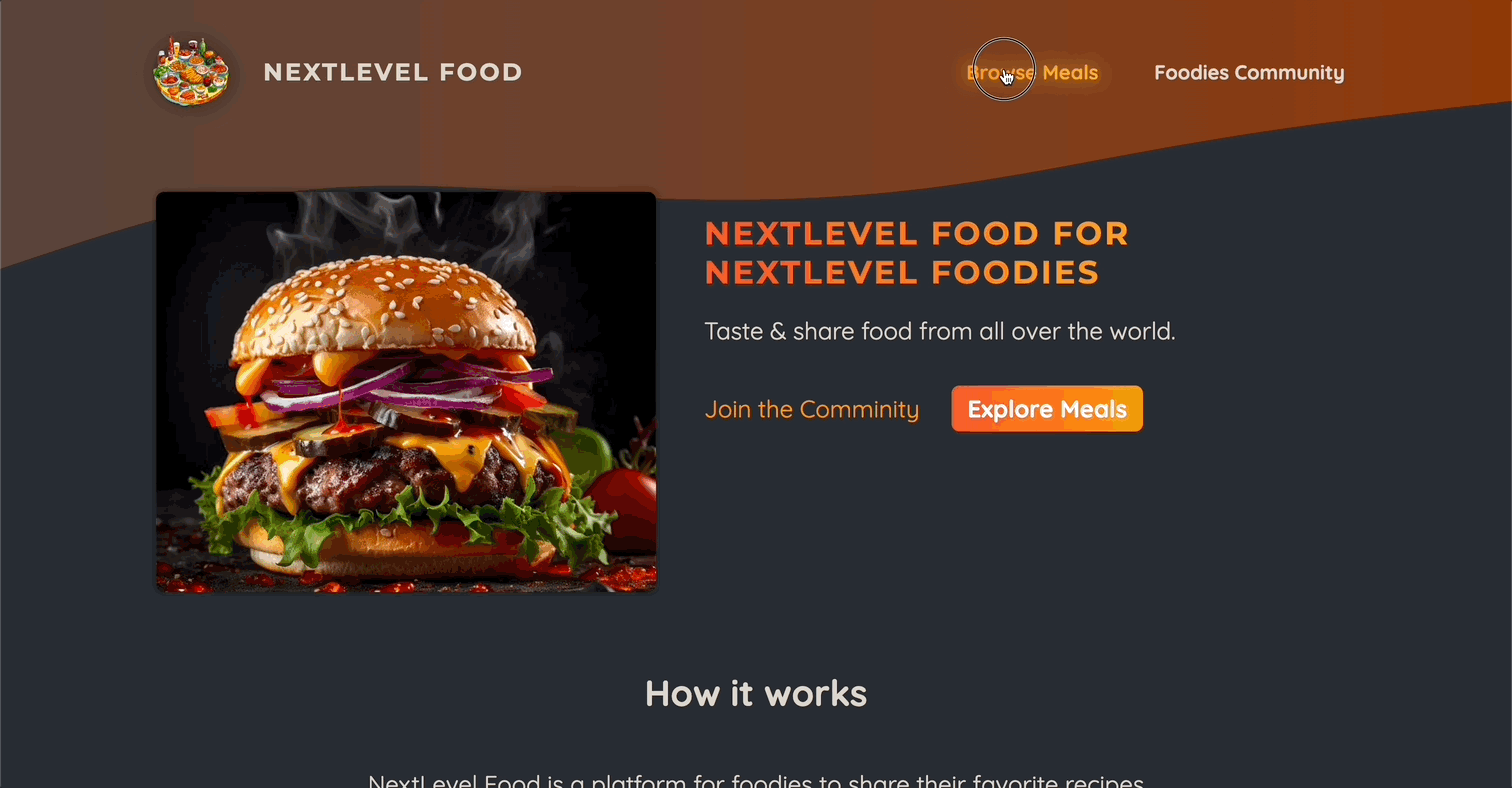
import ImageSlideshow from "@/components/images/image-slideshow";
export default function Home() {
return (
<>
<header className={styles.header}>
{/* 이미지 슬라이드쇼 */}
<div className={styles.slideshow}>
<ImageSlideshow />
</div>
<div>
<div className={styles.hero}>
<h1>NextLevel Food for NextLevel Foodies</h1>
<p>Taste & share food from all over the world.</p>
</div>
<div className={styles.cta}>
<Link href="/community">Join the Comminity</Link>
<Link href="/meals">Explore Meals</Link>
</div>
</div>
</header>
<main>
<section className={styles.section}>
<h2>How it works</h2>
<p>
NextLevel Food is a platform for foodies to share their favorite
recipes with the world. It's a place to discover new dishes,
and to connect with other food lovers.
</p>
<p>
NextLevel Food is a place to discover new dishes, and to connect
with other food lovers.
</p>
</section>
<section className={styles.section}>
<h2>Why NextLevel Food?</h2>
<p>
NextLevel Food is a platform for foodies to share their favorite
recipes with the world. It's a place to discover new dishes,
and to connect with other food lovers.
</p>
<p>
NextLevel Food is a place to discover new dishes, and to connect
with other food lovers.
</p>
</section>
</main>
</>
);
}
// components/images/image-slideshow.js
import { useEffect, useState } from "react";
import Image from "next/image";
import burgerImg from "@/assets/burger.jpg";
import curryImg from "@/assets/curry.jpg";
import dumplingsImg from "@/assets/dumplings.jpg";
import macncheeseImg from "@/assets/macncheese.jpg";
import pizzaImg from "@/assets/pizza.jpg";
import schnitzelImg from "@/assets/schnitzel.jpg";
import tomatoSaladImg from "@/assets/tomato-salad.jpg";
import classes from "./image-slideshow.module.css";
const images = [
{ image: burgerImg, alt: "A delicious, juicy burger" },
{ image: curryImg, alt: "A delicious, spicy curry" },
{ image: dumplingsImg, alt: "Steamed dumplings" },
{ image: macncheeseImg, alt: "Mac and cheese" },
{ image: pizzaImg, alt: "A delicious pizza" },
{ image: schnitzelImg, alt: "A delicious schnitzel" },
{ image: tomatoSaladImg, alt: "A delicious tomato salad" },
];
export default function ImageSlideshow() {
const [currentImageIndex, setCurrentImageIndex] = useState(0);
useEffect(() => {
// 이미지 인덱스를 5초마다 변경하고 슬라이드쇼처럼 보이기 위함.
const interval = setInterval(() => {
setCurrentImageIndex((prevIndex) =>
prevIndex < images.length - 1 ? prevIndex + 1 : 0
);
}, 5000);
return () => clearInterval(interval);
}, []);
return (
<div className={classes.slideshow}>
{images.map((image, index) => (
<Image
key={index}
src={image.image}
className={index === currentImageIndex ? classes.active : ""}
alt={image.alt}
/>
))}
</div>
);
}useState를 필요로하는 컴포넌트를 가지고 있으며 이는 클라이언트 컴포넌트에서만 작동한다는 오류가 발생.

💎 리액트 서버 컴포넌트 vs. 클라이언트 컴포넌트
- Next.js 뿐만 아니라 리액트 또한 대부분의 리액트 앱에서 자체적으로 구분이 있다.
리액트는 기본적으로 클라이언트 컴포넌트를 사용하고 있다. 리액트는 순수한 클라이언트 사이드 라이브러리로 브라우저에서 클라이언트 측에서 코드를 실행한다.
- Next.js에서는 풀스택 프레임워크이므로 이러한 특성이 변경된다. 따라서 코드가 백엔드에서도 실행된다.
기본적으로 Next.js 프로젝트에서 가지고 있는 리액트 컴포넌트들은 그것들이 페이지인지, 레이아웃인지, 기본 컴포넌트인지에 상관없이 오직 서버에서만 렌더링된다. 이것이 리액트 서버 컴포넌트라고 불리는 이유이다.
-
리액트 서버 컴포넌트 (RSC)
- 기본적으로 모든 리액트 컴포넌트는 서버에서만 렌더링 된다.
- 그래서 컴포넌트에
console.log를 사용하면 브라우저의 콘솔에는 뜨지 않고 서버(백엔드)의 콘솔에 표시되는 것이다. - The backend executes the server component functions and hence derives the to-be-rendered HTML code.
- The client-side receives and renders the to-be-rendered HTML code
서버 컴포넌트를 사용하면 다운로드해야 하는 클라이언트 측의 자바스크립트 코드가 줄어들 수 있어 웹 사이트의 성능을 향상시킬 수 있다. 그리고 이것은 검색 엔진 최적화에도 좋다.
- 웹 검색 크롤러들은 완성 콘텐츠를 포함하는 페이지를 볼 수 있기 때문이다.
-
클라이언트 컴포넌트
- 페이지의 소스 코드를 보면 본질적으로 비어있는 것을 볼 수 있다. 왜냐하면 모든 내용은 클라이언트 측 코드와 클라이언트 측 컴포넌트의 도움으로, 클라이언트 측에서 생성되고 채워지기 때문이다.
- Next.js에서 클라이언트 컴포넌트를 만들 수 있다. 그러한 컴포넌트들은 서버에서 사전 렌더링 되는 것들이고 잠재적으로는 클라이언트에 렌더링될 수 있다.
- 만약 Next.js에서 클라이언트 컴포넌트를 만들고자 한다면 컴포넌트를 잡고있는 파일 위에 특별한 지시어(use Client)를 사용해야한다.
// components/images/image-slideshow.js
"use client"; // useState, useEffect와 같은 리액트 훅과 이벤트 트리거를 사용하기 위함

import { useEffect, useState } from "react";
import Image from "next/image";

import burgerImg from "@/assets/burger.jpg";
import curryImg from "@/assets/curry.jpg";
import dumplingsImg from "@/assets/dumplings.jpg";
import macncheeseImg from "@/assets/macncheese.jpg";
import pizzaImg from "@/assets/pizza.jpg";
import schnitzelImg from "@/assets/schnitzel.jpg";
import tomatoSaladImg from "@/assets/tomato-salad.jpg";
import classes from "./image-slideshow.module.css";

const images = [
  { image: burgerImg, alt: "A delicious, juicy burger" },
  { image: curryImg, alt: "A delicious, spicy curry" },
  { image: dumplingsImg, alt: "Steamed dumplings" },
  { image: macncheeseImg, alt: "Mac and cheese" },
  { image: pizzaImg, alt: "A delicious pizza" },
  { image: schnitzelImg, alt: "A delicious schnitzel" },
  { image: tomatoSaladImg, alt: "A delicious tomato salad" },
];

export default function ImageSlideshow() {
  const [currentImageIndex, setCurrentImageIndex] = useState(0);

  useEffect(() => {
    //   이미지 인덱스를 5초마다 변경하고 슬라이드쇼처럼 보이기 위함.
    const interval = setInterval(() => {
      setCurrentImageIndex((prevIndex) =>
        prevIndex < images.length - 1 ? prevIndex + 1 : 0
      );
    }, 5000);

    return () => clearInterval(interval);
  }, []);

  return (
    <div className={classes.slideshow}>
      {images.map((image, index) => (
        <Image
          key={index}
          src={image.image}
          className={index === currentImageIndex ? classes.active : ""}
          alt={image.alt}
        />
      ))}
    </div>
  );
}
📖 클라이언트 컴포넌트의 효율적 사용
- 필요한 컴포넌트만 클라이언트 컴포넌트로 변환하여 대부분의 컴포넌트가 서버 컴포넌트로 유지되고 대부분의 컴포넌트에서 서버 컴포넌트의 이점을 잃지 않도록 하려면 컴포넌트 트리를 가능한 아래로 내려가서
use client를 추가하는 것이 좋다.
// components/main-header/nav-link.js
"use client";

import Link from "next/link";
import { usePathname } from "next/navigation";
import styles from "./nav-link.module.css";

export default function NavLink({ href, children }) {
  const path = usePathname();

  return (
    <Link
      href={href}
      className={
        path.startsWith(href) ? `${styles.link} ${styles.active}` : styles.link
      }
    >
      {children}
    </Link>
  );
}
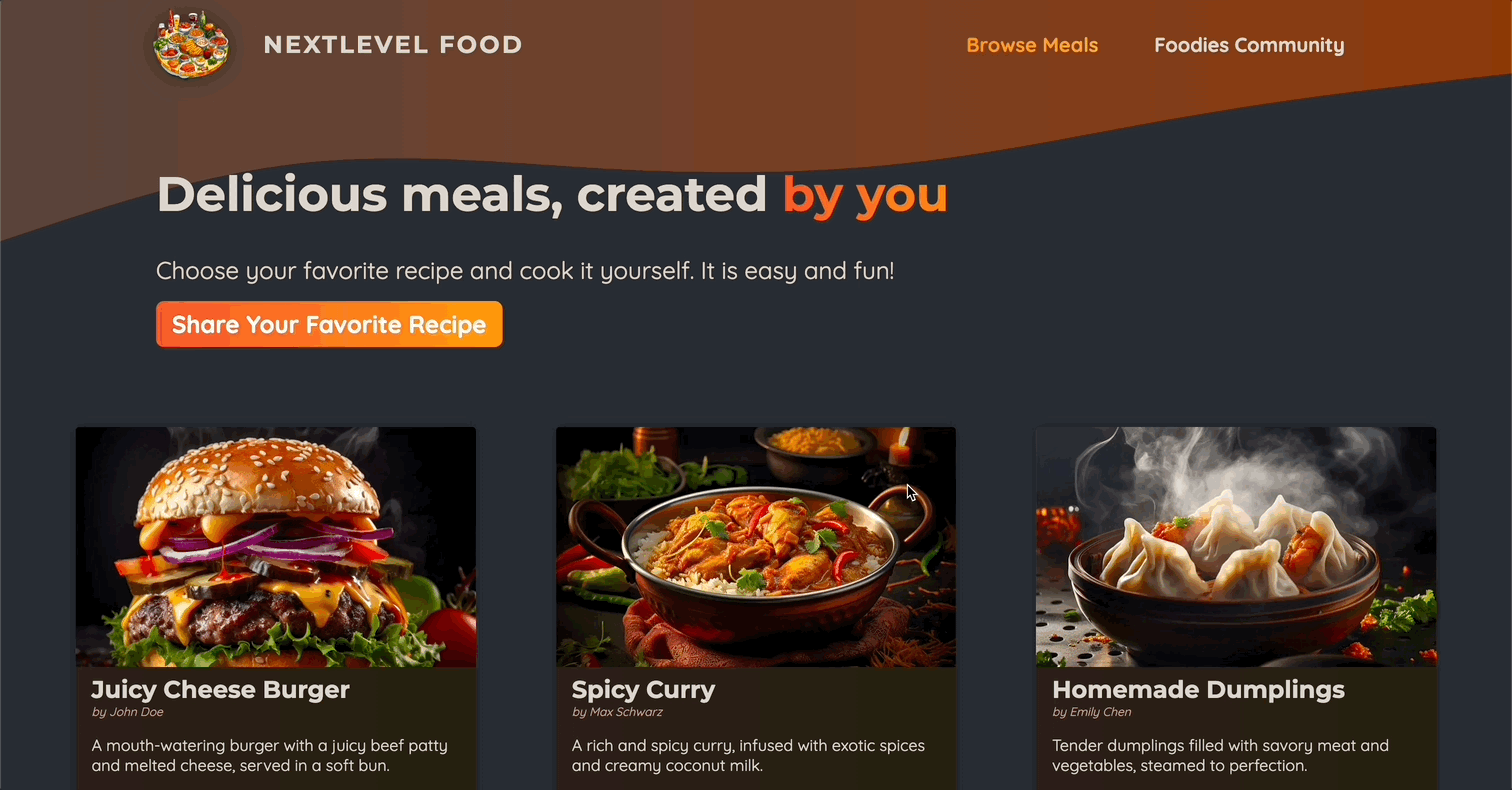
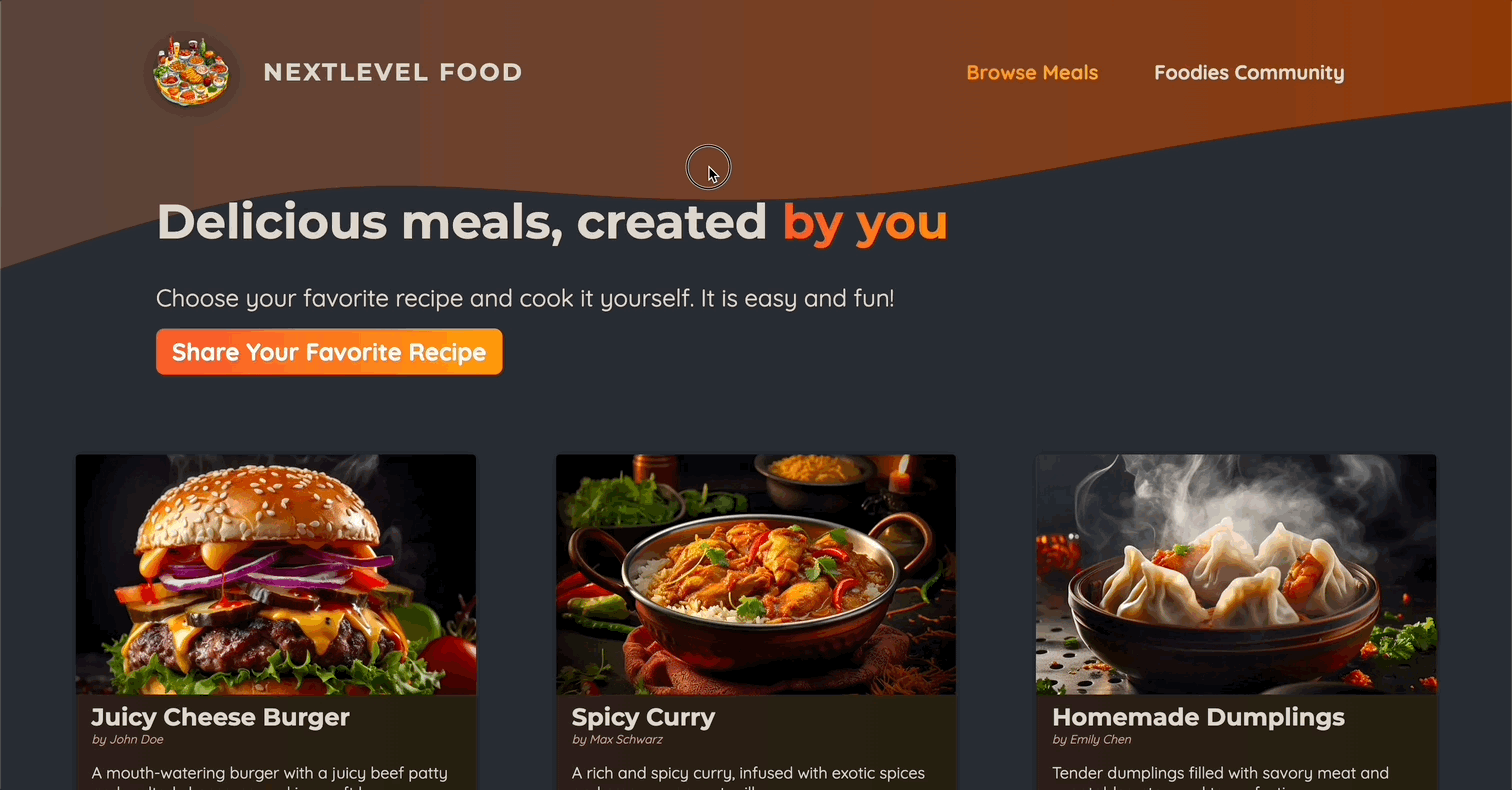
📖 Meals 페이지
// app/meals/page.js
import Link from "next/link";
import styles from "./page.module.css";
import MealsGrid from "@/components/meals/meals-grid";

export default function MealsPage() {
  return (
    <>
      <header className={styles.header}>
        <h1>
          Delicious meals, created
          <span className={styles.highlight}> by you</span>
        </h1>
        <p>
          Choose your favorite recipe and cook it yourself. It is easy and fun!
        </p>
        <p className={styles.cta}>
          <Link href="/meals/share">Share Your Favorite Recipe</Link>
        </p>
      </header>
      <main className={styles.main}>
        <MealsGrid meals={[]} />
      </main>
    </>
  );
}


// components/meals/meals-grid.js
import MealItem from "./meal-item";
import styles from "./meals-grid.module.css";

export default function MealsGrid({ meals }) {
  return (
    <ul className={styles.meals}>
      {meals.map((meal) => (
        <li key={meal.id}>
          <MealItem {...meal} />
        </li>
      ))}
    </ul>
  );
}


// components/meals/meal-item.js
import Link from "next/link";
import Image from "next/image";

import classes from "./meal-item.module.css";

export default function MealItem({ title, slug, image, summary, creator }) {
  return (
    <article className={classes.meal}>
      <header>
        <div className={classes.image}>
          {/* fill : Next.js에게 가능한 공간을 부모 컴포넌트에 의해 정의된 이미지들로 채워야 함을 알려준다. */}
          <Image src={image} alt={title} fill />
        </div>
        <div className={classes.headerText}>
          <h2>{title}</h2>
          <p>by {creator}</p>
        </div>
      </header>
      <div className={classes.content}>
        <p className={classes.summary}>{summary}</p>
        <div className={classes.actions}>
          <Link href={`/meals/${slug}`}>View Details</Link>
        </div>
      </div>
    </article>
  );
}
📖 SQLite 데이터베이스 설정
- 설치 :
npm install better-sqlite3 - initdb.js 작성
const sql = require("better-sqlite3");
const db = sql("meals.db");

const dummyMeals = [
  {
    title: "Juicy Cheese Burger",
    slug: "juicy-cheese-burger",
    image: "/images/burger.jpg",
    summary:
      "A mouth-watering burger with a juicy beef patty and melted cheese, served in a soft bun.",
    instructions: `
      1. Prepare the patty:
         Mix 200g of ground beef with salt and pepper. Form into a patty.

      2. Cook the patty:
         Heat a pan with a bit of oil. Cook the patty for 2-3 minutes each side, until browned.

      3. Assemble the burger:
         Toast the burger bun halves. Place lettuce and tomato on the bottom half. Add the cooked patty and top with a slice of cheese.

      4. Serve:
         Complete the assembly with the top bun and serve hot.
    `,
    creator: "John Doe",
    creator_email: "johndoe@example.com",
  },
  {
    title: "Spicy Curry",
    slug: "spicy-curry",
    image: "/images/curry.jpg",
    summary:
      "A rich and spicy curry, infused with exotic spices and creamy coconut milk.",
    instructions: `
      1. Chop vegetables:
         Cut your choice of vegetables into bite-sized pieces.

      2. Sauté vegetables:
         In a pan with oil, sauté the vegetables until they start to soften.

      3. Add curry paste:
         Stir in 2 tablespoons of curry paste and cook for another minute.

      4. Simmer with coconut milk:
         Pour in 500ml of coconut milk and bring to a simmer. Let it cook for about 15 minutes.

      5. Serve:
         Enjoy this creamy curry with rice or bread.
    `,
    creator: "Max Schwarz",
    creator_email: "max@example.com",
  },
  {
    title: "Homemade Dumplings",
    slug: "homemade-dumplings",
    image: "/images/dumplings.jpg",
    summary:
      "Tender dumplings filled with savory meat and vegetables, steamed to perfection.",
    instructions: `
      1. Prepare the filling:
         Mix minced meat, shredded vegetables, and spices.

      2. Fill the dumplings:
         Place a spoonful of filling in the center of each dumpling wrapper. Wet the edges and fold to seal.

      3. Steam the dumplings:
         Arrange dumplings in a steamer. Steam for about 10 minutes.

      4. Serve:
         Enjoy these dumplings hot, with a dipping sauce of your choice.
    `,
    creator: "Emily Chen",
    creator_email: "emilychen@example.com",
  },
  {
    title: "Classic Mac n Cheese",
    slug: "classic-mac-n-cheese",
    image: "/images/macncheese.jpg",
    summary:
      "Creamy and cheesy macaroni, a comforting classic that's always a crowd-pleaser.",
    instructions: `
      1. Cook the macaroni:
         Boil macaroni according to package instructions until al dente.

      2. Prepare cheese sauce:
         In a saucepan, melt butter, add flour, and gradually whisk in milk until thickened. Stir in grated cheese until melted.

      3. Combine:
         Mix the cheese sauce with the drained macaroni.

      4. Bake:
         Transfer to a baking dish, top with breadcrumbs, and bake until golden.

      5. Serve:
         Serve hot, garnished with parsley if desired.
    `,
    creator: "Laura Smith",
    creator_email: "laurasmith@example.com",
  },
  {
    title: "Authentic Pizza",
    slug: "authentic-pizza",
    image: "/images/pizza.jpg",
    summary:
      "Hand-tossed pizza with a tangy tomato sauce, fresh toppings, and melted cheese.",
    instructions: `
      1. Prepare the dough:
         Knead pizza dough and let it rise until doubled in size.

      2. Shape and add toppings:
         Roll out the dough, spread tomato sauce, and add your favorite toppings and cheese.

      3. Bake the pizza:
         Bake in a preheated oven at 220°C for about 15-20 minutes.

      4. Serve:
         Slice hot and enjoy with a sprinkle of basil leaves.
    `,
    creator: "Mario Rossi",
    creator_email: "mariorossi@example.com",
  },
  {
    title: "Wiener Schnitzel",
    slug: "wiener-schnitzel",
    image: "/images/schnitzel.jpg",
    summary:
      "Crispy, golden-brown breaded veal cutlet, a classic Austrian dish.",
    instructions: `
      1. Prepare the veal:
         Pound veal cutlets to an even thickness.

      2. Bread the veal:
         Coat each cutlet in flour, dip in beaten eggs, and then in breadcrumbs.

      3. Fry the schnitzel:
      Heat oil in a pan and fry each schnitzel until golden brown on both sides.

      4. Serve:
      Serve hot with a slice of lemon and a side of potato salad or greens.
 `,
    creator: "Franz Huber",
    creator_email: "franzhuber@example.com",
  },
  {
    title: "Fresh Tomato Salad",
    slug: "fresh-tomato-salad",
    image: "/images/tomato-salad.jpg",
    summary:
      "A light and refreshing salad with ripe tomatoes, fresh basil, and a tangy vinaigrette.",
    instructions: `
      1. Prepare the tomatoes:
        Slice fresh tomatoes and arrange them on a plate.

      2. Add herbs and seasoning:
         Sprinkle chopped basil, salt, and pepper over the tomatoes.

      3. Dress the salad:
         Drizzle with olive oil and balsamic vinegar.

      4. Serve:
         Enjoy this simple, flavorful salad as a side dish or light meal.
    `,
    creator: "Sophia Green",
    creator_email: "sophiagreen@example.com",
  },
];

// 테이블 생성
db.prepare(
  `
   CREATE TABLE IF NOT EXISTS meals (
       id INTEGER PRIMARY KEY AUTOINCREMENT,
       slug TEXT NOT NULL UNIQUE,
       title TEXT NOT NULL,
       image TEXT NOT NULL,
       summary TEXT NOT NULL,
       instructions TEXT NOT NULL,
       creator TEXT NOT NULL,
       creator_email TEXT NOT NULL
    )
`
).run();

// 데이터베이스에 여러 데이터를 입력하기 위함
async function initData() {
  const stmt = db.prepare(`
      INSERT INTO meals VALUES (
         null,
         @slug,
         @title,
         @image,
         @summary,
         @instructions,
         @creator,
         @creator_email
      )
   `);

  for (const meal of dummyMeals) {
    stmt.run(meal);
  }
}

initData();- initdb.js 실행 :
node initdb.js→ meals.db 생성됨
📖 DB에서 데이터 불러오기
// lib/meals.js
import sql from "better-sqlite3";

const db = sql("meals.db");

export async function getMeals() {
  await new Promise((resolve) => setTimeout(resolve, 2000)); // 임의의 딜레이 발생
  return db.prepare(`SELECT * FROM meals`).all();
}

// app/meals/page.js
import Link from "next/link";
import styles from "./page.module.css";
import MealsGrid from "@/components/meals/meals-grid";
import { getMeals } from "@/lib/meals";

export default async function MealsPage() {
  const meals = await getMeals();
  return (
    <>
      <header className={styles.header}>
        <h1>
          Delicious meals, created
          <span className={styles.highlight}> by you</span>
        </h1>
        <p>
          Choose your favorite recipe and cook it yourself. It is easy and fun!
        </p>
        <p className={styles.cta}>
          <Link href="/meals/share">Share Your Favorite Recipe</Link>
        </p>
      </header>
      <main className={styles.main}>
        <MealsGrid meals={meals} />
      </main>
    </>
  );
}-
getMeals()all: prepare안에 작성한 명령문을 통해 가져올 모든 데이터를 fetch할 때 사용.- 만약 하나의 데이터만 가져오고 싶다면
get을 사용하면 됨.- 해당 함수를 async로 선언(?)함으로써 Promise를 사용할 것임을 알 수 있고 자체적으로 딜레이(차후에 로딩)를 발생시킨 후, db 데이터를 프로미스로 리턴
-
page.js에서
getMeals()를 불러오는데 리턴되는 것이 프로미스이므로await을 사용하였다.
📖 로딩 페이지 추가
- Next.js는 유저가 들어갔던 페이지를 모두 캐싱한다. (해당 페이지의 데이터까지)
- 따라서 새로고침할 때만 페이지가 다시 설계되는 것이다.
- 그러므로 로딩될 때의 페이지를 작성하는 것이 유저 경험에도 좋다!
// app/meals/loading.js
import styles from "./loading.module.css";

export default function MealsLoadingPage() {
  return <p className={styles.loading}>Fetching Meals...</p>;
}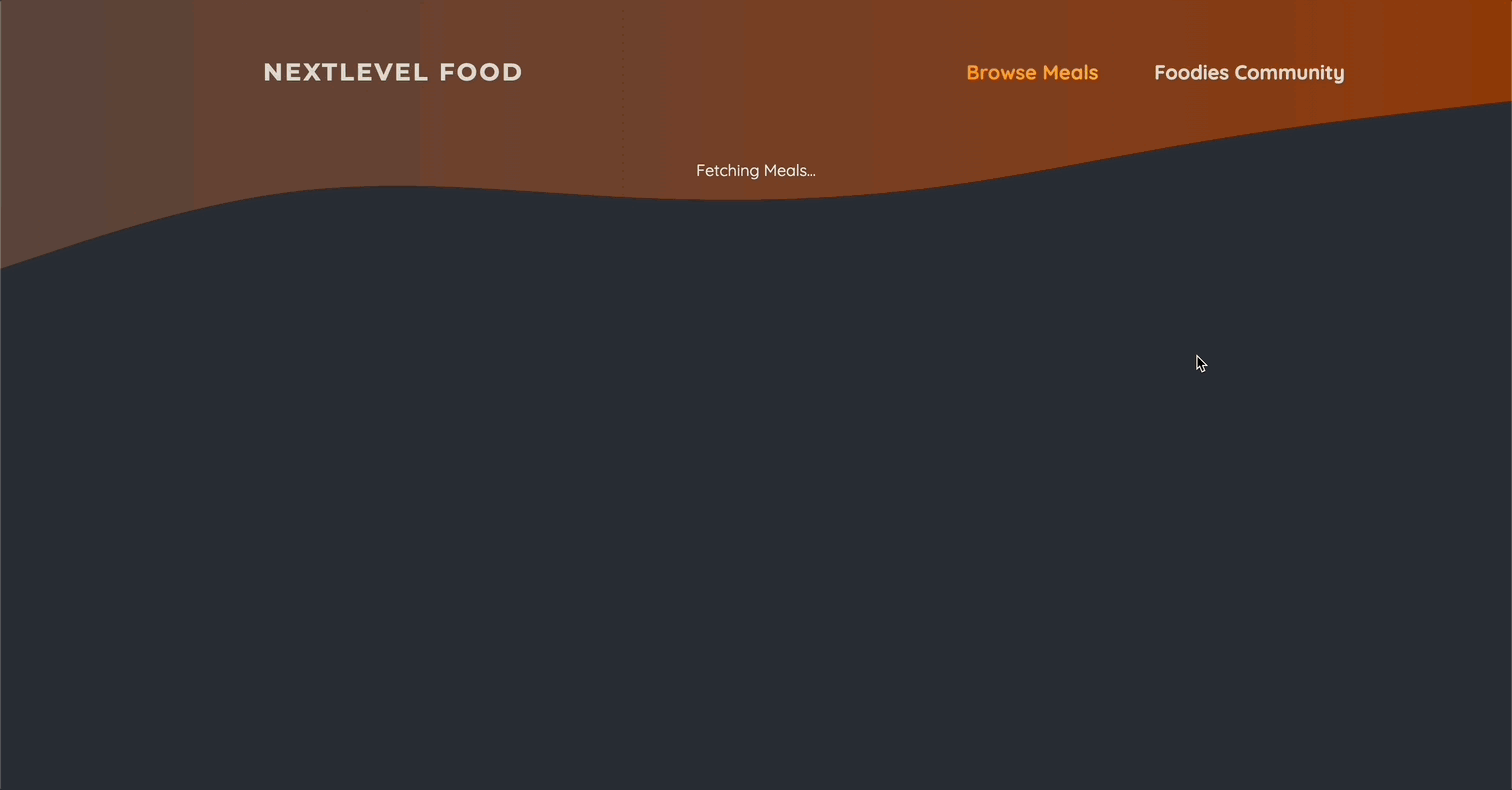
📖 Suspense & Streamed Response를 이용한 세분화 로딩 상태 관리
- meals 패이지에서 데이터를 불러오는
<MealsGrid>를 제외한 부분은 로딩되는 데이터와는 무관하다. 따라서 로딩할 때 데이터를 불러오는 부분을 제외한 텍스트가 바로 보이면 좋다. Suspense는 리액트에서 제공되는 컴포넌트로 일부 데이터 또는 리소스가 불러올 때까지 로딩 상태를 처리하고 대체 컨텐츠를 표시할 수 있다.
// app/meals/page.js
import { Suspense } from "react";
import Link from "next/link";
import styles from "./page.module.css";
import MealsGrid from "@/components/meals/meals-grid";
import { getMeals } from "@/lib/meals";

async function Meals() {
  const meals = await getMeals();
  return <MealsGrid meals={meals} />;
}

export default function MealsPage() {
  return (
    <>
      <header className={styles.header}>
        <h1>
          Delicious meals, created
          <span className={styles.highlight}> by you</span>
        </h1>
        <p>
          Choose your favorite recipe and cook it yourself. It is easy and fun!
        </p>
        <p className={styles.cta}>
          <Link href="/meals/share">Share Your Favorite Recipe</Link>
        </p>
      </header>
      <main className={styles.main}>
        <Suspense
          fallback={<p className={styles.loading}>Fetching Meals...</p>}
        >
          <Meals />
        </Suspense>
      </main>
    </>
  );
}- 기존에 로딩 페이지로 사용한 loading.js와 loading.module.css는 더이상 사용하지 않는다. 따라서 loading-out.js로 이름 변경(Next.js가 감지 못하도록..)
📖 오류 처리 방법
- 에러 페이지는 error 파일과 같은 폴더에 있거나 중첩된 페이지나 레이아웃에서 발생한 에러만 처리한다.
- 따라서 Root(app 폴더)에 작성하여 어떤 페이지에서 작성한 에러도 잡을 수 있도록 할 수 있다.
// app/meals/error.js
"use client";
export default function MealsErrorPage({ error }) {
  return (
    <main className="error">
      <h1>오류가 발생했습니다!</h1>
      <p>{error.message}</p>
    </main>
  );
}
📖 'Not Found' 상태 처리 방법
// app/not-found.js
export default function NotFoundPage({ error }) {
  return (
    <main className="not-found">
      <h1>Not Found</h1>
      <p>요청한 페이지 혹은 리소스를 찾을 수 없습니다.</p>
    </main>
  );
}