오늘은 전체 게임들을 관리하는 싱글톤 매니저들의 구조를 설계하고 구현했다!
💡 Manager 구조
🍋 Scene Manager Ex
-
Scene들을 관리하기 위해 SceneManagerEx를 만들었다.
-
CurrentScene에 현재 Scene의 정보를 담는다.
- NextScene은 LoadingScene으로 전환할 때 사용된다.
private Scenes _curSceneType = Scenes.Unknown;  // 현재 Scene
 private Scenes _nextSceneType = Scenes.Unknown; // 현재 Scene이 LoadingScene일 경우 다음에 호출 될 Scene

 public Scenes CurrentSceneType
 {
	 get
   {
  	 if (_curSceneType != Scenes.Unknown) return _curSceneType;
     return CurrentScene.SceneType;
   }

   set
   {
   	_curSceneType = value;
   }
}

public Scenes NextSceneType
{
	get
  	{
      	return _nextSceneType;
    }
    set
    {
    	_nextSceneType = value;
    }
}

// 현재 Scene 정보
public BaseScene CurrentScene
{
	get
  	{
  		return GameObject.Find("@Scene").GetComponent<BaseScene>();
  	}
}
- NextScene은 LoadingScene으로 전환할 때 사용된다.
-
LoadScene
- Scene을 전환하는 함수이다.
- 기존 Unity의 SceneManager.LoadScene과 혼동하지 말아야 한다.
public void LoadScene(Scenes sceneType, Scenes nextSceneType = Scenes.Unknown) { CurrentScene.Clear(); _curSceneType = sceneType; if (_curSceneType == Scenes.LoadingScene) _nextSceneType = nextSceneType; SceneManager.LoadScene(_curSceneType.ToString()); } - 아래와 같이 사용할 수 있다.
```cs
SceneManagerEx.Instance.LoadScene(Scenes.MainScene);
```
-
Scenes
- enum 타입으로 Scene들의 정의를 관리한다.
- SceneManagerEx로 Scene을 전환하기 위해서 여기에 해당 Scene을 추가해야 한다.
이때 enum과 Scene의 이름이 동일해야 한다.public enum Scenes { Unknown, StartScene, MainScene, LoadingScene, }
-
BaseScene
- 모든 Scene 클래스의 부모이다.
- Scenes에서 정의한 SceneType을 가진다.
- SceneManagerEx로 관리할 Scene의 스크립트를 BaseScene을 상속 받아서 만든다.
이때 스크립트와 클래스 명은 Scene 이름과 동일해야 한다.public class StartScene : BaseScene { protected override bool Init() { if (!base.Init()) return false; SceneType = Scenes.DevelopGameScene; // StartScene이 로드 되었을 때 필요한 동작 정의 return true; } public override void Clear() { // StartScene에서 다른 Scene으로 전환되기 전 필요한 동작 정의 } }
-
세팅하기
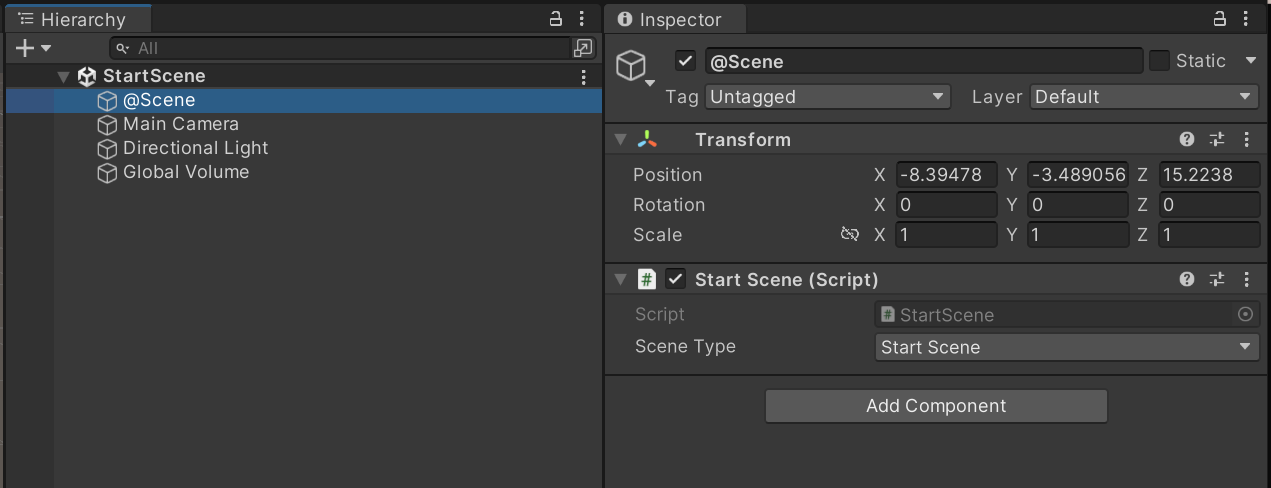
- SceneManagerEx로 관리할 각 Scene에서 @Scene이라는 이름의 빈 오브젝트를 생성한다.
- 해당 오브젝트에 Scene 이름과 동일하게 만든 스크립트를 컴포넌트로 추가해준 뒤, Scene Type을 해당 Scene으로 설정해준다.
🍍 Game Manager
-
우리 프로젝트에서는 각 미니 게임마다 해당 게임을 관리할 게임 매니저가 있고, 이들을 통합해서 관리할 매니저가 필요했다.
그래서 이 역할을 GameManager가 맡는 방식으로 구현했다! -
GameManager는 각 미니 게임을 관리하는 미니 게임의 매니저들을 Dictionary에 담아 관리한다.
// 각 미니 게임들을 관리하는 미니 게임 매니저들을 저장하는 딕셔너리
private Dictionary<string, MonoBehaviour> _miniGameManagers = new Dictionary<string, MonoBehaviour>();
-
사용하기
- GameManager에서 미니 게임 매니저를 불러오기 위해 아래와 같이 호출한다.
GameManager.Instance.GetMiniGameManager<DevelopGameManager>(); - 각 미니 게임 매니저는 GameManager를 통해 호출되며, 아래와 같이 사용된다.
public class Graph : MonoBehaviour
{
	private DevelopGameManager _developGameManager;

    private void Awake()
    {
    	nodeList = GetComponentsInChildren<Node>();
        // 게임 매니저를 통해서 미니 게임을 관리할 매니저 호출
        _developGameManager = GameManager.Instance.GetMiniGameManager<DevelopGameManager>();
    }
}
- GameManager에서 미니 게임 매니저를 불러오기 위해 아래와 같이 호출한다.
🥝 UI Manager
-
UI 컴포넌트들을 Dictionary에 저장해서 관리한다.
// Resources/Prefabs/UI 안의 UI 컴포넌트 프리팹들을 저장하는 딕셔너리
Dictionary<string, UIBase> uiDic = new Dictionary<string, UIBase>();
-
세팅하기
- UI Canvas를 생성하고 필요한 UI 요소들을 추가한다.
- UI Canvas의 이름과 똑같은 이름으로 스크립트를 만들어 가장 상위의 Canvas 오브젝트에 컴포넌트로 추가한다.
UI 스크립트 내에서 필요한 컴포넌트들은 SerializeField로 선언하여 인스펙터 창에서 연결한다.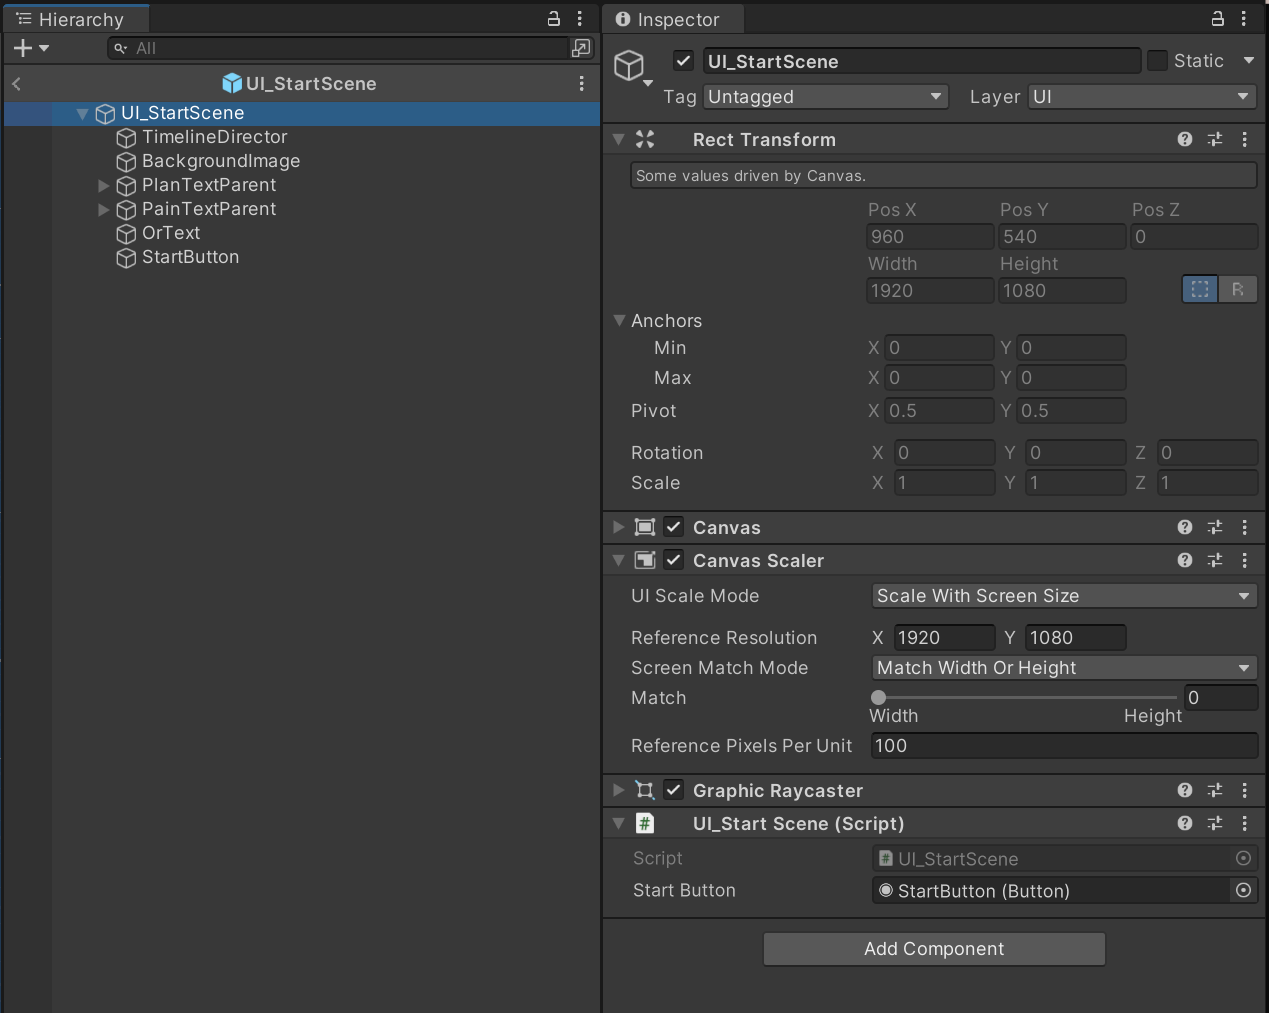
- UI Canvas를 프리팹으로 만들어서 Resources/Prefabs/UI 폴더 안에 저장한다.
- 사용하기
- 아래와 같이 호출하여 사용한다.
이때 Awake가 아닌 Start에서 UI 컴포넌트를 가져와야 null 오류가 나지 않는다.
public class DevelopGameManager : MonoBehaviour { private UI_Popup _uiPopup; private UI_GameEndPopup _uiGameEndPopup; private UI_DevelopGameScene _uiDevelopGameScene; private void Start() { _uiPopup = UIManager.Instance.GetUIComponent<UI_Popup>(); _uiGameEndPopup = UIManager.Instance.GetUIComponent<UI_GameEndPopup>(); _uiDevelopGameScene = UIManager.Instance.GetUIComponent<UI_DevelopGameScene>(); _uiPopup.ShowPopup(Strings.PopupContent.DEVELOP_GAME_NOTIFICATION, Strings.PopupButtons.OK, null); } } - 아래와 같이 호출하여 사용한다.
🍑 Resource Manager
-
Resources/Sprites 폴더 안의 이미지 리소스들을 Dictionary에 담아 관리한다.
public Dictionary<string, Sprite> sprites = new Dictionary<string, Sprite>();- 현재는 Sprites 리소스만 관리하지만 추후 Prefab 리소스들도 관리하는 방향으로 발전시킬 예정이다.
- 현재는 Sprites 리소스만 관리하지만 추후 Prefab 리소스들도 관리하는 방향으로 발전시킬 예정이다.
-
사용 방법
- 실행 중 이미지를 Load해야 할 경우 다음과 같이 호출하여 사용한다.
이때 이미지들은 Resources/Sprites 폴더 안에 저장해야 한다.
Sprite sprite = ResourceManager.Instance.LoadSprite("이미지 소스 이름"); - 실행 중 이미지를 Load해야 할 경우 다음과 같이 호출하여 사용한다.
🍓 Sound Manager
-
Resources/Sounds 폴더 안의 사운드 리소스들을 Dictionary에 담아 관리한다.
public Dictionary<string, AudioClip> audioClips = new Dictionary<string, AudioClip>();
-
Play와 Stop
- Play 메서드에서는 오디오 클립의 이름과 오디오 타입, 볼륨 값을 전달 받는다.
- 오디오 타입은 효과음, 볼륨은 1이 기본 값이다.
public void Play(string audioClipName, AudioType audioType = AudioType.EFFECT, float volume = 1.0f) { AudioClip audioClip = LoadAudioClip(audioClipName); switch(audioType) { case AudioType.BGM: if (_audioSource.isPlaying) _audioSource.Stop(); _audioSource.volume = volume; _audioSource.clip = audioClip; _audioSource.loop = true; _audioSource.Play(); break; case AudioType.EFFECT: _audioSource.volume = volume; _audioSource.PlayOneShot(audioClip); break; } } - Stop 메서드에서는 현재 재생 중인 오디오가 있다면 정지한다.
public void Stop()
 {
 	if (_audioSource.isPlaying) _audioSource.Stop();
 }
-
사용 방법
- 사운드를 재생할 곳에서 아래와 같이 호출한다.
이때 사운드들은 Resources/Sounds 폴더 안에 저장해야 한다.
// 배경음악 재생 SoundManager.Instance.Play("오디오 클립 이름", AudioType.BGM); // 효과음 재생 SoundManager.Instance.Play("오디오 클립 이름"); // volume 조절이 필요한 경우 SoundManager.Instance.Play("오디오 클립 이름", AudioType.BGM, 0.5f); // 음악 정지 SoundManager.Instance.Stop(); - 사운드를 재생할 곳에서 아래와 같이 호출한다.
🍉 GitHub
프로젝트를 진행할 때마다 고민이었던 Manager 구조를 이번에 꽤 만족스럽게 구현했다!
아직 더 보완할 점들과 추가하고 싶은 것들이 많기 때문에 팀 프로젝트가 끝난 이후에 더 디벨롭 할 예정이다 히히 'ㅅ'
끗~~~