For ubuntu installation, refer to this link.
We assume you have a gpu installed (e.g., 2080ti or 3090).
The following installation is based on this
1. Assume you newly installed Ubuntu 20.04. Execute the following:
$ sudo apt-get update
$ sudo apt-get upgrade
$ sudo apt-get install build-essential
2. Install nvidia driver
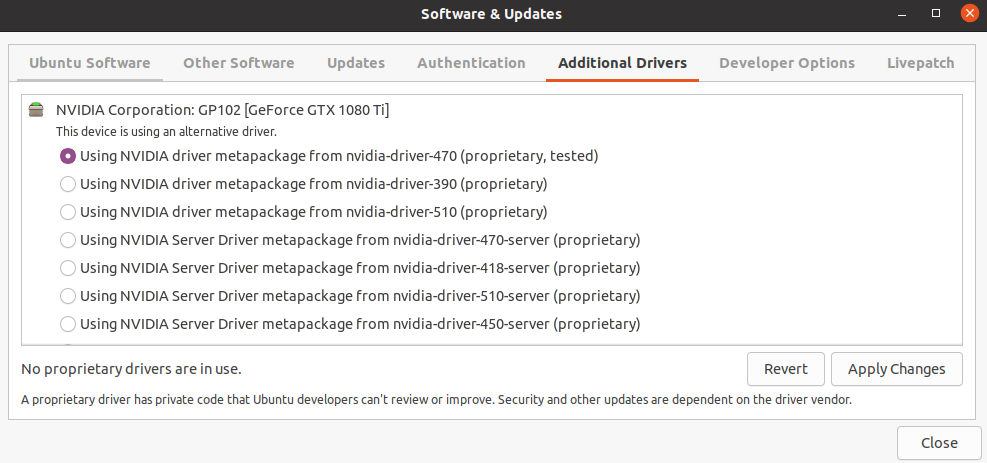
Restart the computer.
Then, verify by typing $ nvidia-smi in the terminal.
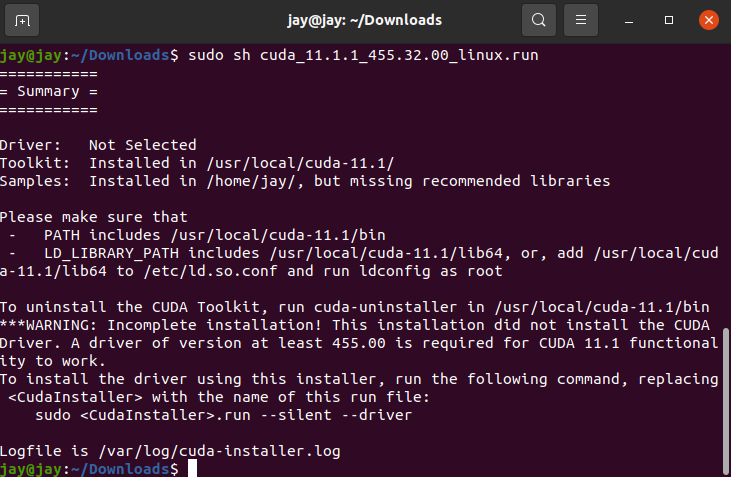
3. Download CUDA 11.1.1 from the official website. I've downloaded and installed by
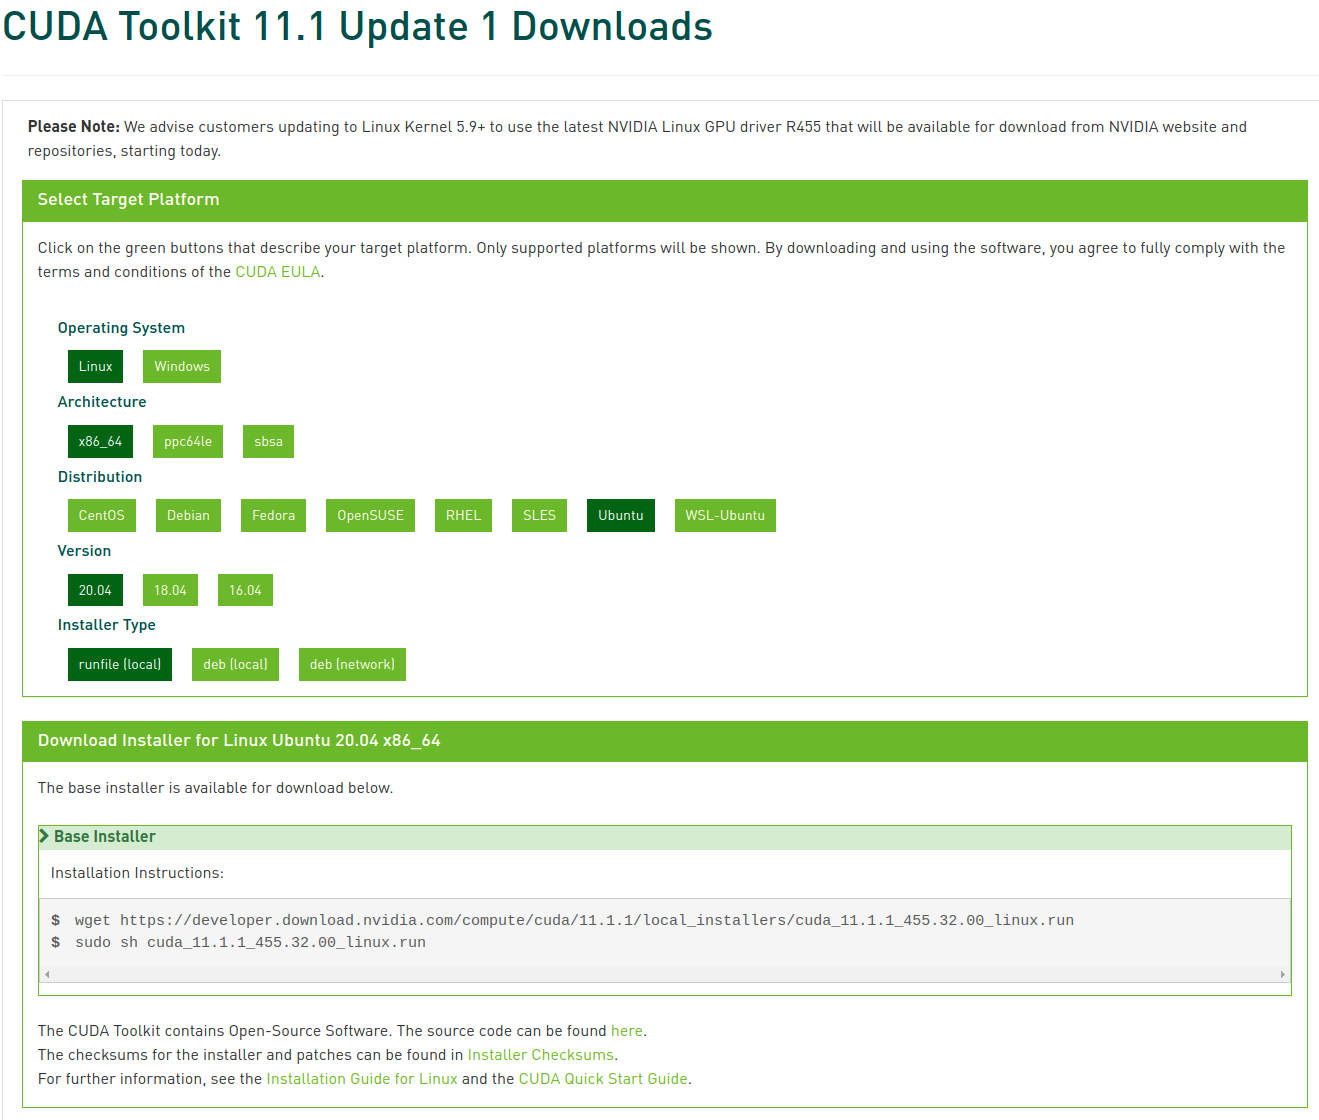
Namely,
$ wget https://developer.download.nvidia.com/compute/cuda/11.1.1/local_installers/cuda_11.1.1_455.32.00_linux.run
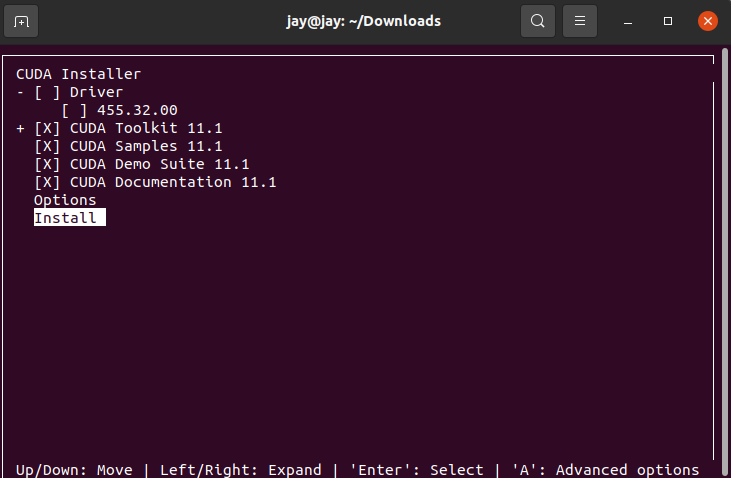
$ sudo sh cuda_11.1.1_455.32.00_linux.run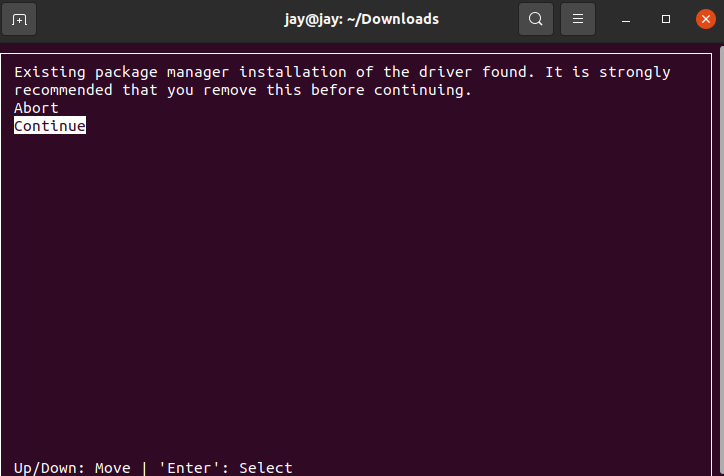
4. Set the environment variables as follows:
(a) First, type the follwing in the terminal
$ sudo gedit ~/.bashrc(b) In the '.bashrc' file, type the following at the end and save (please make sure you are using a right version of CUDA)
export CUDA_HOME=/usr/local/cuda-11.1
export PATH=/usr/local/cuda-11.1/bin${PATH:+:${PATH}}
export LD_LIBRARY_PATH=/usr/local/cuda-11.1/lib64${LD_LIBRARY_PATH:+:${LD_LIBRARY_PATH}}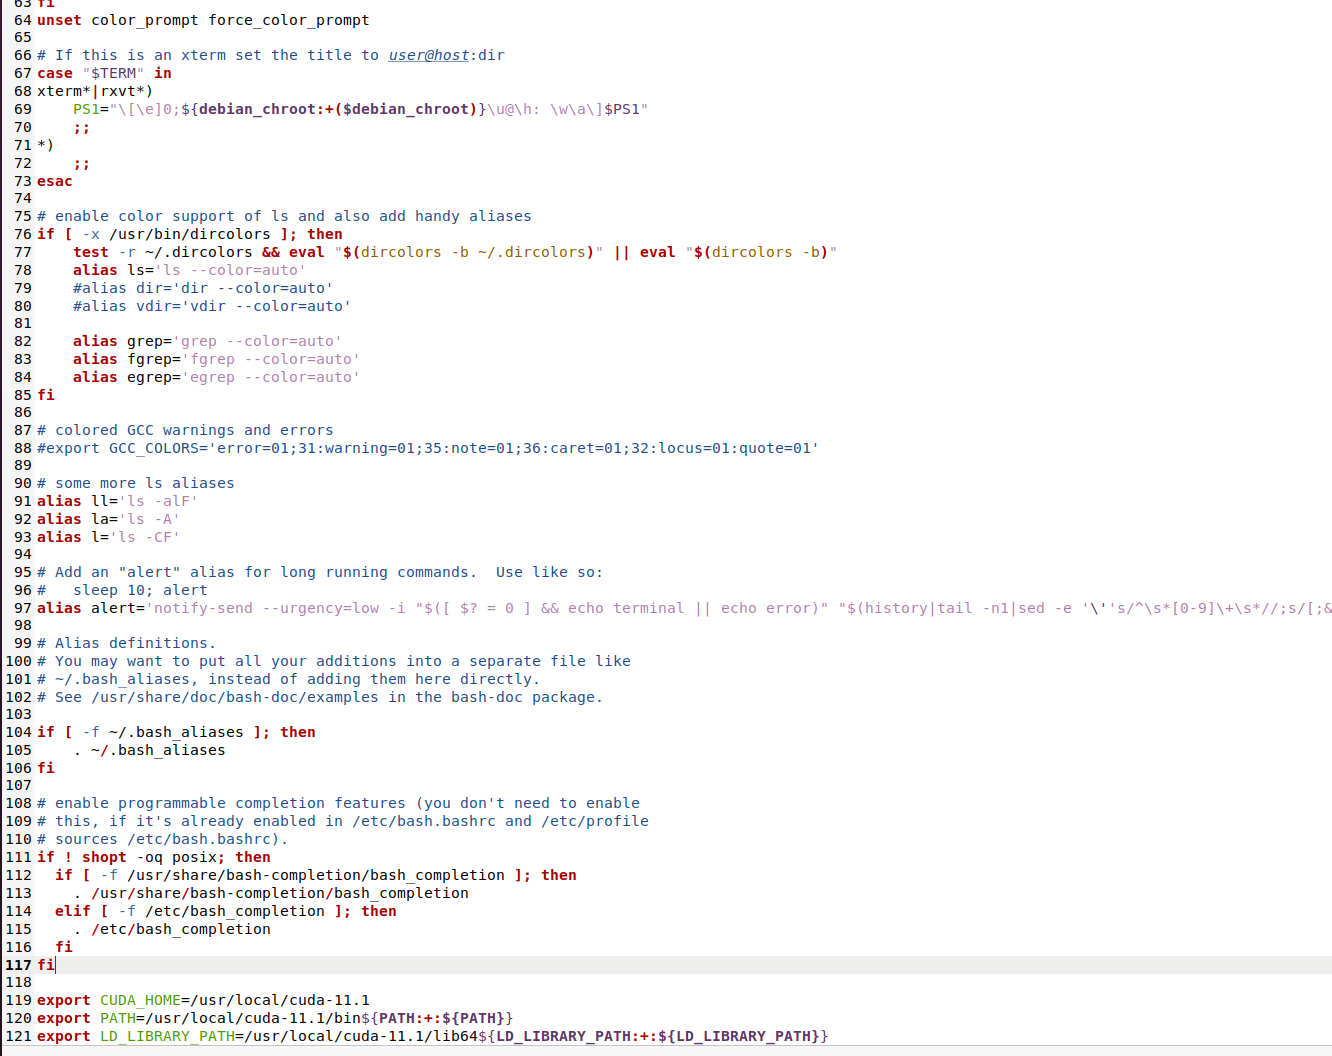
(c) In the terminal, type the following
$ source ~/.bashrcThen, verify by typing $ nvcc -V.
5. Now, install python 3.8
by $ sudo apt-get install python3.8. (For my case, it was already installed.)
6. Install virtualenv
by $ sudo apt-get install virtualenv.
(a) Create a virtual envrionment to install pytorch:
virtualenv --python=python3.8 py_venvs/torch_venv(b) Activate the virtual environment by
$ cd ~/py_venvs/torch_venv/bin
$ source activate
(c) Install pytorch 1.8.2 as described in the link:
$ pip3 install torch==1.8.2+cu111 torchvision==0.9.2+cu111 torchaudio==0.8.2 -f https://download.pytorch.org/whl/lts/1.8/torch_lts.html- Verify the installation in the python as in the link:
import torch
x = torch.rand(5, 3)
print(x)
torch.cuda.is_available()