학습내용
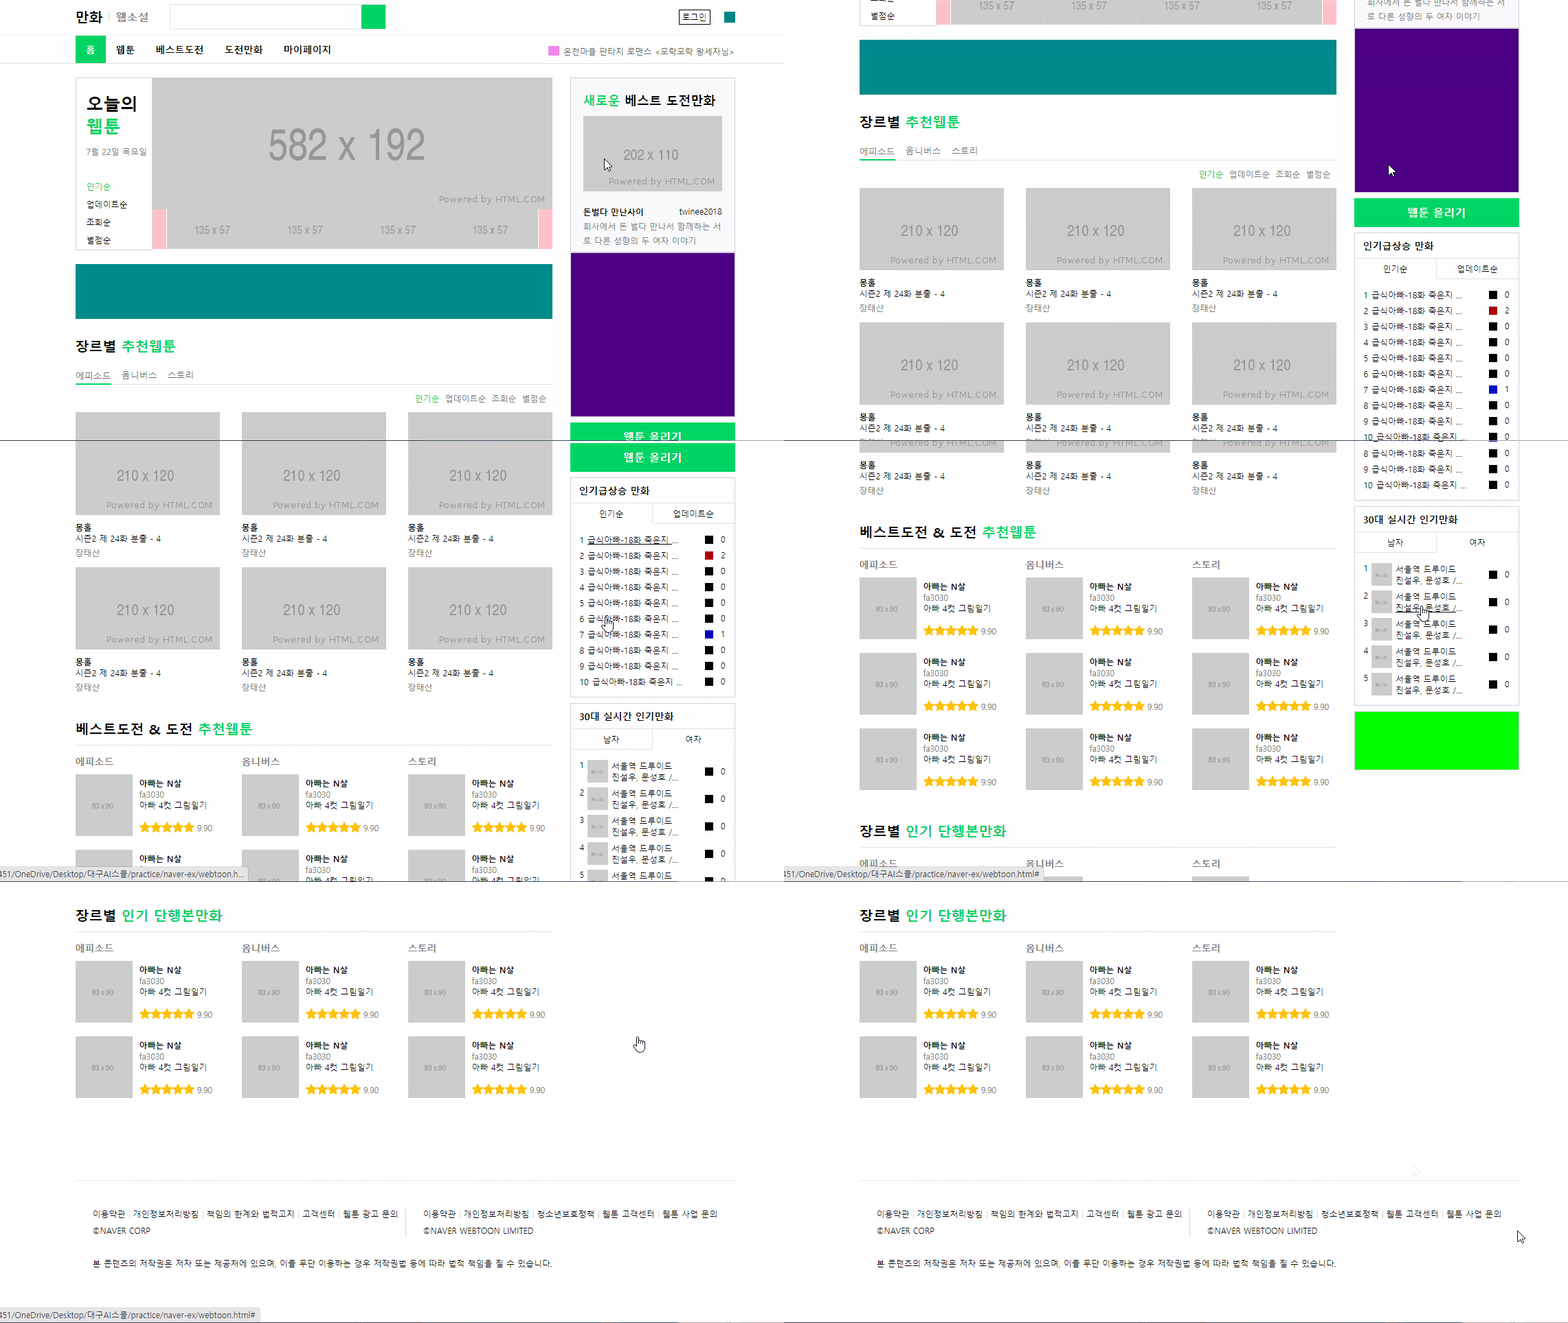
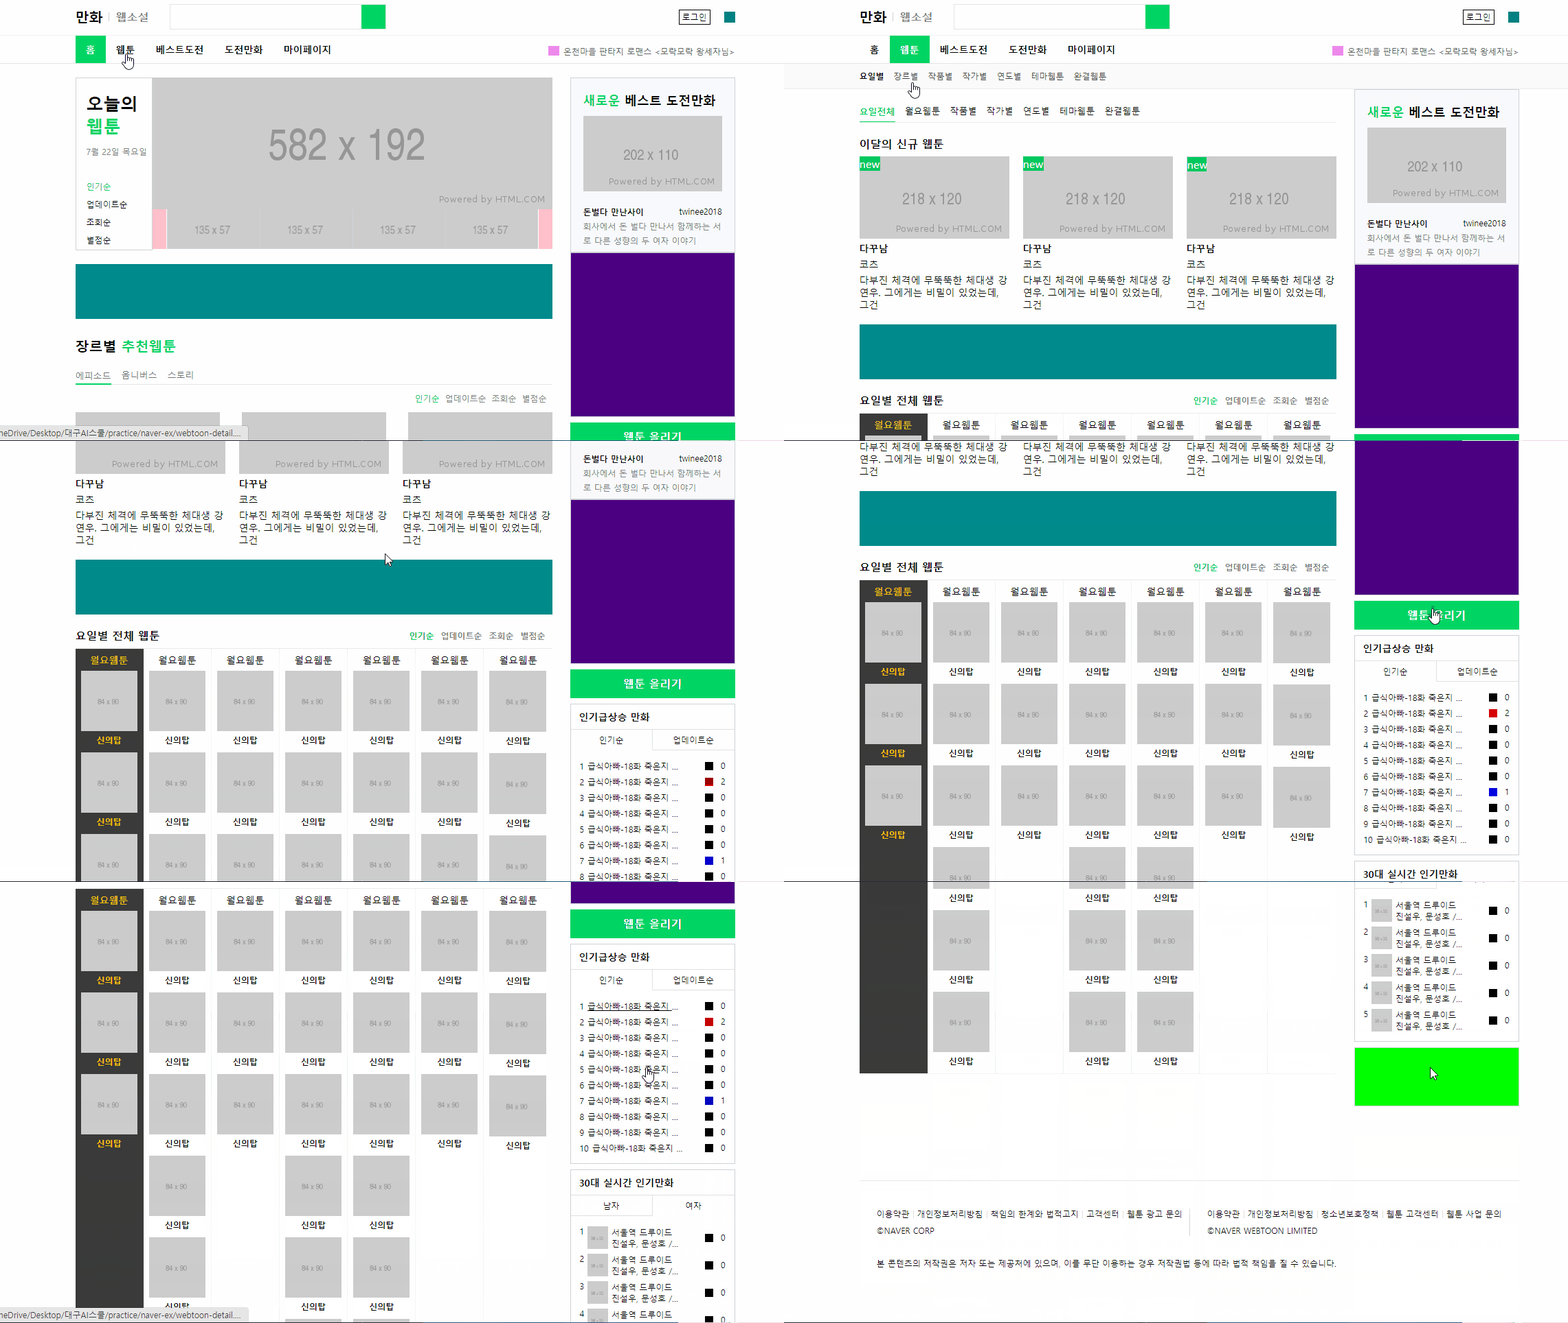
웹툰 홈 main-left 하단, main-right, footer, 웹툰 상세 main-left
남은 강의들을 8월 말까지 다 완료하기 위해 수강 스케줄을 새로 짰다.
github소스코드
웹툰 홈

main-left(2)
padding: 26px 0 10px패딩 값을 3개 줄 경우 상, 좌우, 하로 들어가게 된다.- 부모 태그에
border가 있고, 자식 태그에 hover 등으로 border를 추가할 때,margin-bottom: -1px;처럼 음수값을 줘서 조절할 수 있다. - 별점 채우는 부분은 예전 아이디어스 연습처럼 전체 영역의 크기를 고정한 후 별 모양 사진을
background-image로 채워넣고 default 인 repeat가 실행되도록 했다. 이미지를 가져올 때 현재 파일의 위치를 기준으로 경로 설정을 잘 해야 된다.
#webtoon-main .webtoon-main-left .webtoon-content-info-right .webtoon-content-rating .star {
    display: inline-block;
    width: 80px;
    height: 16px;
    background-image: url(../../idus/img/star.png);
    vertical-align: middle;
}
main-right
- 어떤 공간 안에 사진을 넣고 사진 주변 공백이 필요하다면, 사진에
margin등을 줘도 되겠지만 공간에padding값을 주고 사진 크기를 100%로 하면 padding 안의 영역에 사진이 가득 차게 된다.
#webtoon-main .webtoon-main-right .webtoon-challenge-wrap {
	width: 100%;
	height: 255px;
	background-color: #f9f9fc;
    padding: 20px 18px;
}
#webtoon-main .webtoon-main-right .webtoon-challenge-wrap img {
    width: 100%;
    height: 110px;
    margin-bottom: 18px;
}- 강의엔 나오지 않았지만 실제 페이지에 웹툰 업로드 버튼이 있어서
<a>태그로 만들어 주었다.
/* 웹툰 업로드 버튼 */
#webtoon-main .webtoon-main-right .btn-webtoon-upload {
    display: inline-block;
    width: 100%;
    height: 42px;
    background-color: #00d564;
    margin-bottom: 8px;
    text-align: center;
    color: #fff;
    line-height: 42px;
    font-weight: 700;
}- 처음부터 전체 레이아웃을 보고 중복해서 사용할 수 있을만한 요소는 여러 경우를 아우르도록 작성하는 것이 포인트였다. 예를 들어 두 영역의 헤더가 중복되는데 한 곳에는 자식 요소가 1개, 나머지는 2개였는데 미리 flex를 적용시켜서 자식 개수에 상관없이 레이아웃을 적용할 수 있도록 했다.
- 경우에 따라 border를 없애야 할 경우,
border-color로 안 보이게 색상만 바꿔주면 레이아웃 뒤틀림이 없다.
/* border 없애지말고 흰색으로 처리 */
#webtoon-main .webtoon-main-right .webtoon-popular .webtoon-popular-tabs .tab.active {
    border-bottom: solid 1px #ffffff;
}- 한 줄 말줄임 css 속성 세트
white-space: nowrap줄바꿈 안함overflow: hidden넘어가는 내용 자르기text-overflow: ellipsis글자가 넘치는 경우 말줄임 표시하는 속성값
.ellipsis {
    white-space: nowrap;
    overflow: hidden;
    text-overflow: ellipsis;
}- 순서가 의미 있는 리스트를 만들 때는
<ol>태그를 사용한다. 기본적으로 앞에 숫자가 붙는데, 이 속성을 적용하려면list-style:decimal을 사용한다.decimal-leading-zero도 있길래 써 보니 앞에 0을 추가해 01, 02, 03.. 이런 식으로 표시해준다. - 인기 순위표에서 3가지 상태에 따라 다른 도형(연습에서는 색깔)로 변화여부를 나타내기 위해
status클래스로는 크기,status-stay,status-up,status-down등 3가지 클래스로 색상을 변경해주었다. 나중에는 뒷 부분에background-image등을 적용하면 각기 다른 도형을 삽입할 수 있을 것 같다.
<div class="status status-stay"></div>
<div class="status status-up"></div>
<div class="status status-down"></div>
#webtoon-main .webtoon-main-right .webtoon-popular .webtoon-popular-ranking li .rank-box .status {
width: 12px;
height: 12px;
}
#webtoon-main .webtoon-main-right .webtoon-popular .webtoon-popular-ranking li .rank-box .status.status-stay {
background-color: black;
}
#webtoon-main .webtoon-main-right .webtoon-popular .webtoon-popular-ranking li .rank-box .status.status-up {
background-color: red;
}
#webtoon-main .webtoon-main-right .webtoon-popular .webtoon-popular-ranking li .rank-box .status.status-down {
background-color: blue;
}rank클래스를 그대로 사용하면서도 다른 속성(위치조정)을 적용하기 위해rank-custom을 추가해서 사용했다.
<span class="rank rank-custom">1</span>/* 썸네일 이미지가 포함된 랭킹 */
#webtoon-main .webtoon-main-right .webtoon-popular .webtoon-popular-ranking .rank.rank-custom {
position: relative;
top: -10px;
}footer
- html 특수문자: 저작권 © 기호를 넣을 때 html에서 사용하는 특수문자 표를 이용했다. html특수문자표-참고
<span>©naver corp</span>text-transform: uppercase: 태그의 글자를 전부 대문자로 바꾸어 주는 속성이다.lowercase,capitalize등 여러 효과들이 있다.
#webtoon-footer .webtoon-container .webtoon-footer-wrap span {
    text-transform: uppercase;
}
웹툰 상세

웹툰 상세 페이지는 main-left 영역을 제외하면 웹툰 홈과 같은 레이아웃을 사용하고 있었다.
main-left
- 이미지와 span이 겹치는 것을 구현하기 위해 두 개를 하나의 영역으로 묶고, 부모 태그에
position:relative, 자식 태그에position:absolute를 주는 방법을 사용했다.
.webtoon-detail #webtoon-this-month .webtoon-monthly-list .monthly-img-wrap {
    position: relative;
    width: 100%;
    height: 120px;
}
.webtoon-detail #webtoon-this-month .webtoon-monthly-list .monthly-img-wrap img {
    position: absolute;
    width: 100%;
    height: 100%;
}
.webtoon-detail #webtoon-this-month .webtoon-monthly-list .monthly-img-wrap .new-mark {
    position: absolute;
    width: 30px;
}- 요일마다 웹툰 개수가 달라서 요일 개체마다 높이가 다른 경우, flex를 사용할 때 가장 긴 개체에 늘려서 맞추는
align-item:stretch속성을 적용했다.
.webtoon-detail #webtoon-daily .webtoon-day-lists {
    display: flex;
    align-items: stretch;
    border-bottom: solid 1px #f4f4f4;
}- 개체의 배경색을 바꿀 때
border-color도 같이 신경써서 바꿔준다.
.webtoon-detail #webtoon-daily .webtoon-day-list.active {
    background-color: #3a3a3a;
    border-color: #3a3a3a;
    color: #fdcb00;
}
어려웠던 점
- 웹툰 홈 별점에 채울 별 사진을 가져올 때, 자동완성되는 경로의 도움을 받았는데 제대로 가져와지지 않았다. 루트 경로에서 시작하도록 작성해서 그런 것 같다.
- 일부 부모 태그를 공유하고 내부에서 갈라지는
<a>태그의 속성이 내가 원하는 대로 지정되지 않고 cascading 순위에서 밀려나는 문제가 있었다. 둘다 마지막은 a로 선택하고 나중에 오는 코드가 더 자세하고 세부적인 것 같았는데 왜 먼저 오는 코드의 값이 적용되는지 잘 이해하지 못했다. 아직 내가 cascading 규칙을 잘 숙지하지 못한 것을 알게 되었다.
해결방법
- 현재 파일의 경로를 기준으로 다시 작성했더니 해결되었다.
- 일단 내가 지정하고 싶은 태그에 별도의 클래스를 작성해서 해결했다.
소감
오늘은 좀 욕심을 부린 것 같다. 내용이 많았다...ㅎㅎ 그래도 예전엔 코드를 하나하나 보고 따라 쳤다고 하면 요즘은 소리로만 들어도 대충 어느 태그에 어떤 속성을 적어야 할지 조금은 감이 온다. 강사님이 전에 말씀하신 대로 코드를 작성하면서 화면에 어떻게 나올지 미리 상상하는 연습이 도움이 된 것 같다.
