학습내용
유튜브 왼쪽 nav, content 부분 전부
github
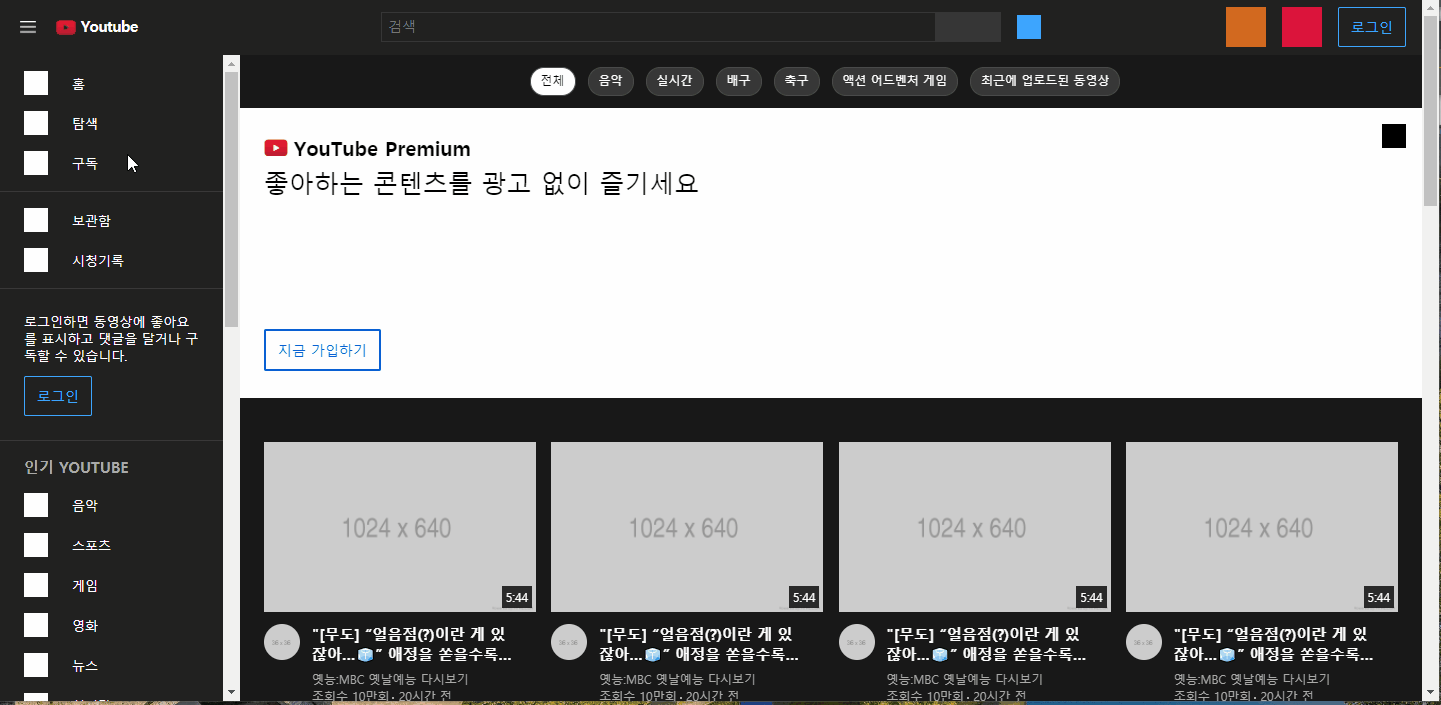
왼쪽 nav
- 내용물은 많지만 동일한 디자인이 반복되고 있어서 빠르게 만들 수 있었다.
- 로그인 영역을 만들 때, txt-wrap이 내부 요소의 크기를 제대로 인식하지 못해서 레이아웃이 겹치는 문제가 있었다. button의 display를
inline-block혹은block으로 변경하니 잘 인식하는 것으로 보아 button의 기본 display가 inline이라 생기는 문제인 듯 하다.
#youtube-left-content .nav-section .nav-body .txt-wrap .btn-login {
    display: inline-block;
    border: solid 1px #3ea6ff;
    border-radius: 2px;
    padding: 10px 12px;
    margin-top: 12px;

    font-size: 14px;
    color: #3ea6ff;
}- footer 안의 단어들이 중간에 잘려서 표시되지 않도록
word-break: keep-=all속성을 추가해주었다.
#youtube-left-content #youtube-footer .txt-wrap a {
    margin-right: 8px;
    word-break: keep-all;
    color: #aaa;
    font-weight: 500;
}
content
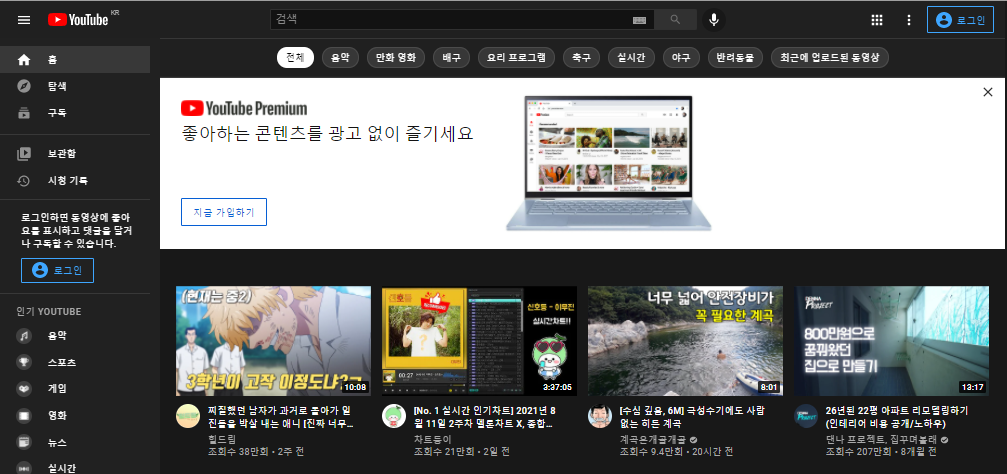
위 캡처는 실제 유튜브 메인 페이지 모습인데, 강의에서 다루지 않았던 태그 목록과 배너 부분이 있어 그 부분도 추가로 만들어보기로 했다.
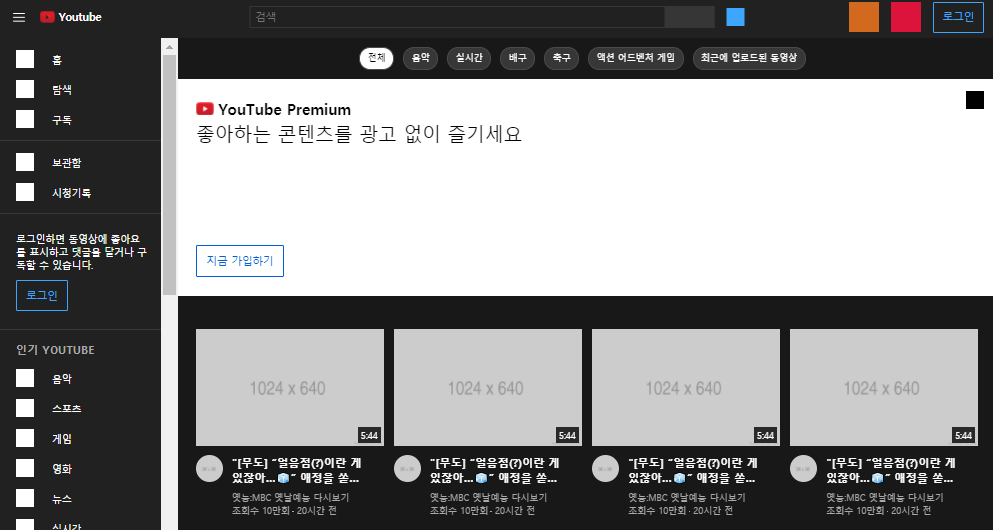
태그 목록 영역
- 태그의 크기는 글자 수에 따라 달라지므로
width대신max-width를 사용했다.
#youtube-main .tag-wrap li {
    max-width: 170px;
    margin: 12px;
    margin-left: 0;
    padding: 3px 10px;
    border: solid 1px #4a4a4a;
    border-radius: 20px;
    background-color: #373737;
}- 실제 페이지에 한줄 말줄임 속성이 있어 똑같이 추가해주었다.
#youtube-main .tag-wrap a {
    overflow: hidden;
    white-space: nowrap;
    text-overflow: ellipsis;

    display: inline-block;
    width: 100%;
    font-size: 12px;
    font-weight: 400;
}- 선택된 태그의 디자인 변경을 위해 클래스를 활용하였다.
#youtube-main .tag-wrap li.on {
    background-color: #ffffff;
    color: #030303;
}
#youtube-main .tag-wrap li.on a {
    color: #030303;
}
배너 영역
- 배너 광고 끄기 버튼을 absolute로 배치하였다.
#youtube-main .youtube-banner .btn-close {
    position: absolute;
    width: 24px;
    height: 24px;
    background-color: black;
    top: 16px;
    right: 16px;
}- 가입하기 버튼은 기존의 로그인 버튼 속성값을 복사해서 쓰고, 위치 조정은 margin-top을 사용했다.
#youtube-main .youtube-banner .txt-wrap .btn-join {
    display: inline-block;
    border: solid 2px #065fd4;
    border-radius: 2px;
    padding: 10px 12px;
    margin-top: 130px;

    font-size: 14px;
    color: #065fd4;
}
비디오 영역
- 지금까지와 다르게 하나의 li 영역 안에 있는 여러 요소들이 서로 다른 링크를 가지고 있어야 해서 html 도면이 상당히 복잡했다.
<div class="video-section">
  <div class="video-section-title-wrap">
    <h2>코로나19 감염증 및 백신 관련 정보</h2>
  </div>
  <ul class="video-lists flex-between">
    <li>
      <!-- 영상링크 / 채널 링크 분기처리 -->
      <div class="video-thumbnail">
        <a href="#">
          <img src="" alt="">
          <span class="time">5:44</span>
        </a>
      </div>

      <div class="video-txt-wrap flex-start">
        <a class="img-link" href="#">
          <img class="profile" src="" alt="">
        </a>

        <div class="txt">
          <h3><a class="title-link" href="#">"[무도]</a></h3>
          <p><a class="channel-link" href="#">옛능...</a></p>

          <div class="txt-bottom">
            <span class="count">조회수 10만회</span>
            <span class="date">20시간 전</span>
          </div>
        </div>
      </div>

    </li>
  </ul>
</div>- 강의에선 다루지 않았지만 일부 비디오 영역의 경우 제목이 있기도 해서 video-section으로 전체 ul을 한번 더 감싸 준 후 title 영역을 넣어주었다.
#youtube-main-content .video-section {
    width: 100%;
    border-bottom: solid 4px rgba(255, 255, 255, 0.1);
    background-color: #181818;
    margin: 20px 0;
}
#youtube-main-content .video-section .video-section-title-wrap {
    margin: 0 0 20px 4px;
    font-size: 13px;
    font-weight: 400;
}- 자연스러운 이미지 리사이즈를 위해 li 넓이값을 비율로 주었다.
#youtube-main-content li {
    width: 24%;
    margin-bottom: 40px;
}- 영상 제목에는 두 줄 말줄임 효과를 적용하였다.
#youtube-main-content li .video-txt-wrap .txt h3 .title-link {
    display: -webkit-box;

    overflow: hidden;
    text-overflow: ellipsis;
    white-space: normal;

    max-width: 100%;
    -webkit-line-clamp: 2;
    -webkit-box-orient: vertical;
}- 조회수와 업로드 날짜 사이 점을 after로 만들어주었다.
#youtube-main-content li .video-txt-wrap .txt .txt-bottom .count::after {
    content: "";
    display: inline-block;
    width: 2px;
    height: 2px;
    background-color: #aaa;
    vertical-align: -1px;
    margin: 0 0 3px 3px;
}
어려웠던 점
- content 내부 높이를 100%로 하니 브라우저 기준으로만 적용되고 스크롤 내리면 배경색이 적용되지 않는 문제가 있었다.
해결방법
- 오히려 높이값을 없애주니 내용물의 높이값으로 적용되었다. 해결은 간단했지만 값을 더 추가하는 것이 아니라 지우는 식이라 바로 떠올리지 못했다.
소감
오늘 영상 길이 자체는 1시간으로 짧았지만 강의에서 다루지 않은 태그 목록이나 배너 등도 추가하고, 오류인지 영상 뒷부분이 잘려서 비디오 목록 부분도 혼자서 만들었더니 평소보다 더 많이 배웠다.

문서화를 좋아하는 개발자