진행해야 할 코드 챌린지
1 . 상품 상세 -> 판매중, 판매 완료, 예약중 상태 변경 가능하도록
2 . /profile 생성하기 -> 내 프로필에서 내가 상품 (상태별로) , 내가 쓴 글 확인 가능
3 . 프로필 수정 가능 (닉네임, 프로필 사진)
4 . 상품에 대한 채팅으로 연결 시키기 (현재 상품에서 채팅하기를 누르면 채팅방이 생성되긴 하지만, 상품에 대한 정보를 연결시켜 놓지 않았음)
5 . 판매 완료가 되면 -> 리뷰 작성이 가능하도록 하기
6 . 내 리뷰를 프로필에서 확인할 수 있도록
이전 시간에 1-4번까지 진행이 완료되었었다.
판매완료 -> 리뷰 작성 가능하도록
상품 판매가 완료가 되면 판매자 구마자가 모두 상대방에 대한 리뷰 작성이 가능하도록 해주어야 한다.
사실 상품의 상태를 바꿀 수 있는 곳이 생각보다 너무 많기 때문에 어떻게 구현을 해야할까 핟가 채팅방에서 대화를 주고 받고 제품을 판매 완료 상태를 변경시키면 -> 리뷰 입력이 가능한 창을 보여줄 수 있도록 먼저 구현을 해보기로 했다.
const shouldShowReviewPrompt = product.status === 'SOLD_OUT'; 를 통해서 상품의 상태가 "SOLD_OUT"이 되게 되면,
 {shouldShowReviewPrompt && (
        <div className="fixed inset-0 bg-black z-50 flex items-center justify-center">
          <ReviewForm
            product={product}
            username={username}
            userId={userId}
            buyerId={buyerId}
            sellerId={sellerId}
          />
        </div>
      )}
<ReviewForm/> 컴포넌트를 보여주자! 를 의미한다.
여기서 Review에 구매한 사람의 id, 판매한 사람의 id, 어떤 상품에 대한 product인지 등등 필요한 정보를 넘겨주었다.
'use client';
import { ChangeEvent, useState } from 'react';
import { ChevronLeftIcon } from '@heroicons/react/24/solid';
import Image from 'next/image';
import { formatToWon } from '@/lib/utils';
import Link from 'next/link';
import { ReviewCreate } from '@/app/products/[id]/actions';
interface IReviewFormProps {
product: {
title: string;
status: string;
photo: string;
price: number;
id: number;
};
username: string;
userId: number;
buyerId: number;
sellerId: number;
}
export default function ReviewForm({
product,
username,
userId, //로그인한 userId
buyerId,
sellerId,
}: IReviewFormProps) {
const userRacting = ['최고에요', '좋아요', '별로에요'];
const goodRacting = [
'제가 있는 곳까지 와서 거래했어요',
'친절하고 매너가 좋아요',
'시간 약속을 잘 지켜요',
'응답이 빨라요',
];
const badRacting = [
'반말을 사용해요',
'불친절해요.',
'거래 시간과 장소를 정한 후 연락이 안돼요',
'약속 장소에 나타나지 않았어요',
'거래 시간과 장소를 정한 후 거래 직전에 취소했어요',
];
const [selectedUserRating, setSelectedUserRating] = useState('');
const [selectedDetailRating, setSelectedDetailRating] = useState('');
const handleUserRatingChange = (
event: React.ChangeEvent<HTMLInputElement>
) => {
setSelectedUserRating(event.target.value);
};
const handleDetailRatingChange = (
event: React.ChangeEvent<HTMLInputElement>
) => {
setSelectedDetailRating(event.target.value);
};
const handleSubmit = async () => {
const targetUserId = sellerId === userId ? buyerId : sellerId;
console.log('userId:', userId); // 추가된 로그
console.log('targetUserId:', targetUserId); // 추가된 로그
try {
await ReviewCreate({
productId: product.id,
userId: targetUserId,
userRating: selectedUserRating,
detailRating: selectedDetailRating,
});
// 제출 후 필요한 동작 (예: 알림, 페이지 이동 등)
} catch (error) {
console.error('리뷰 제출 중 오류 발생:', error);
}
};
return (
<div className="fixed top-0 left-0 right-0 z-50 bg-black p-5 shadow-lg flex flex-col gap-3 *:text-white">
<Link href={'/home'}>
<ChevronLeftIcon className="size-8" />
</Link>
<div className="flex flex-row gap-3 bg-neutral-900 w-full pb-2 p-2 rounded-md">
<div className="relative size-16">
<Image src={`${product.photo}/public`} alt={product.title} fill />
</div>
<div className="flex flex-col">
<h1 className="text-lg font-semibold">{product.title}</h1>
<h2>{formatToWon(product.price)}원</h2>
</div>
</div>
{/* 상대방 ID를 숨겨서 넘김 */}
<input type="hidden" value={sellerId === userId ? buyerId : sellerId} />
<div className="text-center flex flex-col gap-2 mt-4">
<div className="flex flex-row gap-2 justify-center items-center">
<h1 className="text-2xl">{username}님, 거래는 어떠셨나요?</h1>
<h1 className="animate-bounce">🏋🏻♂️</h1>
</div>
<h1>당신의 거래 이야기를 들려주세요 🫶 </h1>
</div>
<div className="mb-6 pt-5">
<label className="block text-lg font-semibold mb-2">
이용자에 대한 평가:
</label>
<div className="flex flex-row items-center gap-4 justify-center">
{userRacting.map((option) => (
<label key={option} className="flex items-center space-x-2">
<input
type="radio"
name="userRating"
value={option}
onChange={handleUserRatingChange}
className="h-4 w-4 text-red-500 focus:ring-red-500 border-gray-300"
/>
<span className="text-neutral-300">{option}</span>
</label>
))}
</div>
</div>
{selectedUserRating === '최고에요' || selectedUserRating === '좋아요' ? (
<div className="mb-6">
<label className="block text-xl font-semibold mb-4">
거래하며 좋았던 점을 선택해 주세요.
</label>
<div className="flex flex-col space-y-2">
{goodRacting.map((option) => (
<label key={option} className="flex items-center space-x-2">
<input
type="radio"
name="goodRating"
value={option}
onChange={handleDetailRatingChange}
className="h-4 w-4 text-red-500 focus:ring-red-500 border-gray-300"
/>
<span className="text-neutral-300">{option}</span>
</label>
))}
</div>
</div>
) : selectedUserRating === '별로에요!' ? (
<div className="mb-6">
<label className="block text-xl font-semibold mb-4">
거래하며 불편했던 점을 선택해 주세요.
</label>
<div className="flex flex-col space-y-2 ">
{badRacting.map((option) => (
<label key={option} className="flex items-center space-x-2">
<input
type="radio"
name="badRating"
value={option}
onChange={handleDetailRatingChange}
className="h-4 w-4 text-red-500 focus:ring-red-500 border-gray-300"
/>
<span className="text-neutral-300">{option}</span>
</label>
))}
</div>
</div>
) : null}
<button
className="bg-red-600 w-full rounded-lg h-10"
onClick={handleSubmit}
>
제출
</button>
</div>
);
}
큰 기능이 들어있진 않아서 코드를 간단하게 설명하자면 (살짝 하드코딩한 느낌이 들긴 하지만), 사용자의 리뷰를 하나 선택한다(userRacting)
그리고 그 선택한 결과에 따라서, 추가적인 goodRacting, badRacting을 보여주면서 자세한 리뷰를 선택할 수 있도록 리뷰창을 구현을 해주었다.
여기서 중요하게 살펴봐야할 것은 "리뷰는 상대방에게 보내는 것" 즉, 내가 작성한 리뷰는 상대방의 리뷰에 저장이 되어야 한다.
Model Review
model Review {
  id          Int         @id @default(autoincrement())
  product     Product  @relation(fields: [productId], references: [id])
  productId Int

  user        User         @relation(fields: [userId], references: [id], onDelete: Cascade)
  userId      Int

  userRating      String                  // 이용자에 대한 평가 (최고에요, 좋아요 등)
  detailRating String
  createdAt     DateTime @default(now())
}
Review의 model를 살펴보면, userId를 저장할 수 있어야 했다 즉, userId를 상대방의 userId를 넘겨주면 되지 않을 까?
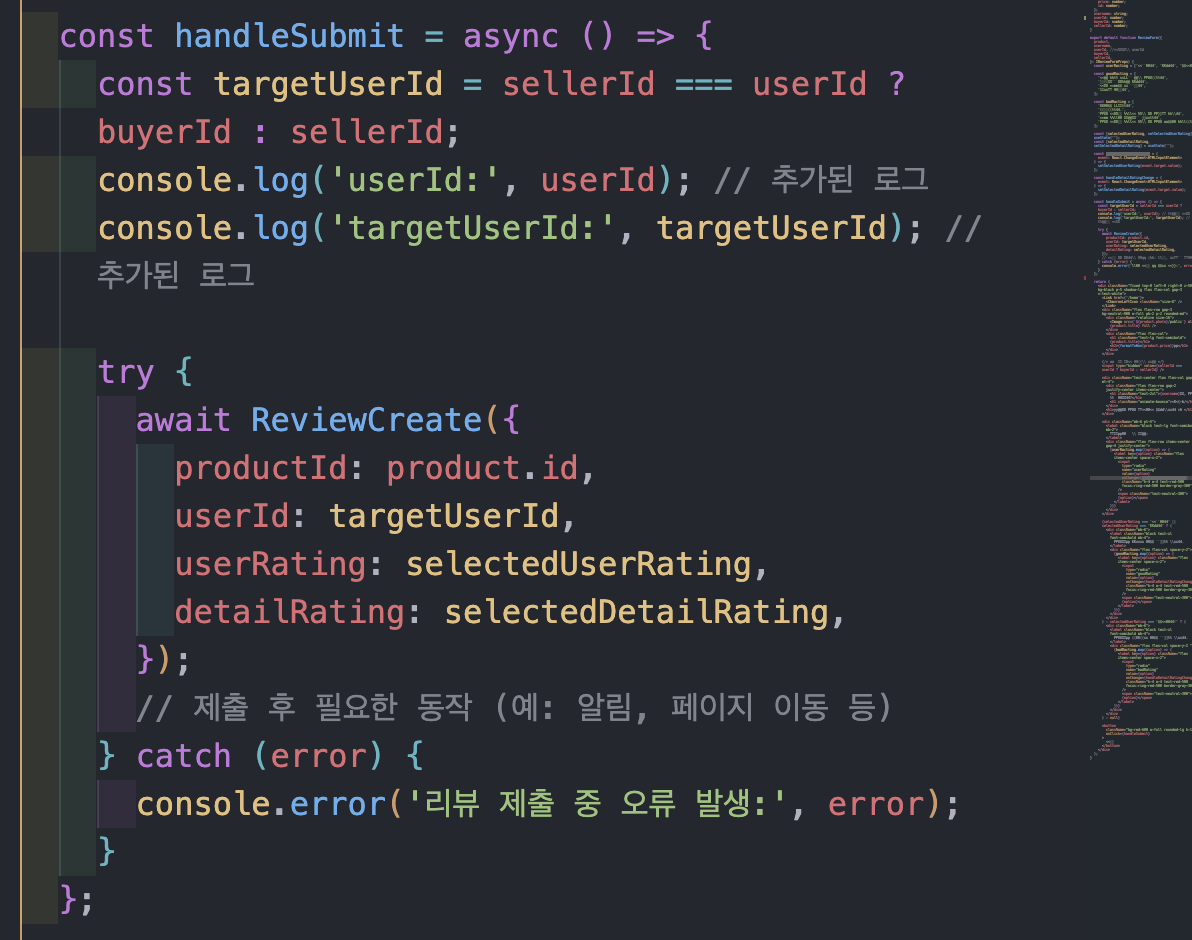
여기서 targetUserId를 통해서 sellerId (판매자와) userId(로그인한 사용자)가 같다면? 반대로 buyerId(구매자)를, 그게 아니라면 sellerId(판매자)를 지정하고,
이를 userId에 넣어줌으로써 내가 아닌 상대방에 대한 리뷰를 작성이 가능하도록 되었다!
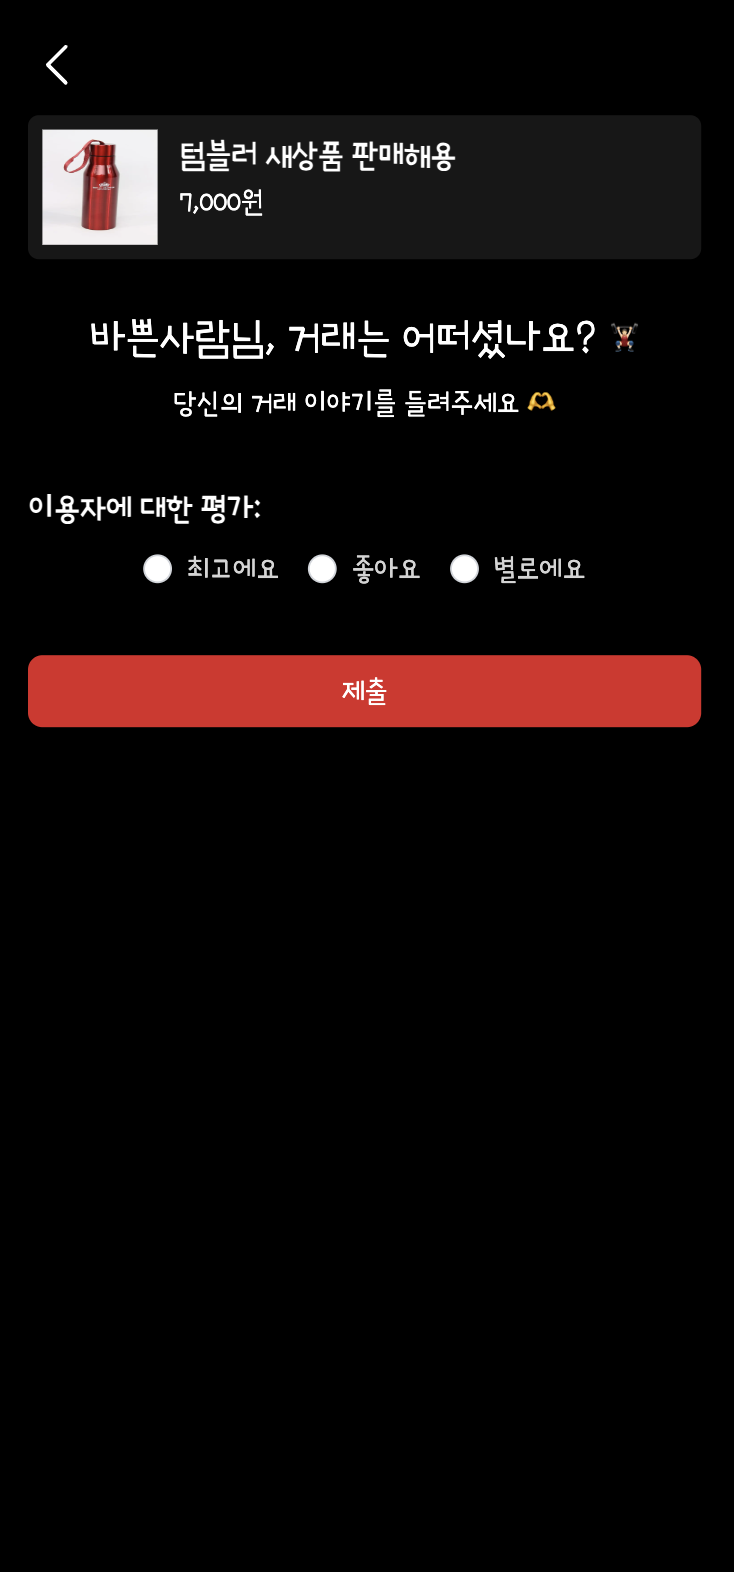 SOLD_OUT 상태가 되면 리뷰 작성이 가능해지고,
 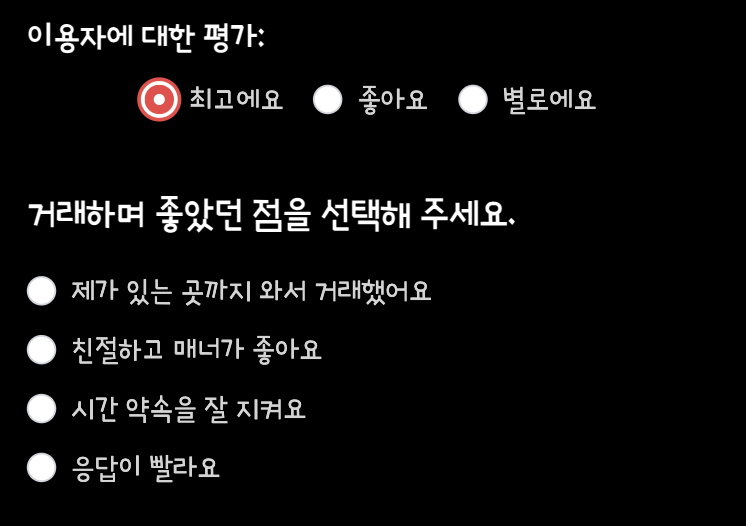 상태를 선택하면 자세한 리뷰 선택이 가능하도록 설정을 해두었다.
내 리뷰를 프로필에서 확인할 수 있도록
그럼 내가 받은 리뷰는 어디서 볼 수 있을 까?
profile 창에 "내가 받은 리뷰 보러가기" 창을 하나 생성해 주었다.
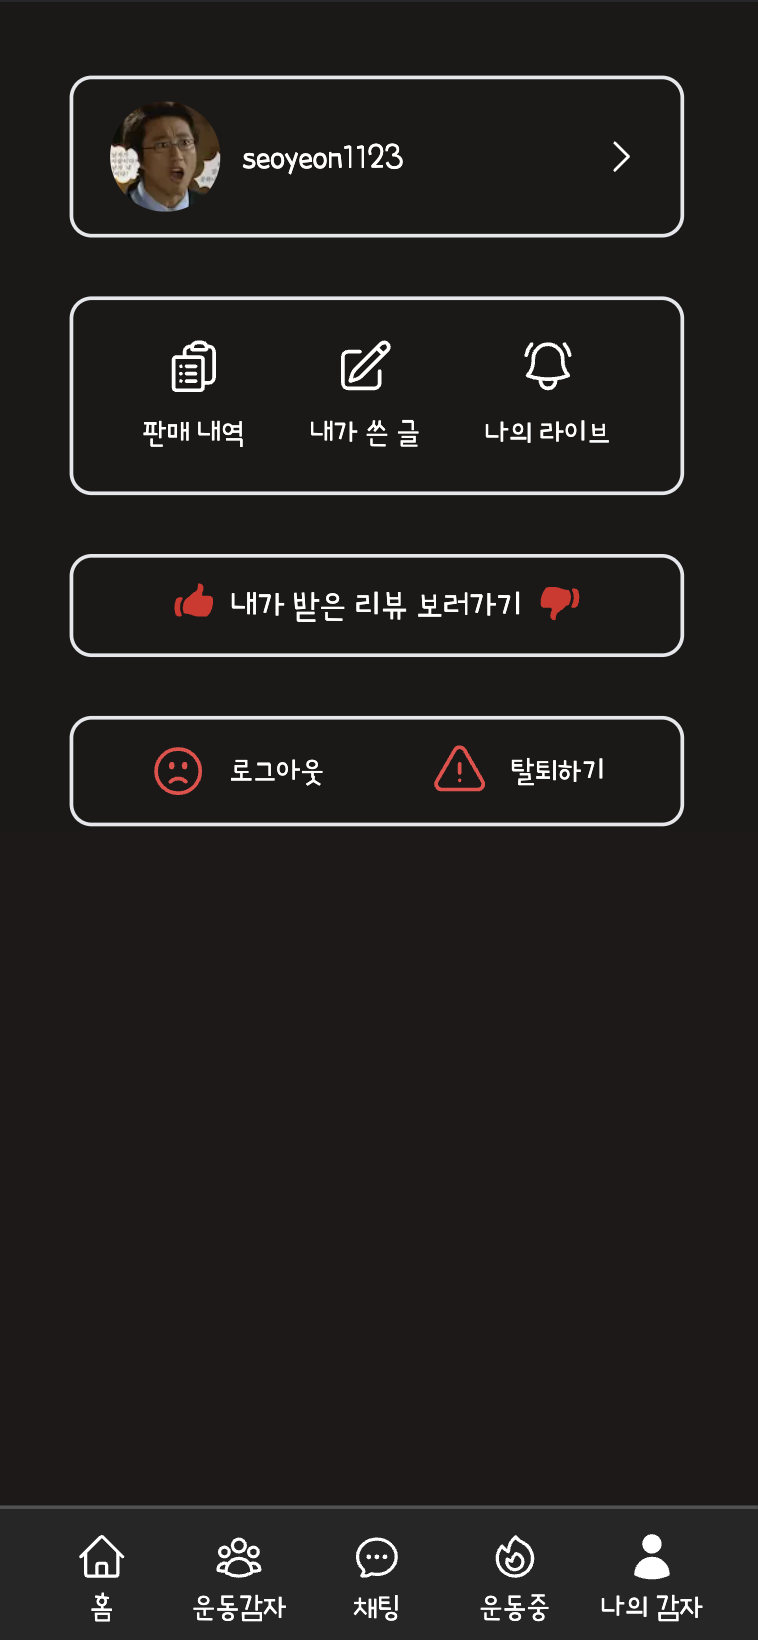
여기서 내가 받은 평점과 후기들을 얼마나 받았는지를 count를 해서 보여줄 수 있도록 간단하게 구현을 해주었다.
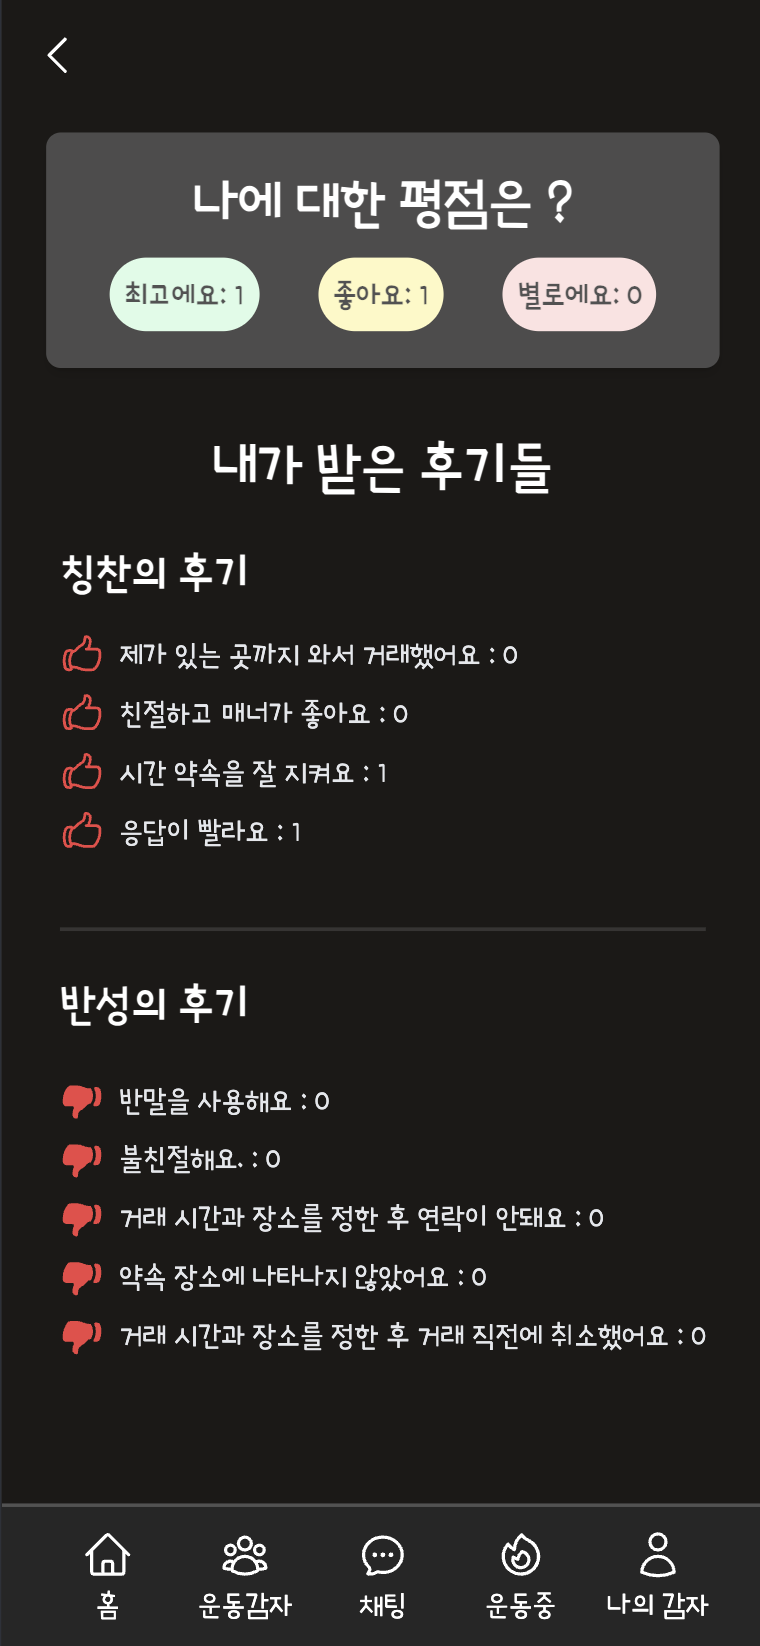
import BeforePage from '@/components/BeforePage';
import db from '@/lib/db';
import getSession from '@/lib/session';
import { HandThumbUpIcon } from '@heroicons/react/24/outline';
import { HandThumbDownIcon } from '@heroicons/react/24/solid';
import { notFound } from 'next/navigation';

async function getReview(userId: number) {
  const reviews = await db.review.findMany({
    where: {
      userId,
    },
    select: {
      id: true,
      userRating: true,
      detailRating: true,
    },
  });
  return reviews;
}

export default async function Review() {
  const user = await getSession();
  if (!user) {
    return notFound();
  }
  const reviews = await getReview(user.id!);
  if (!reviews) {
    return notFound();
  }

  type UserRating = '최고에요' | '좋아요' | '별로에요';
  type GoodRating =
    | '제가 있는 곳까지 와서 거래했어요'
    | '친절하고 매너가 좋아요'
    | '시간 약속을 잘 지켜요'
    | '응답이 빨라요';

  type BadRating =
    | '반말을 사용해요'
    | '불친절해요.'
    | '거래 시간과 장소를 정한 후 연락이 안돼요'
    | '약속 장소에 나타나지 않았어요'
    | '거래 시간과 장소를 정한 후 거래 직전에 취소했어요';

  const userRatingCount: Record<UserRating, number> = {
    최고에요: 0,
    좋아요: 0,
    별로에요: 0,
  };

  const goodRatingCount: Record<GoodRating, number> = {
    '제가 있는 곳까지 와서 거래했어요': 0,
    '친절하고 매너가 좋아요': 0,
    '시간 약속을 잘 지켜요': 0,
    '응답이 빨라요': 0,
  };

  const badRatingCount: Record<BadRating, number> = {
    '반말을 사용해요': 0,
    '불친절해요.': 0,
    '거래 시간과 장소를 정한 후 연락이 안돼요': 0,
    '약속 장소에 나타나지 않았어요': 0,
    '거래 시간과 장소를 정한 후 거래 직전에 취소했어요': 0,
  };

  reviews.forEach((review) => {
    const rating = review.userRating as UserRating;
    if (rating in userRatingCount) {
      userRatingCount[rating]++;
    }
  });

  reviews.forEach((reviews) => {
    const goodRating = reviews.detailRating as GoodRating;
    if (goodRating in goodRatingCount) {
      goodRatingCount[goodRating]++;
    }
  });

  reviews.forEach((reviews) => {
    const badRating = reviews.detailRating as BadRating;
    if (badRating in badRatingCount) {
      badRatingCount[badRating]++;
    }
  });
  return (
    <>
      <div className="flex flex-col p-6 justify-center items-center gap-4">
        <BeforePage />
        <div className="flex flex-col gap-3 p-5 rounded-lg bg-neutral-600 bg-opacity-90 w-full shadow-md">
          <h1 className="text-center text-3xl font-bold text-white">
            나에 대한 평점은 ?
          </h1>
          <div className="flex flex-row justify-center gap-8 font-semibold text-neutral-600">
            <p className="bg-green-100 p-2 rounded-full">
              최고에요: {userRatingCount['최고에요']}
            </p>
            <p className="bg-yellow-100 p-2 rounded-full">
              좋아요: {userRatingCount['좋아요']}
            </p>
            <p className="bg-red-100 p-2 rounded-full">
              별로에요: {userRatingCount['별로에요']}
            </p>
          </div>
        </div>
        <div className="flex flex-col gap-6 text-center mt-5">
          <h1 className="text-3xl font-bold text-white">내가 받은 후기들</h1>
          <div className="flex flex-col gap-4 border-b-2 border-neutral-500 border-opacity-30 pb-10">
            <h2 className="text-2xl text-start font-semibold">칭찬의 후기</h2>
            <div className="flex flex-col gap-2">
              {Object.entries(goodRatingCount).map(([key, count]) => (
                <p
                  key={key}
                  className="flex flex-row items-center gap-2 text-gray-200"
                >
                  <HandThumbUpIcon className="w-6 h-6 text-red-500" />
                  {key} : {count}
                </p>
              ))}
            </div>
          </div>
          <h2 className="text-2xl text-start font-semibold">반성의 후기</h2>
          <div className="flex flex-col gap-2">
            {Object.entries(badRatingCount).map(([key, count]) => (
              <p
                key={key}
                className="flex flex-row items-center gap-2 text-gray-200"
              >
                <HandThumbDownIcon className="w-6 h-6 text-red-500" />
                {key} : {count}
              </p>
            ))}
          </div>
        </div>
      </div>
    </>
  );
}
" 이렇게 보니 찐 하드 코딩 ... "
UserRating, GoodRating, BadRating을 각각 따로 utils에 지정을 해주어야겠다 ...😂
추가적인 구성
채팅방에서 상품 상태 --> "SOLD_OUT"이 되면, 리뷰창 보여주고 --> 리뷰 제출 완료를 해도 다시 채팅방에 들어갈 수 있어야 한다.
(뭐 에를 들면 이전 거래 내역을 확인하고 싶어서 일 수 도 있기 때문에!)
이를 하기 위해서는 -> 상품에 대한 리뷰가 있다면 ? 채팅창을 다시 보여줄 수 있도록 해주는게 된다.
즉, 리뷰가 제출되면 shouldShowReviewPrompt를 false로 설정하여 리뷰 창을 숨기고, 채팅창을 다시 표시하도록
const [shouldShowReviewPrompt, setShouldShowReviewPrompt] = useState(
   product.status === 'SOLD_OUT' && review.length === 0 // 리뷰가 없는 경우에만 보여주기
 );
이 코드는 상품의 상태는 판매 완료과 되었는데, 리뷰의 길이는 0일 때 --> 즉 리뷰가 아직 작성이 안되었을 때
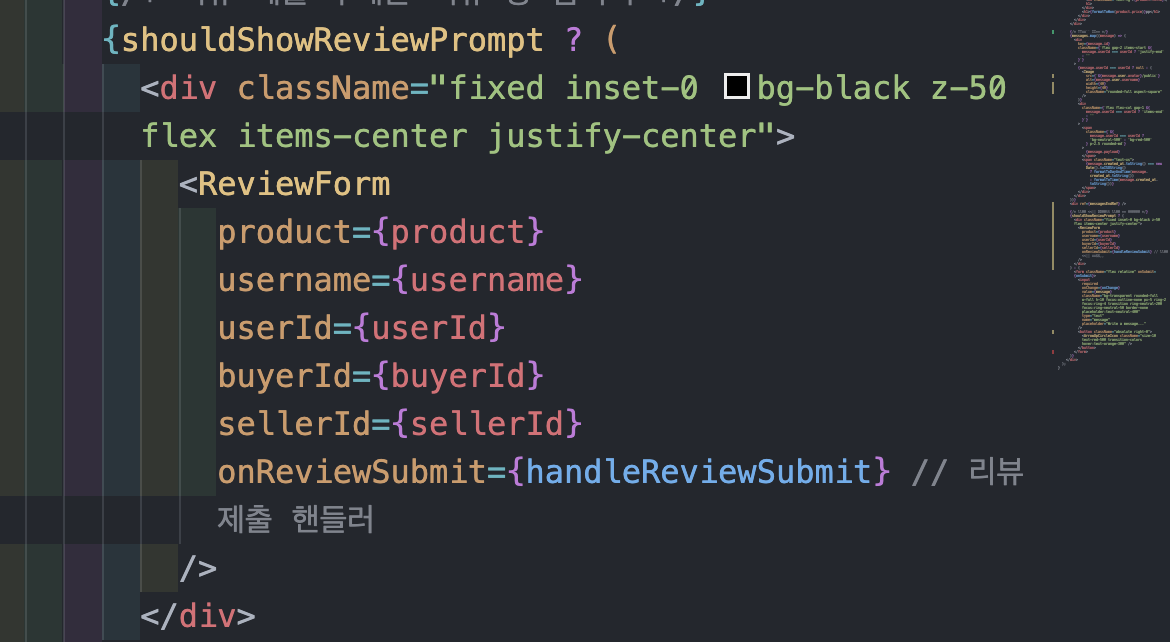
그럴 경우에만 ReviewForm을 보여주게 되고, <ReviewForm/>이 제출이 완료가 되면?
-->
 const handleReviewSubmit = () => {
    setShouldShowReviewPrompt(false);
  };
리뷰창을 다시 숨기도록 해주었다. 이렇게 함으로써 리뷰를 제출하고, 다시 채팅방에 들어가면 채팅방을 확인 및 들어갈 수 있게 되었다!
컨셉 변경
원래 당근마켓 클론 코딩이라 당근마켓을 따라하며 기능을 만들고 했었는데 막상 생각해보니까
클론 코딩이긴 해도 나만의 특별함이 있으면 좋을 것 같다는 생각이 들어서
운동감자 를 만들기로 했다
운동감자란 ?
운동하는 사람들 = 감자
운동하는 감자들이란 의미로 ,
기능은
1 . 운동하는 사람들의 헬스 용품(짐웨어, 기구, 보충제 등등) 판매,
2 . 운동 감자들이 모임(post 작성 -> 다양한 주제로),
3 . 헬스 용품 구매 채팅 ,
4 . 운동감자들의 운동 라이브
이렇게 구현되었다!
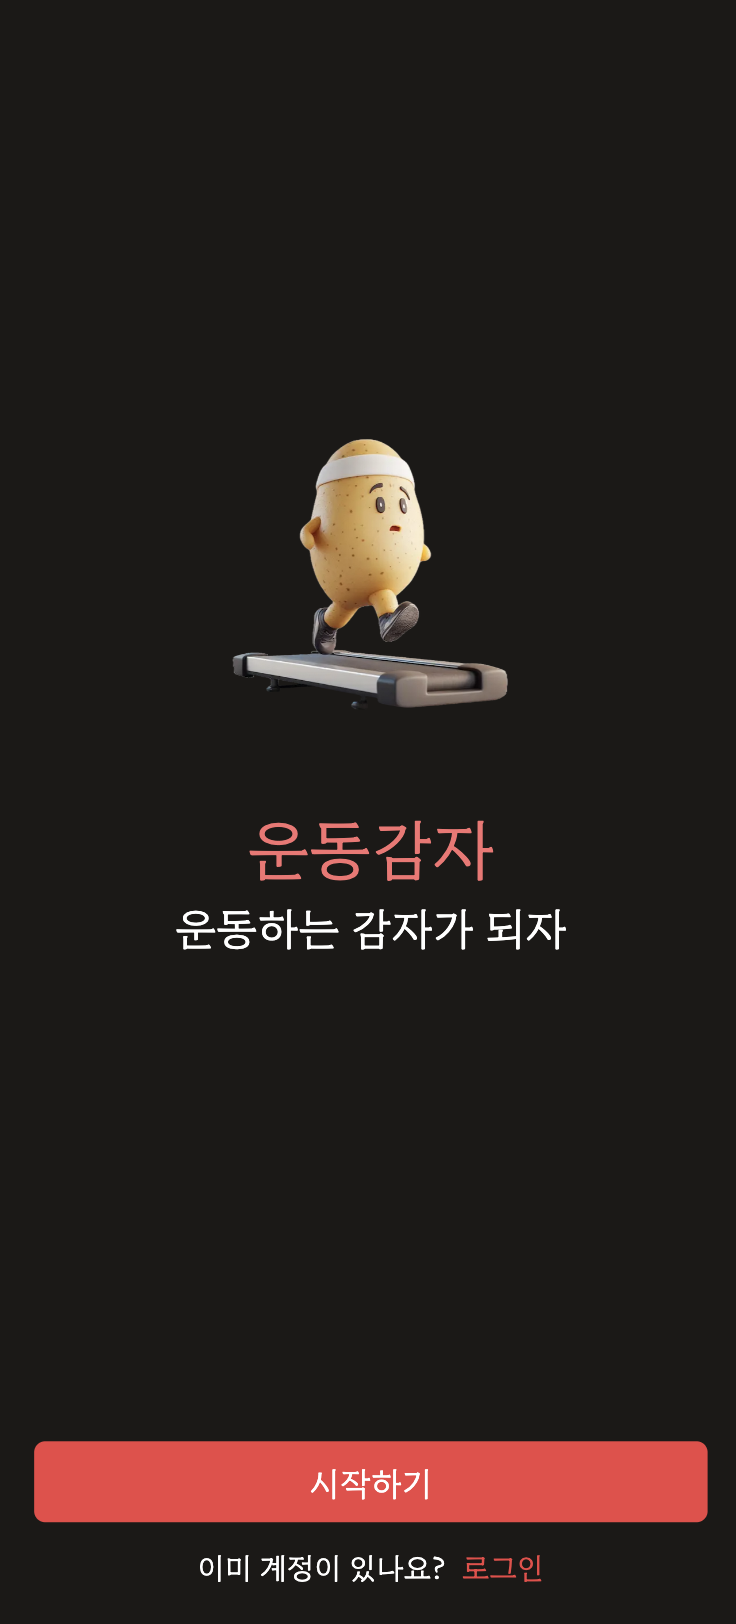 간단한 컨셉만 이야기 하자면
이런 .. 운동하는 감자 -> 운동 감자가 되자 를 의미한다.. 호호