유저 검색
오늘은 검색에 맞게 유저가 나타나도록 구현했다.
//research.tsx
  const { data: session } = useSession();
  const token = session?.user?.name;
로그인한 사용자의 데이터는 현재 useSession 을 이용하여 불러오고 있다. 이것은 next-auth 에서 제공하는 기능이다. 이것이 궁금하다면 전에 작성한 글을 먼저 보고오자.
//research.tsx
  const [researchValue, setResearchValue] = useState("");
  const [researchCards, setResearchCards] = useState([]);
검색창에 입력하는 인풋 값을 관리하는 state와 인풋에 맞게 데이터 요청을 보내고 반환된 배열을 저장할 state를 생성했다.
//Header.tsx
  const onChangeInput = (e: React.ChangeEvent<HTMLInputElement>) => {
    setResearchValue(e.target.value);
  };
그리고 검색 부분 컴포넌트 input에 onChange 함수로 setResearchValue을 수행하고 있다.
//research.tsx
  const Cards = async () => {
    const res = await axios.get(
      `${API_ENDPOINT}user/searchuser/?keyword=${researchValue}`,
      {
        headers: {
          Authorization: `Bearer ${token}`,
          "Content-type": "application/json",
        },
      }
    );
    if (res.data.length > 0) setResearchCards(res.data);
  };

  useEffect(() => {
    Cards();
  }, [researchValue]);
이제 데이터를 요청해야한다. 유저 카드를 검색하는 함수인 Cards를 생성하여, 인풋값을 keyword에 쿼리로 엔트포인트에 포함시켜 get 요청을 보낸다. 만약에 검색한 유저가 하나라도 있다면 setResearchCards을 수행한다. (try catch문으로 에러처리도 해주자.)
그리고 useEffect로 researchValue값이 변동될 때마다 함수를 실행하고 있다.
//Main.tsx
export const Main = ({ researchCards }: Props) => {
  return (
    <MainCont>
      {researchCards.map((arr, i) => {
        return <Card key={`search-card-${i}`} arr={arr} />;
      })}
    </MainCont>
  );
};
받아온 유저 배열로 map을 돌려준다. key값은 필수이다.
유저의 프로필 이미지나 이름 등을 같이 나타내줘야 하므로 배열의 객체 하나하나인 arr도 넘겨준다.
//Card.tsx
export const Card = ({ arr }: Props) => {
  return (
    <UserList>
      <UserItem>
        <Link href={`/${arr.accountname}`}>
          <UserProfile>
            <UserImg src={arr.image} alt="user 이미지" />
            <UserInfo>
              <UserName>{arr.username}</UserName>
              <UserId>{arr.accountname}</UserId>
            </UserInfo>
          </UserProfile>
        </Link>
      </UserItem>
    </UserList>
  );
};
이제 props로 받아온 arr을 이용하여 UI를 설계해주면 완성이다.
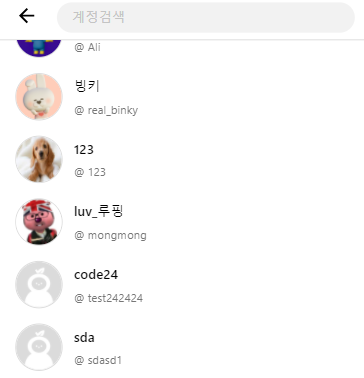
검색에 맞게 유저들이 정상적으로 출력되고 있다.
좋아요 기능

게시글을 보면 좋아요 기능이 존재한다. 먼저 좋아요 버튼을 누른다면 숫자가 카운트 되어야하고, UI에 color도 들어간다.
그리고 로그인한 유저와 연관도 지어야한다. 현호라는 유저가 좋아요를 눌렀다면, 다시 취소할 수 있어야하며 로그아웃 후 다시 로그인해도 좋아요 눌렀던것은 유지가 되야한다.
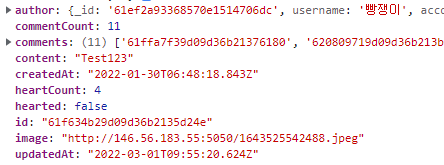
게시글의 데이터를 확인 해보면 heartCount와 hearted가 있다. 요청을 보낼 때, 로그인한 유저의 token을 포함하여 보내주면 그에 맞는 hearted를 반환해주는 것 같다. 기능 구현하기 편리하겠다..!!
//home/Card.tsx
  const onClick = async () => {
    try {
      if (postData.hearted === false) {
        await axios(`${API_ENDPOINT}post/${postData.id}/heart`, {
          method: "post",
          headers: {
            Authorization: `Bearer ${token}`,
            "Content-type": "application/json",
          },
        });
      } else {
        await axios(`${API_ENDPOINT}post/${postData.id}/unheart`, {
          method: "delete",
          headers: {
            Authorization: `Bearer ${token}`,
            "Content-type": "application/json",
          },
        });
      }
    } catch (err) {
      console.error(err);
    }
  };
onClick 이벤트를 주고 있다. 게시글에 하트를 누른적이 없었으면 heart를 추가 하는 요청을 post로 보내고, 과거에 누른적이 있다면 하트를 제거하는 delete 요청을 보낸다.
//home/Card.tsx
//hearted={postData.hearted} 으로 Styled에 props 넘김

const Like = styled.button<Hearted>`
  svg {
    color: ${({ hearted }) => (!hearted ? "#767676" : "red")};
  }
`;
그리고 과거에 하트를 눌렀는지 UI에 나타내기 위해 props로 boolean값을 받아 색을 넣어주고 있다.
이제 정상적으로 동작은 한다. 하지만 하트를 클릭하고 새로고침을 해야 적용되는 문제점을 발견했다.
//home/Card.tsx
  const [hearted, setHearted] = useState(postData.hearted);
  const [heartCount, setHeartCount] = useState(postData.heartCount);
먼저 hearted와 heartCount state를 생성했다.
//home/Card.tsx
  const onClick = async () => {
    try {
      if (hearted === false) {
        await axios(`${API_ENDPOINT}post/${postData.id}/heart`, {
          method: "post",
          headers: {
            Authorization: `Bearer ${token}`,
            "Content-type": "application/json",
          },
        });
        setHeartCount(heartCount + 1);
      } else {
        await axios(`${API_ENDPOINT}post/${postData.id}/unheart`, {
          method: "delete",
          headers: {
            Authorization: `Bearer ${token}`,
            "Content-type": "application/json",
          },
        });
        setHeartCount(heartCount - 1);
      }
    } catch (err) {
      console.error(err);
    }
    setHearted(!hearted);
  };
그리고 onClick 에서 if문의 조건을 state를 이용하여 넣어주었고, 클릭하면 hearted가 반전된다. 또한, 상황에 맞게 카운트도 증가 및 감소한다.

이제 실시간으로 하트의 색이 변하고, 카운트도 변동된다. API가 잘 짜여져 있다 보니 기능을 구현하는것이 수월하다. 슬슬 이 프로젝트도 마무리가 되어간다..
