
스택
- Front
- React Hooks
- TypeScript
- styled-conponents
- Redux
- DB & Deploy
- Firebase
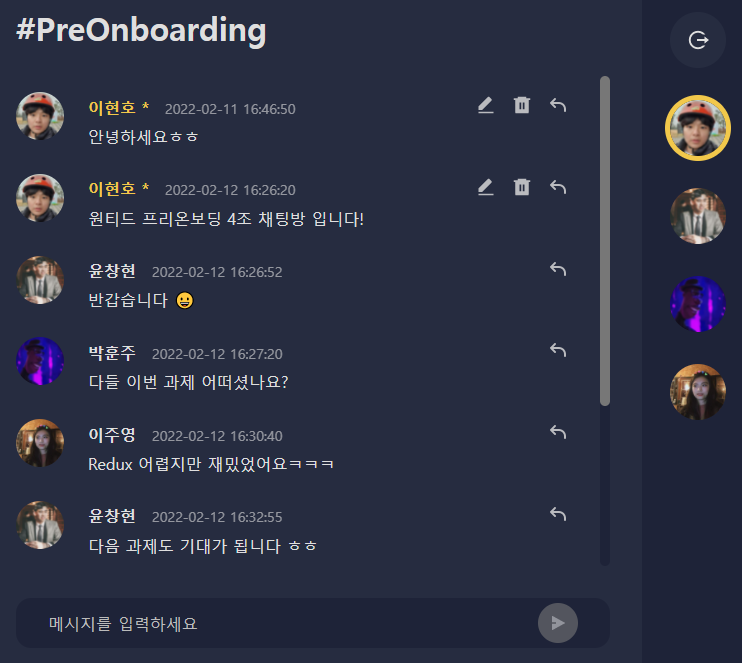
간단한 웹 메신저를 구현하는 과제이다. 우리는 넷플릭스처럼 사용자 4명이 있고, 클릭하면 해당 사용자로 로그인이 되면서 채팅방에 입장하는 형태를 구현하기로 결정했다.
배포 주소 : https://messenger-web-b98e6.web.app/
npx create-react-app [project-name] --template typescript
npm install redux react-redux @types/react-redux
npm i --save firebase
그 후 필요한 패키지들을 설치해주었다.
Firebase
연결 및 스키마 구조
DB를 간단하게 Firebase를 사용하기로 결정했다. 파이어베이스에서 웹개발에서 사용하는 데이터베이스를 생성해주면 API_KEY와 같은 값들을 넘겨준다.
REACT_APP_API_KEY=OOO
REACT_APP_AUTH_DOMAIN=OOO
REACT_APP_PROJECT_ID=OOO
REACT_APP_STORAGE_BUCKET=OOO
REACT_APP_MESSAGINH_SENDER_ID=OOO
REACT_APP_APP_ID=OOO
이 값을 .env 에 넣어주고, firebase.ts 파일에서 사용해주기로 했다.
//server/firebase.ts
const firebaseConfig = {
  apiKey: process.env.REACT_APP_API_KEY,
  authDomain: process.env.REACT_APP_AUTH_DOMAIN,
  projectId: process.env.REACT_APP_PROJECT_ID,
  storageBucket: process.env.REACT_APP_STORAGE_BUCKET,
  messagingSenderId: process.env.REACT_APP_MESSAGINH_SENDER_ID,
  appId: process.env.REACT_APP_APP_ID,
};

initializeApp(firebaseConfig);
export const db = getFirestore();
이제 파이어베이스 DB와 나의 로컬이 연결 되었다.
이제 채팅방에 가져올 데이터를 미리 파이어베이스에 넣어주자. 아직 메세지 입력할 경우 db에 Create하는 기능을 구현하지 않았으므로 직접 넣어줘야한다.
- users
| userId | userName | profileImage |
|---|---|---|
| 1 | 이현호 | https://avatars.githubusercontent.com/LEEHYUNHO2001 |
사용자 데이터에는 id값과 이름이 있고, 프로필 이미지는 깃 허브의 이미지를 가져오고 있다.
- content
| userId | text | date | uuid |
|---|---|---|---|
| 1 | 안녕하세요ㅎㅎ | 1644565610513 | 0e1f321d8c |
누구의 댓글인지 알기 위해 사용자의 id와 댓글 text가 있고, 작성 시간과 content 고유의 uuid 값을 가지고 있다.
데이터 조회
//utils/getUserData.ts
export const getUserData = async (target: string) => {
  const userRef = collection(db, target);
  const querySnapshot = await getDocs(userRef);
  let res: User[] = [];
  querySnapshot.forEach(doc => {
    const data = doc.data();
    data['docId'] = doc.id;
    res.push(data as User);
  });

  return res;
};
사용자의 데이터를 파이어베이스 DB에서 받아오는 함수를 생성했다.

파이어베이스에는 컬렉션, 문서, 필드가 있다. 문서의 id값과 필드를 res에 하나씩 push하여 res 배열에는 모든 user의 데이터가 담기게 된다.
User는 위에서 설명한 사용자 스키마에 대한 타입을 지정해준 것이다. res.push(data as User); 으로 타입 에러를 해결했다.
댓글에 대한 데이터 content도 getContentData.ts에서 이와 유사한 방법으로 가져오고 있다.
Redux
저장소 생성
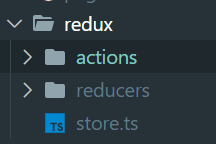
리덕스에는 actions와 reducers 디렉터리가 존재하고, store가 있다.
//redux/store.ts
const store = createStore(rootReducer);
store에서는 rootReducer를 이용한 저장소를 생성한다.
리듀서 생성
//redux/reducers/indtx.ts
export type RootState = ReturnType<typeof rootReducer>;

const rootReducer = combineReducers({
  auth,
  content,
});
rootReducer는 reducer 디렉터리에 존재한다. 사용자와 로그인한 사용자에 관한 리듀서인 auth와 댓글에 대한 리듀서 content를 index.ts에서 하나로 합쳐 rootReducer라는 이름으로 사용하는 것이다.
추후에 useSelector을 사용하여 state를 가져올 때, 타입을 지정하기 위한 RootState도 생성했다.
//redux/reducers/auth.ts
const initialState = { users: [], currentUser: null };

export default function auth(state = initialState, action: any) {
  switch (action.type) {
    case GET_USERS:
      return { ...state, users: action.payload };
    case UPDATE_CURRENT_USER:
      return { ...state, currentUser: action.payload };
    default:
      return state;
  }
}
auth 리듀서이다. state로 initialState를 지정해주고, 특정 action이 들어올 경우 취해줄 행동을 정하면 된다.
액션
//redux/action/getUsers.ts
export const getUsers = (users: User[]) => ({
  type: GET_USERS,
  payload: users,
});
이렇게 action을 생성해주는 것이다. getUsers는 파라미터로 users를 받고, payload에 데이터 users를 넣어 GET_USERS을 리듀서에 보낸다. 리듀서는 case GET_USERS: 을 확인하여 return { ...state, users: action.payload }; 을 해주는 것이다.
Redux로 데이터 조회
//App.tsx
const App = () => {
  const dispatch = useDispatch();
  useEffect(() => {
    const userFetch = async () => {
      const response = await getUserData('users');
      dispatch(getUsers(response));
      return;
    };
    userFetch();
    //...
  }, [dispatch]);

  const {
    auth: { currentUser },
  } = useSelector((state: RootState) => state);
  return <div className="App">{currentUser ? <ChatPage /> : <AuthPage />}</div>;
};
먼저 dispatch에 seDispatch() 를 불러온다. utils의 getUserData 함수를 사용하여 response에 firebase DB에서 받아온 사용자들의 데이터를 넣는다. 그리고 dispatch(getUsers(response)); 으로 getUsers 액션을 response 데이터를 넣어 실행하여, 리듀서에서 user에 이 값을 넣는것이다. 이것이 Redux의 전체적인 동작이다.

마지막으로 currentUser가 존재하는지에 따라 다른 페이지를 보여주고 있는데, 다른 컴포넌트에 사용자를 클릭하면 currentUser에 클릭된 사용자의 정보를 넣어주는 코드가 있을 것이다.
댓글 수정 기능
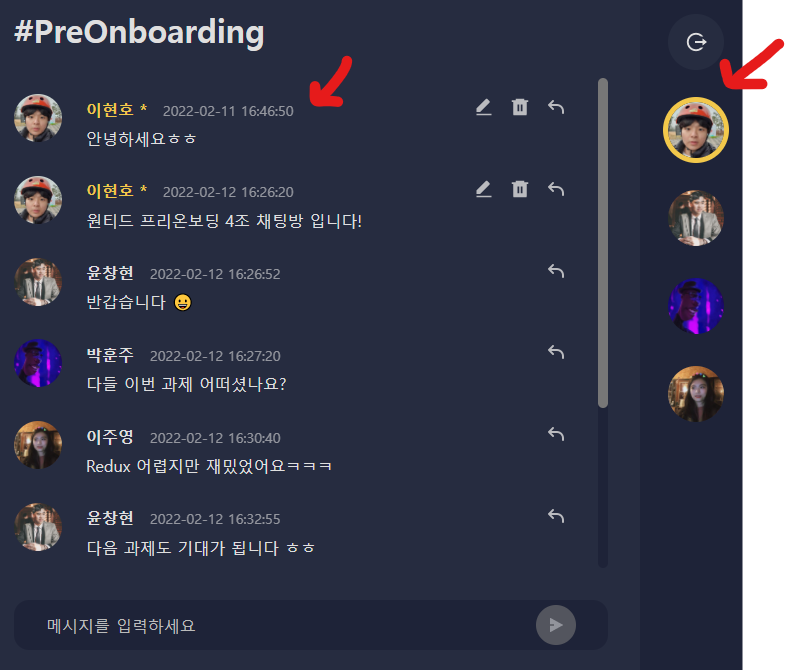
채팅은 날짜로 정렬되어 있고, 로그인한 사용자는 오른쪽에 최상단에 위치하며 border값이 있다. 이제 댓글 수정 기능을 구현해보자.
//utils/editContentData.ts
export const editContentData = async (content: Content, value: string) => {
  const contentRes = await getContentData();
  const newContent = contentRes.filter(data => data.uuid !== content.uuid);

  await updateDoc(doc(db, 'content', 'E1bHxak2ZndSED1tkXdp'), {
    content: [
      ...newContent,
      {
        uuid: content.uuid,
        text: value,
        date: content.date,
        userId: content.userId,
      },
    ],
  });

  return newContent;
};
수정될 글인 content와 수정한 text값 value를 파라미터로 받아온다. 그 후에 파이어베이스 함수인 updateDoc으로 DB에 수정된 text값을 저장하도록 했다. return newContent 을 넣어준 이유는 content state에도 적용해주기 위함이다. 만약에 state에 적용하지 않으면 문제가 생긴다. DB에서는 수정이 되었지만 UI는 새로고침을 해야 변경된 text가 적용되는 것이다. redux로 관리하고 있는 content state에도 적용시켜준다면, 실시간으로 댓글이 변경되는 것처럼 보이게 된다.
//components/chat/ChatMessage.tsx
		//...
                <button onClick={handleUpdate}>
                  <RiEditFill />
                </button>
		//...
        {edit === false ? (
          <Message>{message.text}</Message>
        ) : (
          <EditFormContainer onKeyDown={e => handleKeyDown(e)}>
            <EditInput
              defaultValue={message.text}
              onChange={e => handleChange(e)}
              autoFocus
            ></EditInput>
            <Edit onClick={handleEdit}>
              <RiSendPlane2Fill />
            </Edit>
          </EditFormContainer>
        )}
로그인한 유저의 채팅 메세지에는 수정 삭제 버튼이 생성된다.
//components/chat/ChatMessage.tsx
  const [edit, setEdit] = useState(false);
  const [text, setText] = useState(message.text);

  const handleUpdate = () => {
    setEdit(!edit);
  };
수정 버튼은 handleUpdate 함수를 onClick 이벤트로 사용하고 있다. 수정 버튼을 다시 한번 누르면 수정하는 textarea는 다시 사라질 것이다. 수정버튼을 한번만 누르면 edit에 따라 채팅 메세지를 수정할 수 있는 form 을 띄운다.
textarea 에 기본 값으로 입력되어 있는 값을 주기 위해 defaultValue={message.text} 속성을 부여하고, text는 message.text로 초기화하고 있다.
//components/chat/ChatMessage.tsx
  const handleEdit = async () => {
    setEdit(!edit);
    const newContent = await editContentData(message, text);
    const editContents = [
      ...newContent,
      {
        uuid: message.uuid,
        text: text,
        date: message.date,
        userId: message.userId,
      },
    ];

    dispatch(editContent(editContents));
  };
체크 버튼을 클릭하면 textarea를 닫고, editContentData로 변경된 text 내용에 따라 db를 수정한다. 그 후 return 받은 newContent을 이용하여 content state를 업데이트하기 위해 editContents을 생성하고, editContent 액션을 수행한다. 그러면 리듀서로 가서 content에 데이터 값을 넣어 수정할 것이다.
//components/chat/ChatMessage.tsx
  const handleKeyDown = (e: React.KeyboardEvent<HTMLFormElement>) => {
    if (e.key === 'Enter' && !e.shiftKey) {
      e.preventDefault();
      handleEdit();
      return;
    }
  };
그리고 엔터를 입력했을 경우에도 메세지와 db가 수정되도록 handleEdit() 을 수행하고, Shift + 엔터일 경우에는 다음 줄로 넘어가서 text를 계속 입력할 수 있도록 해주었다.
Firebase 배포
npm install -g firebase-toolsfirebase로 배포하기 위한 툴을 설치하자.
Firebase use --add 만약 Project Setup 이 자동으로 다른 파일을 지정하고 있다면 위의 명령어로 원하는 프로젝트를 선택하자.
firebase init호스팅을 위한 시작 명령어이다.

첫 번째 Hosting 목록을 선택해준다.(스페이스바 -> 엔터)

내 경로는 이와 같다는 것을 알고있자.
- What do you want to use as your public directory?
배포 진행할 디렉터리는 Enter를 입력하면 기본적으로 public 이지만, 우리는 CRA를 사용하고 있으므로 cmder/projects/wanted/messenger-web/build를 입력한다.
- Configure as a single-page app (rewrite all urls to /index.html)
build 안에 index.html을 덮어쓰지 않을 것이므로 N을 입력했다.
- Set up automatic builds and deploys with GitHub?
깃허브와 연동해보기 위해 y를 눌렀다. 깃허브 로그인 페이지가 나타나 로그인 했다. 그리고 현재 프로젝트는 github organization 에서 진행하고 있으므로, 해당 organization을 grant 해주었다.
- For which GitHub repository would you like to set up a GitHub workflow? (format: user/repository)
레파지토리 이름을 넣는공간이다. Free-Onboarding-team4/messenger-web 을 넣어주었다.
- Set up the workflow to run a build script before every deploy?
배포 진행 시 스크립트 사용 여부이다. y를 입력했다. (React 빌드 처리)
- What script should be run before every deploy?
npm i && npm audit fix && npm run build
스크립트를 넣어주었다.
- Set up automatic deployment to your site's live channel when a PR is merged?
배포 트리거 merge 여부는 Y 입력했다.
- What is the name of the GitHub branch associated with your site's live channel?
배포시킬 브랜치이다. 엔터로 기본값을 넣어주었다.

뭔가 성공했다고 나타난다.
npm run build
firebase deploy
빌드를 하고 firebase 배포를 진행하자.
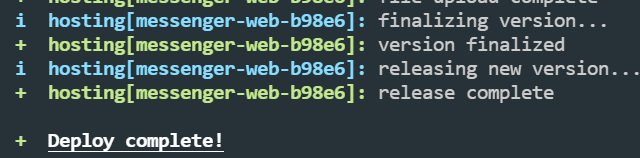
성공했다고 나타났다.
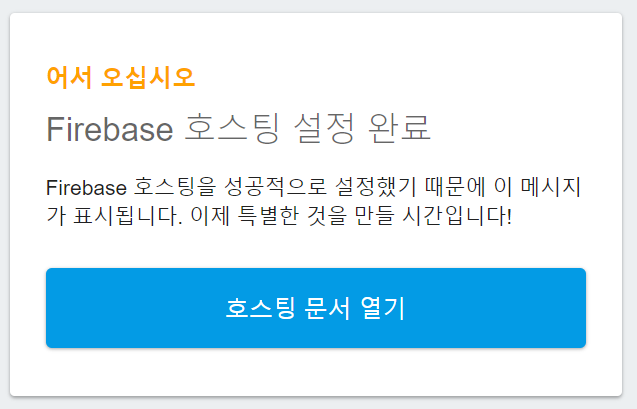
반환해주는 Hosting URL을 들어가면 정상적으로 배포된 페이지가 나타난다. 만약에 위와 같은 화면이 나타난다면 public의 index.html과 build의 index.html이 다를 수 있다. 이것을 같게 해준 후에 다시 배포해주자. 참고 사이트

정상적으로 배포된 것을 볼 수 있다.


진짜 대단하세요! 너무나 고생 많으셨습니다!^^