
이전 포스트에서 navigation 구조를 만들기 위해 nav_graph에서 두개의 fragment를 생성하여 데이터 바인딩을 해주었고 main에 homefragment를 넣어주어 홈으로 실행되게끔 하였다.
📌fragment 전환
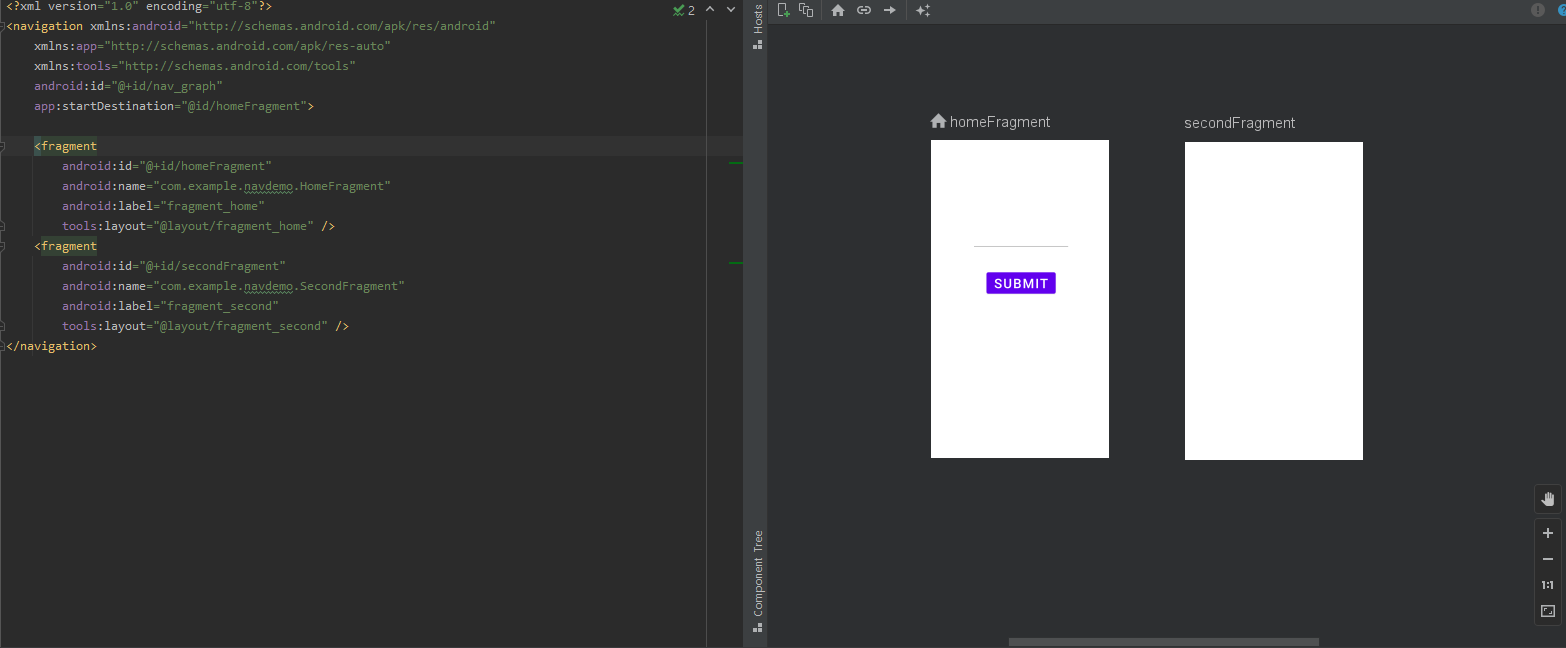
우선 nav_graph.xml의 디자인 모드에서 프래그먼트 좌측의 점을 드래그 시켜 전환할 프래그먼트로 옮긴다.
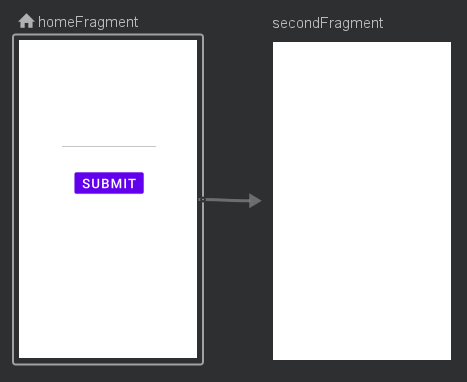
        <action
            android:id="@+id/action_homeFragment_to_secondFragment"
            app:destination="@id/secondFragment" />
위와 같이 코드에 action 태그가 id와 함께 생긴것을 볼 수 있다.
이제 homeFragment로 넘어가
binding.button.setOnClickListener{
            it.findNavController().navigate(R.id.action_homeFragment_to_secondFragment)
        }
버튼에 클릭리스너를 통해 navigate 함수로 화면전환 action을 실행시킨다.
여기서 it은 setOnclick리스너를 부른 view를 말한다.
📌bundle 을 통해 fragment로 데이터 전송
homeFragment.kt
binding.button.setOnClickListener{

            val bundle = bundleOf("user_input" to binding.editText.text.toString())
            it.findNavController().navigate(R.id.action_homeFragment_to_secondFragment, bundle)
        }
위의 onClickListener를 좀 더 수정한 코드이다. bundleOf 함수를 통해 데이터 번들을 만드는데 여기에 키를 원하는대로 작성해준다.
위에서는 user_input으로 하였고. editText의 문자열을 가져왔다.
그리고 navigate의 마지막 인자로 bundle을 넣어 fragment로 보낸다
SecondFragment.kt
var input = requireArguments().getString("user_input")
        binding.textView.text = input.toString()
받는 fragment에서는 이렇게 키를 통해 문자열을 가져온다.
🔑조건부로 데이터 보내기
binding.button.setOnClickListener{
            if(!TextUtils.isEmpty(binding.editText.text.toString())){
                val bundle = bundleOf("user_input" to binding.editText.text.toString())
                it.findNavController().navigate(R.id.action_homeFragment_to_secondFragment, bundle)
            }else{
                Toast.makeText(activity,"Please insert your name",Toast.LENGTH_LONG).show()
            }


        }
좀 더 분기를 세분화하기 위하여 editText가 입력되었을 때만 프래그먼트를 전환하는 것으로 하였다.
비어있는 text를 보낼 경우, 토스트 메시지를 띄운다,
📌 safe Args 통한 데이터 전달
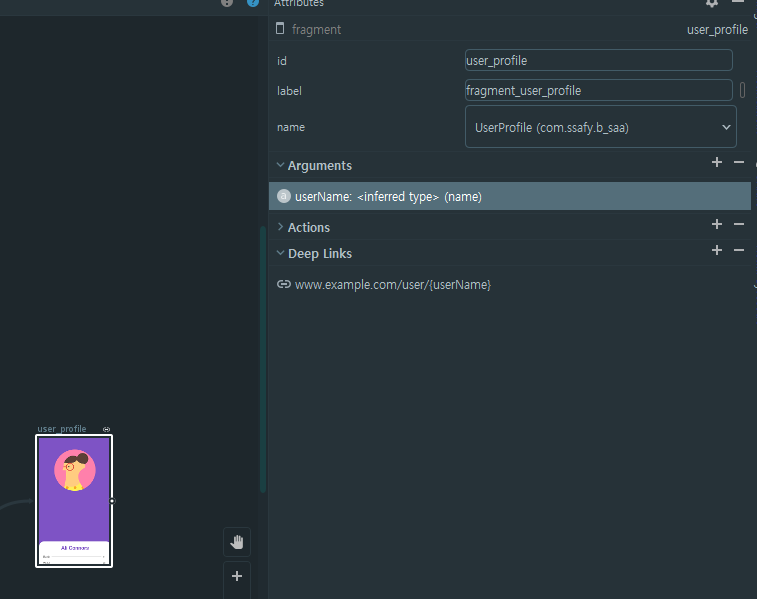
데이터를 받는 fragment에서 argument를 지정해준다. 타입을 명시하지 않으면 inferred type으로 타입을 알아서 해석해서 받는다.
코드 상으로는 아래와 같다.
<fragment
        android:id="@+id/user_profile"
        android:name="com.ssafy.b_saa.UserProfile"
        android:label="fragment_user_profile"
        tools:layout="@layout/fragment_user_profile">
        <argument
            android:name="userName"
            android:defaultValue="name" />
        <deepLink app:uri="www.example.com/user/{userName}" />
    </fragment>
보내는 fragment
            val action = LeaderboardDirections.actionLeaderboardToUserProfile(myDataset[position])
            Navigation.findNavController(holder.item).navigate(action)
받는 fragment
val args : UserProfileArgs by navArgs()
val name = arguments?.getString("userName") ?: "Ali Connors"
내가 받을 argument 클래스인 UserProfileArgs클래스가 스스로 생성된다.
📌 백스택 관리
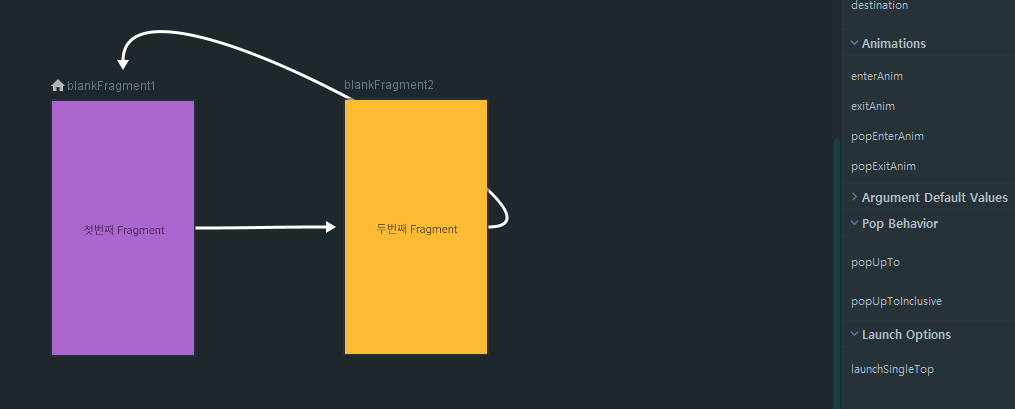
디자인 모드에서 내비게이션 액션을 누르면 popup behavior를 설정할 수 있다.
PopupTo
뒤로가기를 누르면 popupto에 설정한 화면이 나올때까지 pop하고 그 설정한 화면을 백스택에 남긴다.
위 화면에서 frag2 -> frag1 의 popupto를 frag1로 해보자.
frag1 -> frag2 를 한다음
뒤로 가기를 누르면 frag1으로 가면서 백스택에 frag1를 남기므로
현재 남은 스택은 frag1 -> frag1 이다.
이렇게 중복된 frag가 나오는 것을 방지하려면 popuptoinclusive를 설정해준다.
PopupToInclusive
popUpToInclusive를 true로 적용하면 뒤로 가기 하면서 만난 frag1 역시 같이 스택에 쌓이지 않도록 한다.