sudo apt update -y
sudo apt upgrade -y
sudo apt autoremove -y
sudo apt install nginx -y
nginx -h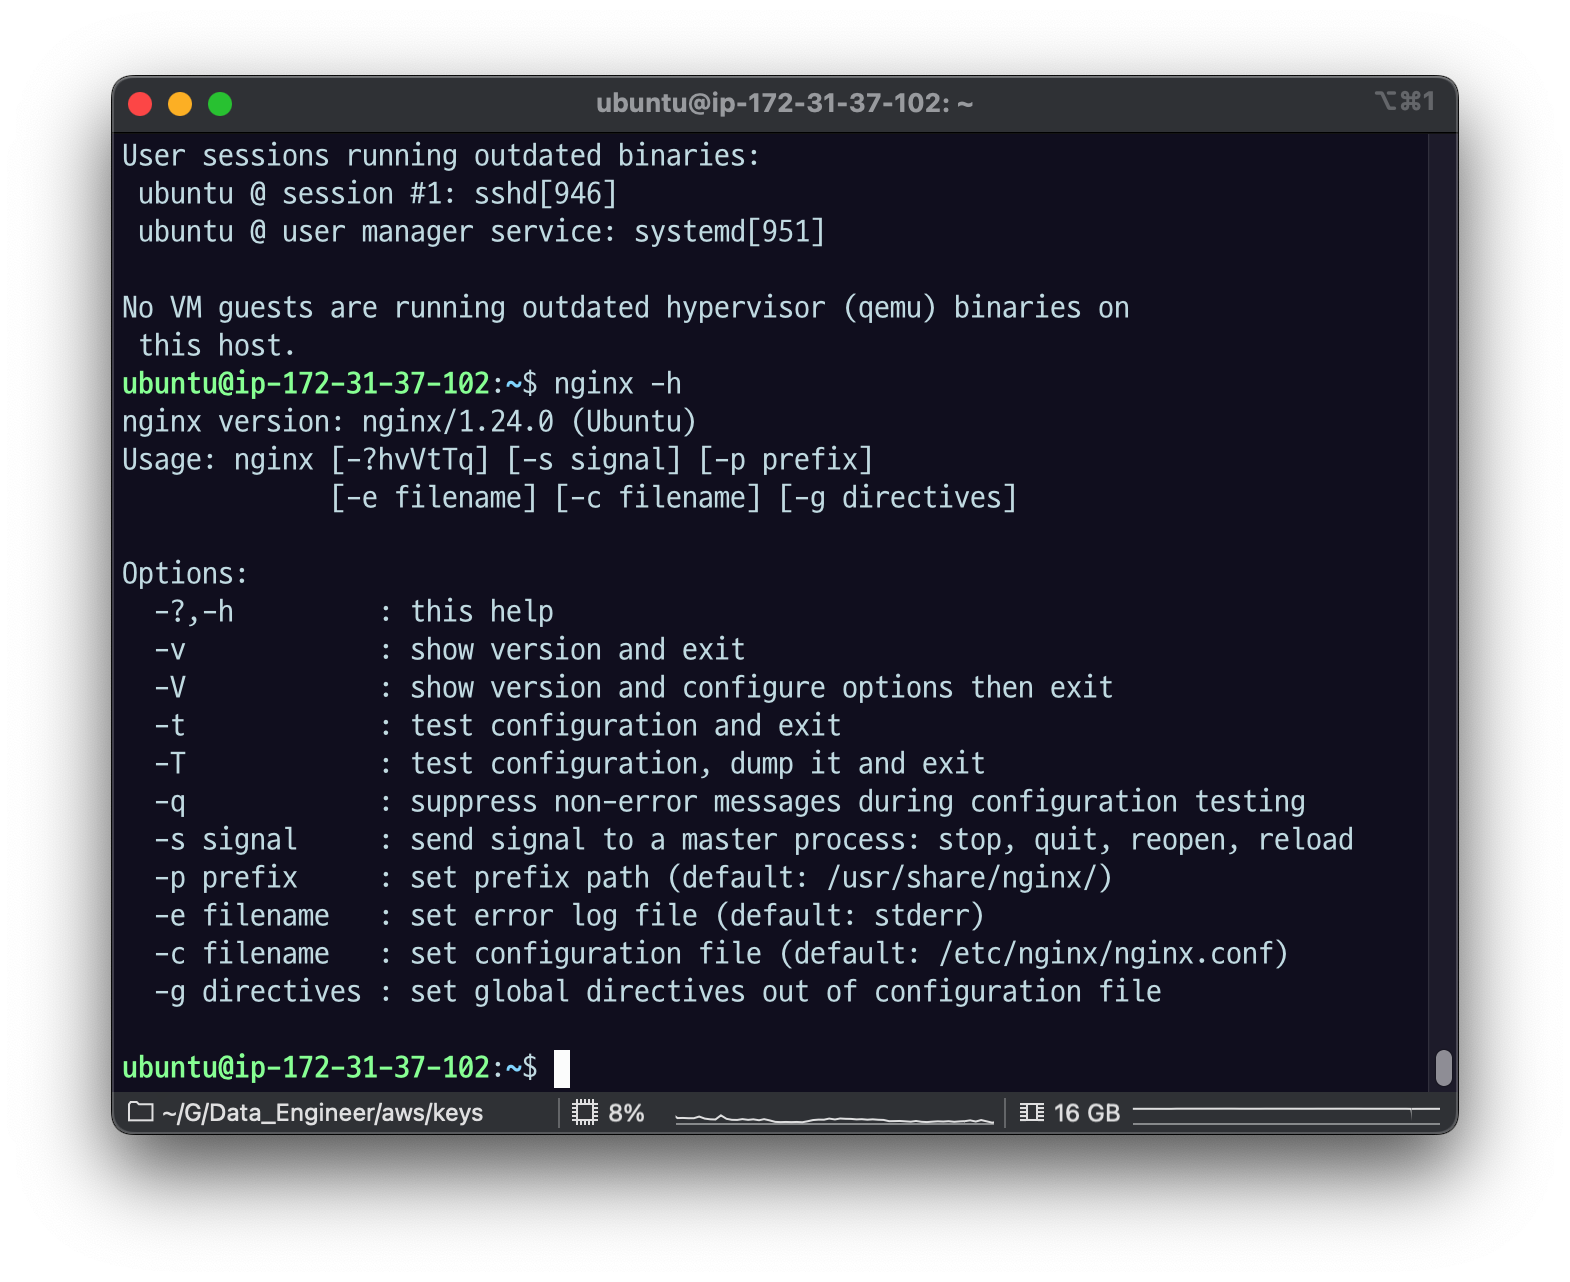
nginx/1.24.0 버전
sudo nginx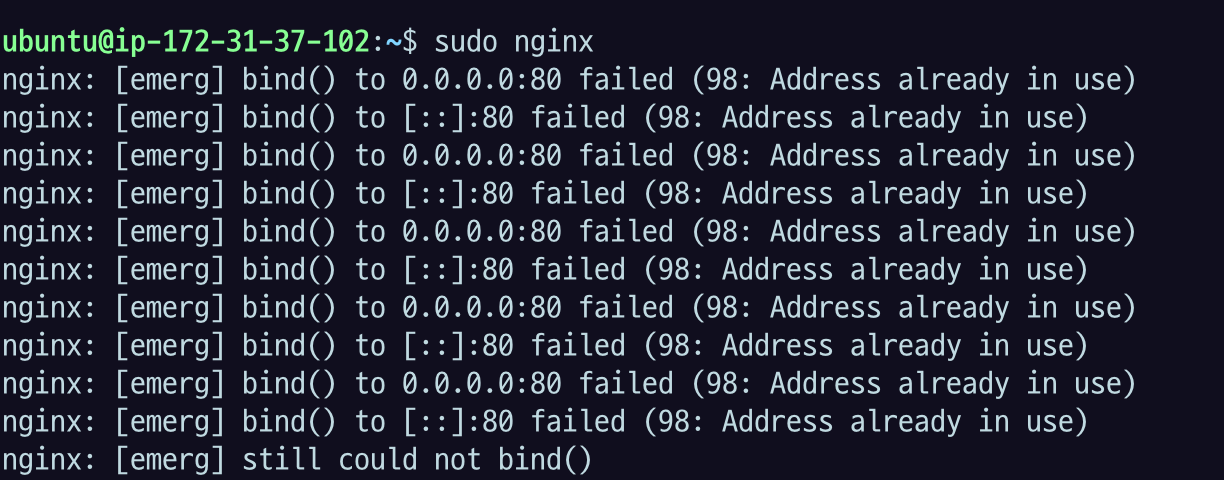
다음과 같은 에러 메세지가 나온다면, 해당 포트(default 80)을 사용중이다
nginx: [emerg] bind() to 0.0.0.0:80 failed (98: Unknown error)
nginx: [emerg] bind() to [::]:80 failed (98: Unknown error)
다음 명령어로 포트를 어떤 프로세스가 사용하고 있는지 확인한다
sudo ss -tulpn | grep LISTEN
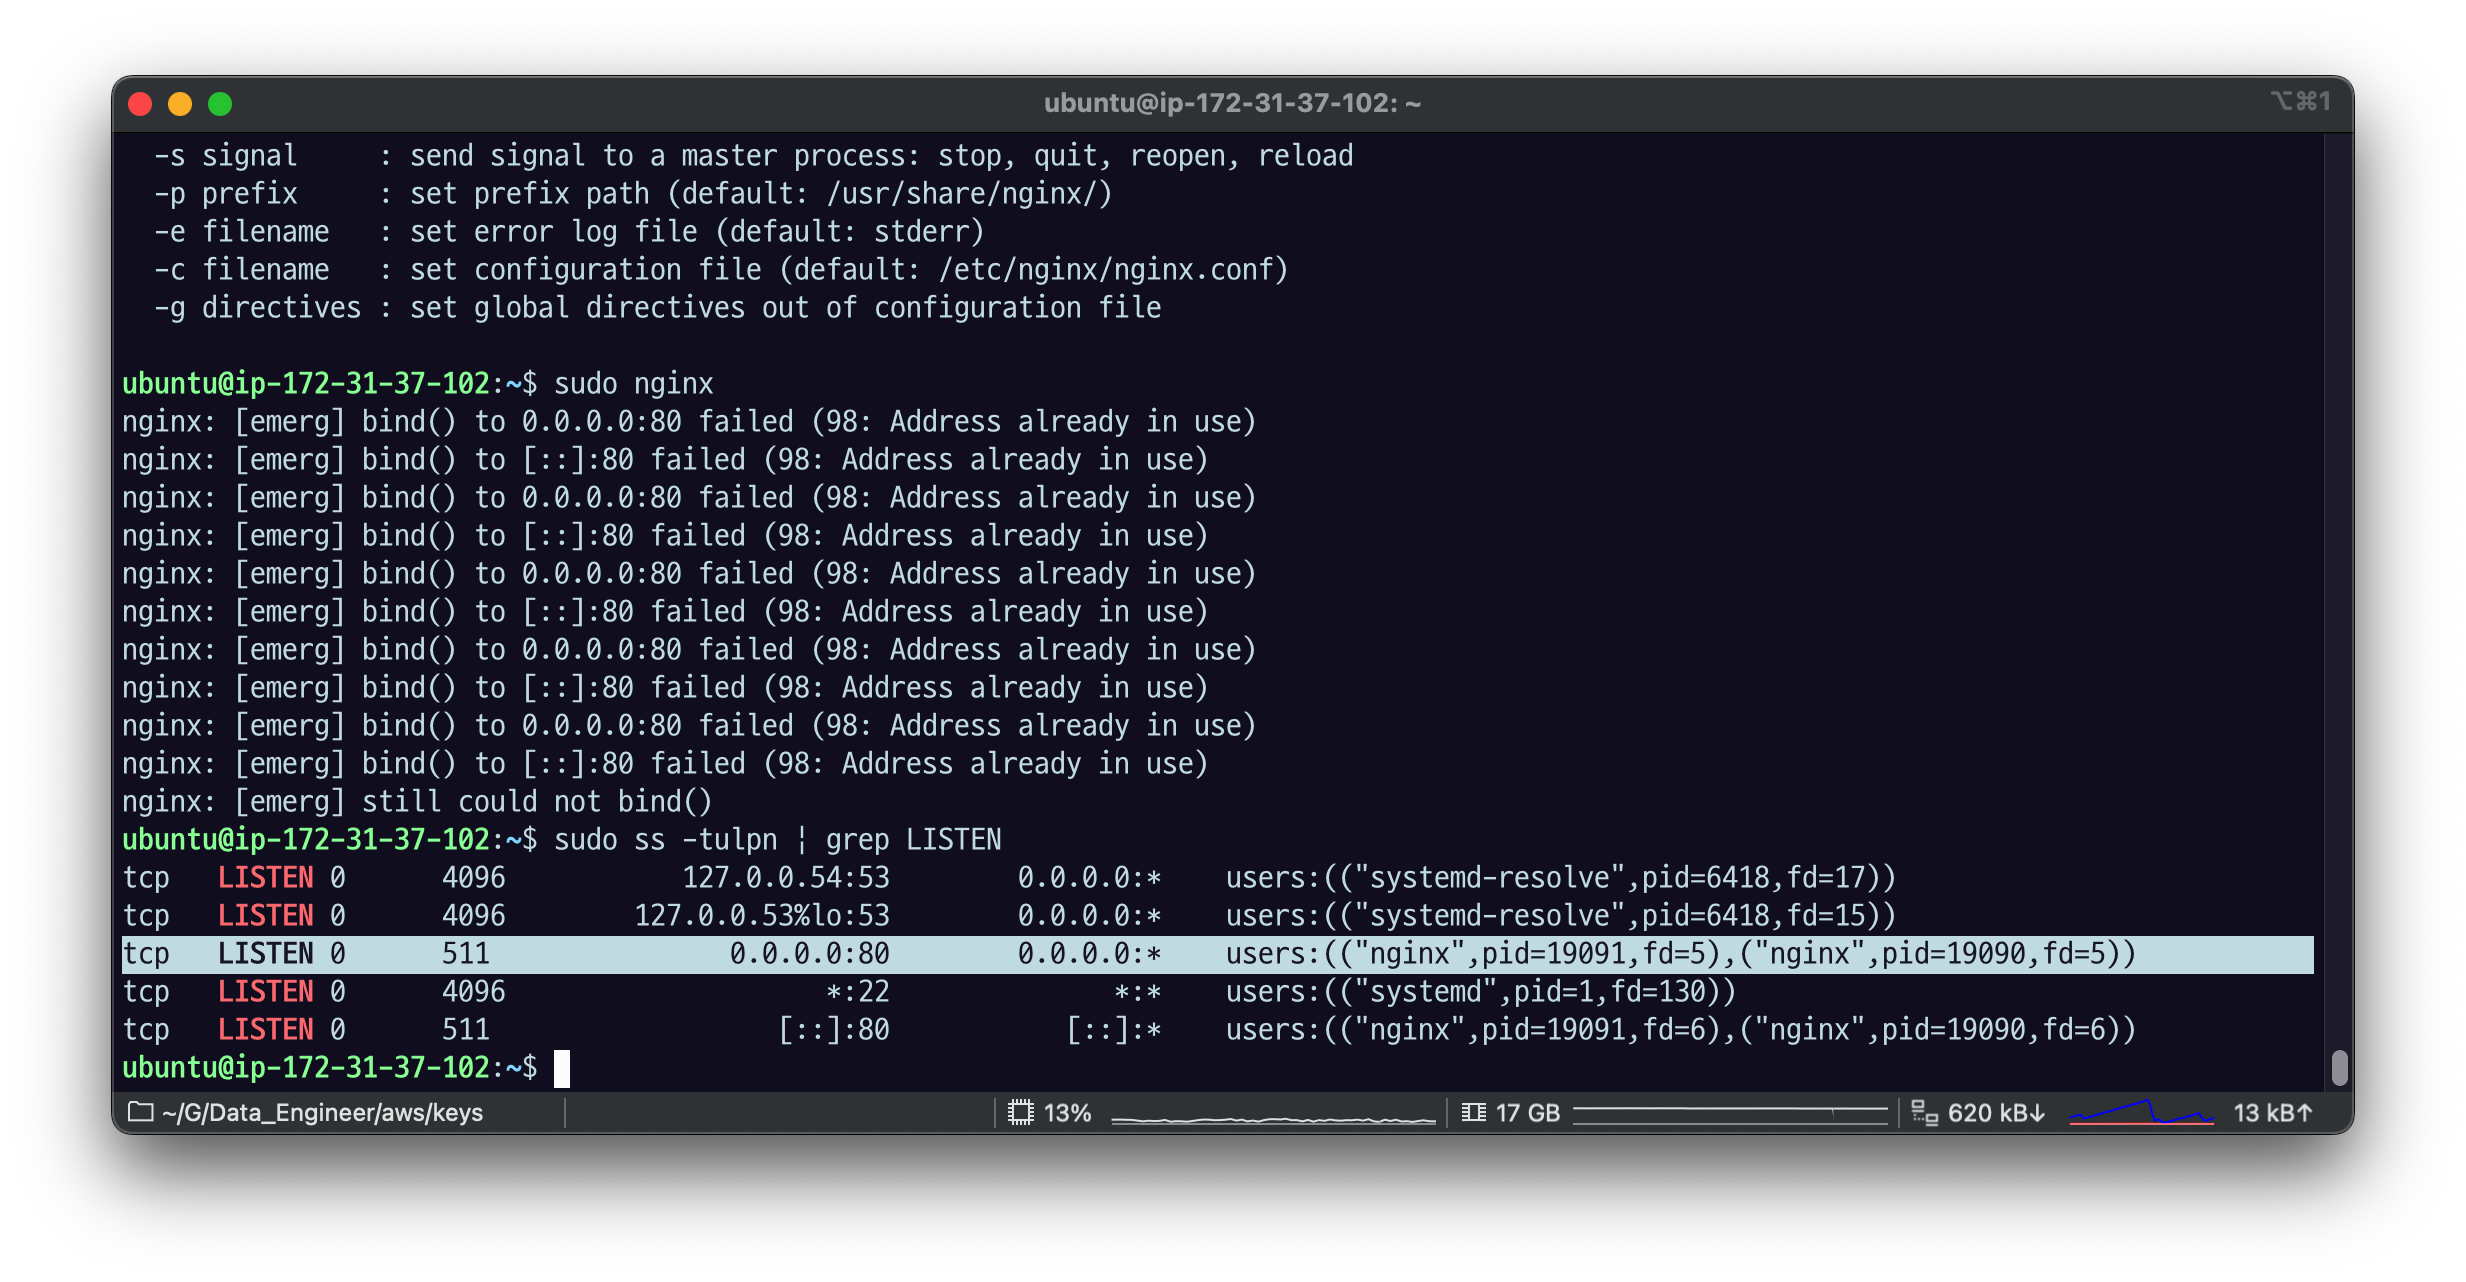
kill -9 19091이런 식으로 PID로 죽여도 되지만
nginx를 활용해 정지시키자.
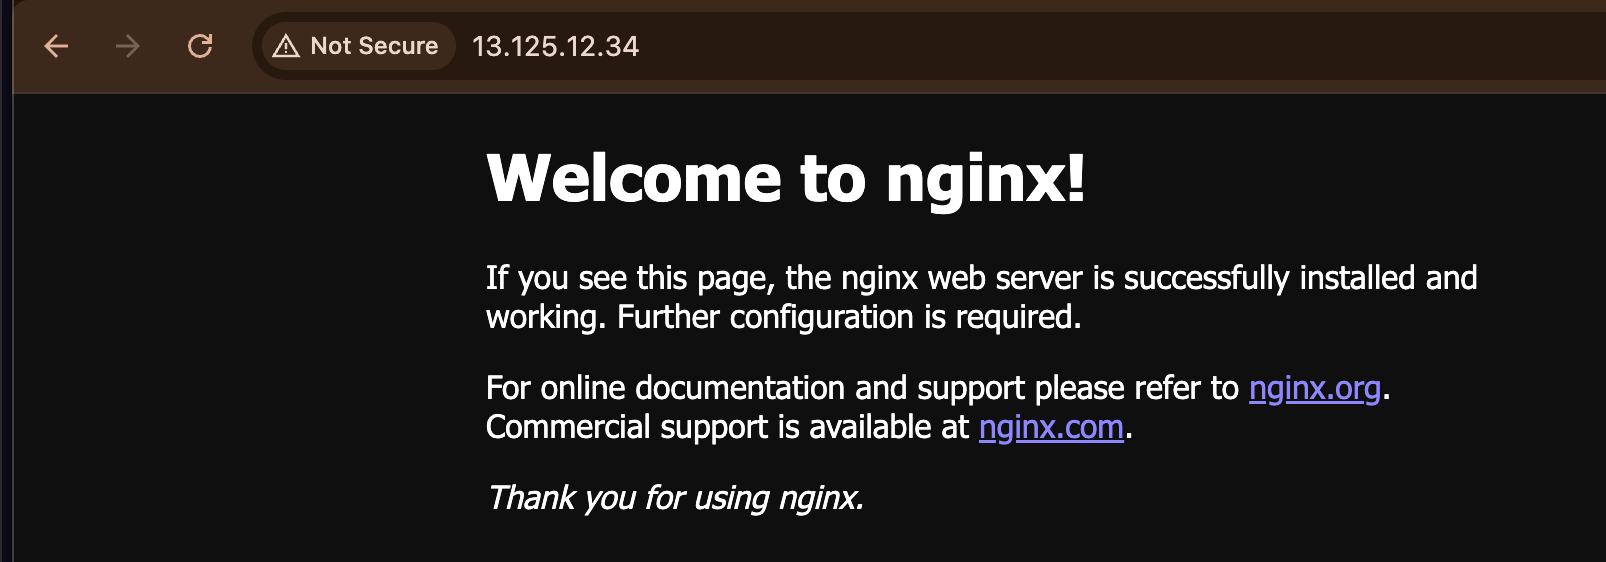
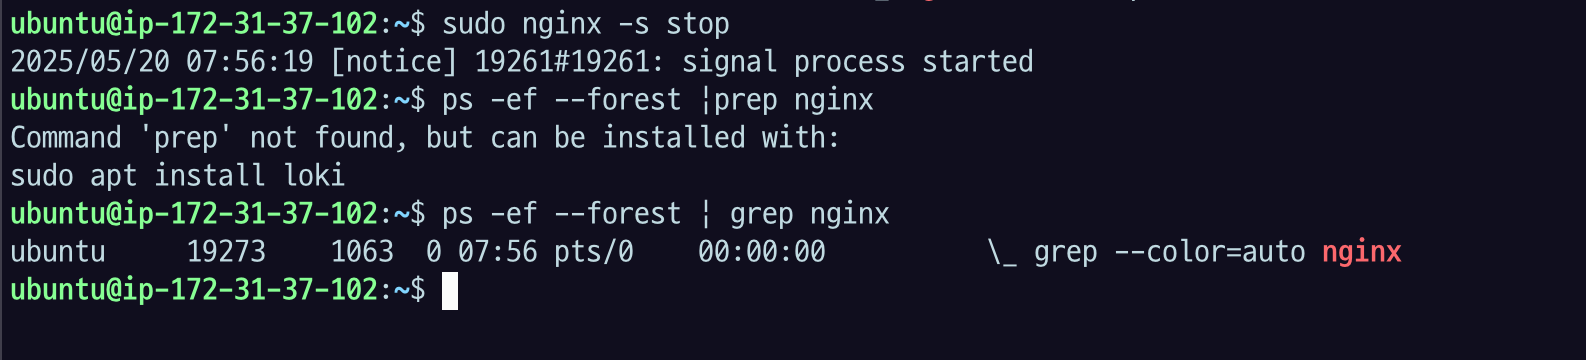
sudo nginx -s stop이 서버의 주소는 80번 포트로 열었다. 아무런 설정을 하지 않으면 기본적으로 80번 포트를 열 것. EC2서버의 퍼블릭 주소를 카피한 다음에 그 주소로 요청을 하면 된다.
브라우저에서 80번 포트 접속이 가능한지 확인해보자.

Process State 확인
ps -ax | grep nginx

ps로 나온 결과 헷갈린다면
헷갈린다면 man ps 로 들어가서 process state 검색해서 보면 될 듯?

여기서 state code 확인 해보자
또 다른 방법 (PID와 부모자식 관계 확인)
ps -ef --forest | grep nginx

nginx master process는 root에 의해 실행됐고,
worker process는 www-data 라는 유저에 의해 실행됐는데 pid를 보면 부모와 자식 관계인 것을 알 수 있다.
이렇게 프로세스 상태 확인해봤고
상태를 변경할 수도 있다.
sudo nginx -s $signalstop/quit/reload/reopen 등

아래처럼 운영체제 명령으로 설치를 했다면 /etc 밑에 nginx 라는 디렉토리가 생겼을 것.
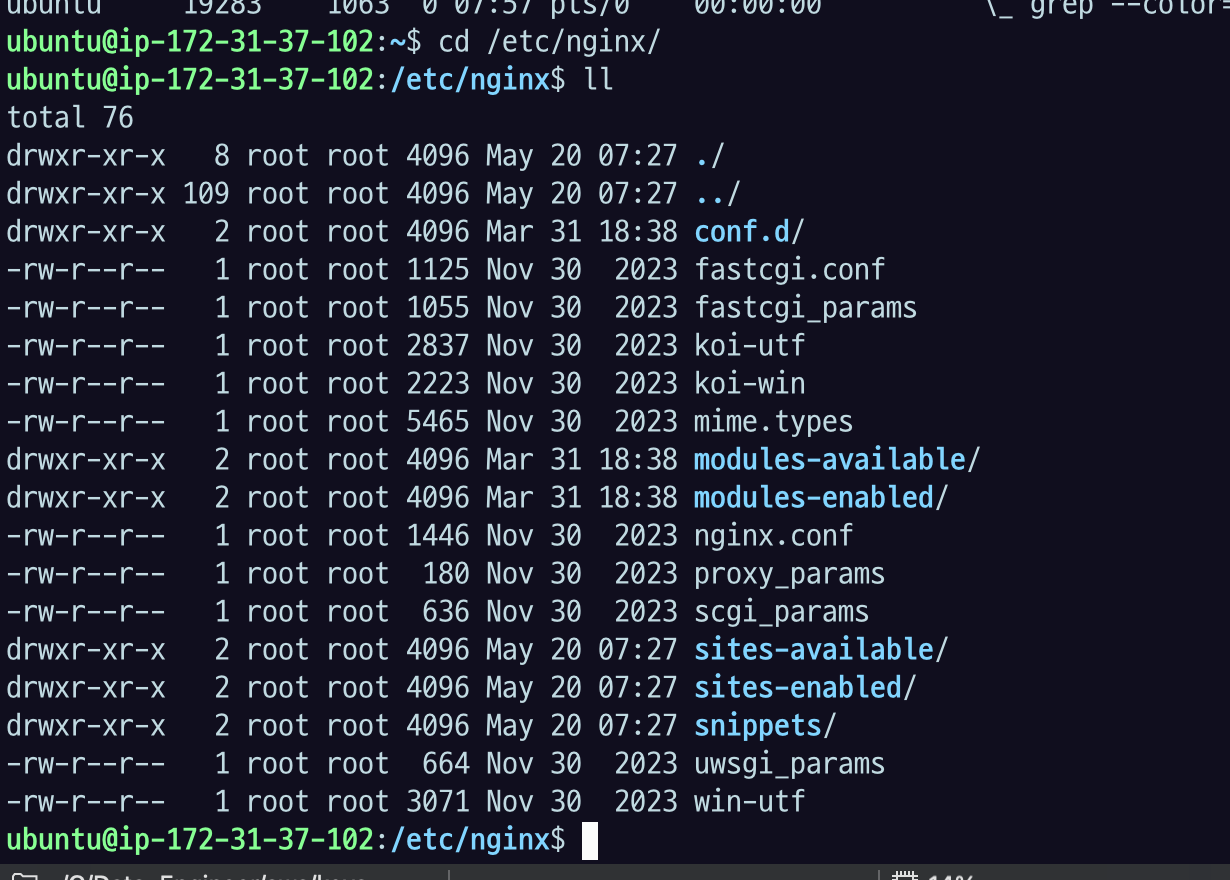
가장 기본으로 nginx.conf 라는 파일이 가장 루트가 되는 파일이다.
nginx.conf
user www-data;
worker_processes auto;
pid /run/nginx.pid;
error_log /var/log/nginx/error.log;
include /etc/nginx/modules-enabled/*.conf;

events {
	worker_connections 768;
	# multi_accept on;
}

http {

	##
	# Basic Settings
	##

	sendfile on;
	tcp_nopush on;
	types_hash_max_size 2048;
	# server_tokens off;

	# server_names_hash_bucket_size 64;
	# server_name_in_redirect off;

	include /etc/nginx/mime.types;
	default_type application/octet-stream;

	##
	# SSL Settings
	##

	ssl_protocols TLSv1 TLSv1.1 TLSv1.2 TLSv1.3; # Dropping SSLv3, ref: POODLE
	ssl_prefer_server_ciphers on;

	##
	# Logging Settings
	##

	access_log /var/log/nginx/access.log;

	##
	# Gzip Settings
	##

	gzip on;

	# gzip_vary on;
	# gzip_proxied any;
	# gzip_comp_level 6;
	# gzip_buffers 16 8k;
	# gzip_http_version 1.1;
	# gzip_types text/plain text/css application/json application/javascript text/xml application/xml application/xml+rss text/javascript;

	##
	# Virtual Host Configs
	##

	include /etc/nginx/conf.d/*.conf;
	include /etc/nginx/sites-enabled/*;
}


#mail {
#	# See sample authentication script at:
#	# http://wiki.nginx.org/ImapAuthenticateWithApachePhpScript
#
#	# auth_http localhost/auth.php;
#	# pop3_capabilities "TOP" "USER";
#	# imap_capabilities "IMAP4rev1" "UIDPLUS";
#
#	server {
#		listen     localhost:110;
#		protocol   pop3;
#		proxy      on;
#	}
#
#	server {
#		listen     localhost:143;
#		protocol   imap;
#		proxy      on;
#	}
#}
include는 다른 configuration 파일을 내가 포함할 거야. 이 http 블럭 안에 포함할 거야 라는 의미.
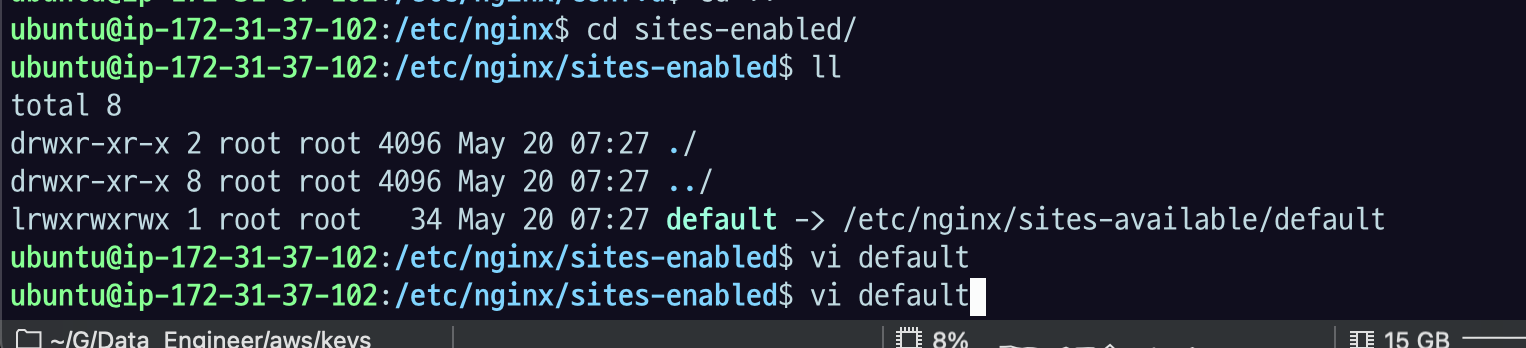
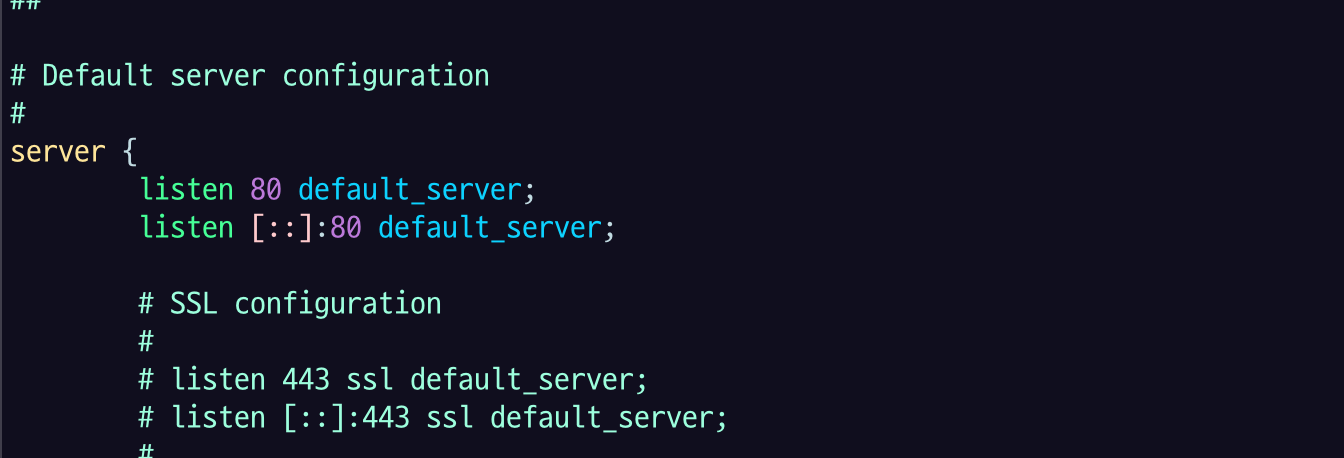
80포트로 서빙하고 있고.
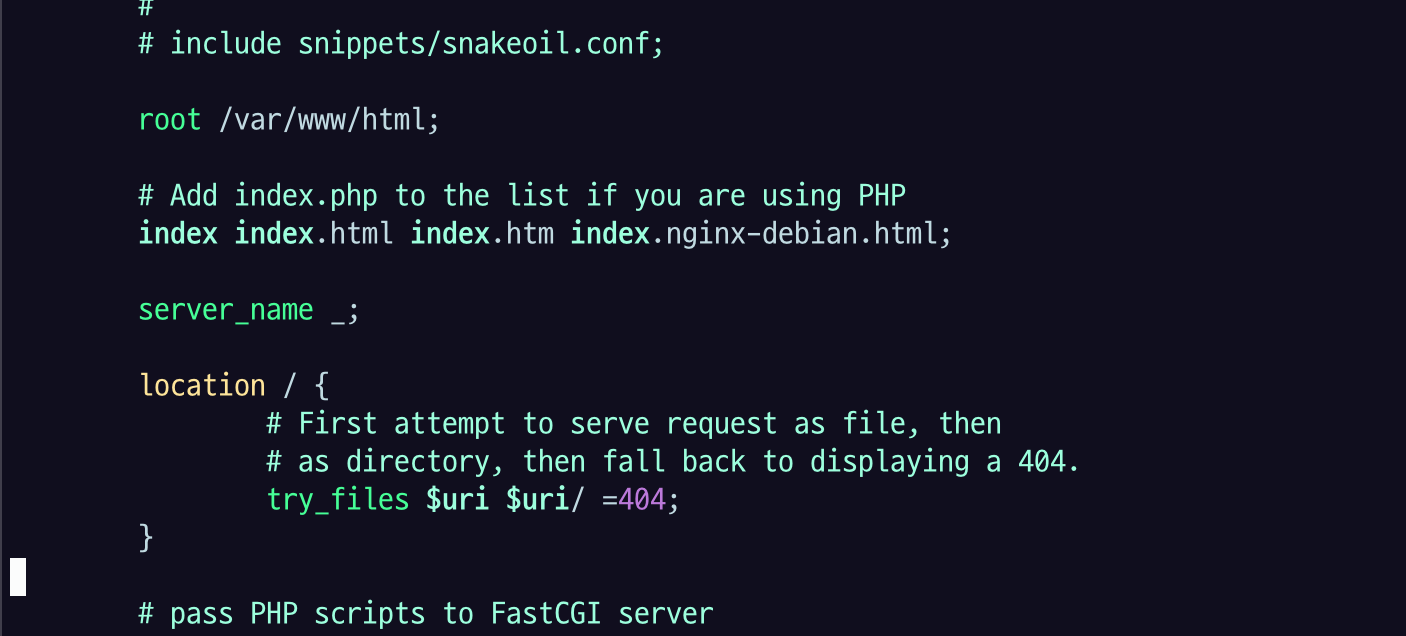
루트가 var/www/html 인데 index.html 을 서빙하게 되어 있다.
아까 주소 포트로 접속 했을 때, 봤던 welcome.index 그 파일이 요거에 의해 서빙되고 있다는 걸 알 수 있다.
그럼 conf 파일 어케 쓰냐?
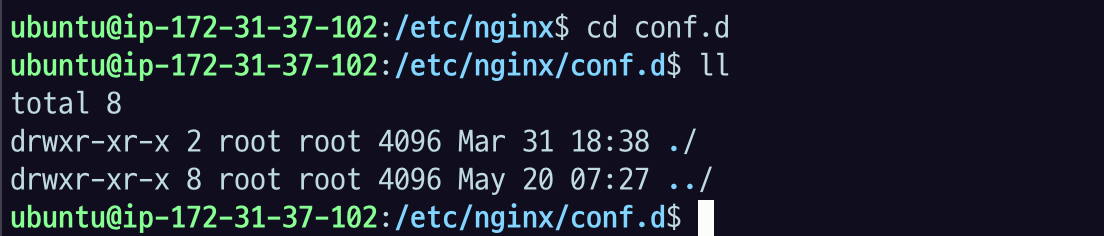
설정파일들의 묶음 디렉토리: /etc/nginx/conf.d
설정파일의 묶음 디렉토리는 conf.d 폴더에다가 .conf 라는 파일로 위치시킨 다음에 사용하면 된다.
xxx.d는 xxx 성격의 파일을 여러 개 묶어 놓은 디렉토리다 라는 의미.
command의 parameter로 특정 conf 파일을 명시할 수 있다.
sudo nginx -c $your_file_location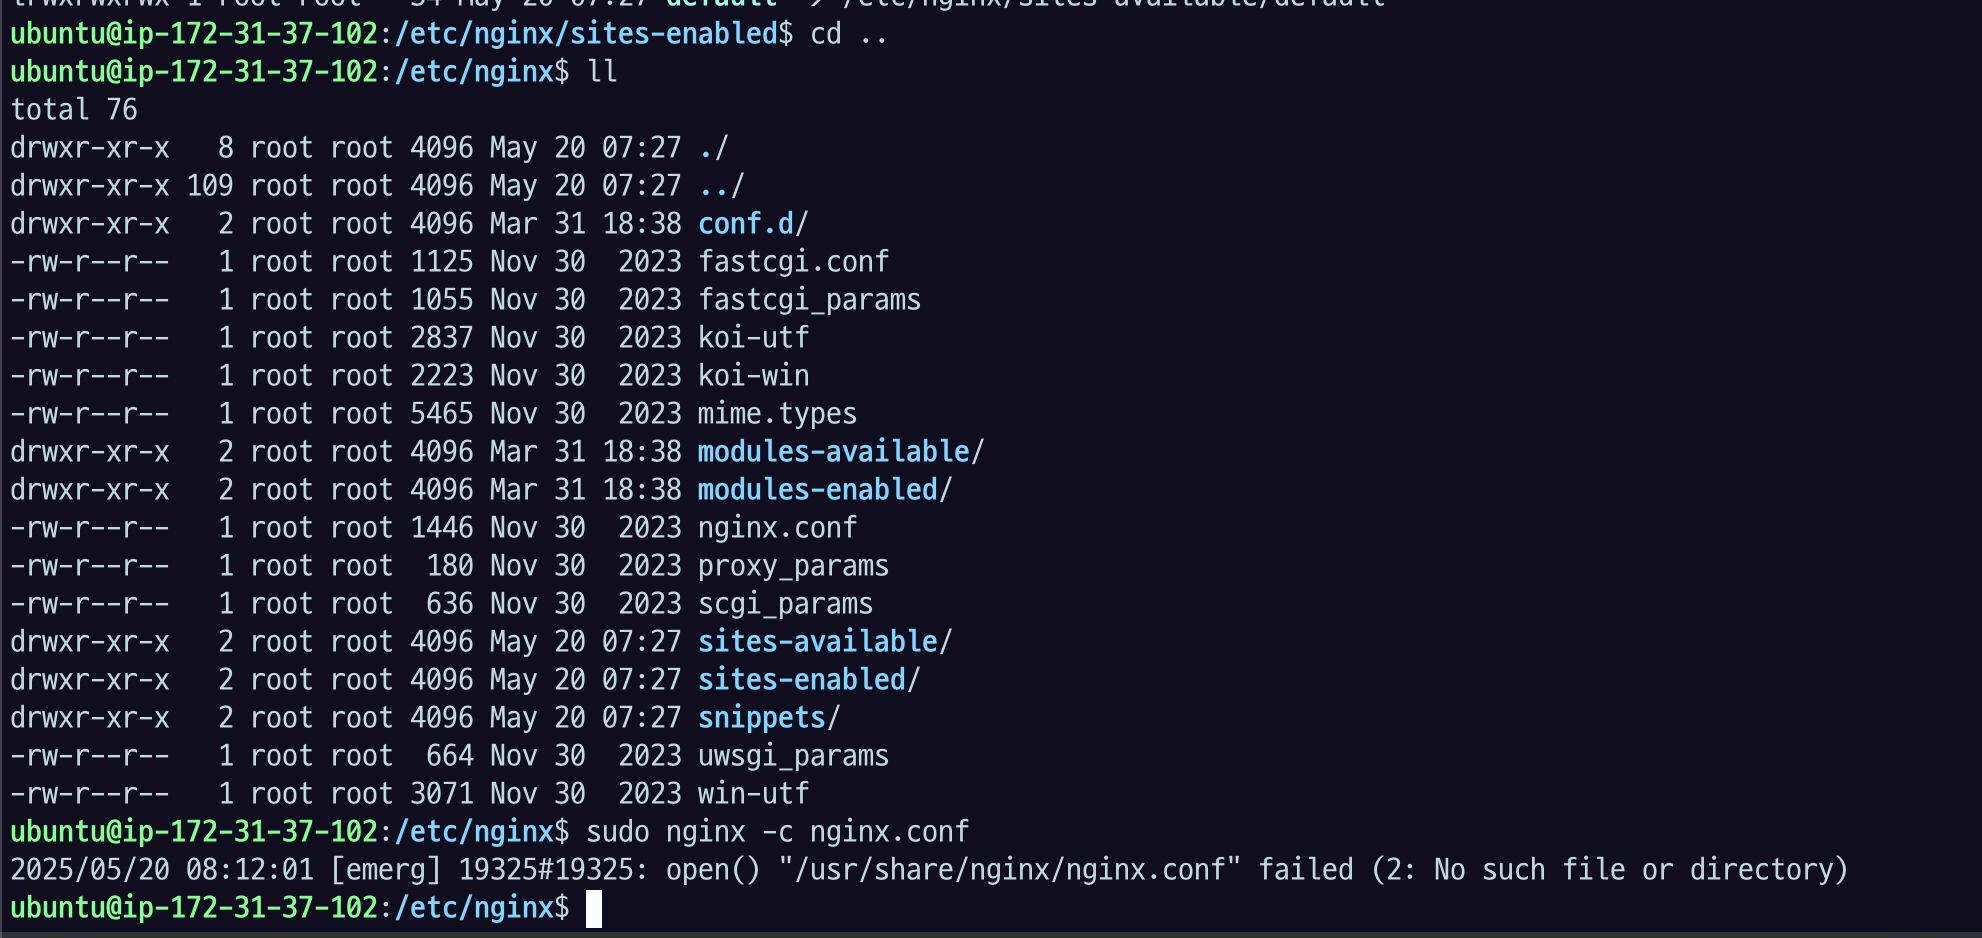
이런 식으로. 사용 가능하다. 이미 실행시킨 게 있으니까 실패.
문법적으로 틀린 것이 있는지 -t 옵션으로 syntax 와 내용의 validation을 할 수 있다.
sudo vi wrong.conf
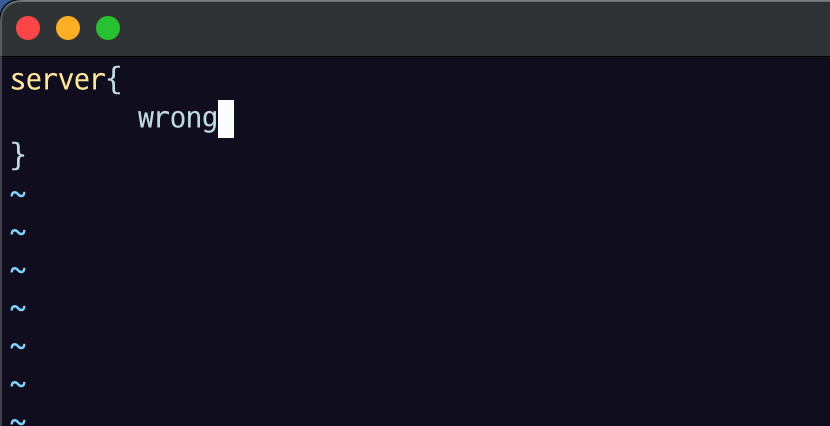
일부로 틀린 거 입력

이렇게 실제로 실행하기 전에 잘못된 게 있는지 t옵션을 미리 확인할 수 있다.
아까 nginx.conf.d 봤을 때, *.conf 모두 인클루드 하라고 되어 있으니까 이렇게 된 것.
아ㅏ까 conf 파일 모아두면 좋다고 했는데 그 안에서도 하나의 conf 파일이 아닌 여러 개의 conf 파일을 어떻게 분리하면 좋을지, 그리고 제약사항 뭐가 있을지 설명.
찐 실습
AWS에서 두 개의 EC2 서버를 발급한다.
각각의 서버에 아래 nodejs 서버 세팅을 한다.
node 는 java와 다르게 컴파일 안 해도 실행할 수 있는 편의성 때문에 사용.
npm 설치, node 자동설치
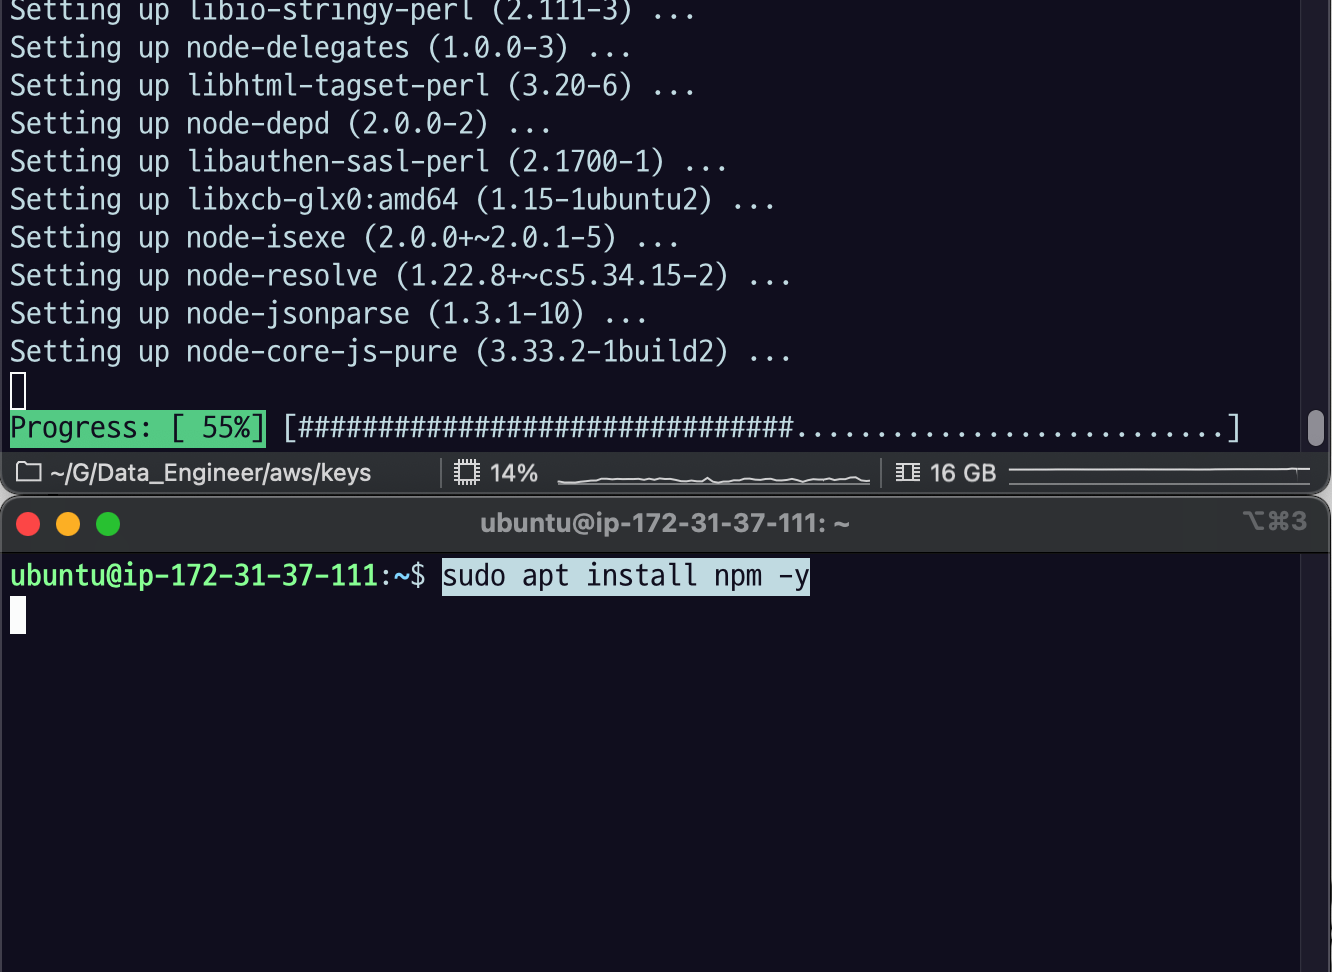
sudo apt install npm -y
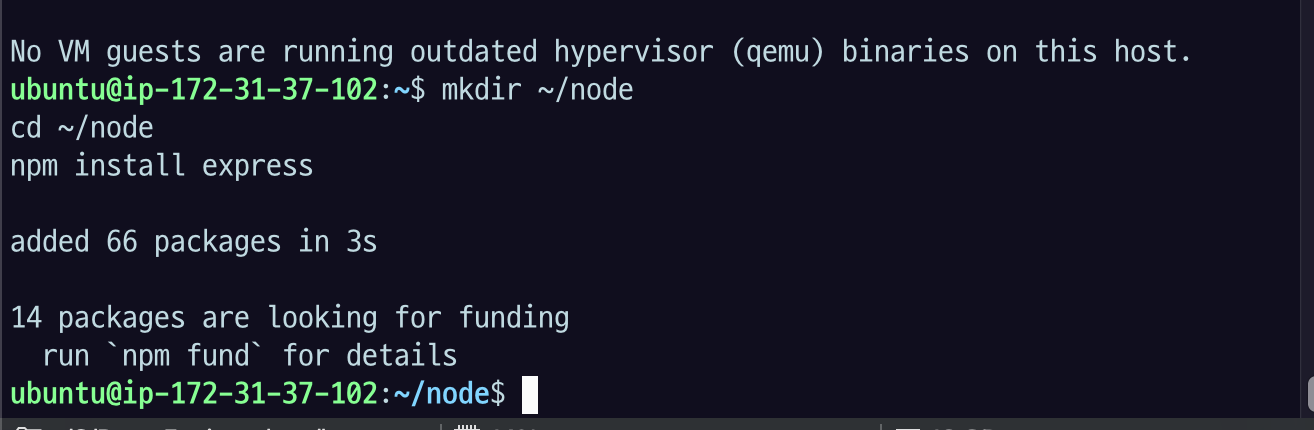
실습용 directory 세팅
mkdir ~/node
cd ~/node
npm install express
server app
server.js 에 서버별로 다른 응답을 하도록 nodejs app을 작성한다.
vi server.js
1번 서버
var express = require('express');
var app = express();
var fs = require("fs");
app.get('/user', function (req, res) {
var time = new Date().toLocaleTimeString().substring(0,8)
console.log("API call /user at " + time)
res.end(JSON.stringify({ "user": "user1", "time": time }))
})

app.get('/customer', function (req, res) {
var time = new Date().toLocaleTimeString().substring(0,8)
console.log("API call /customer at " + time)
res.end(JSON.stringify({ "customer": "customer1", "time": time }))
})

var server = app.listen(9000, function () {
var host = server.address().address
var port = server.address().port
console.log("Example app listening at http://%s:%s", host, port)
})
2번 서버
var express = require('express');
var app = express();
var fs = require("fs");

app.get('/user', function (req, res) {
var time = new Date().toLocaleTimeString().substring(0,8)
console.log("API call /user at " + time)
res.end(JSON.stringify({ "user": "user2", "time": time }))
})

app.get('/customer', function (req, res) {
var time = new Date().toLocaleTimeString().substring(0,8)
console.log("API call /customer at " + time)
res.end(JSON.stringify({ "customer": "customer2", "time": time }))
})

var server = app.listen(9000, function () {
var host = server.address().address
var port = server.address().port
console.log("Example app listening at http://%s:%s", host, port)
})
이렇게 각각 서버에 서버1, 서버 2 내용을 server.js 에 붙여넣자.
var server = app.listen(9000, function () {
var host = server.address().address
var port = server.address().port
console.log("Example app listening at http://%s:%s", host, port)
})
설명하자면 9000번 포트열고 있는 리퀘스트를 받아줄 수 있는 HTTP 어플리케션이다.
app.get('/user', function (req, res) {
var time = new Date().toLocaleTimeString().substring(0,8)
console.log("API call /user at " + time)
res.end(JSON.stringify({ "user": "user2", "time": time }))
})
그리고 REST API 로 user 라는 패스로 명령이 오면 json key:value 형태로 user라는 정보와 time이라는 정보 줄 것.. customer 라는 패스로 오면 한 번 로그를 찍고 customer 라는 키에 customer value 그리고 시간을 찍을 건데 1번, 2번 다른 건 user1 customer1, user2,costomer2 숫자만 다르다.
application background로 실행시키기
nohup node server.js > server.log 2>&1 & echo $! > run.pidnuhup이라는 게 백그라운드에서 어떤 프로세스 실행시키고 관리할 수 있는 툴이다. 리눅스 기본 설치 되어 있음. node server.js 는 Nodejs로 server.js에 있는 스크립트로 node.js 어플리케이션 실행시키겠다는 것. 그 뒤에 있는 > append는 standard-out을 server.log파일에 남긴다.
그리고 2>&1 은 standard error가 2인데, standard-error도 standard-out에 붙여줘,
그니까 모든 로그가 여기 남는 것이다.
$!는 이제 실행되면 그 결과로 pid가 나온다. 그걸 받아주는 리눅스 bash의 예약어고 이걸 run.pid 에 쓰겠다. 우리가 background 실행시키고 나서도 어? PID가 뭐였지? 나중에 찾아 죽이던가 해야 할 때 이 파일을 보면 알 수 있는 것.
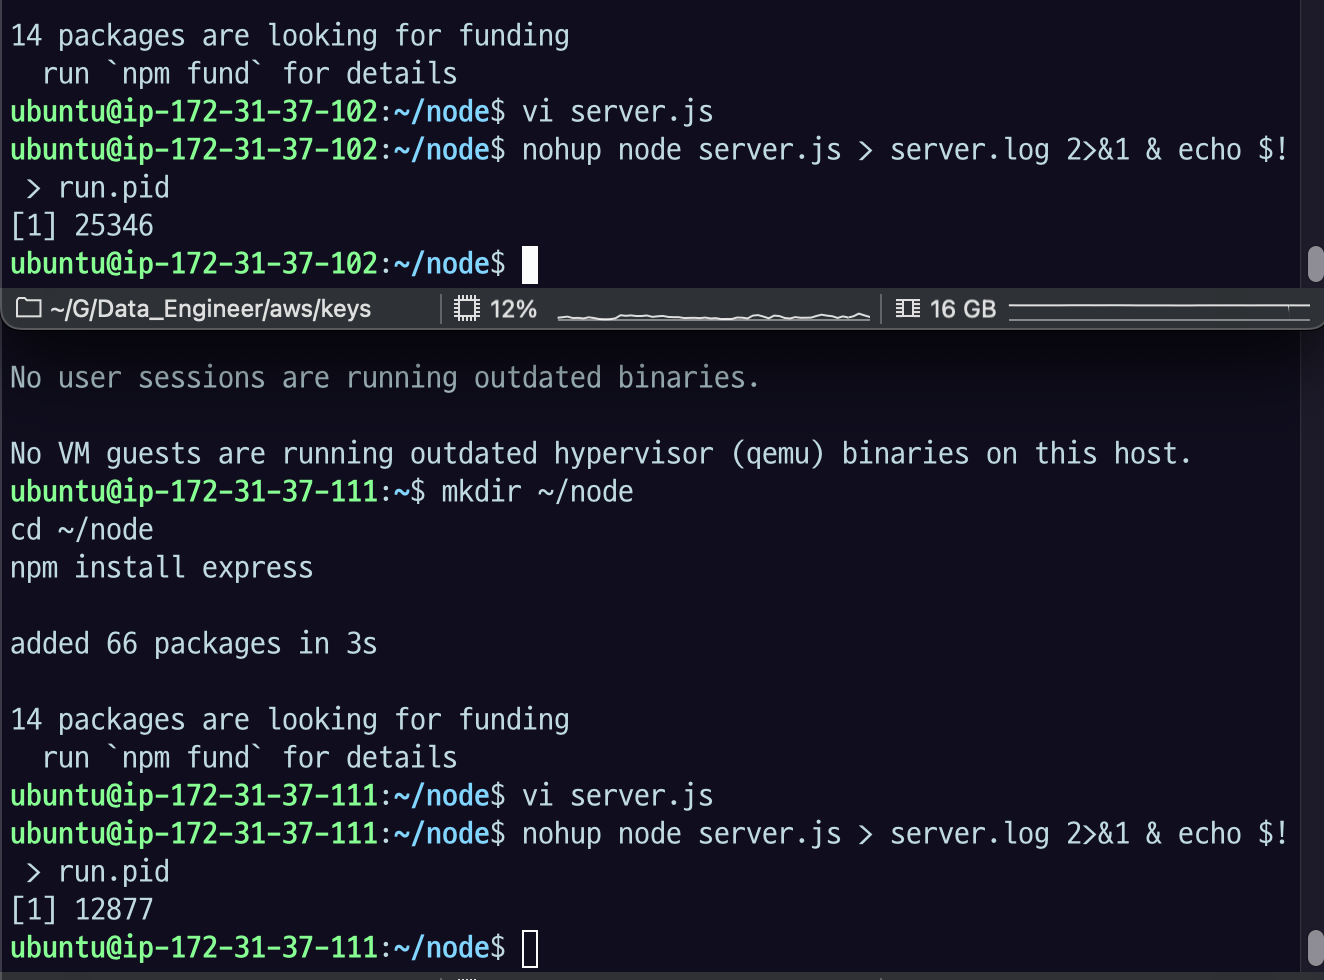
이런 식으로 각각 프로세스 실행시키자.
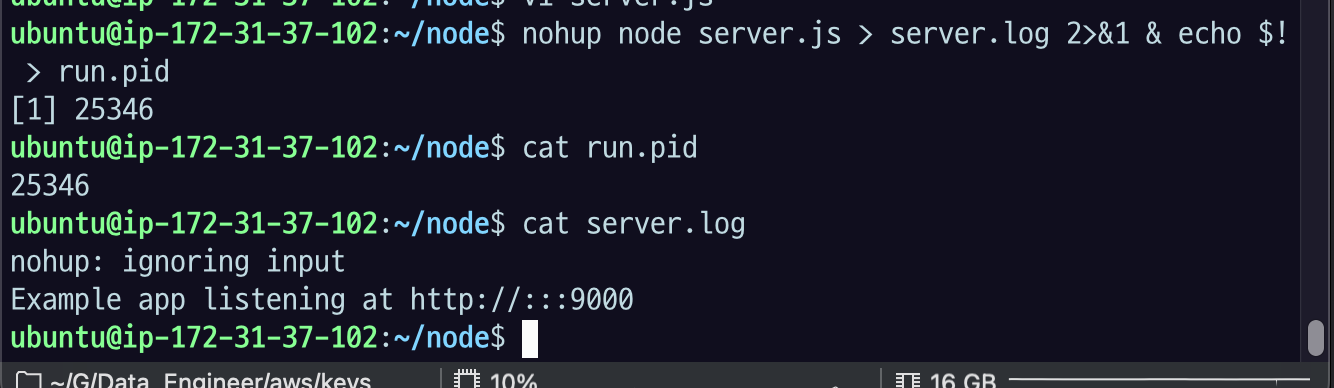
cat run.pid : 아까 설정한 대로 run.pid 보면 Pid 번호가 잘 들어간 것을 볼 수 있고
cat server.log 봐도 기본적인 로그가 잘 들어간 것을 볼 수 있다.
application 종료
kill -9 $(cat run.pid) && rm run.pid어플리케이션 종료할 대는 이거 사용하면 됨.
PID 파일을 get으로 뽑아내서 kill하겠다. 그리고 run.pid 파일 지우겠다 명령어임.
log tracking
tail -f server.logf 가 follow. 계속 따라가면서 트래킹하면서 로그 파일을 보겠다. 명령어