1번 서버에서는 로그를 보내고
2번 서버에서는 로그를 받는데
2번 서버의 설정이다.
강의에서는 opensearch, opendashboard - 2.4.0 버전을 사용한다.
이 강의에서는 기본적인 설치만 다룬다. 더 자세한 설치와 설정 방법은 매뉴얼을 참고.
기본설치는 다음 특징을 갖는다.
- single mode
- 권한이 없다
- tls(https) 사용안함
권한 제어 안 할거고,
admin이나 access control 안 하고 바로 접속해서 기능을 확인하게 편하게 할 것..
설정을open dashboard에서 편하게 할 수 있으니까
open dashboard설치도 같이 진행.
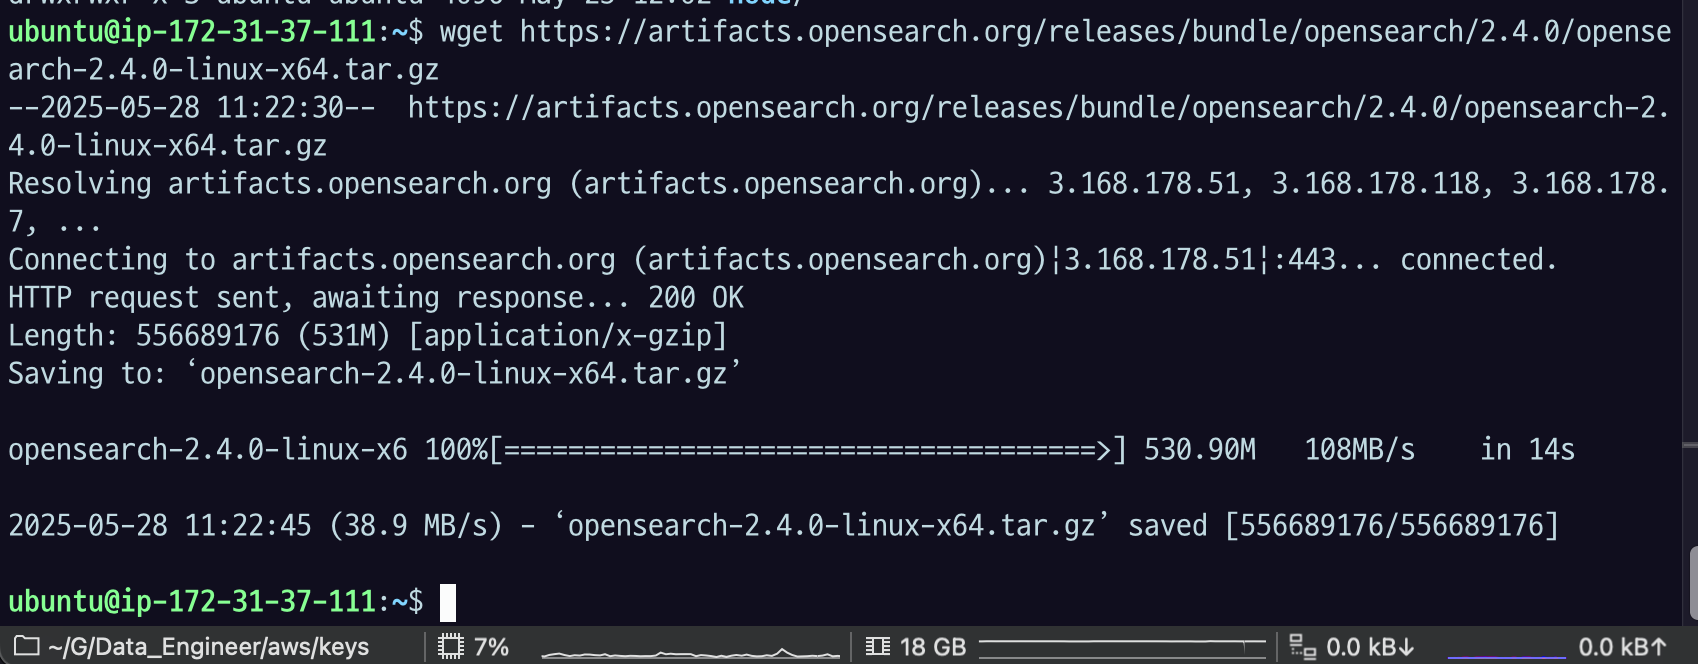
wget https://artifacts.opensearch.org/releases/bundle/opensearch/2.4.0/opensearch-2.4.0-linux-x64.tar.gz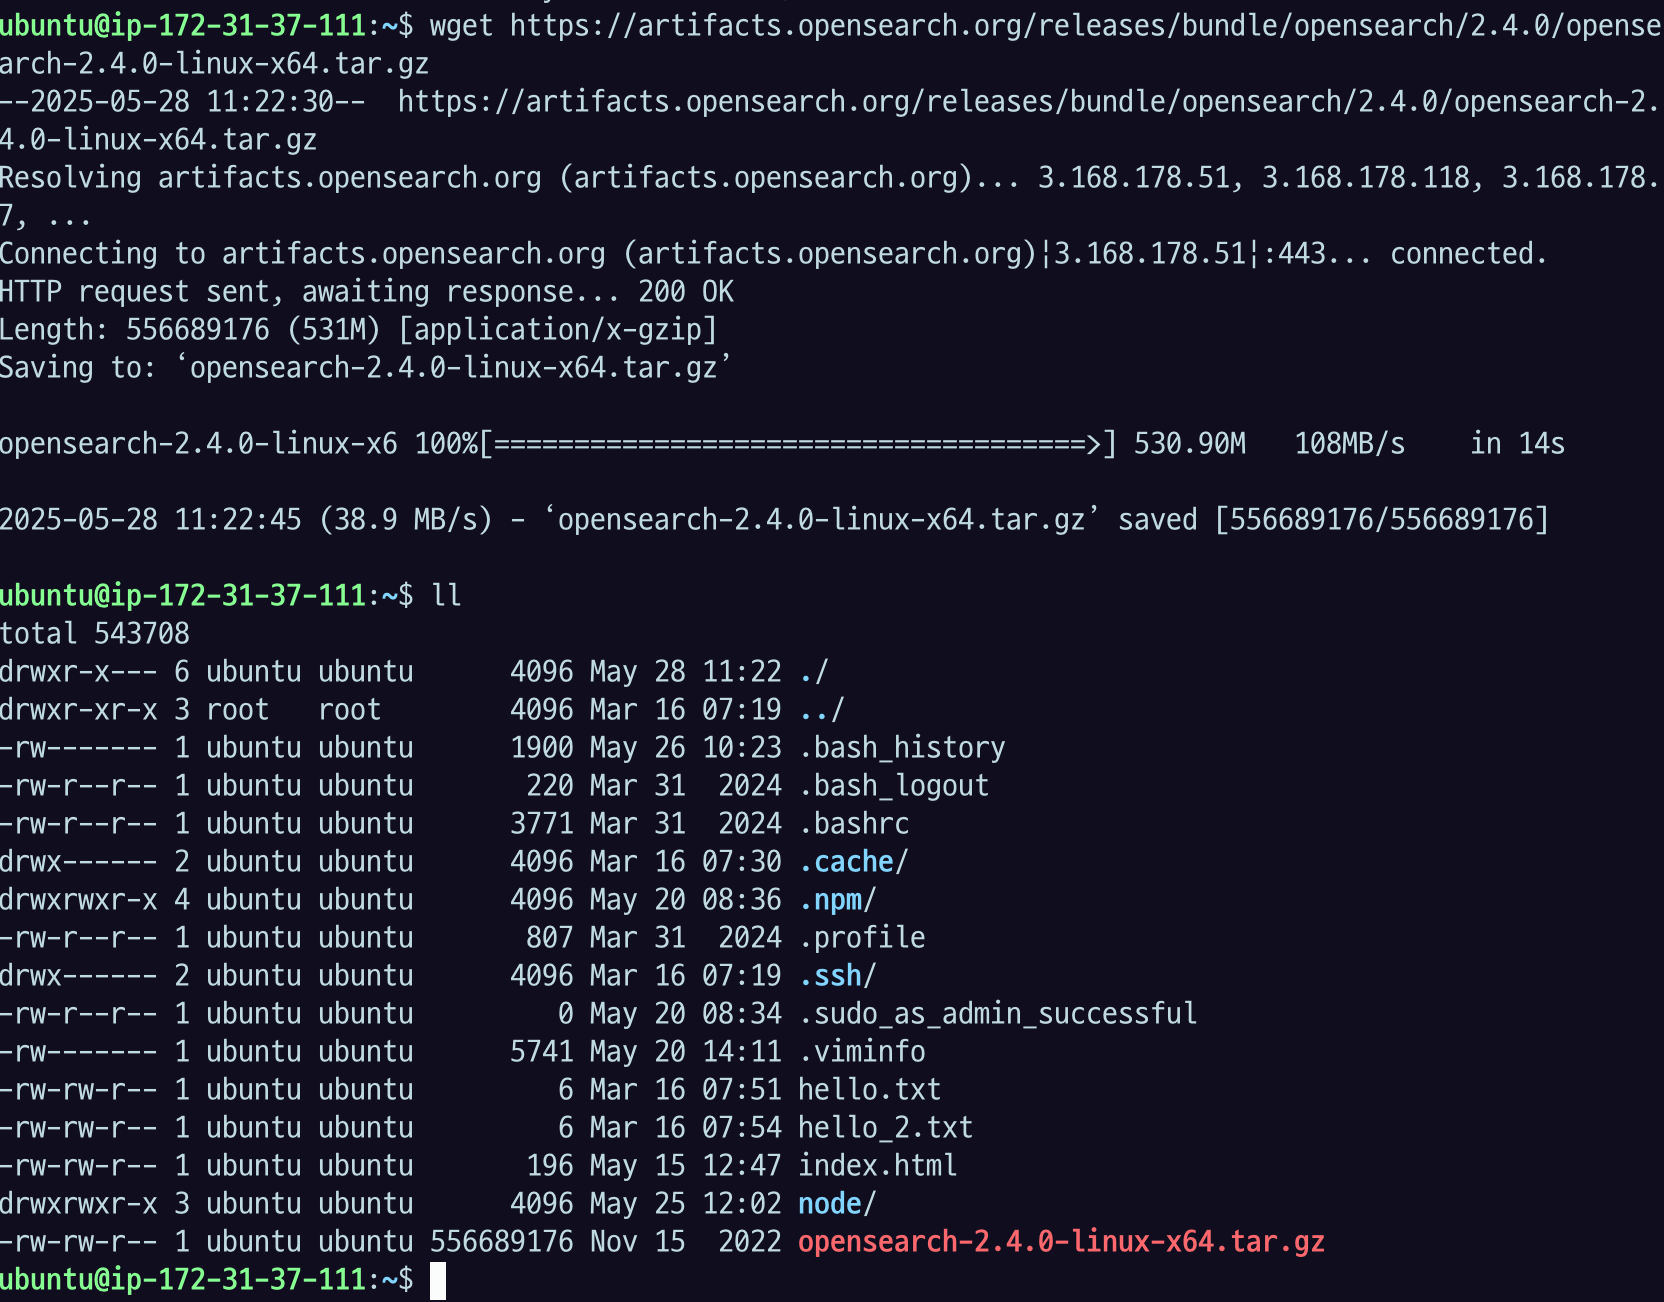
opensearch 폴더 만들어서
opensearch-2.4.0-linux-x64.tar.gz 위치를 폴더 안으로 옮겨주자.
mkdir opensearch
mv opensearch-2.4.0-linux-x64.tar.gz opensearch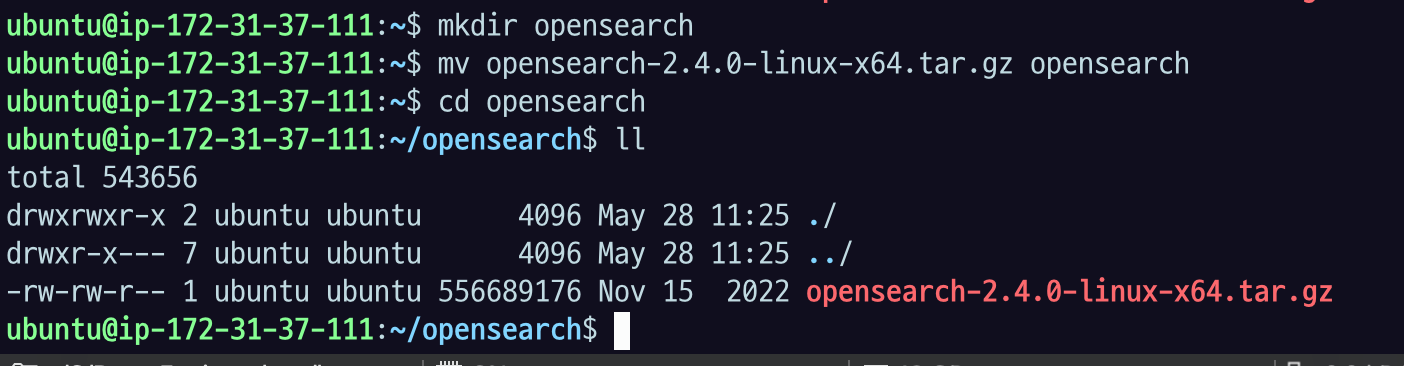
cd opoensearch오픈서치 폴더로 이동해서
tar -xvf opensearch-2.4.0-linux-x64.tar.gztar 명령어로 압축파일 풀어주자.

opensearch-2.x.x 라는 디렉토리가 나온다.
만들어진 디렉토리에 들어가서 사용하기 편하게 opensearch_home이라고 이름지어준다.
cd opensearch-2.4.0
export OPENSEARCH_HOME=$(pwd)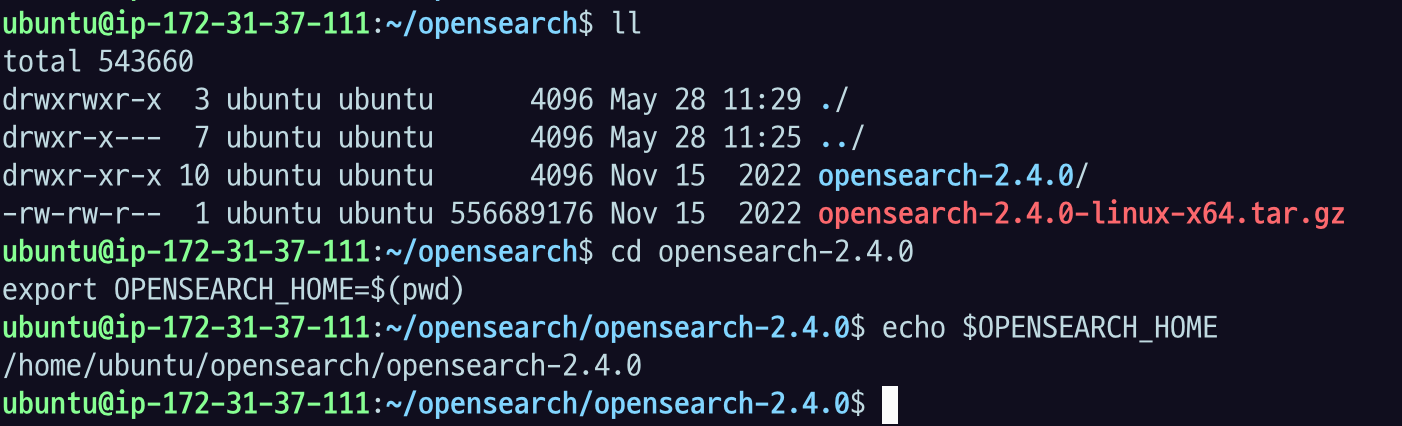
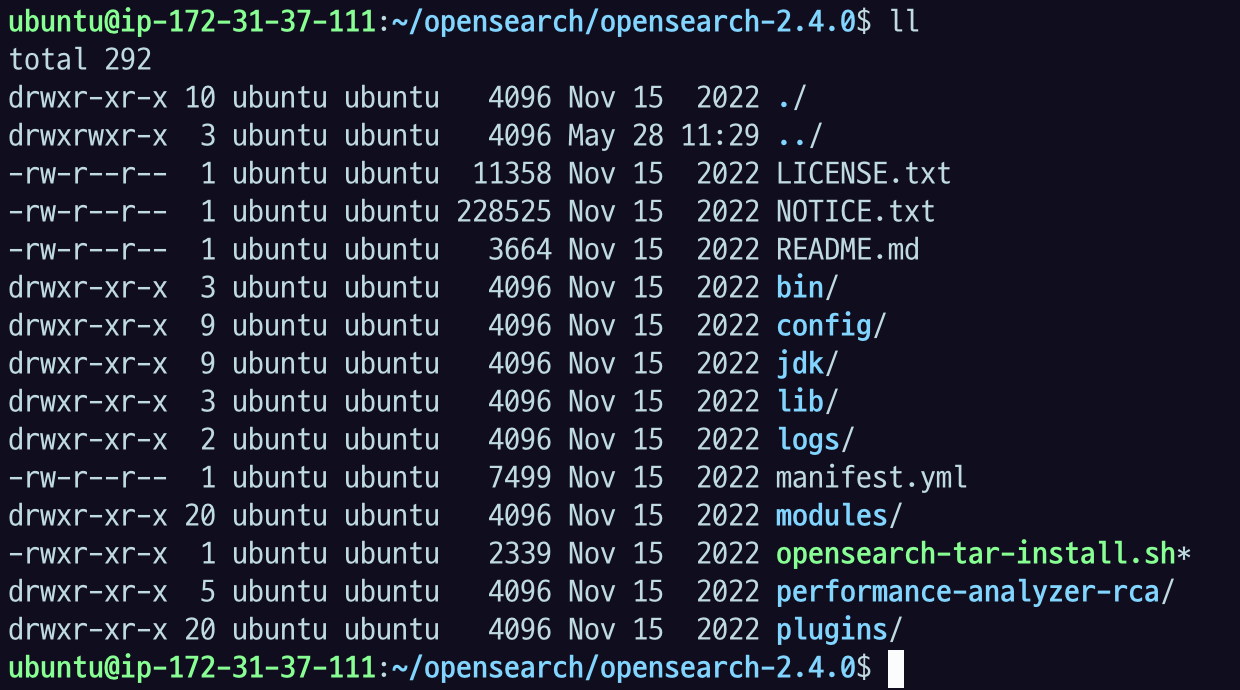
주요 디렉토리
bin: 실행파일들의 위치config: 설정 파일의 위치. 부팅하기 전에 설정을 완료해야한다.data: opensearch 가 데이터를 저장하는 위치jdk: 내장 JDK. Host 에 JDK가 설치되어있지 않으면 사용한다.logs: log 디렉토리plugins: plugin 의 위치
중요한 시스템 세팅
important system settings
DB종류들은 system 세팅이 필요하다.
아래 내용은 실습을 위한 간단한 세팅이므로, 고성능이 필요하다면 따로 검토해야한다.
- Disable memory paging and swapping performance on the host to improve performance.
sudo swapoff -a- (선택, 안해도 됨) Increase the number of memory maps available to OpenSearch.
# Edit the sysctl config file
sudo vi /etc/sysctl.conf

# Add a line to define the desired value
# or change the value if the key exists,
# and then save your changes.
vm.max_map_count=262144

# Reload the kernel parameters using sysctl
sudo sysctl -p

# Verify that the change was applied by checking the value
cat /proc/sys/vm/max_map_count
EC2 T2 마이크로가 작은 거라서 이걸 설정하진 않았다는데 필요하면 선택적으로 설치 해주면 될 것 같다.
설정
vi $OPENSEARCH_HOME/config/opensearch.yml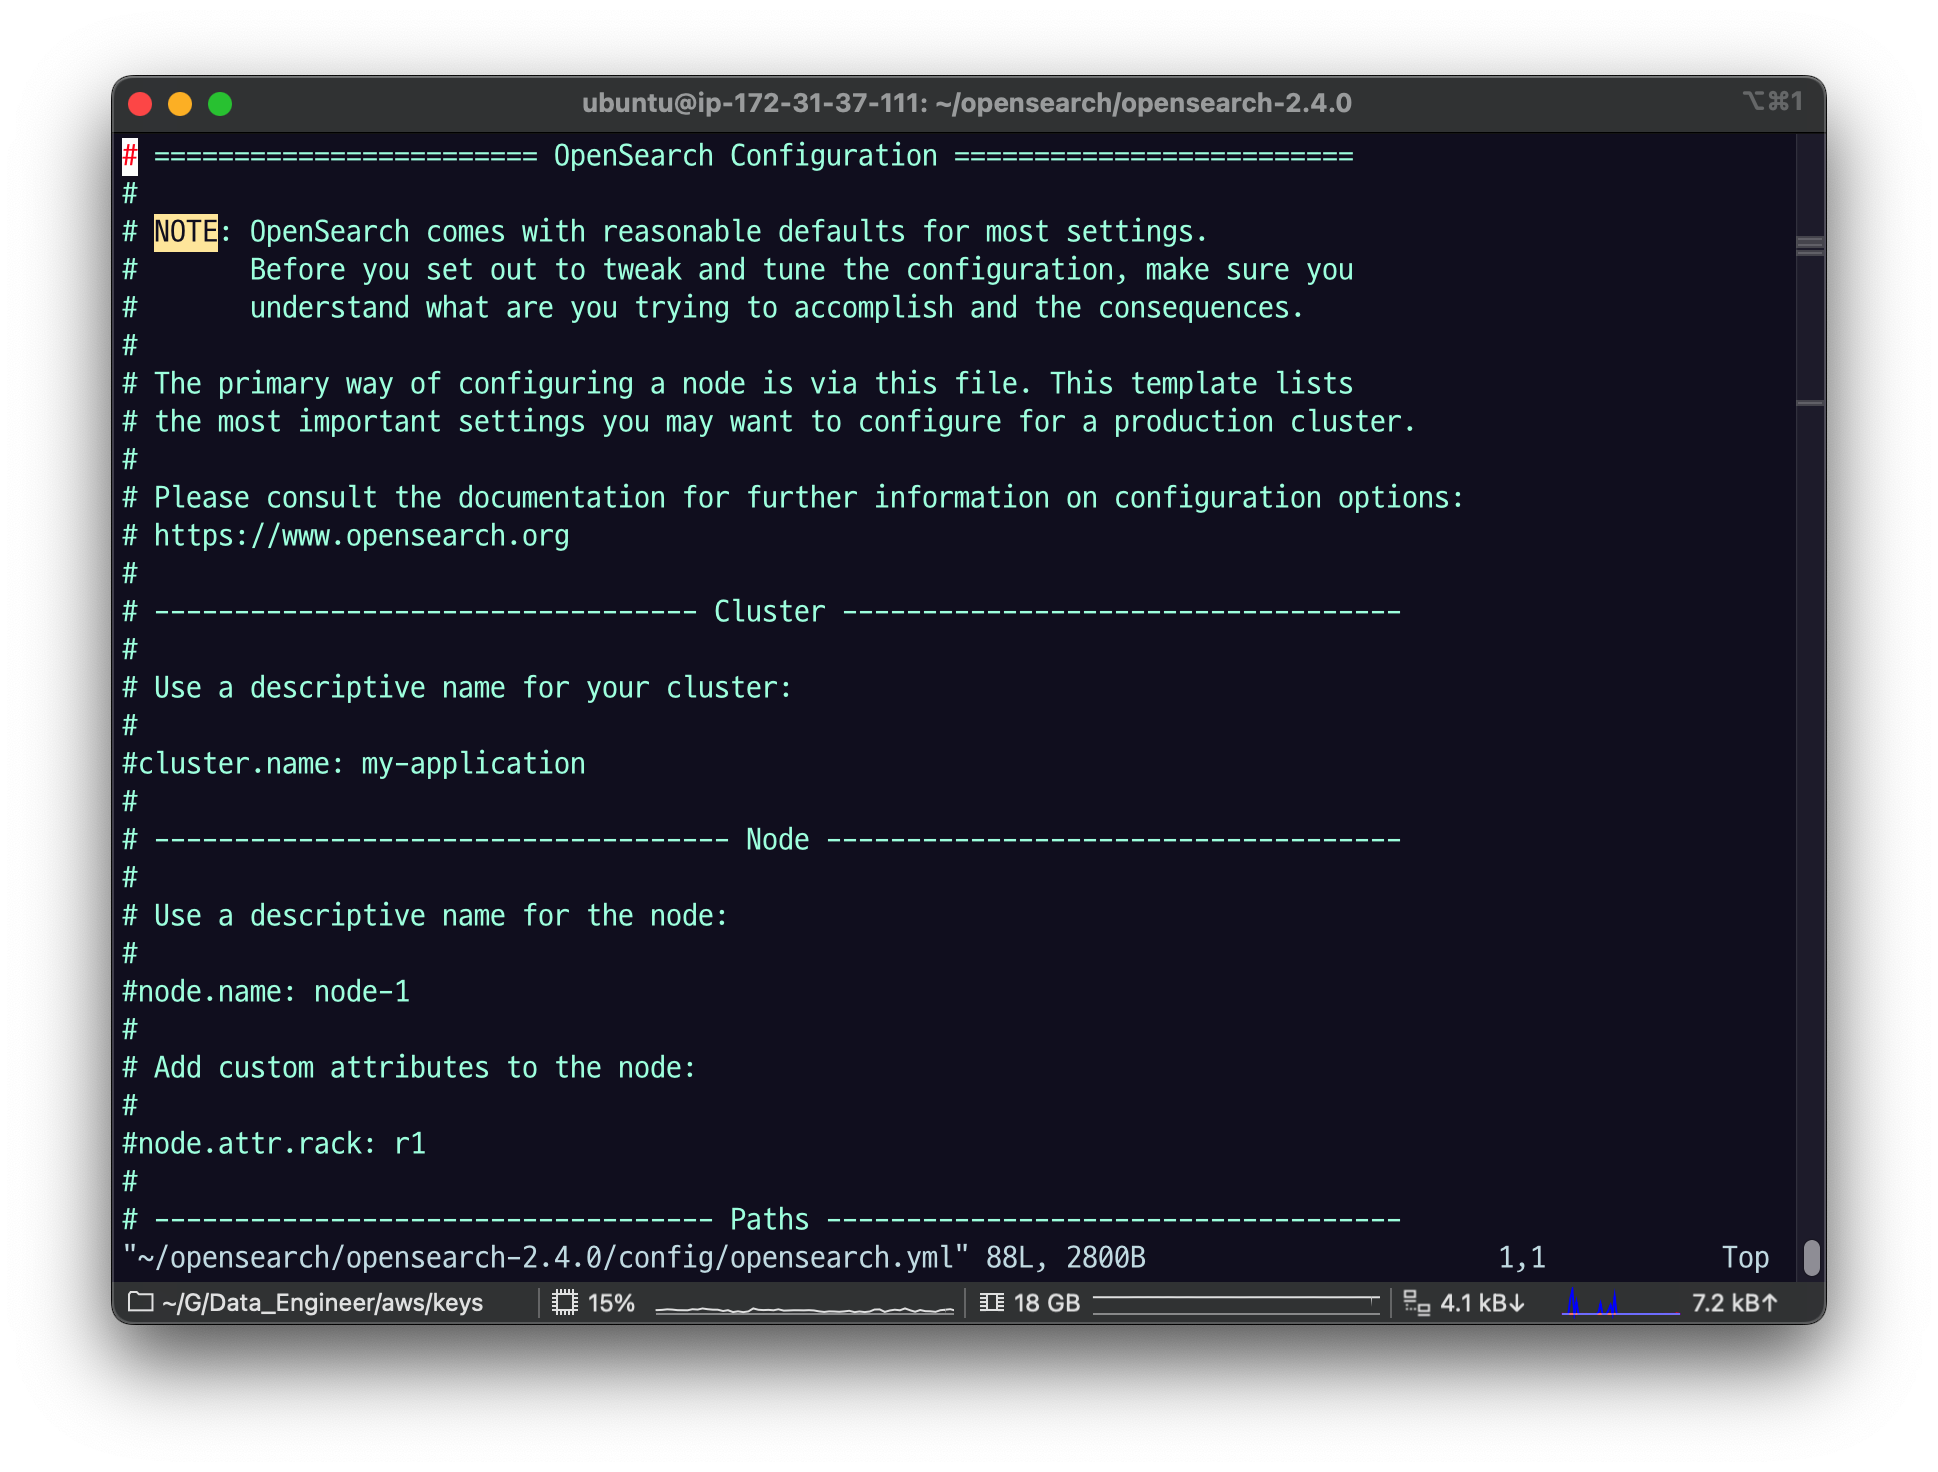
기본적으로 다 주석처리되어 있다.
network.host : 자기 자신이고
discovery.type : 나 혼자니까 다른 친구들은 클러스터가 아니야 라는 의미
세큐리티 플러그 관련은 아예 주석처리 해놓았음
# Bind OpenSearch to the correct network interface. Use 0.0.0.0
# to include all available interfaces or specify an IP address
# assigned to a specific interface.
network.host: 0.0.0.0

# Unless you have already configured a cluster, you should set
# discovery.type to single-node, or the bootstrap checks will
# fail when you try to start the service.
discovery.type: single-node

# If you previously disabled the security plugin in opensearch.yml,
# be sure to re-enable it. Otherwise you can skip this setting.
# plugins.security.disabled: true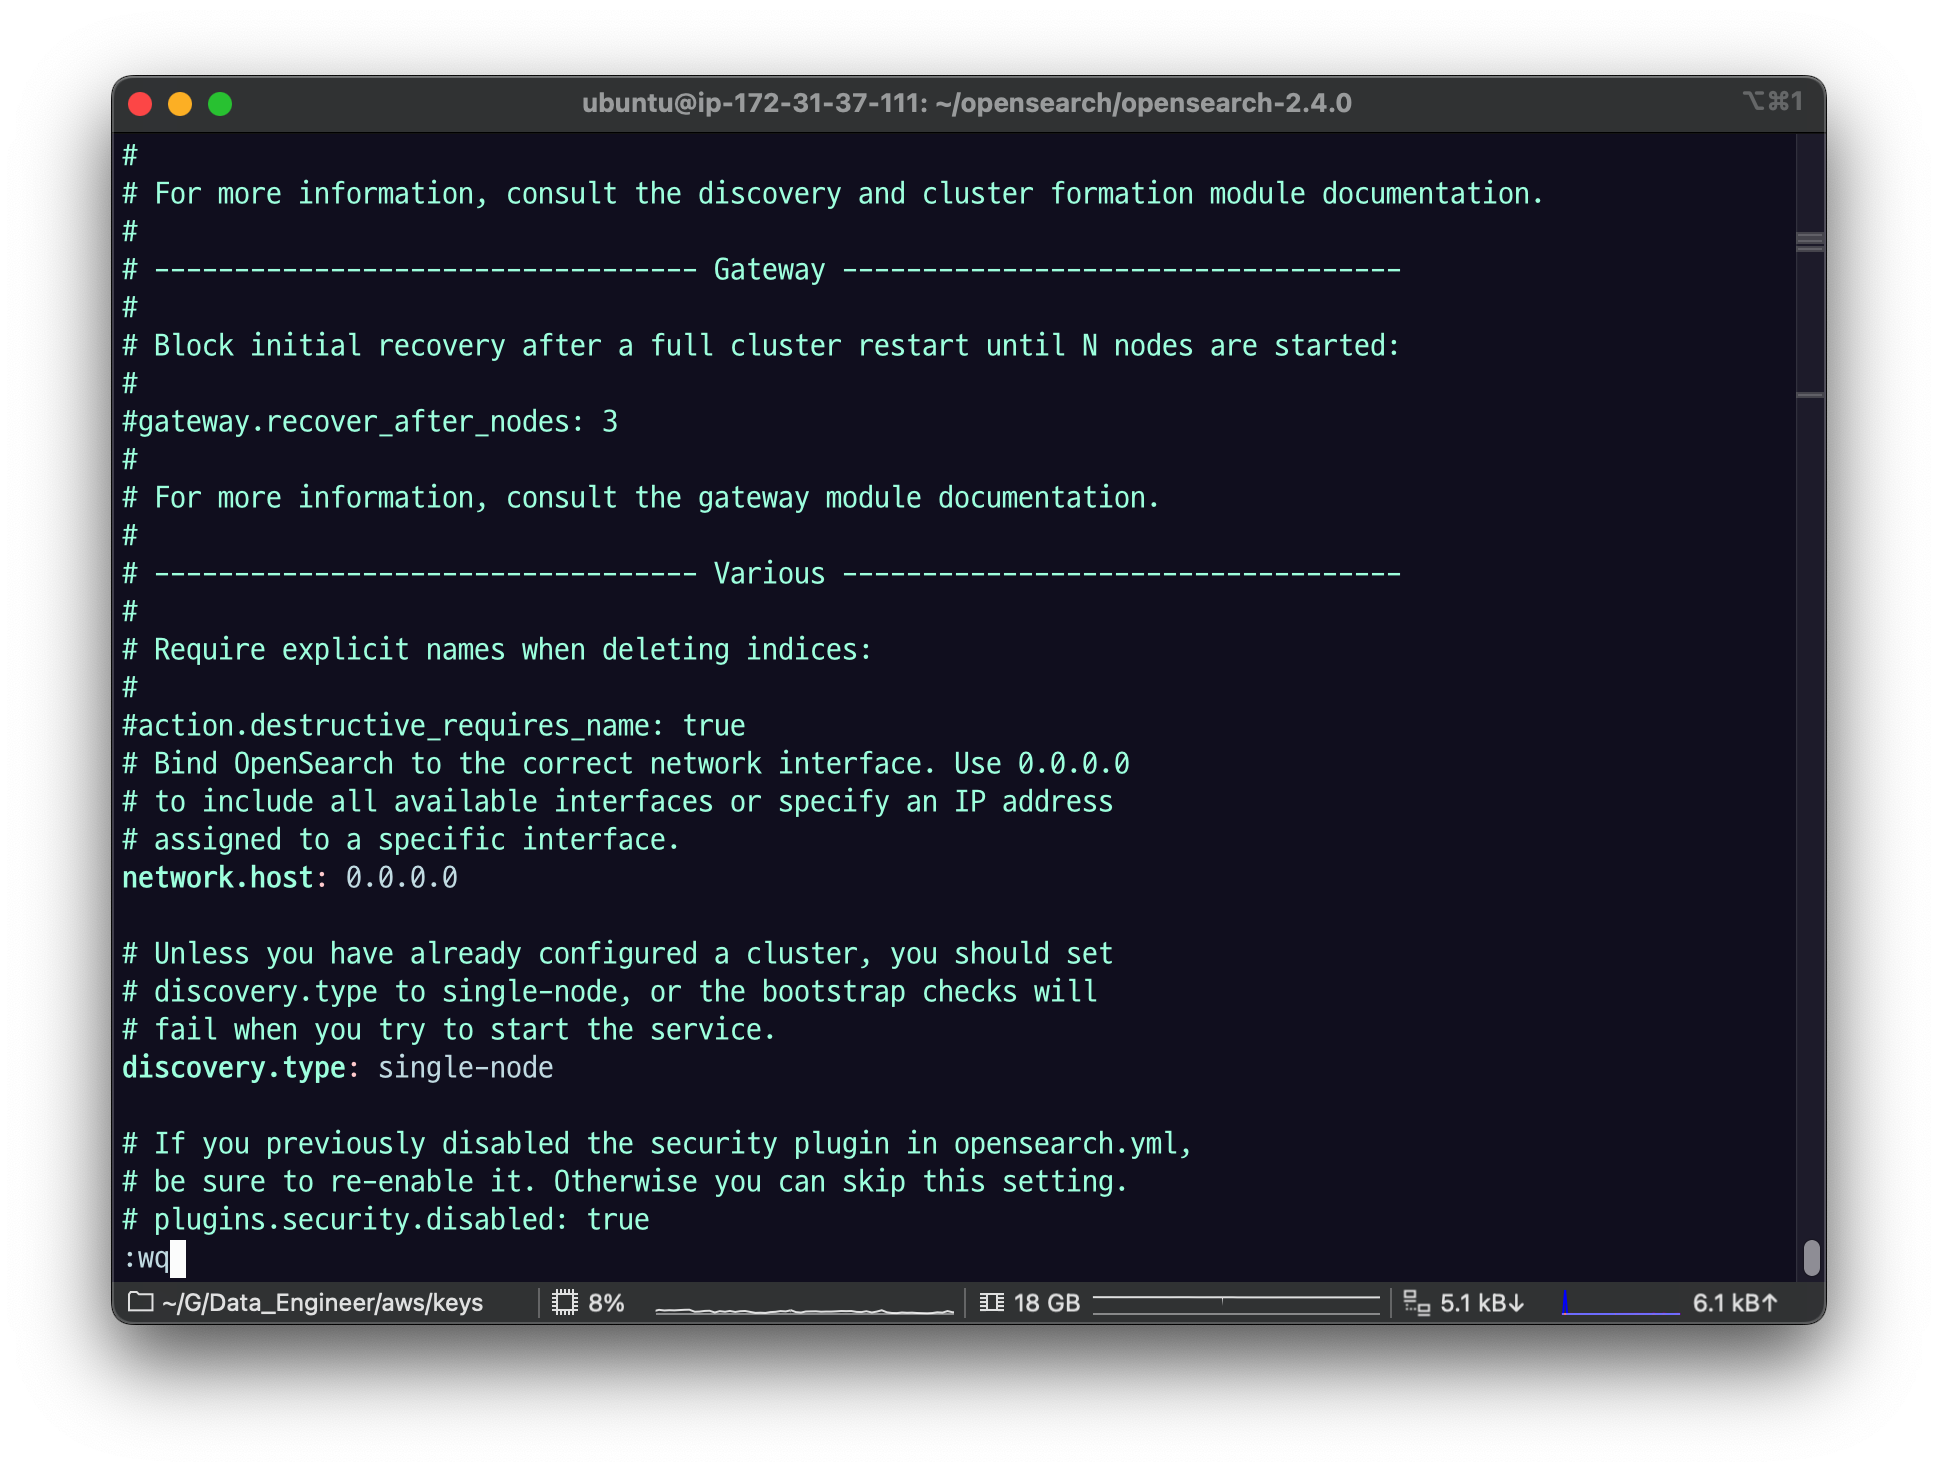
Specify initial and maximum JVM heap sizes.
vi $OPENSEARCH_HOME/config/jvm.options
1기가, 1기가 되어 있는데 T2마이크로 엘라스틱 서치가 총 메모리가 1기가다. 이걸 이렇게 하면 안돼서
128m 로 바꾸겠다.
-Xms128m
-Xmx128m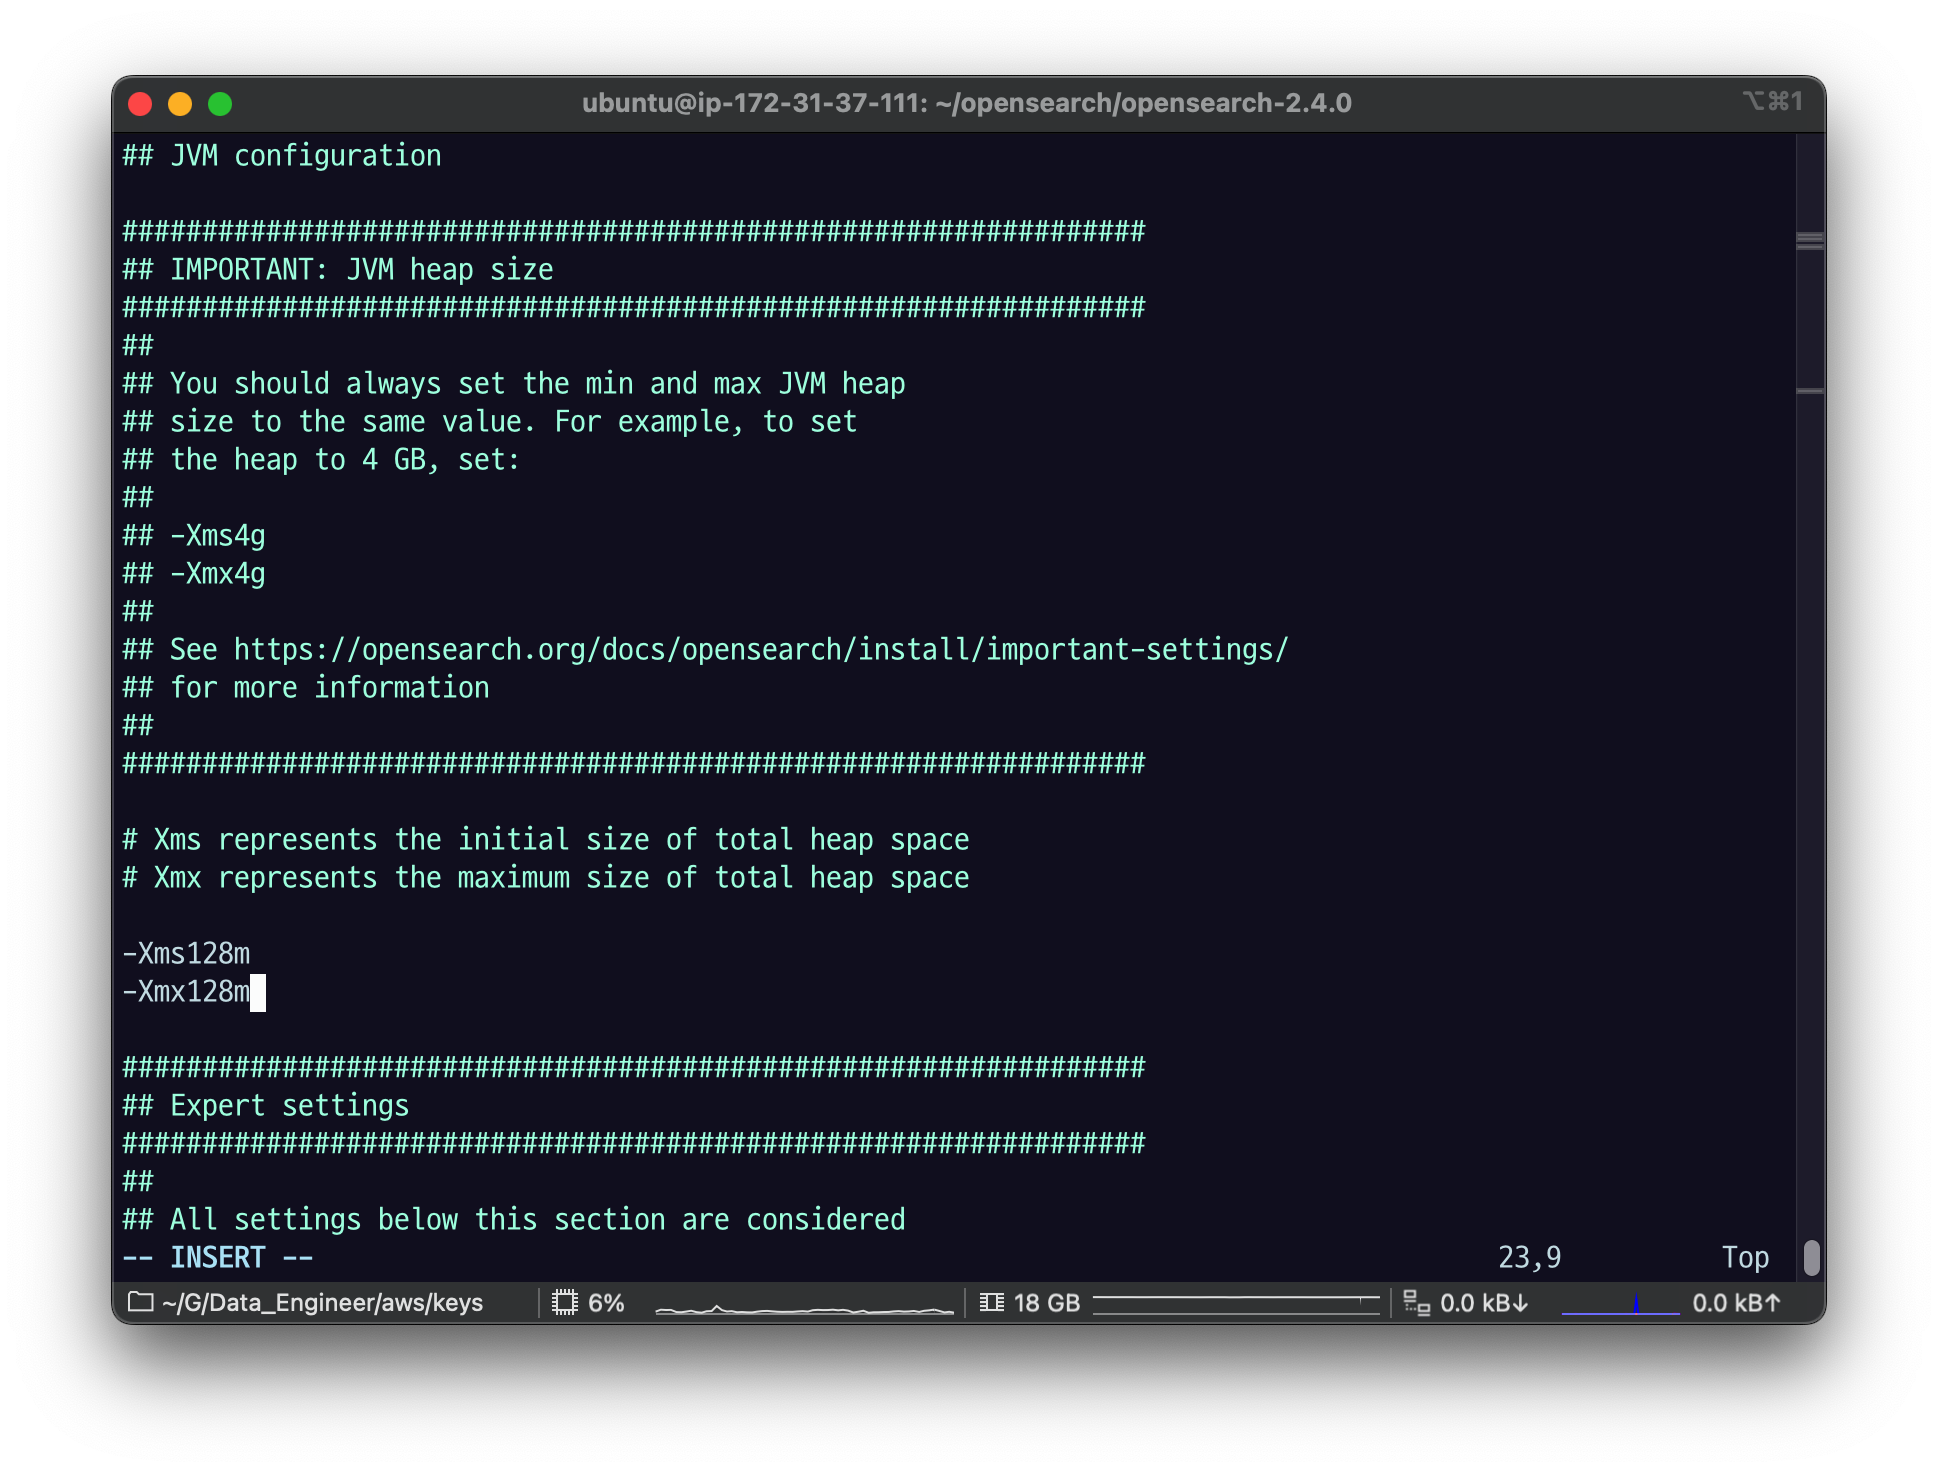
Xms : 시작할 때 가지고 있는 메모리
Xmx : 최대로 가질 수 있는 메모리
똑같이 해놓으면 운영상 편함
오픈서치는 64기가 이상으로 하면 자바의 특징 때문에 크게 효과가 없다. 그래서 64g 밑으로 메모리를 쓰는 게 좋다.
Specify the location of the included JDK.
export OPENSEARCH_JAVA_HOME=$OPENSEARCH_HOME/jdkOPENSEARCH_HOME을 세팅해주자.

오픈서치는 기본적인 기능들은 데이터를 저장하고
데이터를 파일에서 찾아서 인덱싱하는 방법을 제공하고
그걸 활용하는 로직은 대부분 플러그인 식으로 구현이 되어 있다.
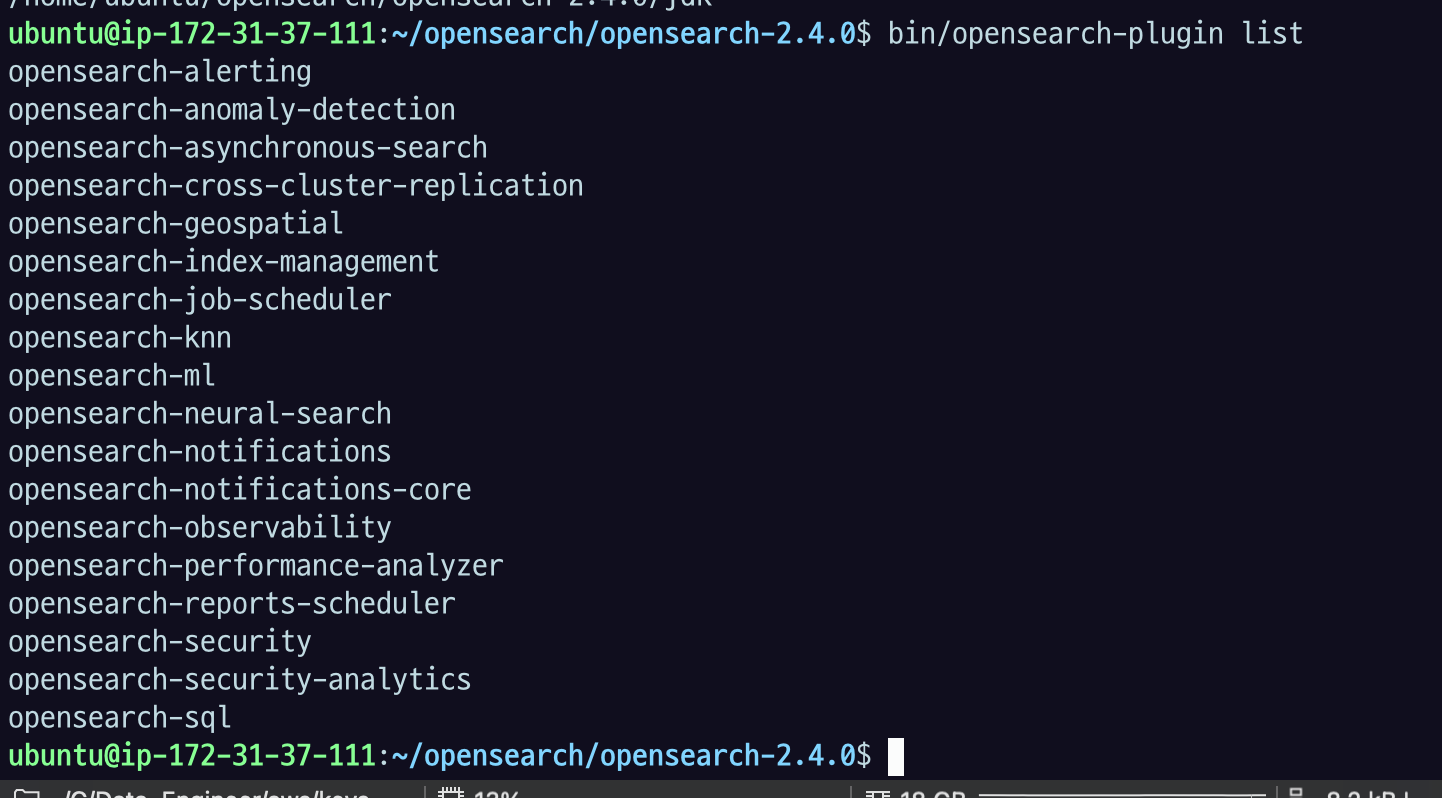
플러그인은 내부적으로 maven으로 다운받아서 실행되게 되어 있다. 그래서 메이븐을 이용해 다운로드 했고, 여기에 기본 설치되어 있는 친구들이다.
원활한 실습을 위해서 security 관련 플러그인을 제거하자
bin/opensearch-plugin remove opensearch-security
bin/opensearch-plugin remove opensearch-security-analytics
권한제어 관련된 security-analytics 이런 게 있는데 secrity 설정을 지우고 시작한다.

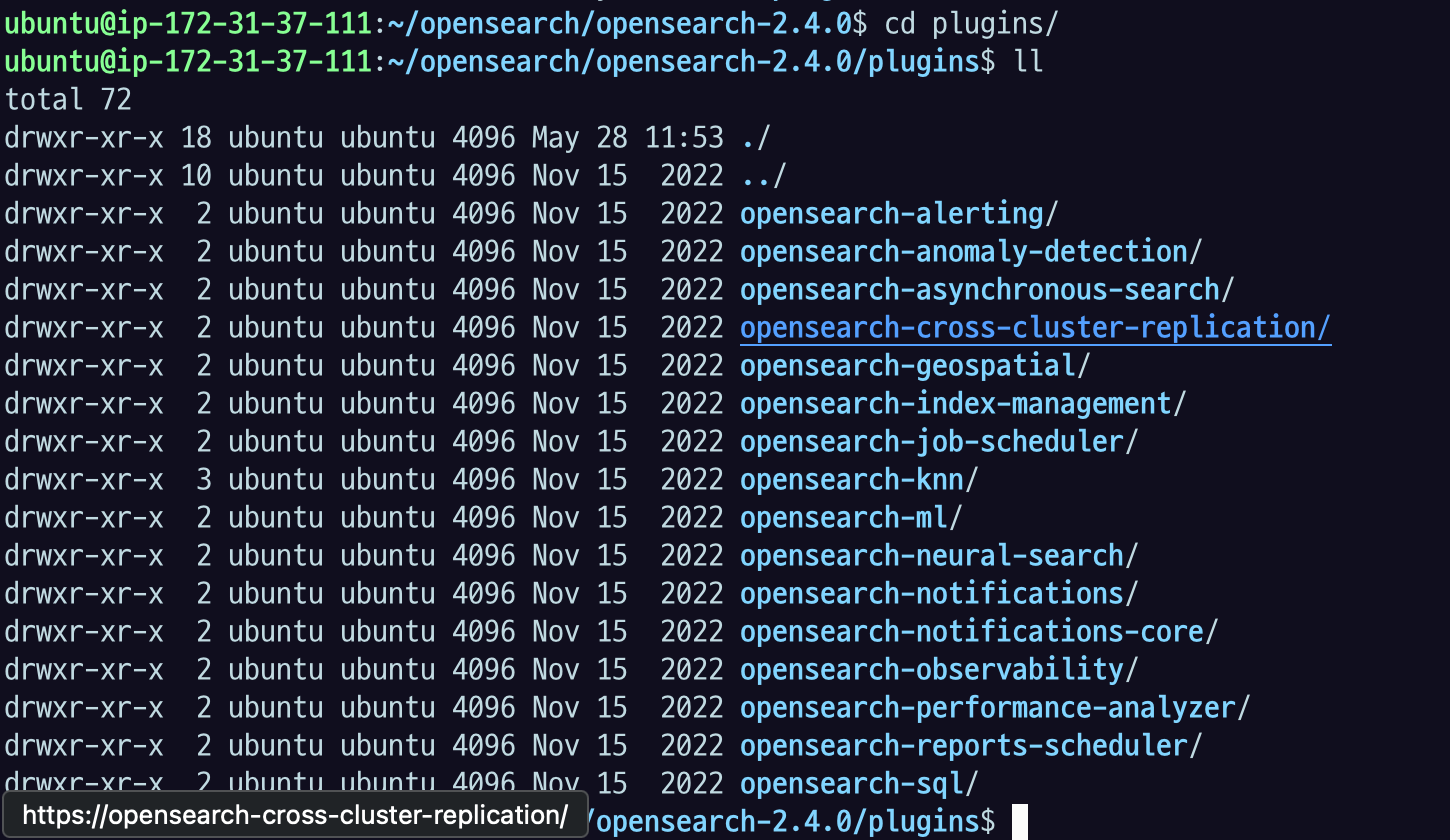
실제 플러그인에 들어가서 security 관련 디렉토리가 지워졌는지까지 확인해야한다.
$OPENSEARCH_HOME 에서
./bin/opensearch 로 실행한다.


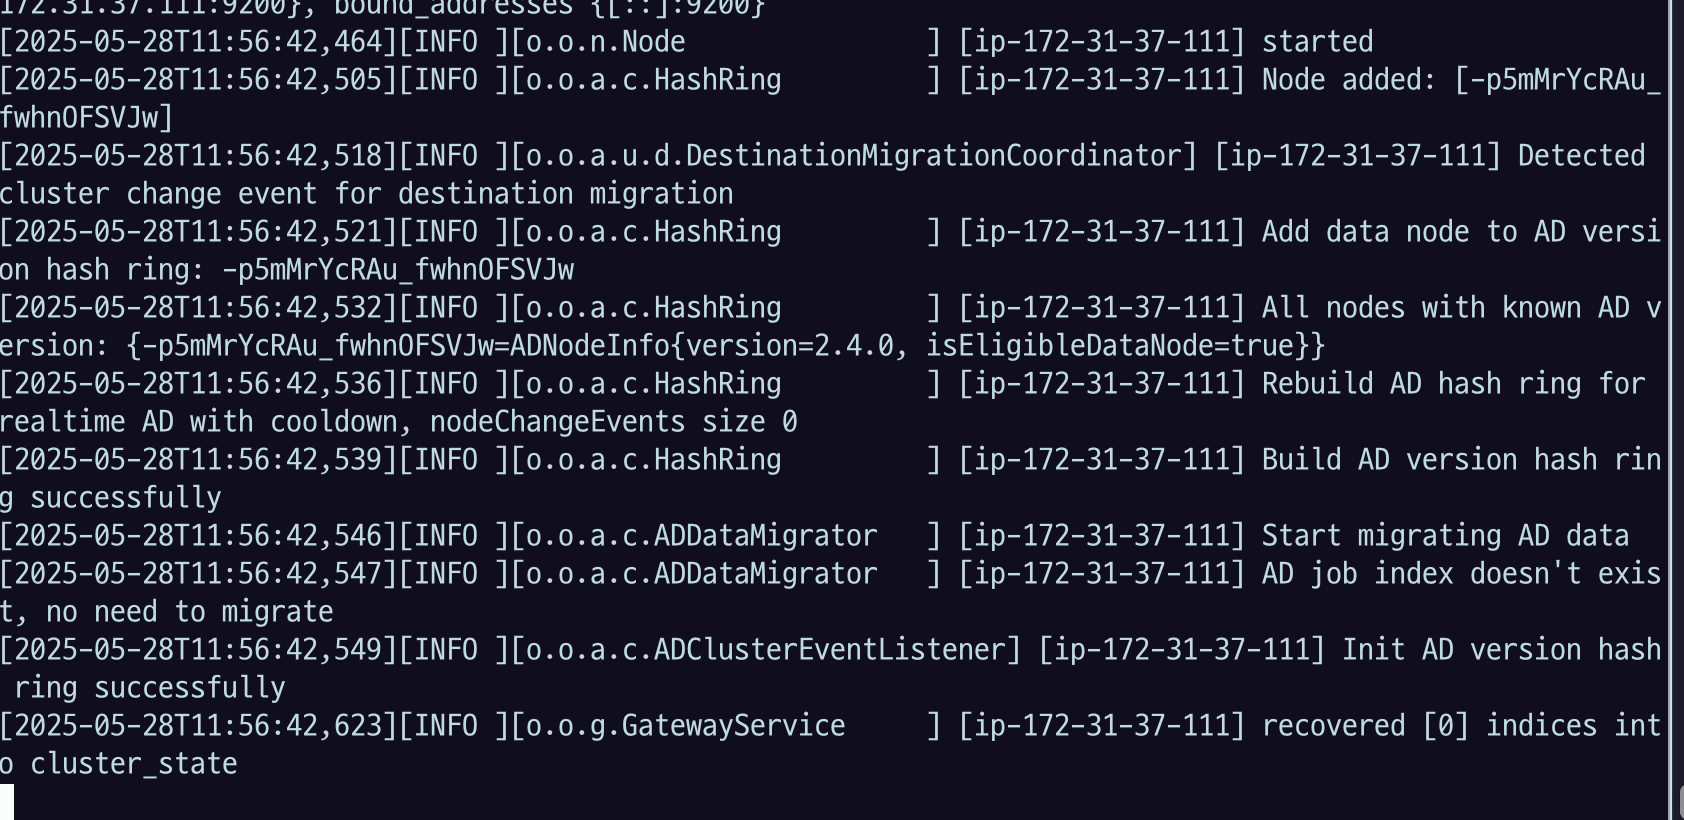
started 가 나오고
recovered [0] indices into cluster_state 로그가 나오면 제데로 부팅이 된 것이다.

처음 실행한 것이니까 인덱스가 하나도 없는 걸 확인할 수 있다.
터미널을 하나 열어서 curl로 대상이 되는 ec2서버의 IP 주소와 포트로(기본이면 9200) GET을 날리면 될 것.
확인
curl -X GET http://$IP:9200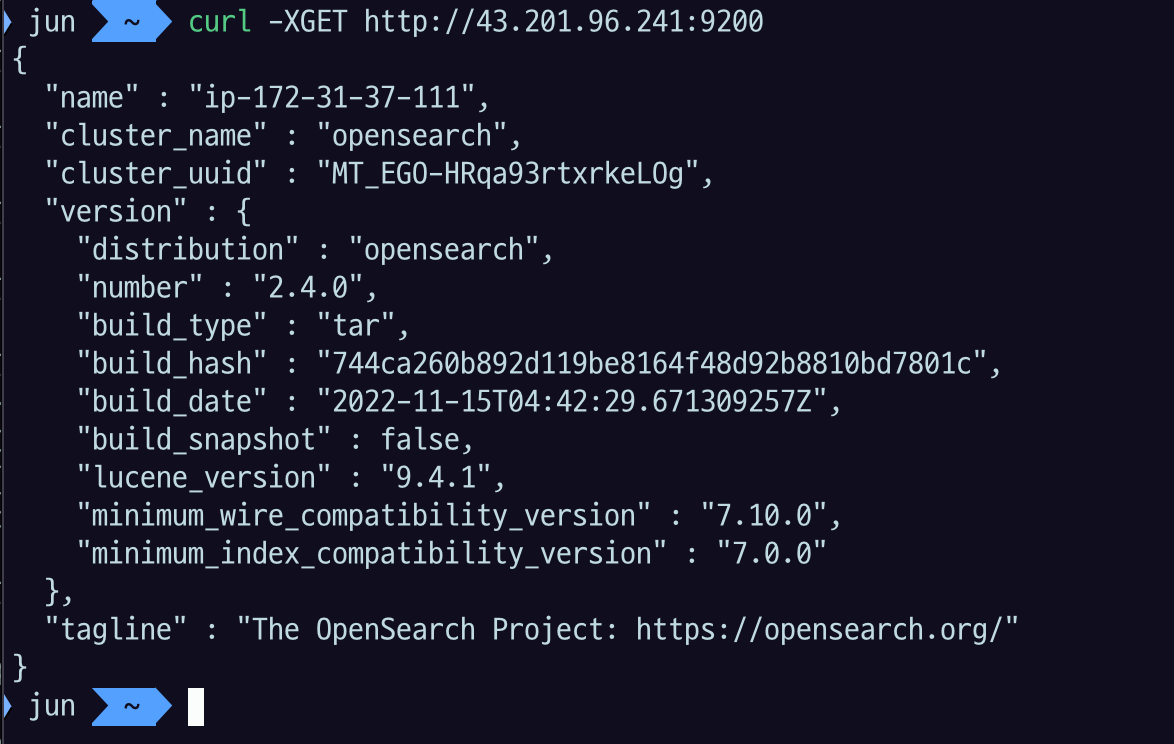
호스트네임 나오고
내가 설치한 오픈서치 버전 등 값들이잘 나온 것을 확인할 수 있다.
여기서 끝이 아니라 이걸 잘 띄우려면 systemctl로 관리하면 좋다.
sudo vi /etc/systemd/system/opensearch.service[Unit]
Description=OpenSearch
Wants=network-online.target
After=network-online.target
[Service]
Type=forking
RuntimeDirectory=data
WorkingDirectory=$YOUR_OPENSEARCH_HOME
ExecStart=$YOUR_OPENSEARCH_HOME/bin/opensearch -d
User=$YOUR_USER
Group=$YOUR_USER
StandardOutput=journal
StandardError=inherit
LimitNOFILE=65535
LimitNPROC=4096
LimitAS=infinity
LimitFSIZE=infinity
TimeoutStopSec=0
KillSignal=SIGTERM
KillMode=process
SendSIGKILL=no
SuccessExitStatus=143
TimeoutStartSec=75
[Install]
WantedBy=multi-user.target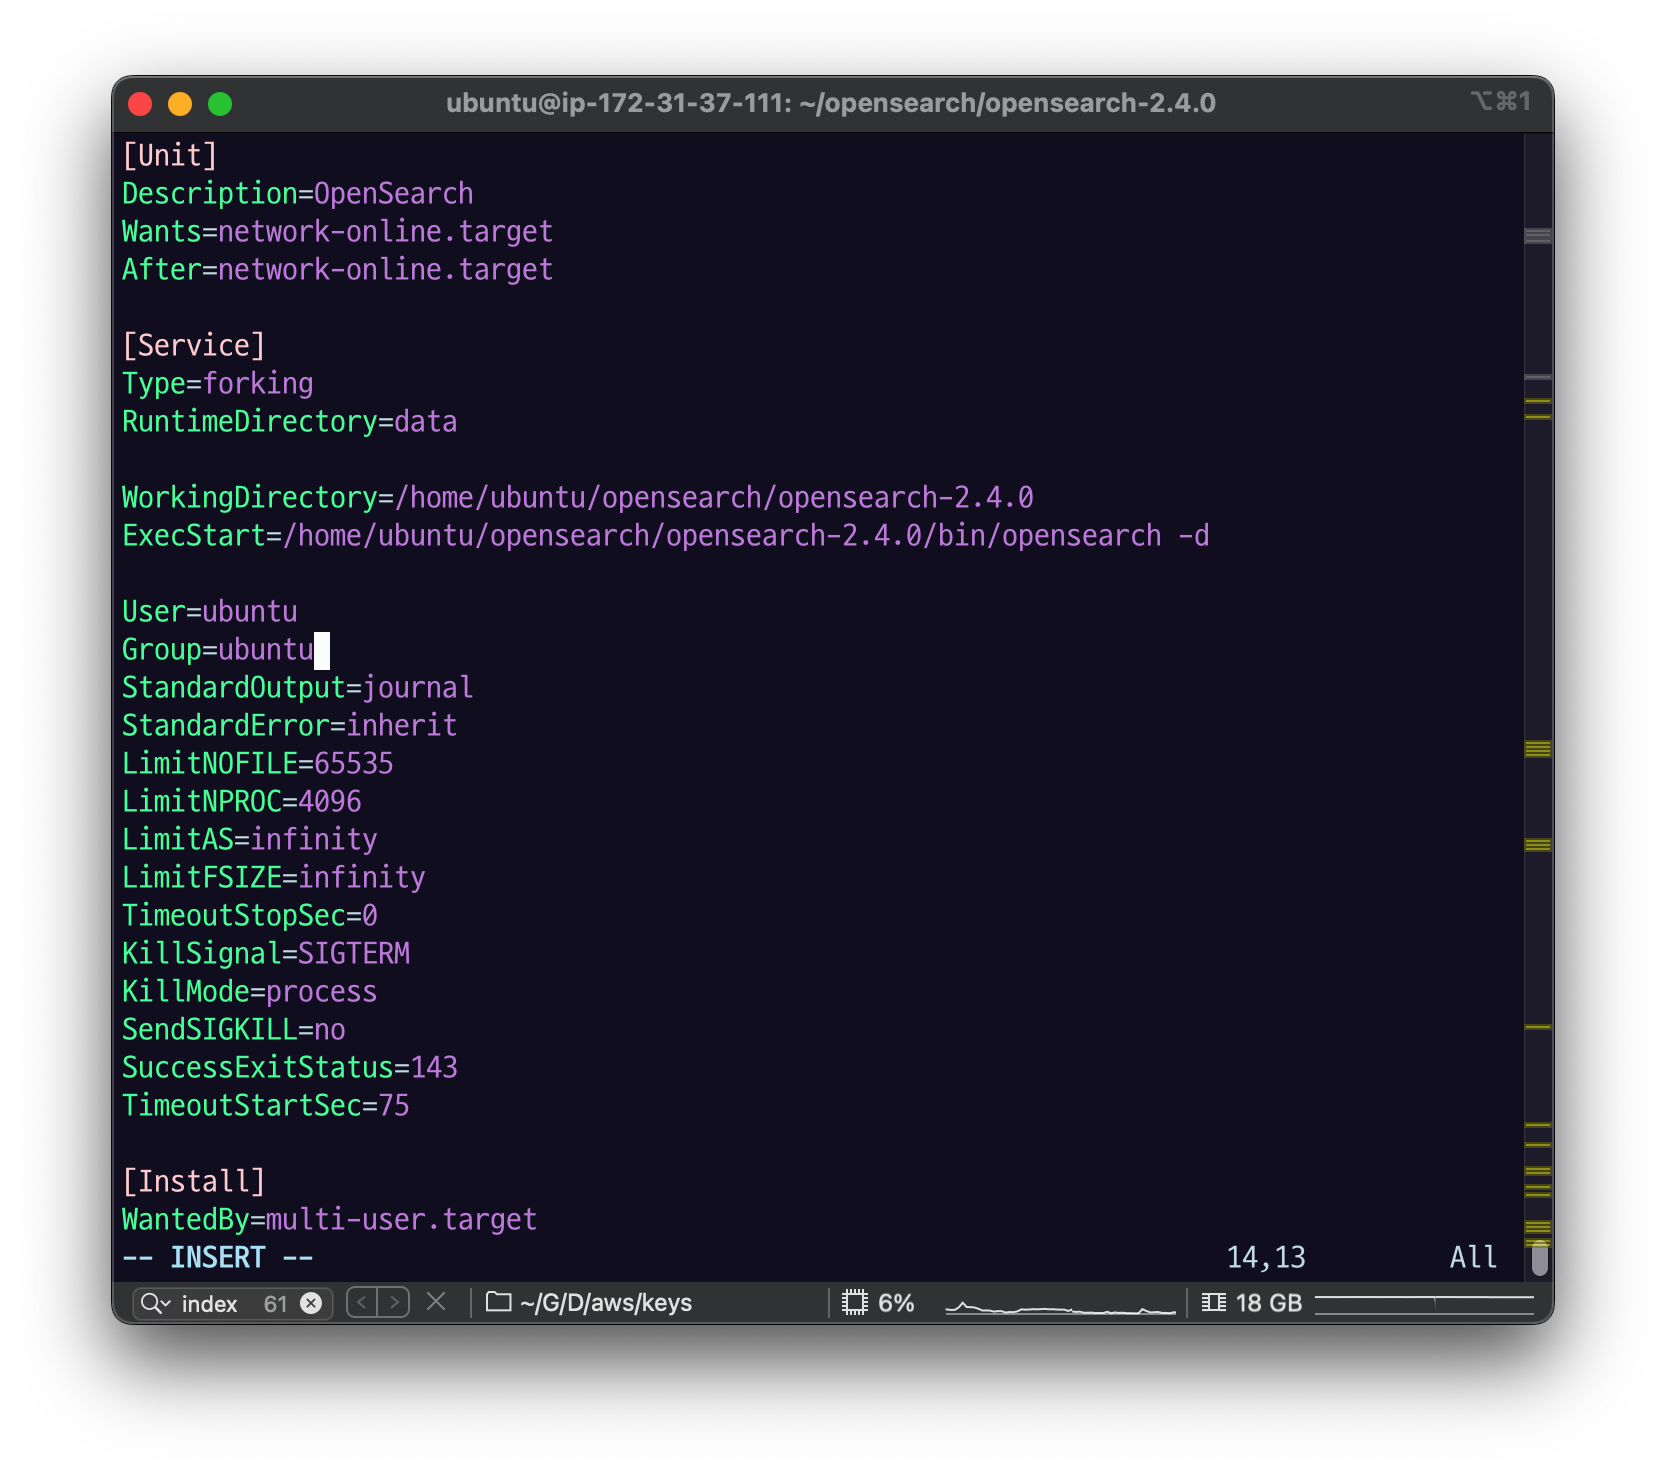
$YOUR_OPENSEARCH_HOME을 자신의 경로에 맞게 수정한다.$YOUR_USER도 자신이 사용할 유저에 맞게 수정한다.$YOUR_OPENSEARCH_HOME에 대한 소유권한 ( chown )이
$YOUR_USER에게 있어야 한다.
등록
sudo systemctl daemon-reload시스템에 설치된 서비스를 뒤져서 설정이 바뀐 게 있으면 로드를 해주고
처음 등록한 것이기 때문에 enable을 해줘야 함
sudo systemctl enable opensearch.servicesystemctl로 opensearch 시작
sudo systemctl start opensearch.serviceps -ef | grep opensearch
이렇게 프로세스가 떠 있는 것을 확인할 수 있다.
log 디렉토리 들어가서 로그 확인
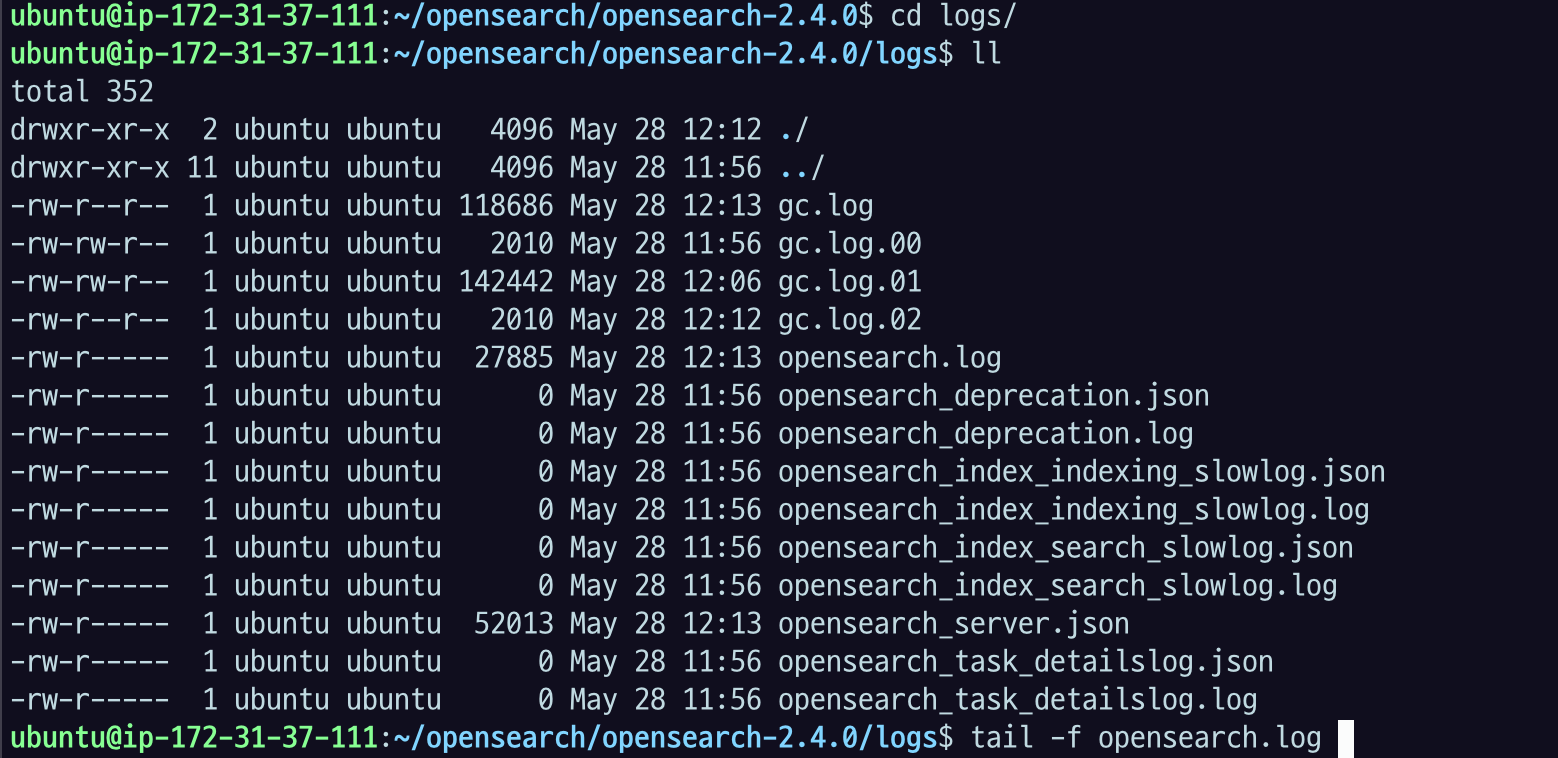
tail -f $OPENSEARCH_HOME/logs/opensearch.log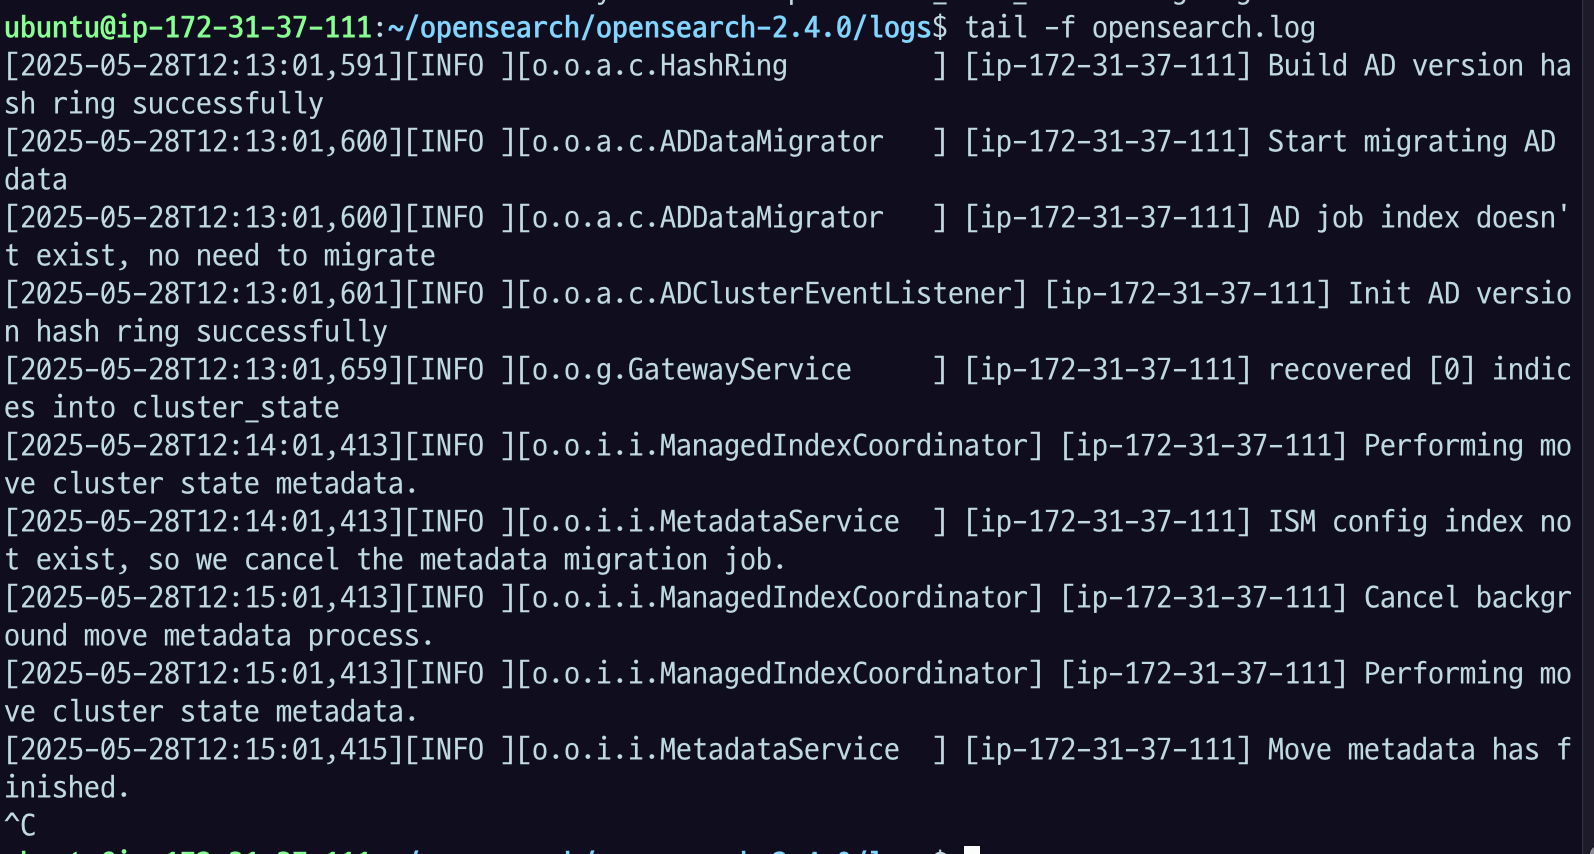
부팅하면서 로그가 남아있고 있다.