[개발글쓰기 1일차] GoRouter를 이용한 Bottom Navigation Bar - 1 : shellRoute 의 소개와 활용 방법 알기
오늘 구현해보고자 하는 것은 Navigation Bar 입니다.
하지만 조금 다른 점이 있다면 GoRoute 의 shellRoute 를 사용하여 바텀 네비게이션 바를 구현할 예정입니다.
shellRoute
참고한 공식 문서 : 다음 글은 공식문서를 참고하였습니다.
shellRoute는 GoRouter 내에서 특정 UI 셸(프레임이나 기본 레이아웃 같은 것)을 자식 경로들 주위에 추가하여 표시할 때 사용하는 클래스입니다. 이를 통해 앱 내에서 다른 페이지나 색션으로 이동할 때 기본적인 UI 구조를 유지할 수 있습니다. shellRoute 를 사용하면 새로운 Navigator를 생성하여, 이 Navigator 안에 자식 경로들이 표시되게 만듭니다.
이는 자식 경로들이 루트 Navigator가 아닌 별도의 Navigator 안에 배치되게 함으로써 다양한 네비게이션 스택을 관리할 수 있게 해줍니다.
간단한 예로, 만약 앱에 바텀 네비게이션 바가 있고, 각 탭이 자신만의 네비게이션 스택을 가져야 한다면, 각 탭의 루트를 ShellRoute로 만들어서 관리할 수 있습니다. 이렇게 하면 사용자가 탭 사이를 이동할 때 이전에 탐색했던 페이지들의 상태를 유지할 수 있습니다.
또한, 특정 자식 경로를 루트 Navigator에 직접 표시하고 싶을 때는 parentNavigatorKey를 사용하여 이를 지정할 수 있습니다. 이 기능은 특정 페이지를 앱의 전체 화면에 표시하고 싶을 때 유용합니다.
ShellRoute는 앱 바, 바텀 네비게이션 바를 생성하는데 유용하다.
구현 목표

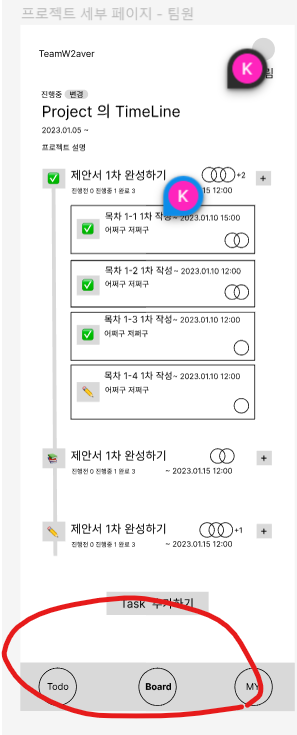
개발하고자 하는 구현 목표는 아래에 네비게이션 바였습니다. 처음 구현을 하고자 할 때 궁금한 점은 다음과 같았습니다.
- ShallRoute 의 문법은 무엇이지?
- 현재 태스트 앱에서는 '/' 페이지를 거치고 이동해야한다. 어떻게 구현할 수 있을까?
- ToDo 페이지는 정보를 유지해야하지만, Board와 My 페이지 같은 경우는 정보를 유지하지 않고 각 페이지를 새로고침해야한다 어떻게 구현 할 수 있을까?
정보 알아보기
예제 코드 보기 & 분석
import 'package:flutter/material.dart';
import 'package:go_router/go_router.dart';
// ignore: depend_on_referenced_packages
import 'package:flutter_web_plugins/url_strategy.dart';

// private navigators
final _rootNavigatorKey = GlobalKey<NavigatorState>();
final _shellNavigatorAKey = GlobalKey<NavigatorState>(debugLabel: 'shellA');
final _shellNavigatorBKey = GlobalKey<NavigatorState>(debugLabel: 'shellB');

final goRouter = GoRouter(
  initialLocation: '/a',
  // * Passing a navigatorKey causes an issue on hot reload:
  // * https://github.com/flutter/flutter/issues/113757#issuecomment-1518421380
  // * However it's still necessary otherwise the navigator pops back to
  // * root on hot reload
  navigatorKey: _rootNavigatorKey,
  debugLogDiagnostics: true,
  routes: [
    // Stateful navigation based on:
    // https://github.com/flutter/packages/blob/main/packages/go_router/example/lib/stateful_shell_route.dart
    StatefulShellRoute.indexedStack(
      builder: (context, state, navigationShell) {
        return ScaffoldWithNestedNavigation(navigationShell: navigationShell);
      },
      branches: [
        StatefulShellBranch(
          navigatorKey: _shellNavigatorAKey,
          routes: [
            GoRoute(
              path: '/a',
              pageBuilder: (context, state) => const NoTransitionPage(
                child: RootScreen(label: 'A', detailsPath: '/a/details'),
              ),
              routes: [
                GoRoute(
                  path: 'details',
                  builder: (context, state) => const DetailsScreen(label: 'A'),
                ),
              ],
            ),
          ],
        ),
        StatefulShellBranch(
          navigatorKey: _shellNavigatorBKey,
          routes: [
            // Shopping Cart
            GoRoute(
              path: '/b',
              pageBuilder: (context, state) => const NoTransitionPage(
                child: RootScreen(label: 'B', detailsPath: '/b/details'),
              ),
              routes: [
                GoRoute(
                  path: 'details',
                  builder: (context, state) => const DetailsScreen(label: 'B'),
                ),
              ],
            ),
          ],
        ),
      ],
    ),
  ],
);

void main() {
  // turn off the # in the URLs on the web
  usePathUrlStrategy();
  runApp(const MyApp());
}

class MyApp extends StatelessWidget {
  const MyApp({super.key});

  @override
  Widget build(BuildContext context) {
    return MaterialApp.router(
      routerConfig: goRouter,
      debugShowCheckedModeBanner: false,
      theme: ThemeData(primarySwatch: Colors.indigo),
    );
  }
}

// Stateful navigation based on:
// https://github.com/flutter/packages/blob/main/packages/go_router/example/lib/stateful_shell_route.dart
class ScaffoldWithNestedNavigation extends StatelessWidget {
  const ScaffoldWithNestedNavigation({
    Key? key,
    required this.navigationShell,
  }) : super(
            key: key ?? const ValueKey<String>('ScaffoldWithNestedNavigation'));
  final StatefulNavigationShell navigationShell;

  void _goBranch(int index) {
    navigationShell.goBranch(
      index,
      // A common pattern when using bottom navigation bars is to support
      // navigating to the initial location when tapping the item that is
      // already active. This example demonstrates how to support this behavior,
      // using the initialLocation parameter of goBranch.
      initialLocation: index == navigationShell.currentIndex,
    );
  }

  @override
  Widget build(BuildContext context) {
    return LayoutBuilder(builder: (context, constraints) {
      if (constraints.maxWidth < 450) {
        return ScaffoldWithNavigationBar(
          body: navigationShell,
          selectedIndex: navigationShell.currentIndex,
          onDestinationSelected: _goBranch,
        );
      } else {
        return ScaffoldWithNavigationRail(
          body: navigationShell,
          selectedIndex: navigationShell.currentIndex,
          onDestinationSelected: _goBranch,
        );
      }
    });
  }
}

class ScaffoldWithNavigationBar extends StatelessWidget {
  const ScaffoldWithNavigationBar({
    super.key,
    required this.body,
    required this.selectedIndex,
    required this.onDestinationSelected,
  });
  final Widget body;
  final int selectedIndex;
  final ValueChanged<int> onDestinationSelected;

  @override
  Widget build(BuildContext context) {
    return Scaffold(
      body: body,
      bottomNavigationBar: NavigationBar(
        selectedIndex: selectedIndex,
        destinations: const [
          NavigationDestination(label: 'Section A', icon: Icon(Icons.home)),
          NavigationDestination(label: 'Section B', icon: Icon(Icons.settings)),
        ],
        onDestinationSelected: onDestinationSelected,
      ),
    );
  }
}

class ScaffoldWithNavigationRail extends StatelessWidget {
  const ScaffoldWithNavigationRail({
    super.key,
    required this.body,
    required this.selectedIndex,
    required this.onDestinationSelected,
  });
  final Widget body;
  final int selectedIndex;
  final ValueChanged<int> onDestinationSelected;

  @override
  Widget build(BuildContext context) {
    return Scaffold(
      body: Row(
        children: [
          NavigationRail(
            selectedIndex: selectedIndex,
            onDestinationSelected: onDestinationSelected,
            labelType: NavigationRailLabelType.all,
            destinations: const <NavigationRailDestination>[
              NavigationRailDestination(
                label: Text('Section A'),
                icon: Icon(Icons.home),
              ),
              NavigationRailDestination(
                label: Text('Section B'),
                icon: Icon(Icons.settings),
              ),
            ],
          ),
          const VerticalDivider(thickness: 1, width: 1),
          // This is the main content.
          Expanded(
            child: body,
          ),
        ],
      ),
    );
  }
}

/// Widget for the root/initial pages in the bottom navigation bar.
class RootScreen extends StatelessWidget {
  /// Creates a RootScreen
  const RootScreen({required this.label, required this.detailsPath, Key? key})
      : super(key: key);

  /// The label
  final String label;

  /// The path to the detail page
  final String detailsPath;

  @override
  Widget build(BuildContext context) {
    return Scaffold(
      appBar: AppBar(
        title: Text('Tab root - $label'),
      ),
      body: Center(
        child: Column(
          mainAxisSize: MainAxisSize.min,
          children: <Widget>[
            Text('Screen $label',
                style: Theme.of(context).textTheme.titleLarge),
            const Padding(padding: EdgeInsets.all(4)),
            TextButton(
              onPressed: () => context.go(detailsPath),
              child: const Text('View details'),
            ),
          ],
        ),
      ),
    );
  }
}

/// The details screen for either the A or B screen.
class DetailsScreen extends StatefulWidget {
  /// Constructs a [DetailsScreen].
  const DetailsScreen({
    required this.label,
    Key? key,
  }) : super(key: key);

  /// The label to display in the center of the screen.
  final String label;

  @override
  State<StatefulWidget> createState() => DetailsScreenState();
}

/// The state for DetailsScreen
class DetailsScreenState extends State<DetailsScreen> {
  int _counter = 0;

  @override
  Widget build(BuildContext context) {
    return Scaffold(
      appBar: AppBar(
        title: Text('Details Screen - ${widget.label}'),
      ),
      body: Center(
        child: Column(
          mainAxisSize: MainAxisSize.min,
          children: <Widget>[
            Text('Details for ${widget.label} - Counter: $_counter',
                style: Theme.of(context).textTheme.titleLarge),
            const Padding(padding: EdgeInsets.all(4)),
            TextButton(
              onPressed: () {
                setState(() {
                  _counter++;
                });
              },
              child: const Text('Increment counter'),
            ),
          ],
        ),
      ),
    );
  }
}
이 코드는 Flutter에서 GoRouter 패키지를 활용해 상태를 유지하는 중첩 내비게이션 시스템을 구현하는 방법을 보여줍니다. 주요 구성요소와 흐름은 다음과 같습니다:
기본 설정 및 GoRouter 초기화:
usePathUrlStrategy()함수를 사용해 웹 애플리케이션에서 URL의#을 제거합니다.- 전역으로 선언된 내비게이터 키(
_rootNavigatorKey,_shellNavigatorAKey,_shellNavigatorBKey)를 사용해 각각의 내비게이션 스택을 관리합니다. GoRouter객체(goRouter)를 통해 앱의 라우팅 로직을 정의합니다. 이 때,StatefulShellRoute.indexedStack을 사용하여 상태를 유지하는 중첩 내비게이션을 구현합니다.
StatefulShellRoute 및 StatefulShellBranch:
StatefulShellRoute.indexedStack를 통해 각 탭(A,B)에 대한 별도의 내비게이션 스택을 생성합니다. 이는 사용자가 탭을 전환해도 각 탭의 상태(예: 스크롤 위치, 카운터 값)가 유지되게 합니다.- 각
StatefulShellBranch는 특정 탭(A또는B)에 대한 라우트를 정의합니다. 예를 들어,'/a'경로는RootScreen으로,'/a/details'는DetailsScreen으로 이동합니다.
반응형 UI 구성:
LayoutBuilder를 사용하여 화면 크기에 따라 다른 내비게이션 컴포넌트(NavigationBar또는NavigationRail)를 표시합니다. 좁은 화면에서는 하단에 탭 바가, 넓은 화면에서는 좌측에 네비게이션 레일이 표시됩니다.
UI 위젯:
RootScreen: 각 탭의 메인 화면으로, 디테일 화면으로 이동할 수 있는 버튼을 제공합니다.DetailsScreen: 세부 정보 화면으로, 간단한 카운터 기능을 포함합니다. 사용자가 버튼을 누를 때마다 카운터 값이 증가합니다.
핵심 기능:
- 사용자는 탭(
Section A,Section B)을 전환하면서 각 탭의 상태를 유지할 수 있습니다. 예를 들어,DetailsScreen에서 카운터 값을 변경한 후 다른 탭으로 이동해도, 다시 돌아왔을 때 카운터 값이 유지됩니다. ScaffoldWithNestedNavigation,ScaffoldWithNavigationBar,ScaffoldWithNavigationRail위젯을 통해 반응형 레이아웃을 구현하여 화면 크기에 따라 적절한 내비게이션 방식을 제공합니다.
이 코드는 Flutter 앱에서 복잡한 내비게이션 패턴을 구현하고자 할 때 유용한 예시로, GoRouter를 사용하여 상태 관리와 중첩된 내비게이션, 반응형 UI 디자인을 효율적으로 처리하는 방법을 보여줍니다.
주목하고 싶은 곳
구현하는 도중 어떻게 body 와 navigationBar 을 합칠 수 있는지 궁금하였다. 그리고 어떻게 bottomnavigation 의 버튼을 클릭할 때 마다 탭이 변하는 지도 궁금하였다.
class ScaffoldWithNestedNavigation extends StatelessWidget {
const ScaffoldWithNestedNavigation({
Key? key,
required this.navigationShell,
}) : super(
key: key ?? const ValueKey<String>('ScaffoldWithNestedNavigation'));
final StatefulNavigationShell navigationShell;
void _goBranch(int index) {
navigationShell.goBranch(
index,
// A common pattern when using bottom navigation bars is to support
// navigating to the initial location when tapping the item that is
// already active. This example demonstrates how to support this behavior,
// using the initialLocation parameter of goBranch.
initialLocation: index == navigationShell.currentIndex,
);
}
Widget build(BuildContext context) {
return LayoutBuilder(builder: (context, constraints) {
return ScaffoldWithNavigationBar(
body: navigationShell,
selectedIndex: navigationShell.currentIndex,
onDestinationSelected: _goBranch,
);
});
}
}
class ScaffoldWithNavigationBar extends StatelessWidget {
const ScaffoldWithNavigationBar({
super.key,
required this.body,
required this.selectedIndex,
required this.onDestinationSelected,
});
final Widget body;
final int selectedIndex;
final ValueChanged<int> onDestinationSelected;
Widget build(BuildContext context) {
return Scaffold(
body: body,
bottomNavigationBar: NavigationBar(
selectedIndex: selectedIndex,
destinations: const [
NavigationDestination(label: 'Todo', icon: Icon(Icons.check_box)),
NavigationDestination(label: 'Board', icon: Icon(Icons.dashboard)),
NavigationDestination(label: 'My', icon: Icon(Icons.person)),
],
onDestinationSelected: onDestinationSelected,
),
);
}
}-
navigationShell: StatefulNavigationShell은 StatefulShellRoute의 상태를 관리하는 위젯입니다. 일반적으로 이 위젯은 직접 사용되지 않고, StatefulShellRoute에 의해 내부적으로 생성됩니다
-
goBranch : 제공된 인덱스에 해당하는 StatefulShellBranch로 내비게이션하는 메소드입니다. 이를 통해 앱 내에서 다른 섹션으로 전환할 수 있습니다. 선택적으로 initialLocation 플래그를 사용하여 초기 위치로 이동할지 여부를 결정할 수 있습니다.
즉 GoRouter 를 이용해 상태를 저장하는 탭을 생성하기 위해서는 다음과 같은 과정이 필요하다.
1. 내비게이터 키 생성
2. GoRouter StatefulShellRoute 클래스를 이용하고, 각 탭에 해당하는 브랜치를 생성
3. 네비게이션, 각 탭에 해당하는 바디 스크린을 만들기
4. navigationShell을 이용해 합치고 관리하기
