실제 코드 적용하는 법
loginScreen.dart
Widget build(BuildContext context) {
    var t = Translations.of(context).loginScreen;
    loginScreenViewModel = ref.read(loginScreenViewModelProvider.notifier);
    return CustomForm(
      key: _formKey,
      child: SafeArea(
        child: Scaffold(
          body: SingleChildScrollView(
            child: Center(
              child: Padding(
                padding: const EdgeInsets.fromLTRB(20, 10, 20, 10),
                child: Column(children: [
                  const Text(''),
                  const SizedBox(
                    height: 20,
                  ),
                  CustomTextFormField(
                    fieldName: 'email',
                    validator: FieldValidationBuilder.field('email')
                        .required(t.emailField.validation.required,
                            AutoValidationMode.onUserInteraction)
                        .build(),
                    decoration: inputDecoration.copyWith(
                      hintText: t.emailField.hintText,
                    ),
                  ),
                  const SizedBox(
                    height: 20,
                  ),
                  CustomTextFormField(
                    fieldName: 'password',
                    validator: FieldValidationBuilder.field('password')
                        .required(t.passwordField.validation.required,
                            AutoValidationMode.onUserInteraction)
                        .pattern(
                            passwordRegexPatternString,
                            t.passwordField.validation.pattern(minLength: 2),
                            AutoValidationMode.onUserInteraction)
                        .build(),
                    decoration: inputDecoration.copyWith(
                      hintText: t.passwordField.hintText,
                    ),
                  ),
                  CheckboxTextRow(
                    text: t.rememberMeCheckbox,
                    value: rememberMe!,
                    onChanged: (value) {
                      setState(() {
                        rememberMe = value;
                      });
                    },
                  ),
                  RoundedElevatedButton(
                    text: t.loginButton,
                    onPressed: _onLoginButtonPressed,
                  ),
                  TextButton(
                      onPressed: () {
                        context.go('/signup');
                      },
                      child: Text(t.signUpButton, style: textStyle)),
                  Row(
                    mainAxisAlignment: MainAxisAlignment.center,
                    children: [
                      TextButton(
                        onPressed: () {},
                        child: Text(t.findIdButton, style: textStyle),
                      ),
                      Text('|', style: textStyle),
                      TextButton(
                        onPressed: () {},
                        child: Text(t.findPasswordButton, style: textStyle),
                      )
                    ],
                  ),
                  const Padding(
                    padding: EdgeInsets.all(16),
                    child: Divider(
                      color: Colors.black,
                    ),
                  ),
                  Text(t.snsLoginTitle, style: textStyle),
                  const SizedBox(
                    height: 16,
                  ),
                  Row(
                    mainAxisAlignment: MainAxisAlignment.center,
                    children: [
                      Container(
                        width: 50, // 원의 너비
                        height: 50, // 원의 높이
                        decoration: BoxDecoration(
                          shape: BoxShape.circle, // 동그라미 모양
                          color: Colors.grey[300], // 회색
                        ),
                      ),
                      const SizedBox(
                        width: 20,
                      ),
                      Container(
                        width: 50, // 원의 너비
                        height: 50, // 원의 높이
                        decoration: BoxDecoration(
                          shape: BoxShape.circle, // 동그라미 모양
                          color: Colors.grey[300], // 회색
                        ),
                      ),
                    ],
                  )
                ]),
              ),
            ),
          ),
        ),
      ),
    );
  }

  void _onLoginButtonPressed() async {
    var email = _formKey.currentState?.fields['email']?.value;
    var password = _formKey.currentState?.fields['password']?.value;

    if (_formKey.currentState?.validate(null) == true) {
      try {
        await loginScreenViewModel.signInByEmail(email!, password!);
        context.go('/main');
        // 로그인 성공 후의 로직
      } catch (e) {
        print('로그인 프로세스 중 에러 발생: $e');
        // 에러 처리 로직 (예: Snackbar 띄우기)
      }
    }
  }
}
string_ko.18n.json
"loginScreen": {
    "title": "로그인",
    "emailField": {
      "hintText": "이메일",
      "validation": {
        "required": "이메일을 입력하세요"
      }
    },
위 코드들을 보면 먼저 json 으로 login 스크린에 텍스트를 모두 정의하고 있다.
그리고 loginScreen.dart 에서는 var t = Translations.of(context).loginScreen; 즉 context 를 통하여 번역 정보를 받아온다.
마지막으로 위젯 내 하드코딩된 String 을 Translation 객체로 치환해주면 된다.
매개변수를 생성하는 법
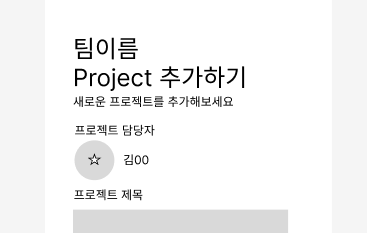
만약 이런 상황일 경우는 어떻게 할까? 팀이름은 고정된 String 값이 아닌 계속 팀이름에 따라 변해야한다. 이럴 땐 Slang에서도 매개변수를 받을 수 있는데 문법은 다음과 같다.
  "projectUpdateScreen": {
    "teamName": "${teamName} ",
    "editProjectTitle": "Project 수정하기",
    "editProjectDescription": "프로젝트의 내용을 수정해보세요",
  },
단순히 json 파일에 $ 을 붙이면 된다.
그러면 자동으로 Slang 에서 dart 파일을 생성해준다.

앱 개발과 AI, 서비스에 관심이 많은 학생입니다.