
1. group_vars & host_vars
Inventory 에서의 group_vars
Inventory 파일의 group 별로 변수를 정의한다. 이때, 해당 디렉토리 안에 파일 이름을 Inventory 파일에서 정의한 group 명과 동일하게 해야 한다. 해당 group 의 Node 들은 파일에 정의된 변수들을 사용할 수 있다
mkdir group_vars
touch group_vars/east

vagrant@control:~/lab1$ cat group_vars/east
 dist: "{{ 'centos' if ansible_distribution == 'CentOS'
           else 'ubuntu' if ansible_distribution == 'Ubuntu'
           else 'linux' }}"
- 변수를 선언한 부분을 group_vars 폴더의 east 파일에 붙여넣기 해주자
vagrant@control:~/lab1$ cat install_nginx.yaml
---
- name: install nginx
  hosts: east
  become: yes
#  vars:
#    dist: "{{ 'centos' if ansible_distribution == 'CentOS'
#               else 'ubuntu' if ansible_distribution == 'Ubuntu'
#               else 'linux' }}"
  tasks:
    - name: install nginx per distribution
      include_tasks: "install_{{dist}}.yaml"
- install_nginx 에는 이제 변수 선언 부분이 필요없으므로, 주석 처리를 하자
PLAY RECAP ********************************************************************************************************************************
centos1                    : ok=6    changed=4    unreachable=0    failed=0    skipped=0    rescued=0    ignored=0
centos2                    : ok=6    changed=4    unreachable=0    failed=0    skipped=0    rescued=0    ignored=0
ubuntu1                    : ok=4    changed=2    unreachable=0    failed=0    skipped=0    rescued=0    ignored=0
- Playbook 을 실행하면, Inventory 의 east 에 해당하는 Node 들에만 작업이 실행되는데, 이때 east 에 대해 변수 선언을 했으므로, east group 에 해당 하는 모든 Node 에서는 변수 선언을 한다
Inventory 에서의 host_vars
host 별로 변수를 정의한다. 이때, 디렉토리 안에 파일의 이름은 Inventory 파일에서 정의한 host 의 이름과 동일시 한다. 해당 Host 는 파일에 정의한 변수들을 사용할 수 있다
mv group_vars ..
- group_vars 를 위로 옮기자
mkdir host_vars
touch host_vars/centos1 host_vars/ubuntu1
- host_vars 디렉토리를 만들고, 안에 파일 두개를 생성하자
vagrant@control:~/lab1$ cat host_vars/centos1
 dist: "{{ 'centos' if ansible_distribution == 'CentOS'
           else 'ubuntu' if ansible_distribution == 'Ubuntu'
           else 'linux' }}"
vagrant@control:~/lab1$ cat host_vars/ubuntu1
 dist: "{{ 'centos' if ansible_distribution == 'CentOS'
           else 'ubuntu' if ansible_distribution == 'Ubuntu'
           else 'linux' }}"
- 각 파일에 변수 선언 부분을 작성해주자
host_vars 는 우선 순위가 높다. 따라서 install_nginx 에서 hosts 를 east 로 지정하였지만, host_vars 에서 지정한 두 개의 Node 에만 작업을 한다
- 즉, 우리는 centos1 과 ubuntu1 host 를 지정했으므로, east 의 3 개의 노드 중에서 host_vars 에서 지정한 두 개의 노드에서만 변수를 선언한다
TASK [install nginx per distribution] *****************************************************************************************************
fatal: [centos2]: FAILED! => {"msg": "'dist' is undefined"}
- hosts 가 east 이지만, host_vars 에서 centos2 는 없으므로, 해당 Node 에서는 변수가 선언되지 않았다고 FAILED 가 발생한다
2. Template
Template 은 기본 형태를 생성하고, 변경된 사항을 각각의 노드에 전달하기 위해 사용한다
문제
- centos 의 경우
Hello CentOS
211.183.3.x- ubuntu 의 경우
Hello Ubuntu
211.183.3.Y
위와 같이 출력되게 하시오
check.j2
vagrant@control:~/lab1$ cat check.j2
<!DOCTYPE html>
<html>
        <head>
                <meta charset="utf-8">
                <title>IP 와 배포판 확인 </title>
        </head>
<body>
        <center>
                <p><h2>Hello {{ ansible_distribution }}</h2></p>
                <p>IP ADDRESS : {{ ansible_eth1.ipv4.address }}</p>
        </center>
</body>
</html>
- 진자2 파일은 위와 같이 작성한다
- 위 형태에서 각 노드의 정보를 넣어서 전달된다
install_centos.yaml
vagrant@control:~/lab1$ cat install_centos.yaml
- name: install epel-release
  action: "{{ ansible_pkg_mgr }} name=epel-release state=latest"

- name: install nginx
  action: "{{ ansible_pkg_mgr }} name=nginx state=present"

- name: create index.html
  get_url: url=https://www.nginx.com dest=/usr/share/nginx/html

- name: start nginx
  service: name=nginx state=started

- name: template
  template:
    src: check.j2
    dest: /usr/share/nginx/html/check.html
    mode: 0644
- template 모듈을 사용하여 진자2 파일을 노드에 넣어주게 한다. 이때, 각 노드별로 페이지에 정보가 추가되서 전달된다
3. role
준비
[koreaeast]
centos1
centos2
ubuntu1

[koreawest]
centos3
ubuntu2
- /etc/ansible/hosts 에 위 내용 추가
mkdir /home/vagrant/project3_role
- 디렉토리 추가. 이름에 의미는 없다. 단순히 실습을 오류 없이 진행하기 위해 위와 같이 해야 한다
vagrant@control:~/project3_role$ touch nginx_install_with_roles.yml
vagrant@control:~/project3_role$ mkdir -p roles/nginx/defaults
vagrant@control:~/project3_role$ cd roles/nginx
vagrant@control:~/project3_role/roles/nginx$ mkdir files
vagrant@control:~/project3_role/roles/nginx$ mkdir handlers meta tasks templates vars
vagrant@control:~/project3_role/roles/nginx$ ls
defaults  files  handlers  meta  tasks  templates  vars
- 필요한 파일과 디렉토리를 생성하자
nginx_install_with_roles.yml
---
- name: 각 노드에 nginx 설치하기
  hosts: koreaeast
  become: true

  roles:
    - role: ./roles/nginx
- 실행할 파일을 작성하자
필요한 파일 작성
vagrant@control:~/project3_role$ tree
.
├── nginx_install_with_roles.yml
└── roles
    └── nginx
        ├── defaults
        ├── files
        ├── handlers
        │   └── main.yml
        ├── meta
        ├── tasks
        │   ├── CentOS.yml
        │   ├── config.yml
        │   ├── main.yaml
        │   └── Ubuntu.yml
        ├── templates
        │   └── index.j2
        └── vars
            └── main.yml
- 위와 같은 구조를 만들어야 한다
---
- name: 배포판 별 리눅스 설치
  include_tasks: "{{ lnx_name }}.yml"

- name: nginx 구성하기
  include_tasks: config.yml
- roles/nginx/tasks/main.yml 작성
---
- name: restart nginx web server
  service:
    name: nginx
    state: restarted
- roles/nginx/handlers/main.yml 작성
---
- name: 기본 웹 페이지 생성
  template:
    src: index.j2
    dest: "{{ nginxdir }}"
    mode: 0644
    backup: yes
  notify:
    - restart nginx web server
- roles/nginx/tasks/config.yml 작성
- name: "{{ ansible_distribution }} 에 epel-release 설치하기"
  action: "{{ ansible_pkg_mgr }} name=epel-release state=latest"
- name: "{{ ansible_distribution }} 에 nginx 설치하기"
  action: "{{ ansible_pkg_mgr }} name=nginx state=present"
- roles/nginx/tasks/CentOS.yml 작성
- name: "{{ ansible_distribution }} 을 위한 nginx 설치"
  action: "{{ ansible_pkg_mgr }} name=nginx state=present update_cache=yes"
- roles/nginx/tasks/Ubuntu.yml 작성
<!DOCTYPE html>
<html>
        <head>
                <title>nginx web server</title>
        </head>
        <body>
                <center>
                <p><h2>ANSIBLE TEST PAGE</h2></p>
                <p>NGINX NUMBER : {{idx}}/{{nu}}</p>
                </center>
        </body>
</html>
- roles/nginx/templates/index.j2 작성
---
nu: "{{ groups.koreaeast | count }}"
idx: "{{ groups.koreaeast.index(inventory_hostname)+1 | int }}"
lnx_name: "{{ 'CentOS' if ansible_distribution == 'CentOS'
               else 'Ubuntu' if ansible_distribution == 'Ubuntu'
               else 'ETC' }}"

nginxdir: "{{ '/usr/share/nginx/html' if ansible_distribution == 'CentOS'
              else '/var/www/html' if ansible_distribution == 'Ubuntu'
              else 'ETC' }}"
- roles/nginx/vars/main.yml 작성
4. galaxy
vagrant@control:~$ mkdir project4_galaxy
vagrant@control:~$ cd project4_galaxy/
vagrant@control:~/project4_galaxy$ touch galaxy_nginx.yaml
- 디렉토리와 파일 생성
vagrant@control:~/project4_galaxy$ cat galaxy_nginx.yaml
---
- name: galaxy test
  hosts: west
  become: yes

  roles:
    - role: jdauphant.nginx
- 실행할 Playbook 작성
ansible-galaxy install jdauphant.nginx

vagrant@control:~/project4_galaxy$ ls /home/vagrant/.ansible/roles/jdauphant.nginx/
ansible.cfg  defaults  handlers  meta  README.md  tasks  templates  test  Vagrantfile  vars
- role 다운로드. 다운받은 파일은 위 경로에서 확인 가능
ansible-playbook galaxy_nginx.yaml
- Playbook 을 실행하자
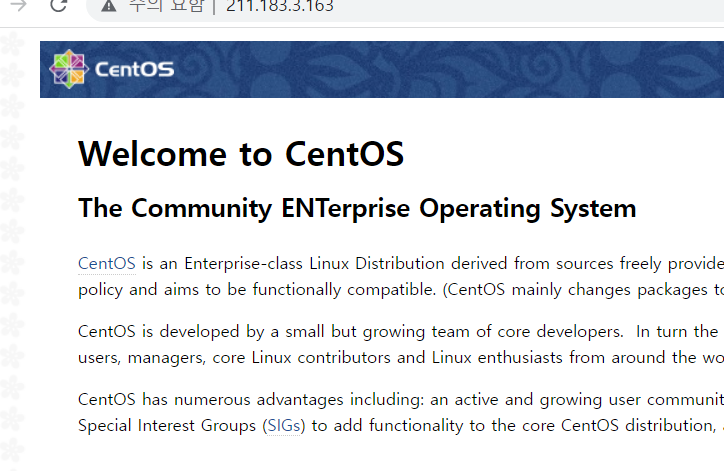
- nginx 가 잘 설치됬다

멋진 엔지니어가 될 때까지