
GitLab-Runner 등록
GitLab-Runner 등록
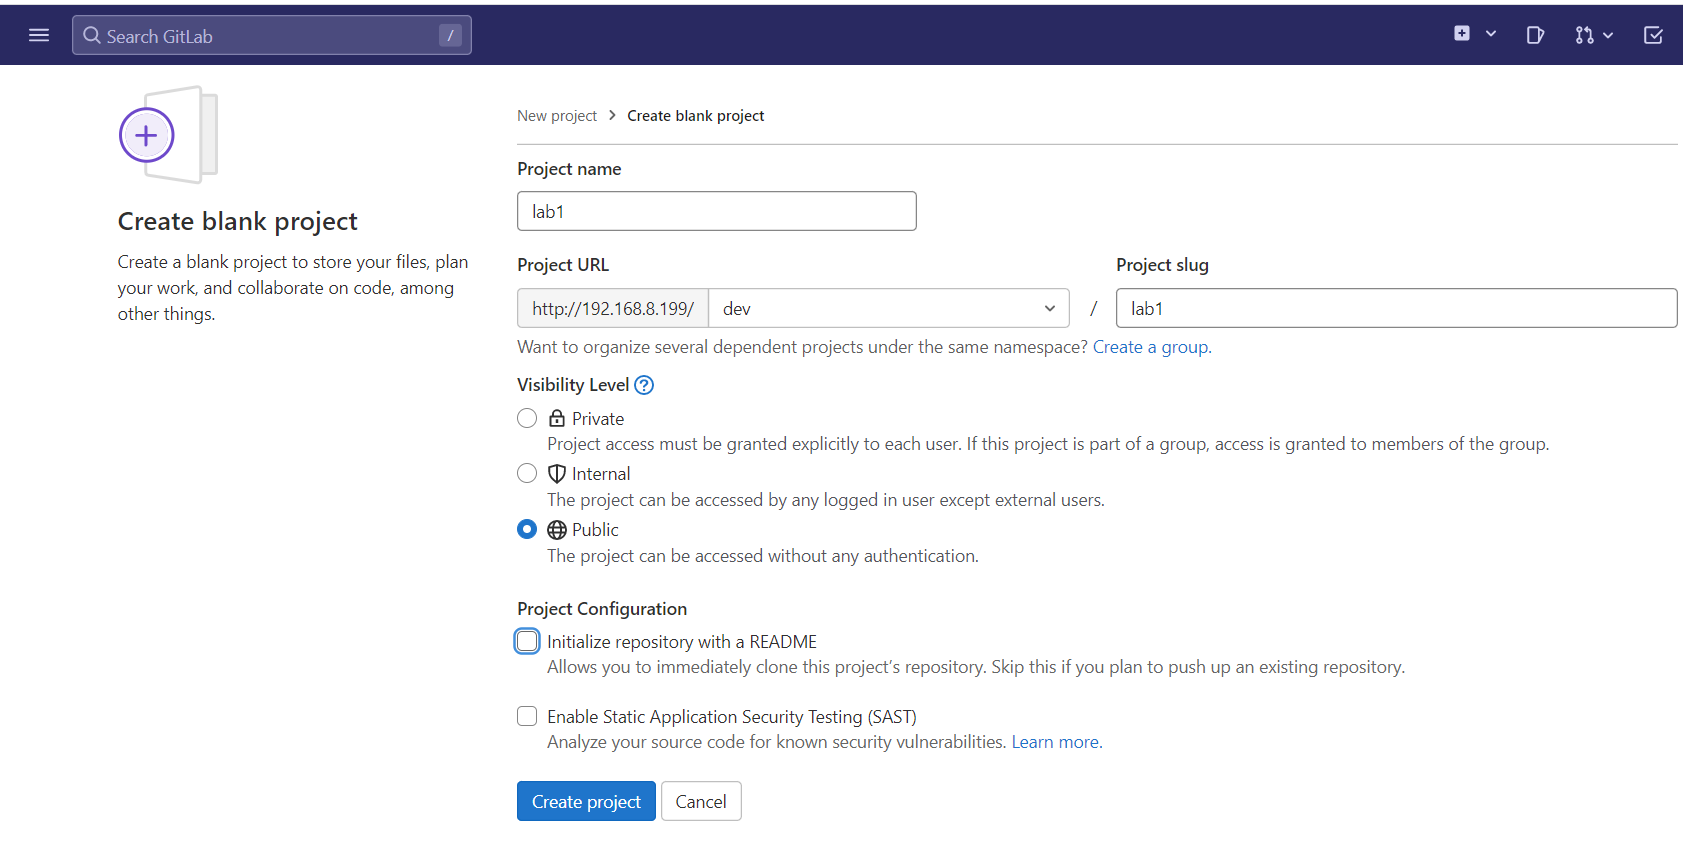
- 위의 설정으로 Project 를 생성하자
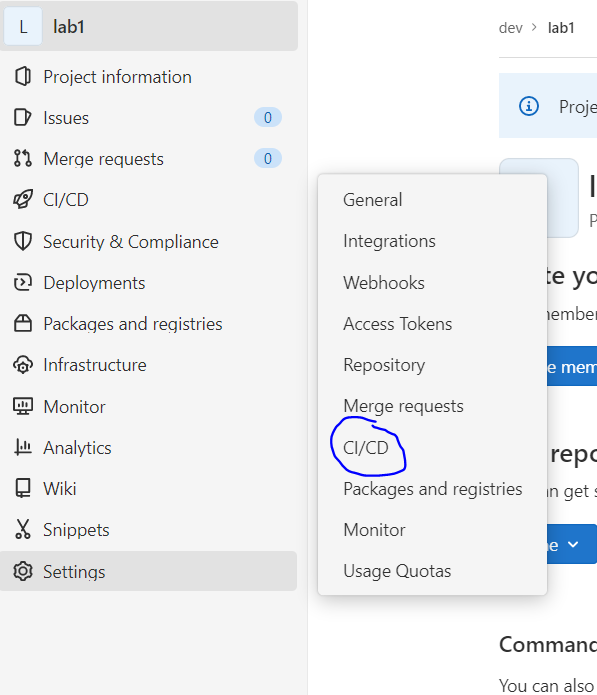
- 생성이 완료되면, 우측 메뉴에서 Settings -> CI/CD 를 클릭하자
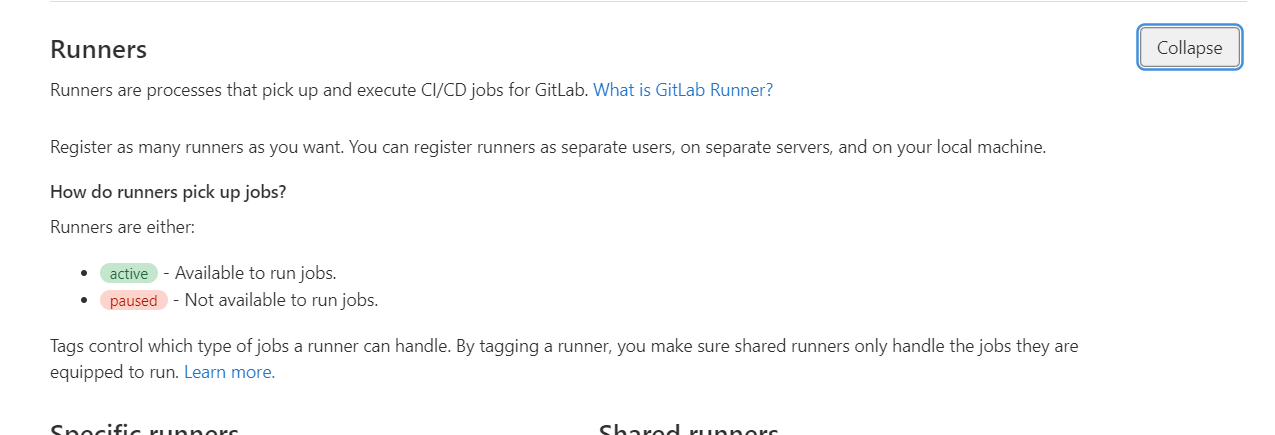
- Runners 를 Expand 해서 Token 을 확인하자
gitlab-runner register
- gitlab-runner 를 등록하자
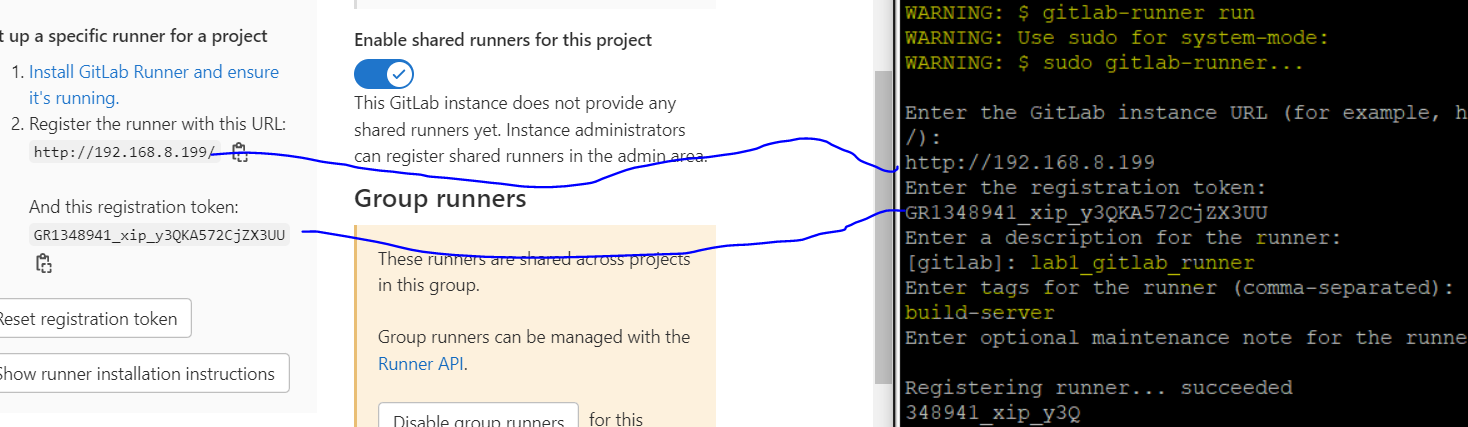
- tag 는 중요하다. 이 tag 를 이용해 사용할 gitlab-runner 를 지정할 수 있다
- token 과 주소는 Runners 에서 나온 것을 복사해서 붙여넣자
- 주소는 https 가 아닌 http 를 입력해야 한다
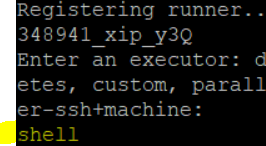
- Executor 에는 shell 을 입력하자
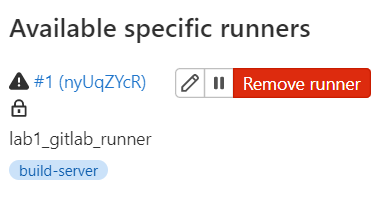
- 다시 Runners 에 들어가면 Runner 가 등록되어 있다
허나 root 로 등록하지 않았기에 경고가 뜬다. 등록한 Runner 를 삭제하고, root 계정으로 전환하여 Runner 를 등록해보자
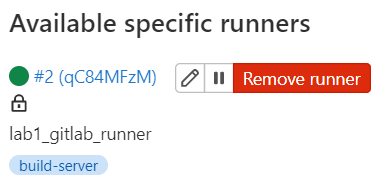
- 이제 경고가 안뜬다
GitLab 을 이용한 CI & CD
실습 시나리오
pipeline
- 개발자는 Dockerfile, index.html 그리고 Jenkinsfile 과 같은 역할을 수행하는 .gitlab-ci.yml 파일을 작성하여 http://192.168.8.199/dev/lab1.git 에 push 한다
- 해당 프로젝트에 새로운 파일이 등록된 것을 확인한 gitlab-runner 는 작업지시서 역할을 하는 .gitlab-ci.yml 파일을 읽고 ci/cd 를 진행한다
- Dockerfile 을 이용하여 이미지를 사설 저장소에 등록하고, Ansible 이용하여 worker 노드들이 사설저장소에서 이미지를 pull 하도록 설정
위의 과정에는 중단이 없다. Code 를 Push 하면 CI 부터 CD 까지 무중단으로 진행된다
파일 준비
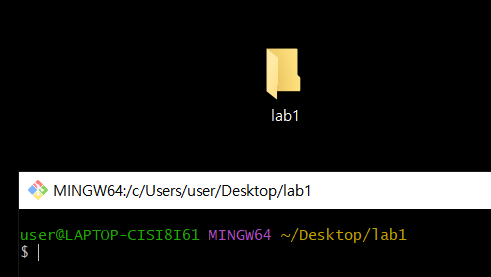
- 로컬에 디렉토리름 만들고, Git bash here 를 누르자
user@LAPTOP-CISI8I61 MINGW64 ~/Desktop/lab1
$ touch Dockerfile index.html .gitlab-ci.yml

user@LAPTOP-CISI8I61 MINGW64 ~/Desktop/lab1
$ echo "<h2>GITLAB CI/CD TEST</h2>" > index.html
- 3 개의 파일을 준비하고, index.html 을 작성하자
FROM nginx
ADD index.html /usr/share/nginx/html/index.html
- Dockerfile 은 위와 같이 작성한다
.gitlab-ci.yml
lab1-job:
  only:
    - master
  tags:
    - build-server
  #when: manual

  script:
    - docker build -t 192.168.8.100:5000/lab1:1.0 .
    - docker push 192.168.8.100:5000/lab1:1.0
    - ansible worker -u root -m command -a 'docker pull 192.168.8.100:5000/lab1:1.0'
    - echo "작업이 완료되었습니다"
- only 는 작업할 branch 를 지정한다
- tags 는 사용할 Gitlab-Runner 를 지정한다
- when 은 작업을 수동으로 시작할지, 자동으로 시작할지를 지정한다. 기본값은 자동이다. 만약, when 을 manaul 로 지정하면 수동으로 작업을 실행해줘야 한다
- script 는 작업 내용을 정의한다. 우리는 shell 을 Executor 로 사용한다. 따라서 Shell 명령어를 적어주자
파일 업로드 및 작업 자동 실행
user@LAPTOP-CISI8I61 MINGW64 ~/Desktop/lab1
$ git init
Initialized empty Git repository in C:/Users/user/Desktop/lab1/.git/

user@LAPTOP-CISI8I61 MINGW64 ~/Desktop/lab1 (master)
$ git remote add origin http://192.168.8.199/dev/lab1.git

user@LAPTOP-CISI8I61 MINGW64 ~/Desktop/lab1 (master)
$ git add .
warning: LF will be replaced by CRLF in .gitlab-ci.yml.
The file will have its original line endings in your working directory
warning: LF will be replaced by CRLF in Dockerfile.
The file will have its original line endings in your working directory
warning: LF will be replaced by CRLF in index.html.
The file will have its original line endings in your working directory

user@LAPTOP-CISI8I61 MINGW64 ~/Desktop/lab1 (master)
$ git commit -m "첫번째 gitlab 작업"
[master (root-commit) 3b22058] 첫번째 gitlab 작업
 3 files changed, 15 insertions(+)
 create mode 100644 .gitlab-ci.yml
 create mode 100644 Dockerfile
 create mode 100644 index.html

user@LAPTOP-CISI8I61 MINGW64 ~/Desktop/lab1 (master)
$ git push origin master
- Gitlab Project 에 파일을 업로드하자
- 인증창이 나오면 root / test1234 를 입력해주면 된다
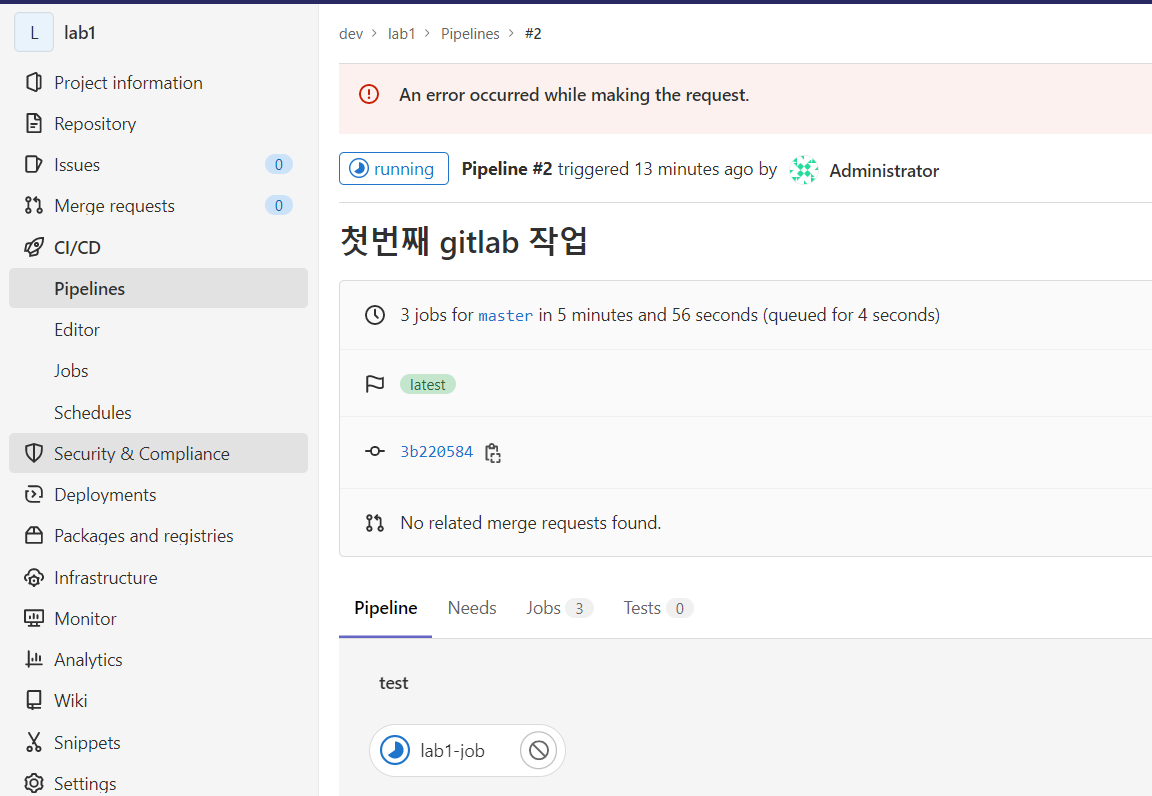
- Push 가 되면 작업이 자동으로 실행된다
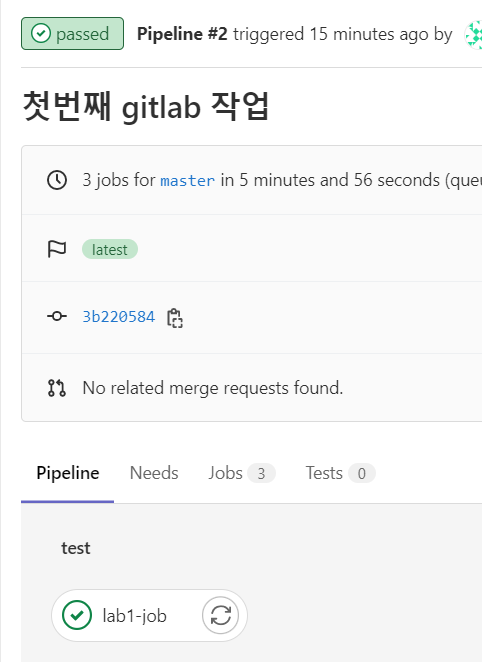
- Passed 가 되면 작업이 완료된 것이다
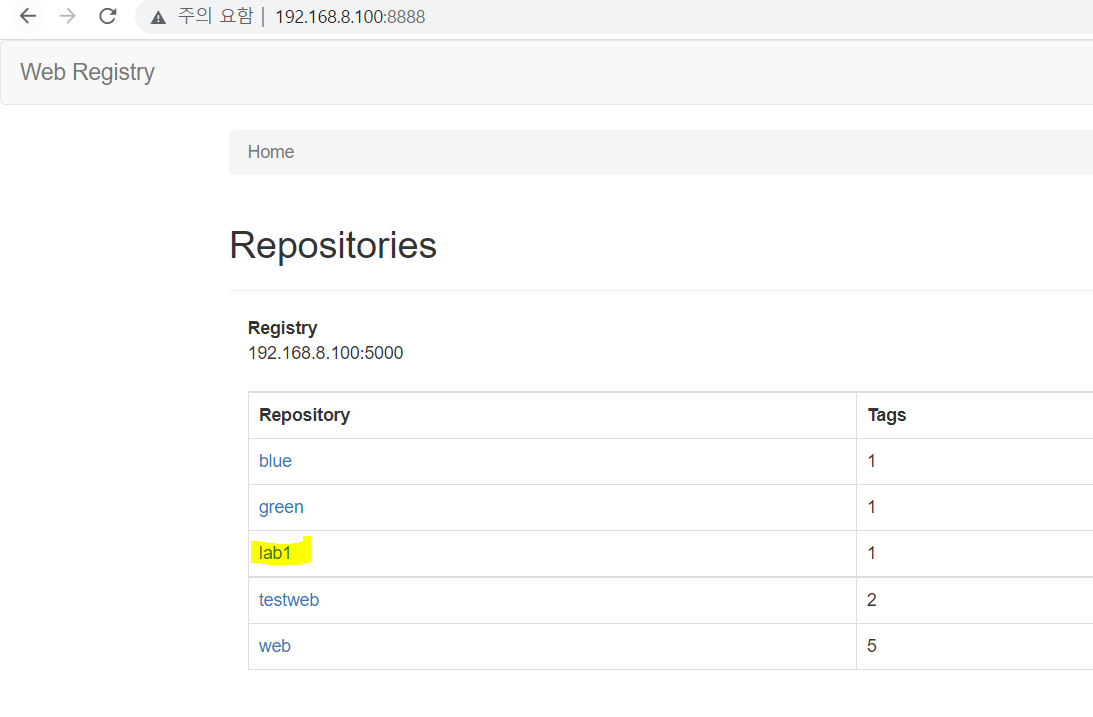
- 이미지가 잘 등록되었다
작업 수동 실행
lab1-job:
  only:
    - master
  tags:
    - build-server
  when: manual

  script:
    - docker build -t 192.168.8.100:5000/lab1:2.0 .
    - docker push 192.168.8.100:5000/lab1:2.0
    - ansible worker -u root -m command -a 'docker pull 192.168.8.100:5000/lab1:2.0'
    - echo "작업이 완료되었습니다"
- index.html 내용을 수정하고, 이미지를 2.0 으로 파일 내용을 수정하여 Push 해보자
- 이번에는 when 의 주석을 해제해서 manaul 로 지정해주자. 이는 수동으로 작업을 실행해야 한다
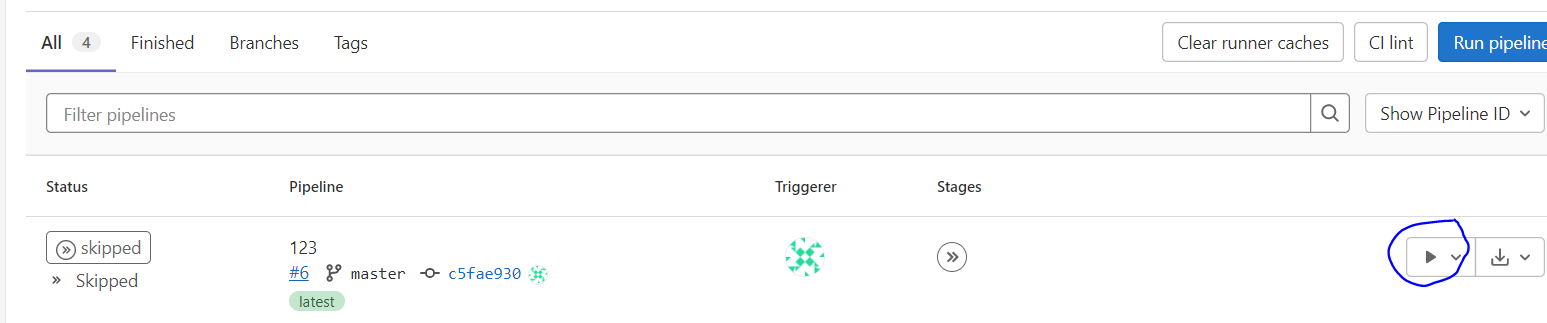
- 수동이므로 우측에 Play 버튼을 눌러야 실행된다
Jenkins & GitLab
Jenkins 패키지 설치
Jenkins 를 패키지 설치 방식으로 설치하자
rpm --import https://www.elrepo.org/RPM-GPG-KEY-elrepo.org
rpm -Uvh http://www.elrepo.org/elrepo-release-7.0-2.el7.elrepo.noarch.rpm
yum --disablerepo="*" --enablerepo="elrepo-kernel" list available
yum -y --enablerepo=elrepo-kernel install kernel-ml
reboot

yum -y install epel-release
yum -y install java-11-openjdk
- 필요한 패키지를 설치하자
There are 2 programs which provide 'java'.

  Selection    Command
-----------------------------------------------
*+ 1           java-1.8.0-openjdk.x86_64 (/usr/lib/jvm/java-1.8.0-openjdk-1.8.0.262.b10-1.el7.x86_64/jre/bin/java)
   2           java-11-openjdk.x86_64 (/usr/lib/jvm/java-11-openjdk-11.0.17.0.8-2.el7_9.x86_64/bin/java)

Enter to keep the current selection[+], or type selection number: 2
- java 설정
rpm --import https://pkg.jenkins.io/redhat-stable/jenkins.io.key
yum -y install wget
wget -O /etc/yum.repos.d/jenkins.repo \
https://pkg.jenkins.io/redhat-stable/jenkins.repo --no-check-certificate
yum -y install jenkins
systemctl start jenkins
- Jenkins 를 설치하자
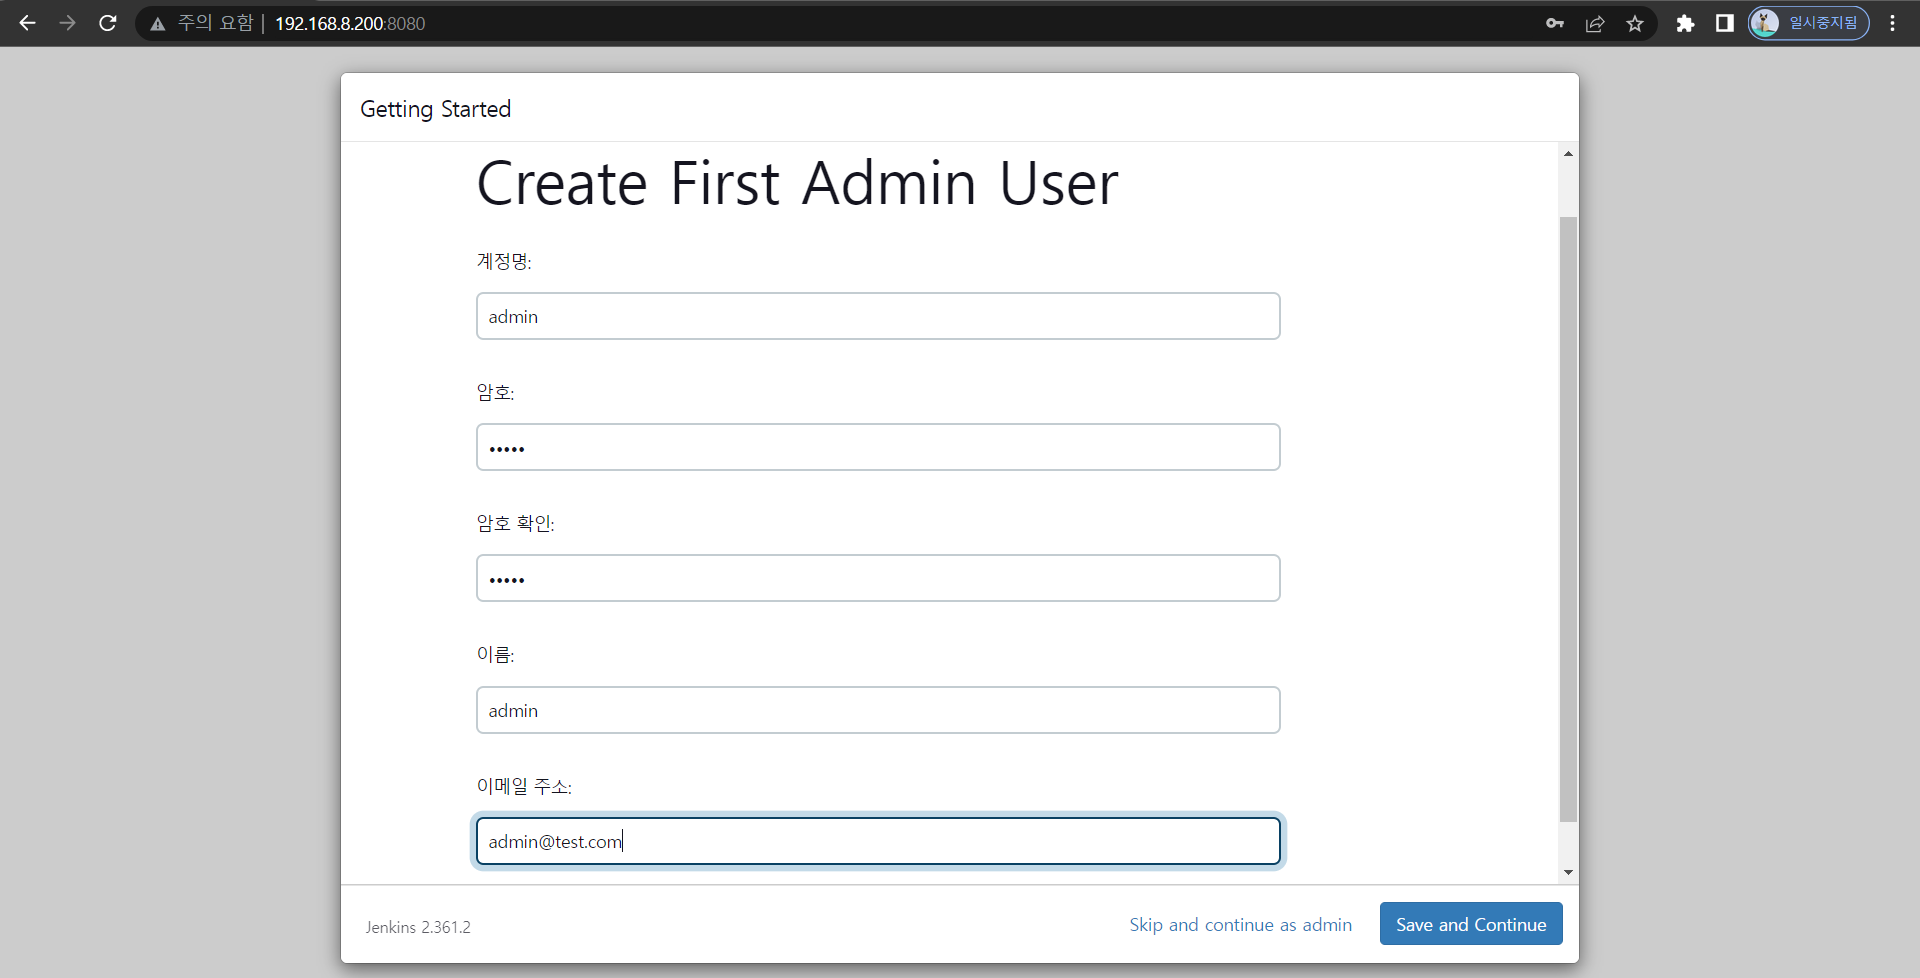
192.168.8.200:8080 에 접속하면 Jenkins 에 접속한다
[root@jenkins ~]# cat /var/lib/jenkins/secrets/initialAdminPassword
- 초기 Password 는 위 파일 통해 확인한다

- Plugin 을 설치하자
Token 생성 및 Gitlab 연동
- Jenkins 에서 계정을 생성하자
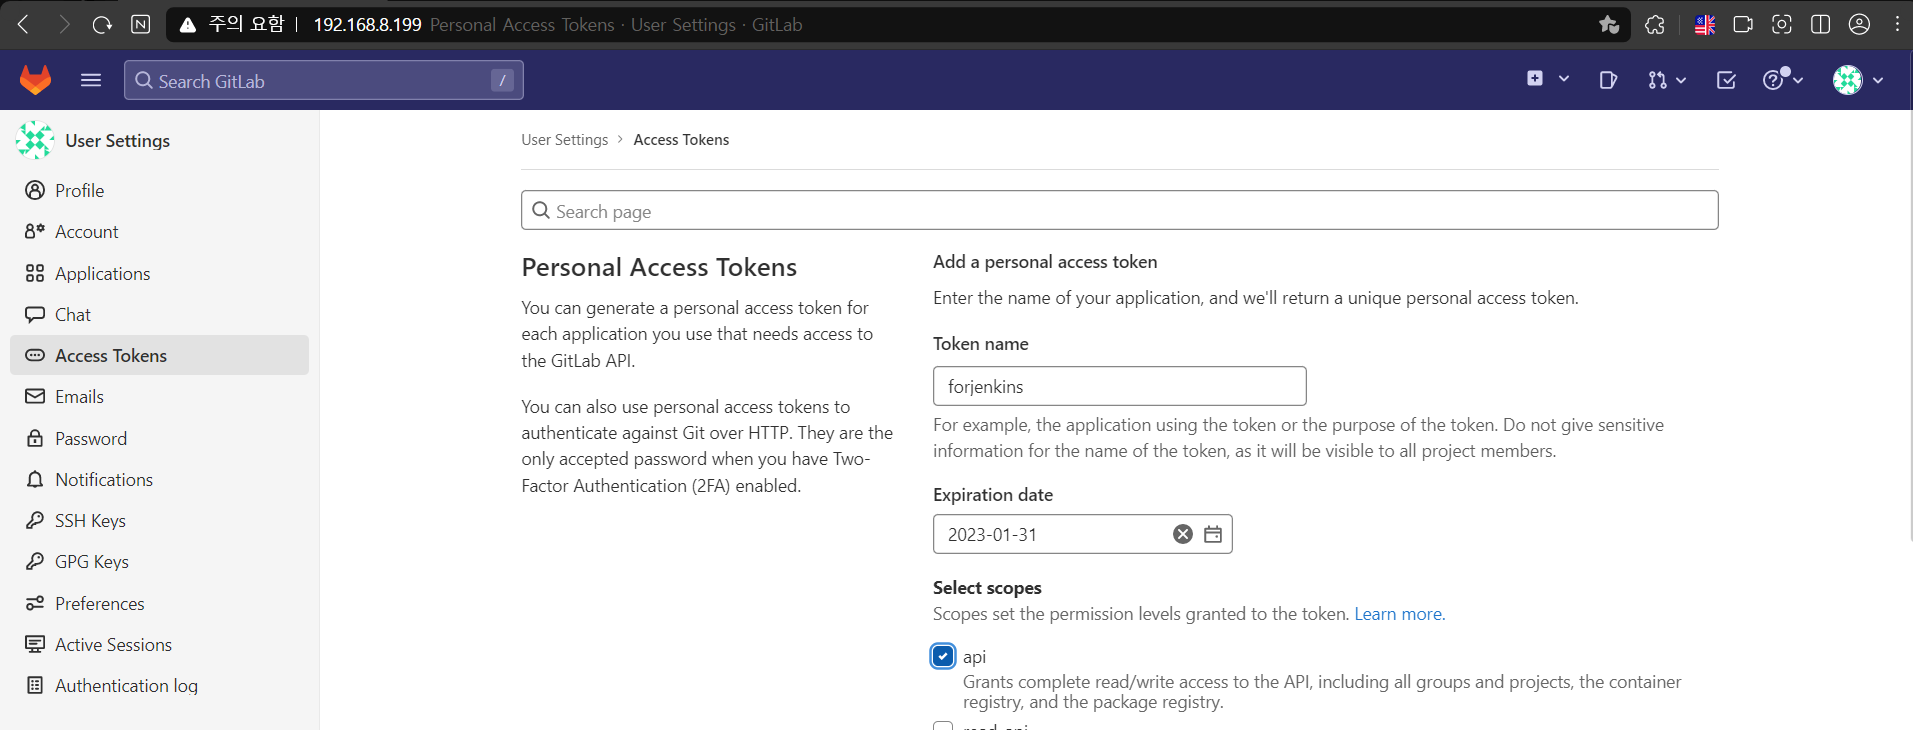
- Gitlab 에서 Token 을 발행하자
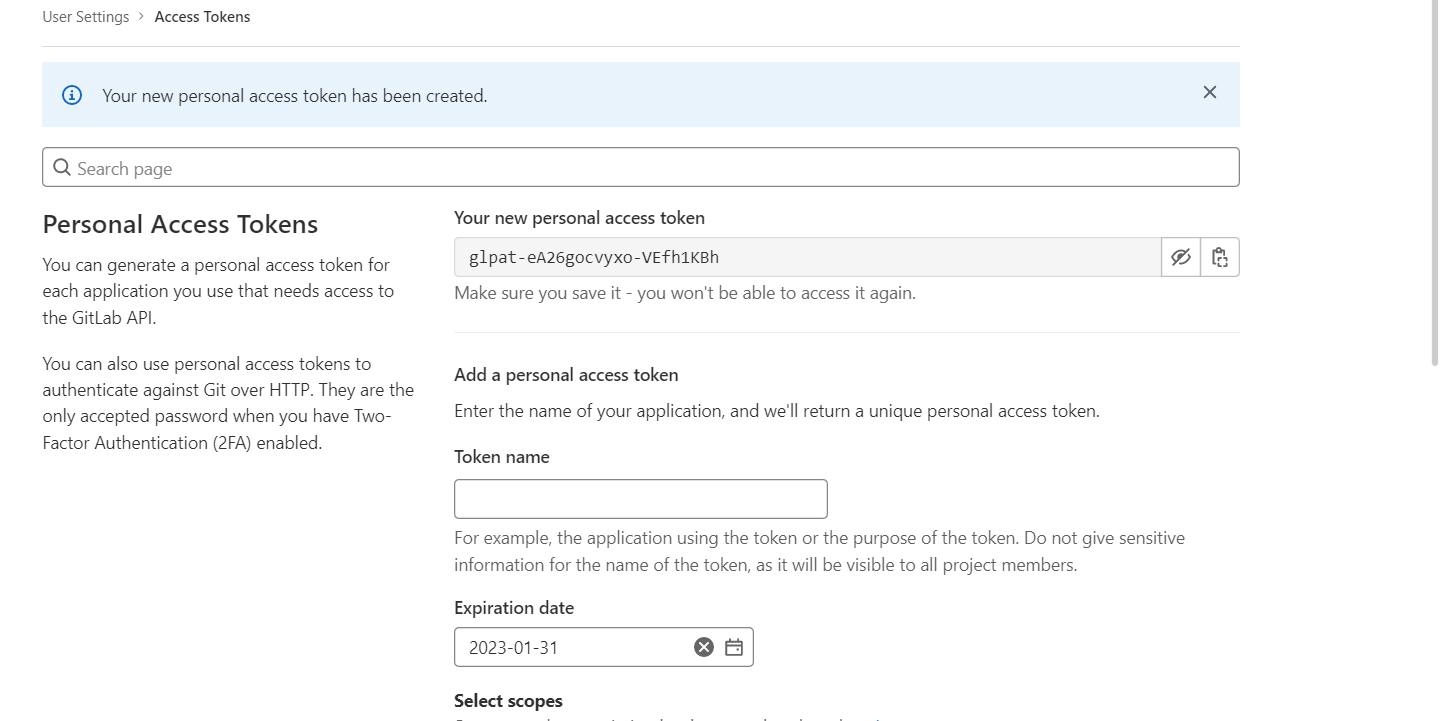
- 발행된 Token 을 확인하자
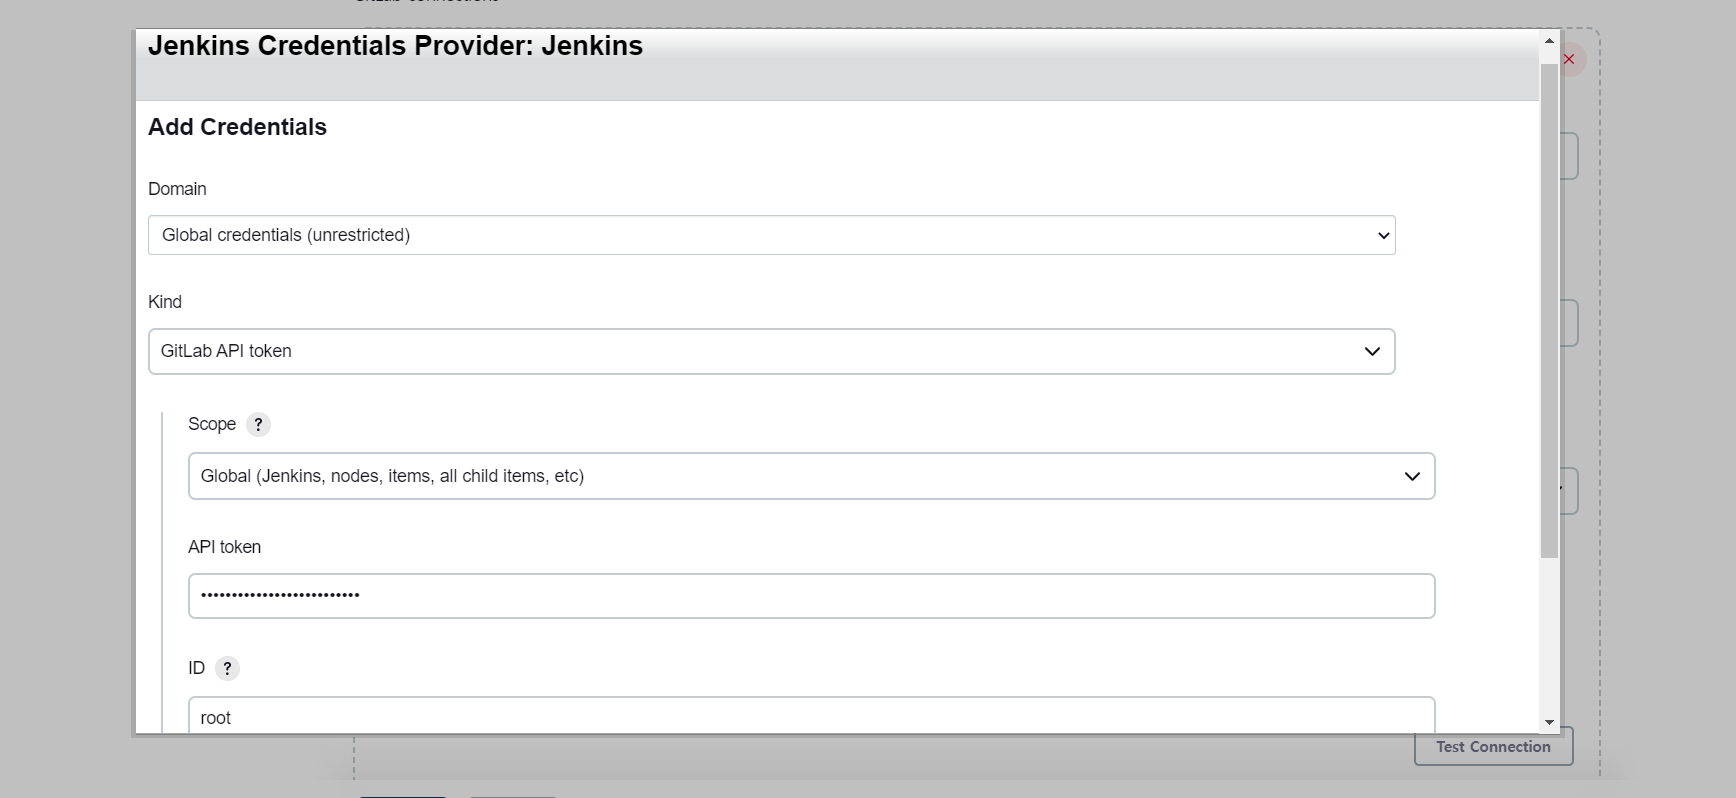
- 이를 Jenkins 에 등록한다
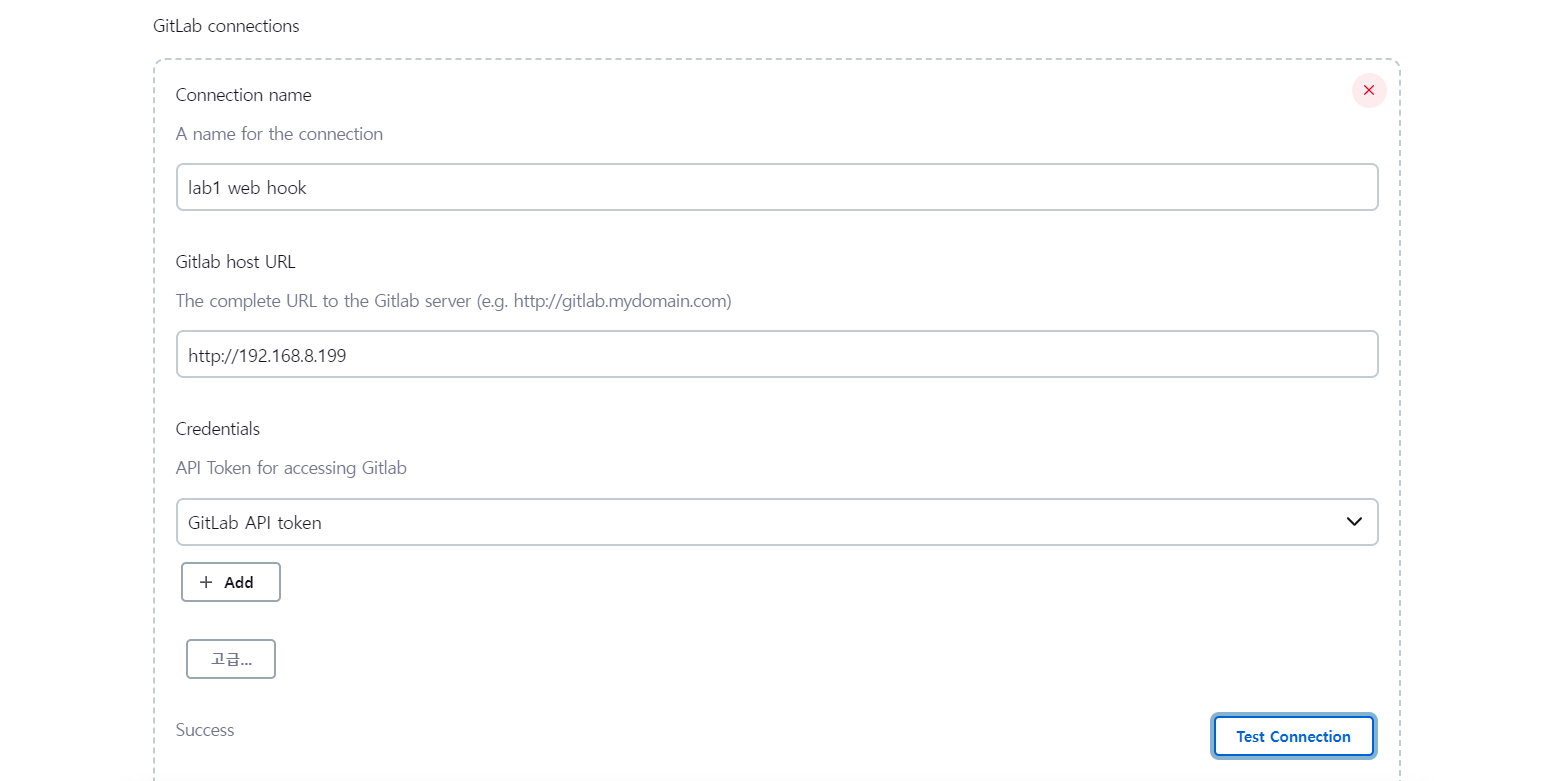
- 연결 상태를 확인하자
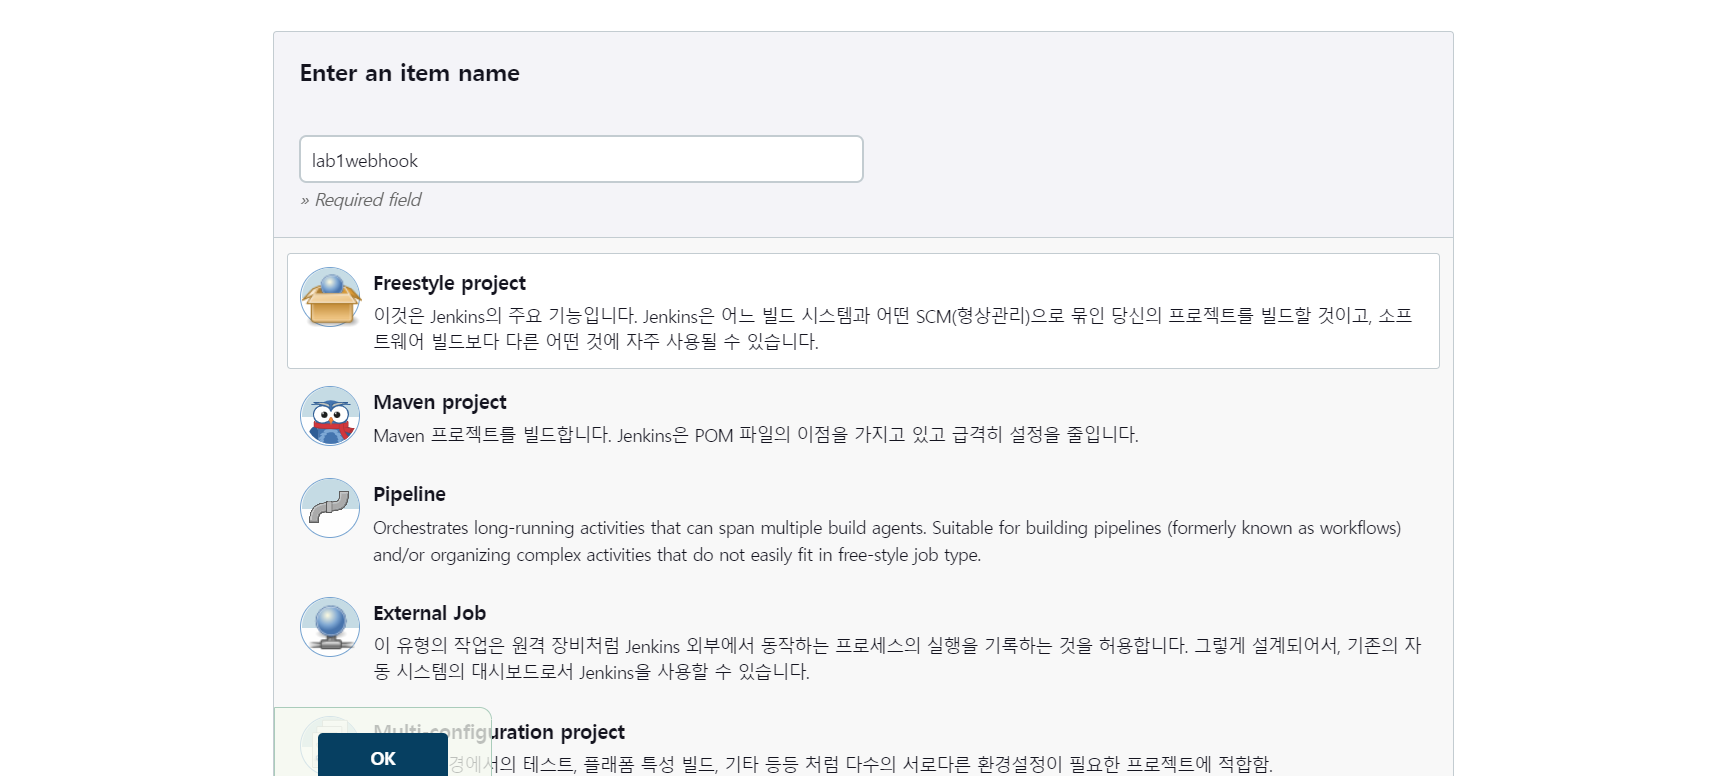
- Item 을 통해 Project 를 생성하자
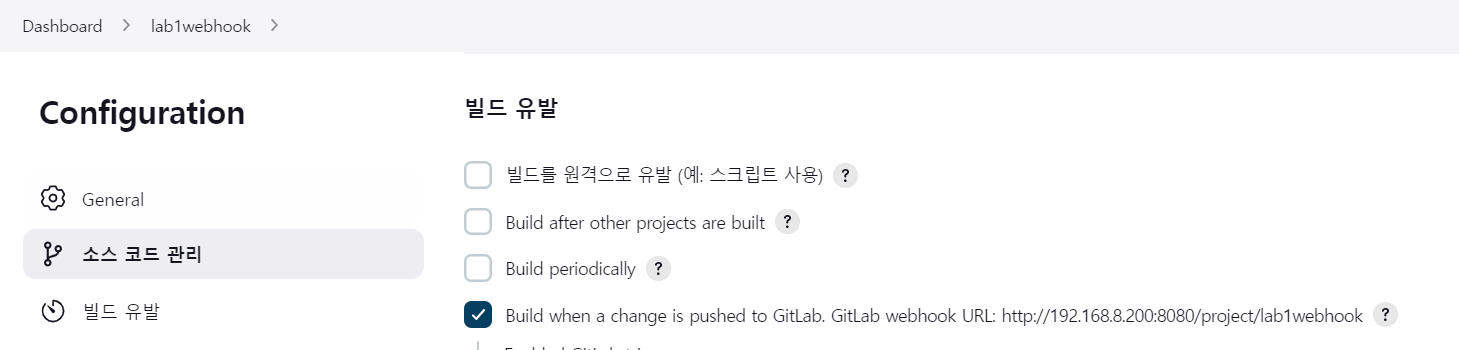
- 위에 옵션을 체크해주자

- Secret token 을 발행하자
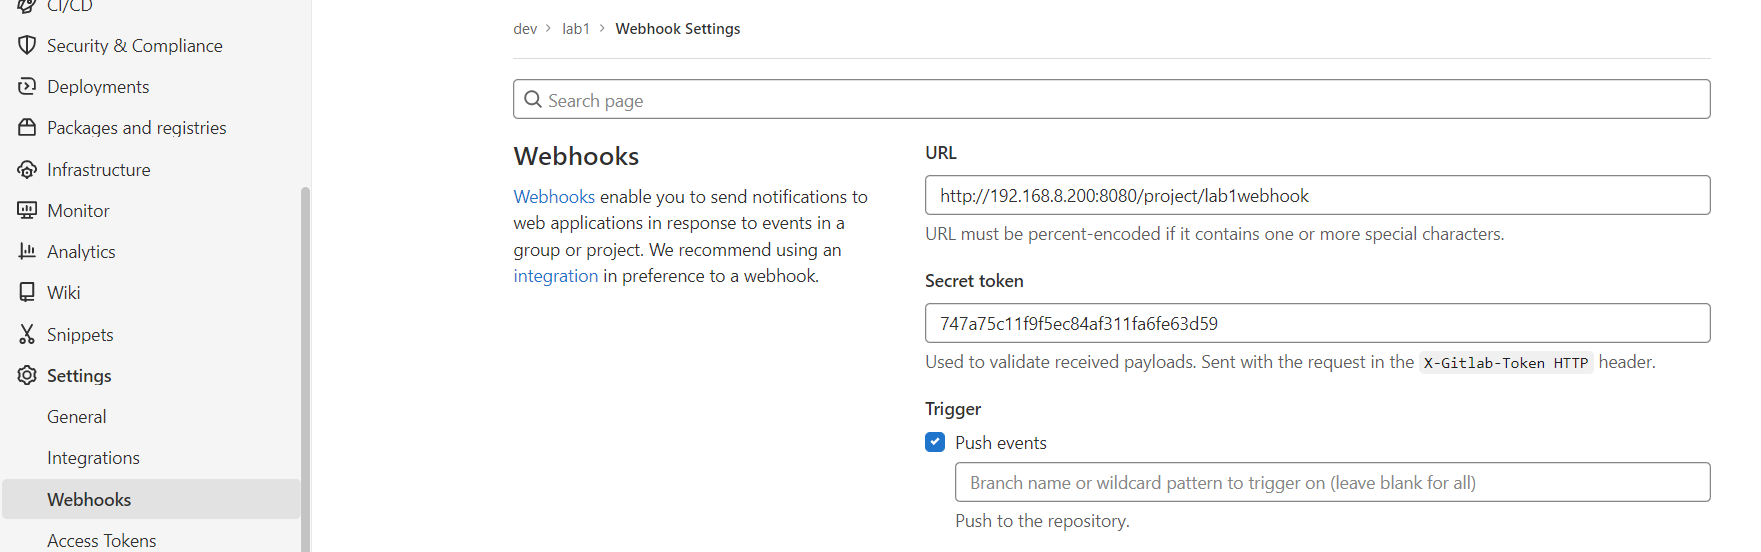
- 위에서 발행한 Secret token 을 입력해주어 webhook 를 추가하자
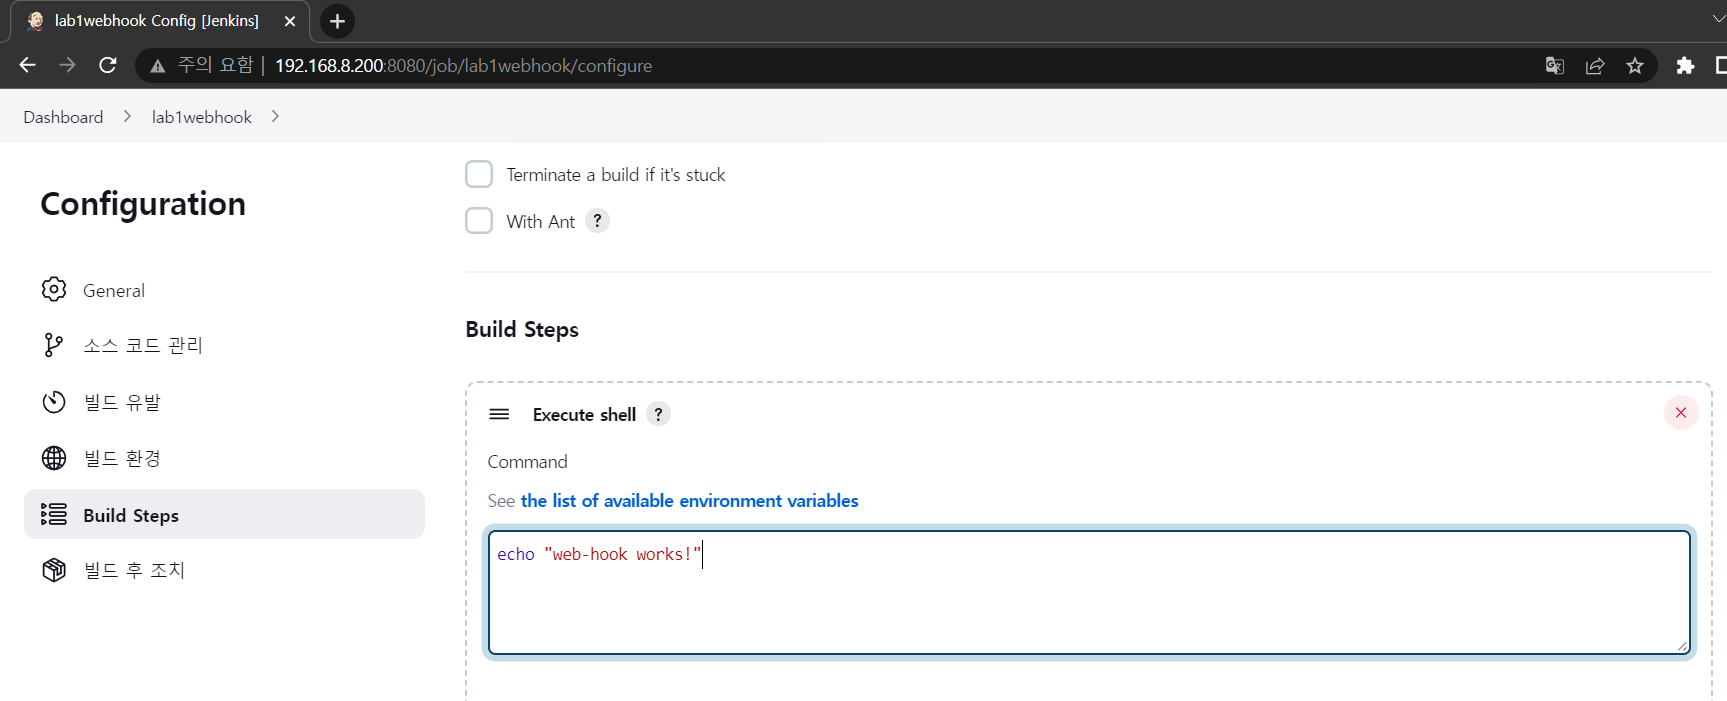
- Build steps 설정

- Network 설정
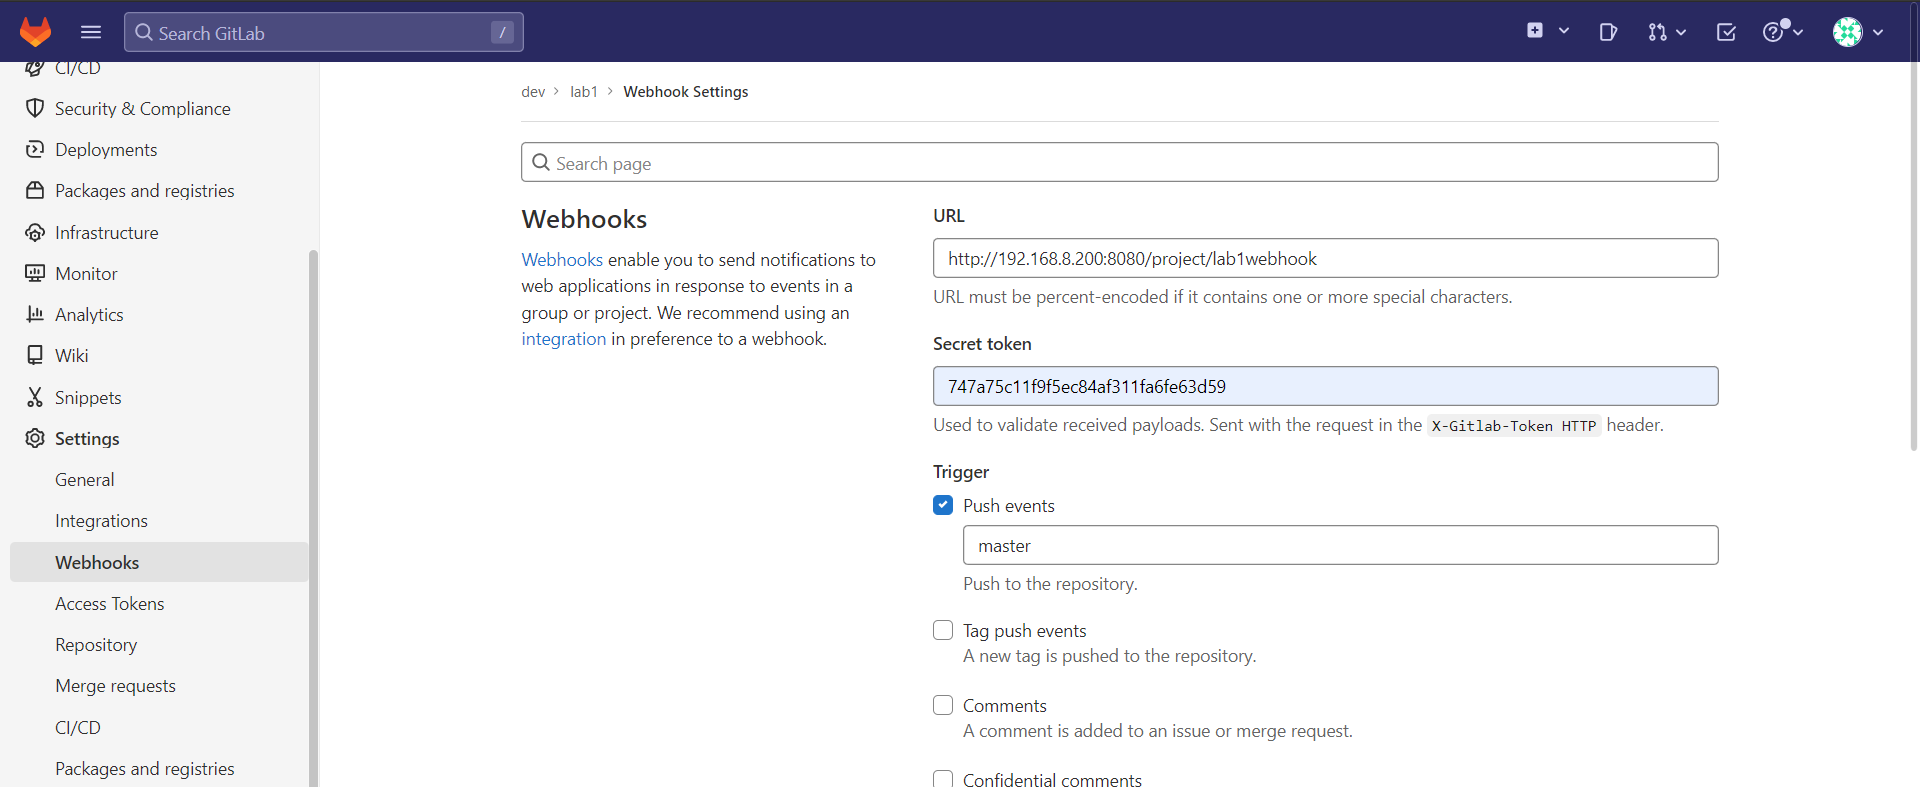
- webhook 등록
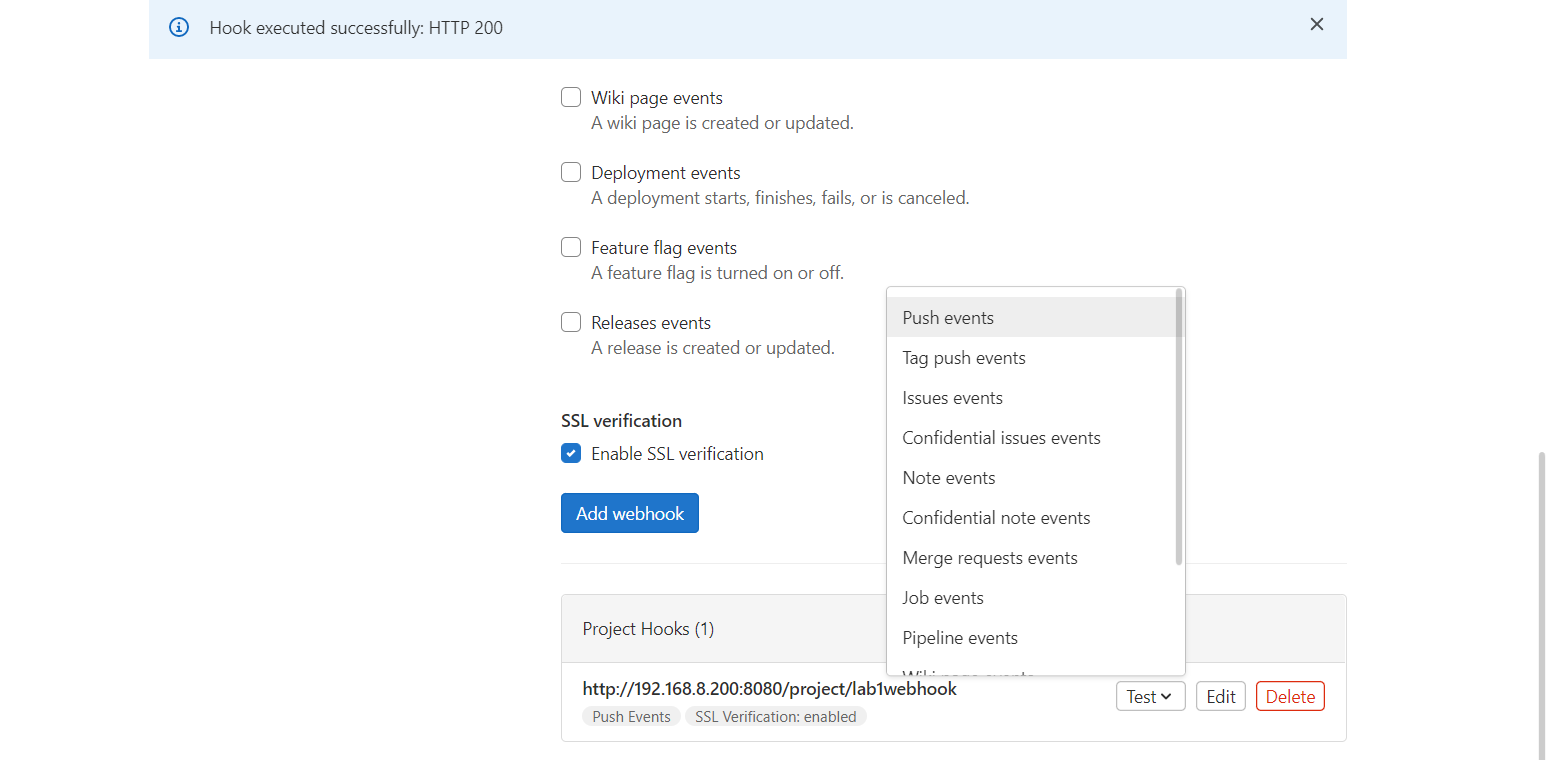
- Push 를 Test 하자
Push 하여 Build 확인
user@LAPTOP-CISI8I61 MINGW64 ~/Desktop/lab1 (master)
$ vi index.html
<h2>GITLAB CI/CD TEST webhook</h2>
user@LAPTOP-CISI8I61 MINGW64 ~/Desktop/lab1 (master)
$ git add .
warning: LF will be replaced by CRLF in index.html.
The file will have its original line endings in your working directory

user@LAPTOP-CISI8I61 MINGW64 ~/Desktop/lab1 (master)
$ git commit -m "test webhook"
[master e5a08ae] test webhook
 1 file changed, 1 insertion(+), 1 deletion(-)

user@LAPTOP-CISI8I61 MINGW64 ~/Desktop/lab1 (master)
$ git push origin master
Enumerating objects: 5, done.
Counting objects: 100% (5/5), done.
Delta compression using up to 8 threads
Compressing objects: 100% (2/2), done.
Writing objects: 100% (3/3), 283 bytes | 283.00 KiB/s, done.
Total 3 (delta 1), reused 0 (delta 0), pack-reused 0
To http://192.168.8.199/dev/lab1.git
   de1c4db..e5a08ae  master -> master
- local 에서 파일을 Push 해주자
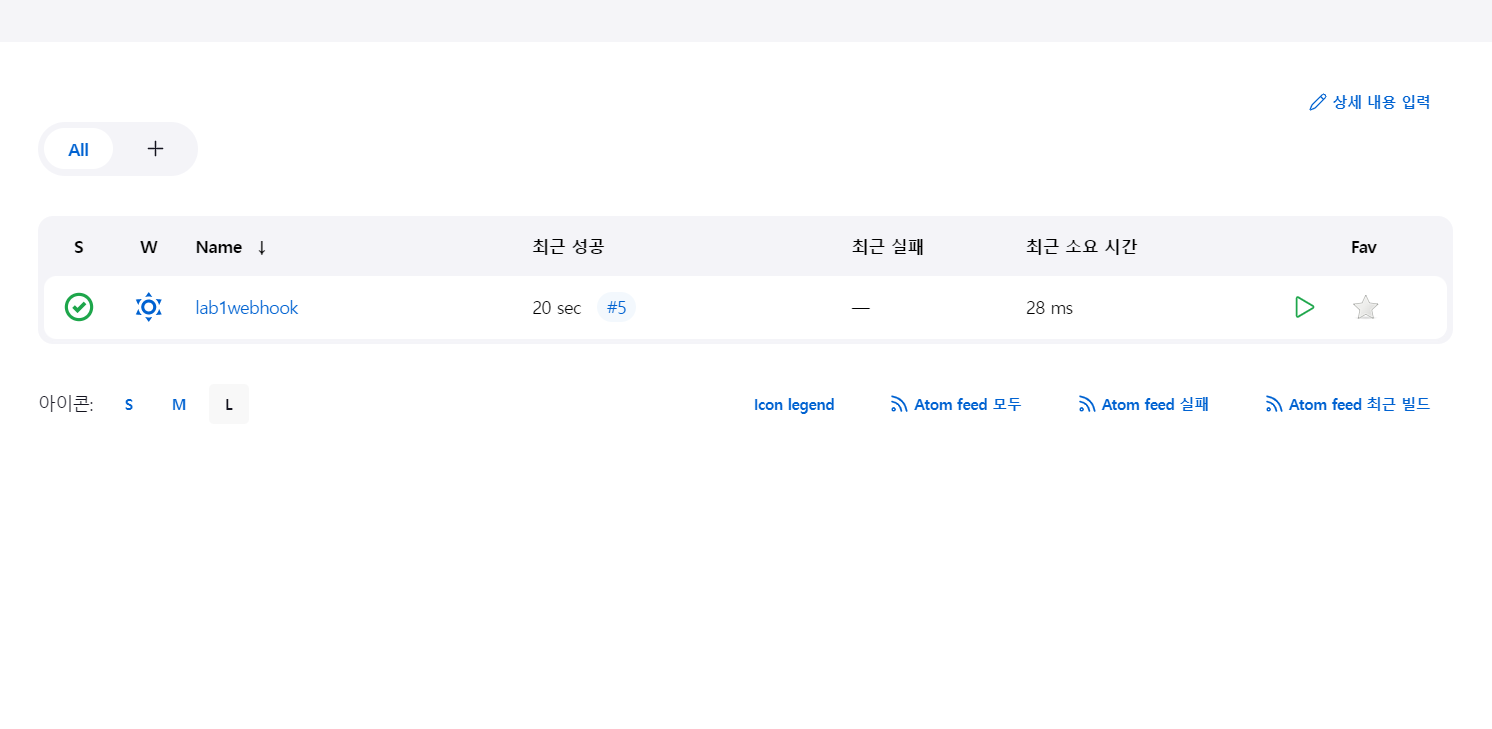
- Build 가 잘 실행된다
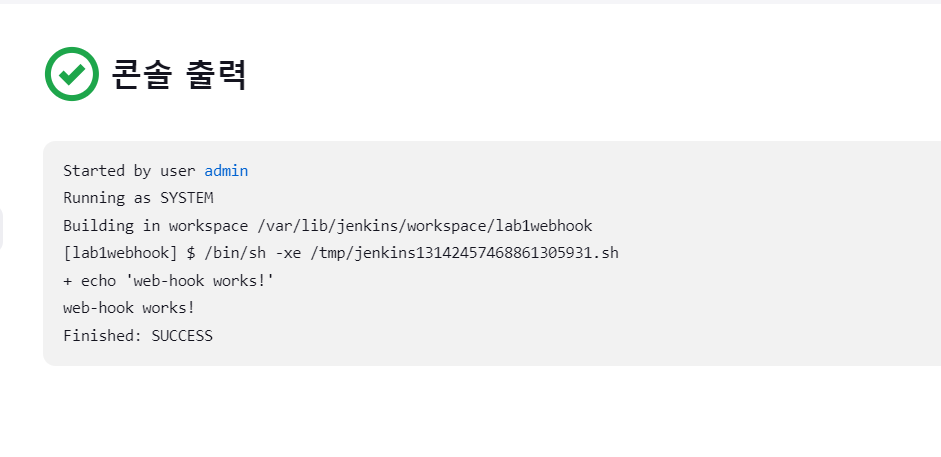
- Build 가 성공적으로 실행되었다
쉘을 수정하여 Dockerfile 로 이미지를 생성하고 생성된 이미지는 private registry에 192.168.8.100:5000/lab1:3.0 으로 등록하고 ansible worker들에게 전달하여 해당 이미지를 로컬 저장소에 pull하도록 해보자

멋진 엔지니어가 될 때까지