1. CRON
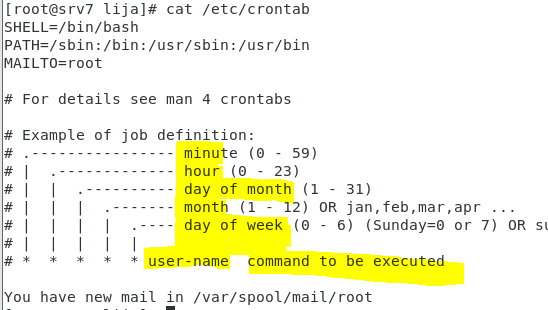
- cron 은 주기적으로 반복되는 일을 자동으로 실행할 수 있도록, 시스템 작업을 예약해 놓은 데몬 서비스 이다. 이 cron 과 관련된 데몬 프로그램 이름은 crond 이고, cron작업을 설정하는 파일은 /etc/crontab 이다. 즉, cron은 특정한 시간에 또는 특정 시간 마다 어떤 작업을 자동으로 수행하게 해주는 시간 기반 잡 스케쥴러 성격의 데몬 프로세스 이다
CRON 을 써보자

- crontab을 열어준다
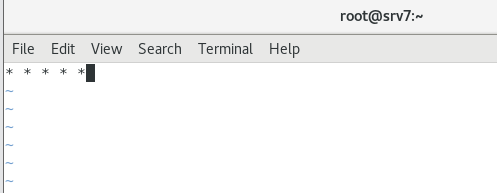
- 각각 분 / 시 / 일 / 월 / 요일 을 나타낸다. * 은 매 순간을 의미한다. 모두 별로 설정했기에, 매 분마다 실행된다. 만약, 숫자로 지정하면 해당 시점에 지정한 작업을 실행하는 것 이다
- 만약, 분을 2로 하면 매 시 2분에 실행한다. 허나, */2로 하면, 2분 마다 실행하는 것 이다
- 01 05 1 * * 로 하면, 매월 1일 5시 1분에 명령어를 실행하는 것 이다

- 다음 내용을 작성하고, 저장한다

- crond 를 재시작 한다. 구성 파일을 변경했기에 이를 적용하려면 cron의 데몬을 재시작해서, 구성 파일을 읽어서 적용시키게 해야 한다

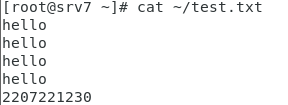
- 파일을 살펴보면 hello 가 두 번 써있다. 즉, 위에서 작성한 내용은 분마다 hello를 해당 파일에 보내는 것 이다

- 이번에는 매 분마다 년 / 월 / 일 / 시 / 분 을 출력하게 해보자. 다음 내용을 작성하고, 저장한 다음 , crond 를 재시작 한다
- 잘 출력된다
CRON 으로 파일을 실행해보자

- crontab을 다음과 같이 작성

- 파일을 하나 만들고, 실행 권한을 주자. 그 다음, 편집기로 열자

- backup.sh 는 다음과 같이 작성한다

- 1분 기다리면, 다음과 같이 txt 파일이 생기고, 안에 내용이 저장된다. 이제 1분 마다 내용이 추가된다. 다음과 같이 crond 를 재실행 하지 않아도 되긴 한다

- 잘 작동한다
2. CRON 으로 시나리오 구현
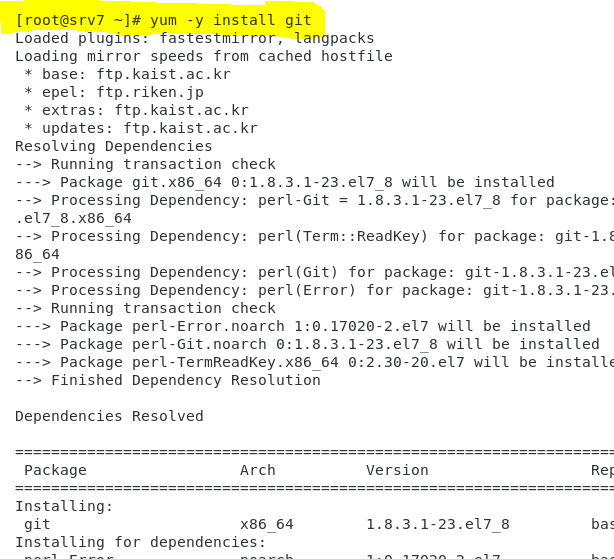
- yum 으로 git 설치
- 자신의 git 에서 아무 레포지터리 주소를 복사하자

- 해당 레포지터리를 빈 디렉터리에 clone 해주자

- 잘 저장됬다

- 다음과 같이 시간과 분을 이용해 디렉터리를 만들어서 Clone 할 수도 있다. 따라서, CRON 으로 실행할 때, 자동으로 Clone을 한다면, 디렉터리가 겹칠 일이 없다
다음과 같이 sh 에 내용을 추가하여 git 에 올린 내용을 웹 서버에 넣을 수 있다
git clone 레포지터리 주소 /root/(date +%y~%M)/* /var/www/html
systemctl restart httpd
위 과정을 위해 cp 를 테스트

- 잘 복사된다

- cp 앞에 \ 를 붙이면, alias 를 무력화 시킨다. 따라서 cp -i 가 아닌 그냥 cp 가 실행된다

- 다음과 같이 잘 복사된다
변경된 index.html 을 git 에서 가져와 적용하기
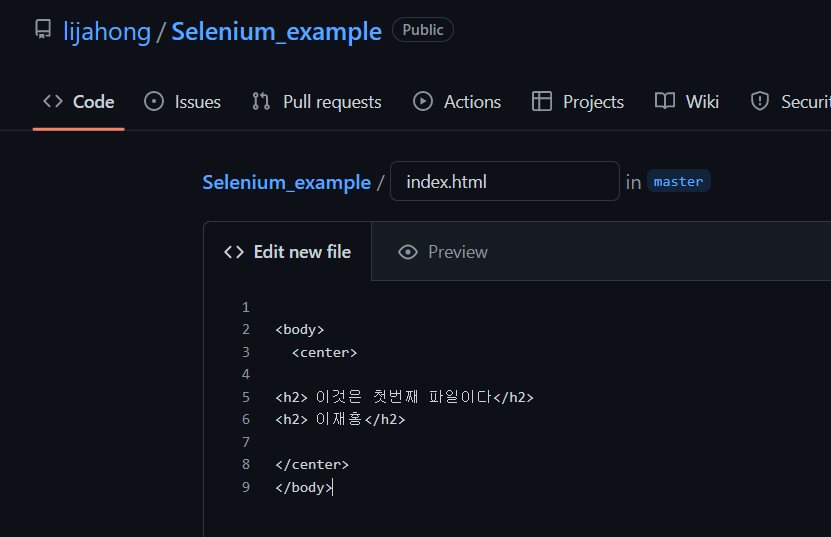
- Clone 할 레포지터리에 index.html 을 만들자
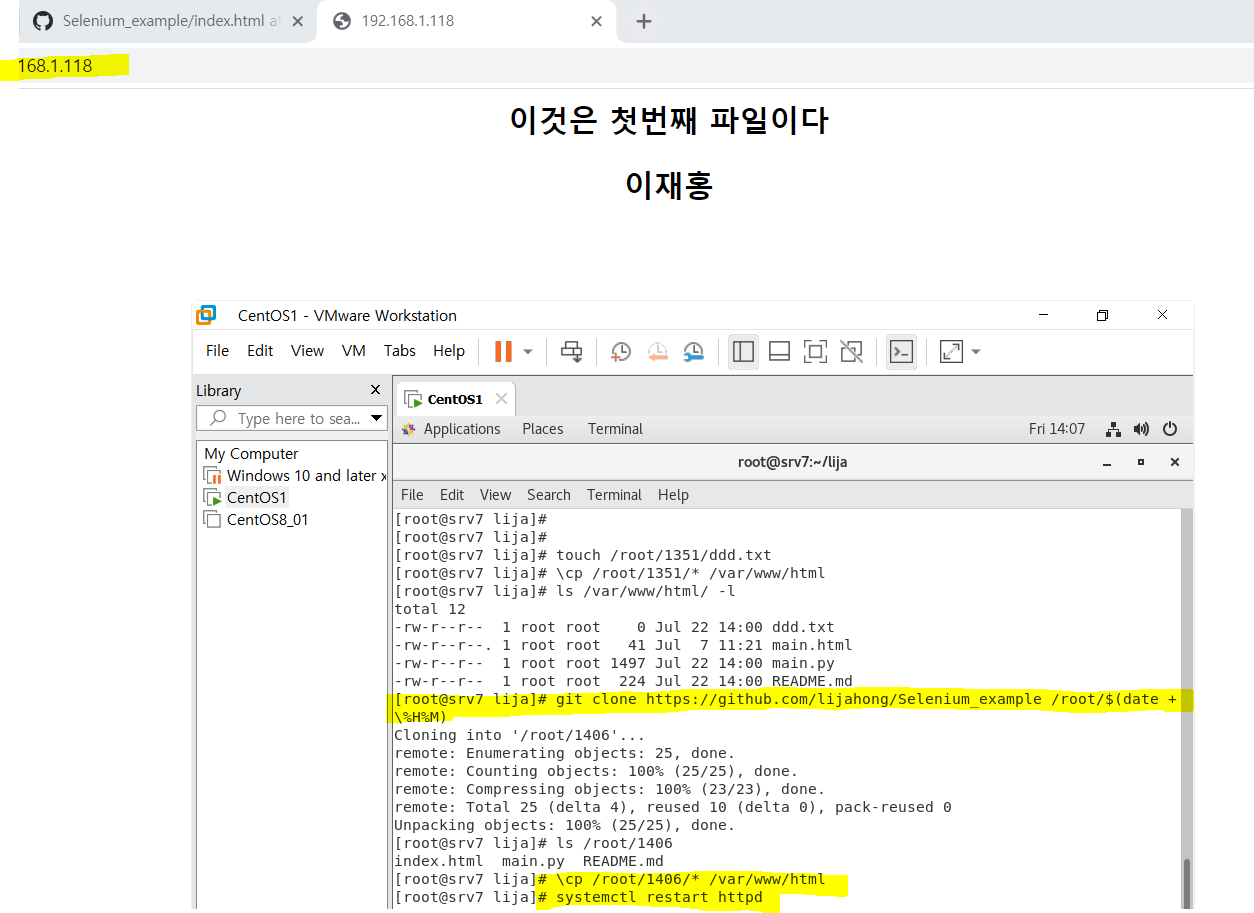
- 다음과 같이 Clone 후 http 에다가 복사해서 httpd 를 재실행하면, 변경 사항이 잘 적용된다
시나리오
- 깃 저장소에 임의의 index.html 생성
- 리눅스에 있는 /root/backup.sh 파일의 내용을 수정하여 깃 허브로 부터 로컬 디렉터리에 클론 , /var/www/html 로 복시 / httpd 재실행
- crontab -e 에서 매분마다 /root/backup.sh를 실행하도록 작성
- 다 끝나면, http://localhost 확인
- index.html 을 수정하고, 다시 확인
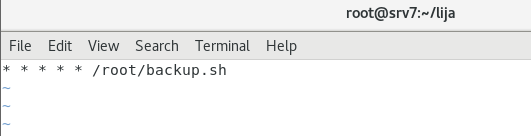
- crontab 은 다음과 같이 작성
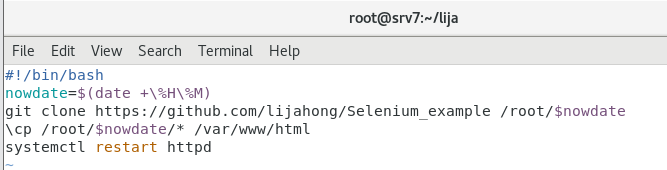
- backup.sh 는 다음과 같이 작성한다. 변수를 사용하는 이유는, 만약 clone 시 디렉터리를 변수가 아니라 일반 date 명령 결과로 실행했을 때, 시간이 경과하여 밑에 cp 명령에서 실행한 date 명령 결과와 달라진다면, clone 시 생성한 디렉터리 이름과 달라져서, 밑에 cp에서 지정한 디렉터리가 없기에 에러가 생길 수 있기 때문에 변수에 저장하여 사용하자
- 잘 적용된다

- 매 분마다 잘 실행된다

- 잘 실행된다
CRON 은 주기적으로 실행할 내용을 디렉터리에 넣어놓고 작동한다. 실습에서는 실행할 작업이 적기에 crontab 에 직접 작성했지만, 만약 작업이 매우 많을 경우, crontab 에 작성하면 불편하므로, 디렉터리에 넣는다 ( p. 233 )
- 다음과 같이 crontab 을 열어보면 crontab 에 대한 정보를 확인 가능 하다
3. AT
p. 236
at 명령어는 일회성 작업을 예약하는 것
실습 마무리

- 현재 시간을 담은 변수를 하나 정의하자

- 해당 변수를 이용한 이름을 통해 xz 파일로 압축해주자. 이렇게 압축하면 /var 디렉터리를 묶어서 압축한다. 마지막 html 디렉터리만 묶어서 압축하려면 P 옵션을 추가하여 cfjP 를 이용해야 한다

- 압축한 파일을 해당 폴더로 가져오자

- 압축 해제가 잘 된다

멋진 엔지니어가 될 때까지