
4.0 Setup
만들 페이지 개요
- ‘/’ → Home 화면 : 모든 코인들이 보여지는 페이지
- ‘/:coinId’ → 코인 상세 정보 페이지
- ‘btc/information’ → 코인 정보 페이지
- ‘btc/chart’ → 코인 가격 차트
React RouterDom : 어플리케이션에 URL을 갖도록 해준다.
⇒ 각기 다른 화면을 보여줌
Nested Router : 한 스크린 내에 또다른 Router를 가지게 한다.
ex.. ‘/btc/information’, ‘btc/chart’
환경 세팅
-
create-react-app
-
typescript 설치
-
styled components 설치
-
React Router 설치 →
npm i react-router-dom@5.3.0 -
React Query 설치 →
npm i react-query -
src 폴더 내에 routes 폴더 생성 후 스크린 생성 → Coins.tsx, Coin.tsx

- Coin.tsx
function Coin() { return <h1>Coin</h1>; } export default Coin;- Coins.tsx
function Coins() { return <h1>Coins</h1>; } export default Coins; -
src에 Router.tsx 생성
Switch : 한 번에 하나의 Route를 렌더링 할 수 있는 방법
👀 /:coinId 란 ?
Router에게 이 url이 변수값을 가짐을 알려주는 방식
import React from 'react'; import { BrowserRouter, Switch, Route } from 'react-router-dom'; import Coin from './routes/Coin'; import Coins from './routes/Coins'; function Router() { return ( <BrowserRouter> <Switch> <Route path='/:coinId'> <Coin /> </Route> <Route path='/'> <Coins /> </Route> </Switch> </BrowserRouter> ); } export default Router;- 만약 TypeScript가 react-router-dom을 모르면? ⇒
npm i —-save-dev @types/react-router-dom
- 만약 TypeScript가 react-router-dom을 모르면? ⇒
-
App.tsx 에서 Router를 Render
import Router from './Router'; function App() { return <Router />; } export default App; -
url의 변수를 잡아내기 → Coin.tsx
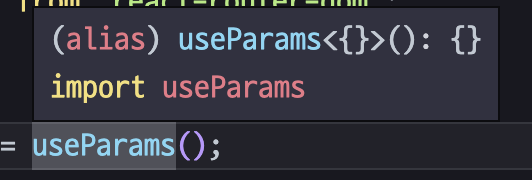
useParams() 훅을 사용!
// Coin.tsx
import { useParams } from 'react-router-dom';

function Coin() {
	const params = useParams();
	console.log(params);
	return <h1>Coin</h1>;
}

export default Coin;
url : http://localhost:3000/btc

-
useParams()에서 coinId만 추출하자
import { useParams } from 'react-router-dom';

function Coin() {
	const { coinId } = useParams();
	return <h1>Coin</h1>;
}

export default Coin;
⇒ 오류발생 🤯
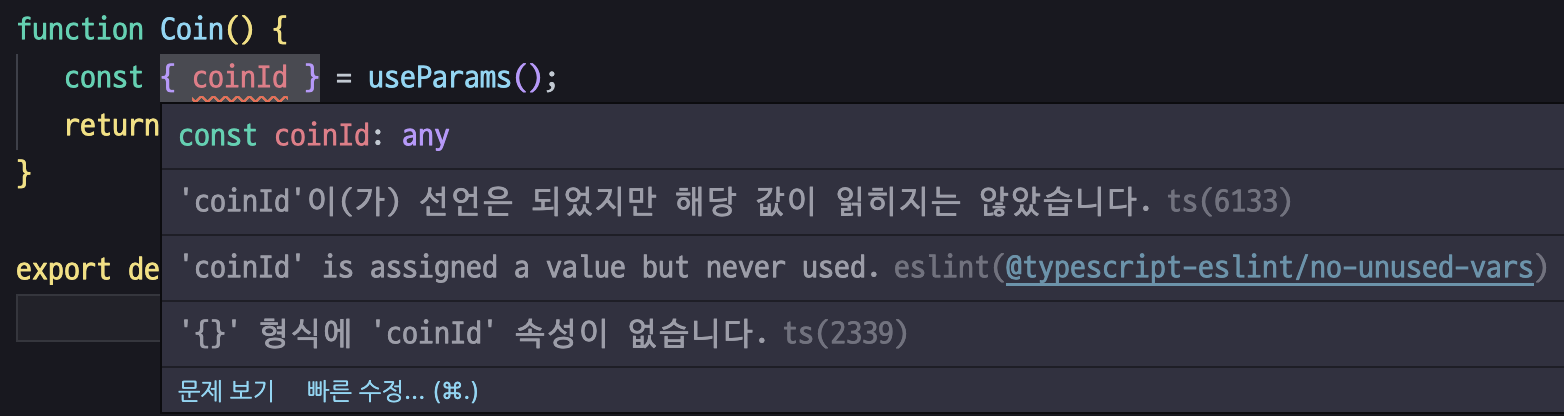
: 타입스크립트는 useParams가 빈 오브젝트라고 생각하기 때문이다! ⇒ url에 파라미터가 없다고 판단!
🪄 해결방법
1. useParams<coinId:string>();
2. 인터페이스 설정

    ```tsx
    import { useParams } from 'react-router-dom';

    interface RouteParams {
    	coinId: string;
    }

    function Coin() {
    	const { coinId } = useParams<RouteParams>();
    	return <h1>Coin: {coinId}</h1>;
    }

    export default Coin;
    ```
4.1 Styles
스타일을 적용해보자
CSS 초기화 하기
-
reset css
- source code
/* http://meyerweb.com/eric/tools/css/reset/
   v2.0 | 20110126
   License: none (public domain)
*/

html, body, div, span, applet, object, iframe,
h1, h2, h3, h4, h5, h6, p, blockquote, pre,
a, abbr, acronym, address, big, cite, code,
del, dfn, em, img, ins, kbd, q, s, samp,
small, strike, strong, sub, sup, tt, var,
b, u, i, center,
dl, dt, dd, ol, ul, li,
fieldset, form, label, legend,
table, caption, tbody, tfoot, thead, tr, th, td,
article, aside, canvas, details, embed,
figure, figcaption, footer, header, hgroup,
menu, nav, output, ruby, section, summary,
time, mark, audio, video {
	margin: 0;
	padding: 0;
	border: 0;
	font-size: 100%;
	font: inherit;
	vertical-align: baseline;
}
/* HTML5 display-role reset for older browsers */
article, aside, details, figcaption, figure,
footer, header, hgroup, menu, nav, section {
	display: block;
}
body {
	line-height: 1;
}
ol, ul {
	list-style: none;
}
blockquote, q {
	quotes: none;
}
blockquote:before, blockquote:after,
q:before, q:after {
	content: '';
	content: none;
}
table {
	border-collapse: collapse;
	border-spacing: 0;
}
- source code
-
styled-reset
- source code
import { css, createGlobalStyle } from 'styled-components'

// prettier-ignore
export const reset = css`
/* http://meyerweb.com/eric/tools/css/reset/
   v5.0.1 | 20191019
   License: none (public domain)
*/

html, body, div, span, applet, object, iframe,
h1, h2, h3, h4, h5, h6, p, blockquote, pre,
a, abbr, acronym, address, big, cite, code,
del, dfn, em, img, ins, kbd, q, s, samp,
small, strike, strong, sub, sup, tt, var,
b, u, i, center,
dl, dt, dd, menu, ol, ul, li,
fieldset, form, label, legend,
table, caption, tbody, tfoot, thead, tr, th, td,
article, aside, canvas, details, embed,
figure, figcaption, footer, header, hgroup,
main, menu, nav, output, ruby, section, summary,
time, mark, audio, video {
  margin: 0;
  padding: 0;
  border: 0;
  font-size: 100%;
  font: inherit;
  vertical-align: baseline;
}
/* HTML5 display-role reset for older browsers */
article, aside, details, figcaption, figure,
footer, header, hgroup, main, menu, nav, section {
  display: block;
}
/* HTML5 hidden-attribute fix for newer browsers */
*[hidden] {
    display: none;
}
body {
  line-height: 1;
}
menu, ol, ul {
  list-style: none;
}
blockquote, q {
  quotes: none;
}
blockquote:before, blockquote:after,
q:before, q:after {
  content: '';
  content: none;
}
table {
  border-collapse: collapse;
  border-spacing: 0;
}
`

export const Reset = createGlobalStyle`${reset}`

export default reset
- source code
-
createGlobalStyle
렌더링 시에 전역 스코프에 스타일을 올려주는 컴포넌트를 생성
import { createGlobalStyle } from 'styled-components';
import Router from './Router';

const GlobalStyle = createGlobalStyle`
	body{
		color:red;
	}
`;

function App() {
	return (
		<>
			<GlobalStyle />
			<Router />
		</>
	);
}
export default App;
Fragment :
<></>⇒ 유령 컴포넌트styled-reset의 코드를 GlobalStyle에 복붙하자!
- source code
html, body, div, span, applet, object, iframe,
h1, h2, h3, h4, h5, h6, p, blockquote, pre,
a, abbr, acronym, address, big, cite, code,
del, dfn, em, img, ins, kbd, q, s, samp,
small, strike, strong, sub, sup, tt, var,
b, u, i, center,
dl, dt, dd, menu, ol, ul, li,
fieldset, form, label, legend,
table, caption, tbody, tfoot, thead, tr, th, td,
article, aside, canvas, details, embed,
figure, figcaption, footer, header, hgroup,
main, menu, nav, output, ruby, section, summary,
time, mark, audio, video {
  margin: 0;
  padding: 0;
  border: 0;
  font-size: 100%;
  font: inherit;
  vertical-align: baseline;
}
/* HTML5 display-role reset for older browsers */
article, aside, details, figcaption, figure,
footer, header, hgroup, main, menu, nav, section {
  display: block;
}
/* HTML5 hidden-attribute fix for newer browsers */
*[hidden] {
    display: none;
}
body {
  line-height: 1;
}
menu, ol, ul {
  list-style: none;
}
blockquote, q {
  quotes: none;
}
blockquote:before, blockquote:after,
q:before, q:after {
  content: '';
  content: none;
}
table {
  border-collapse: collapse;
  border-spacing: 0;
}
- source code
기본 폰트를 변경하자
- 구글 폰트 Google Fonts
-
원하는 폰트 선택
-
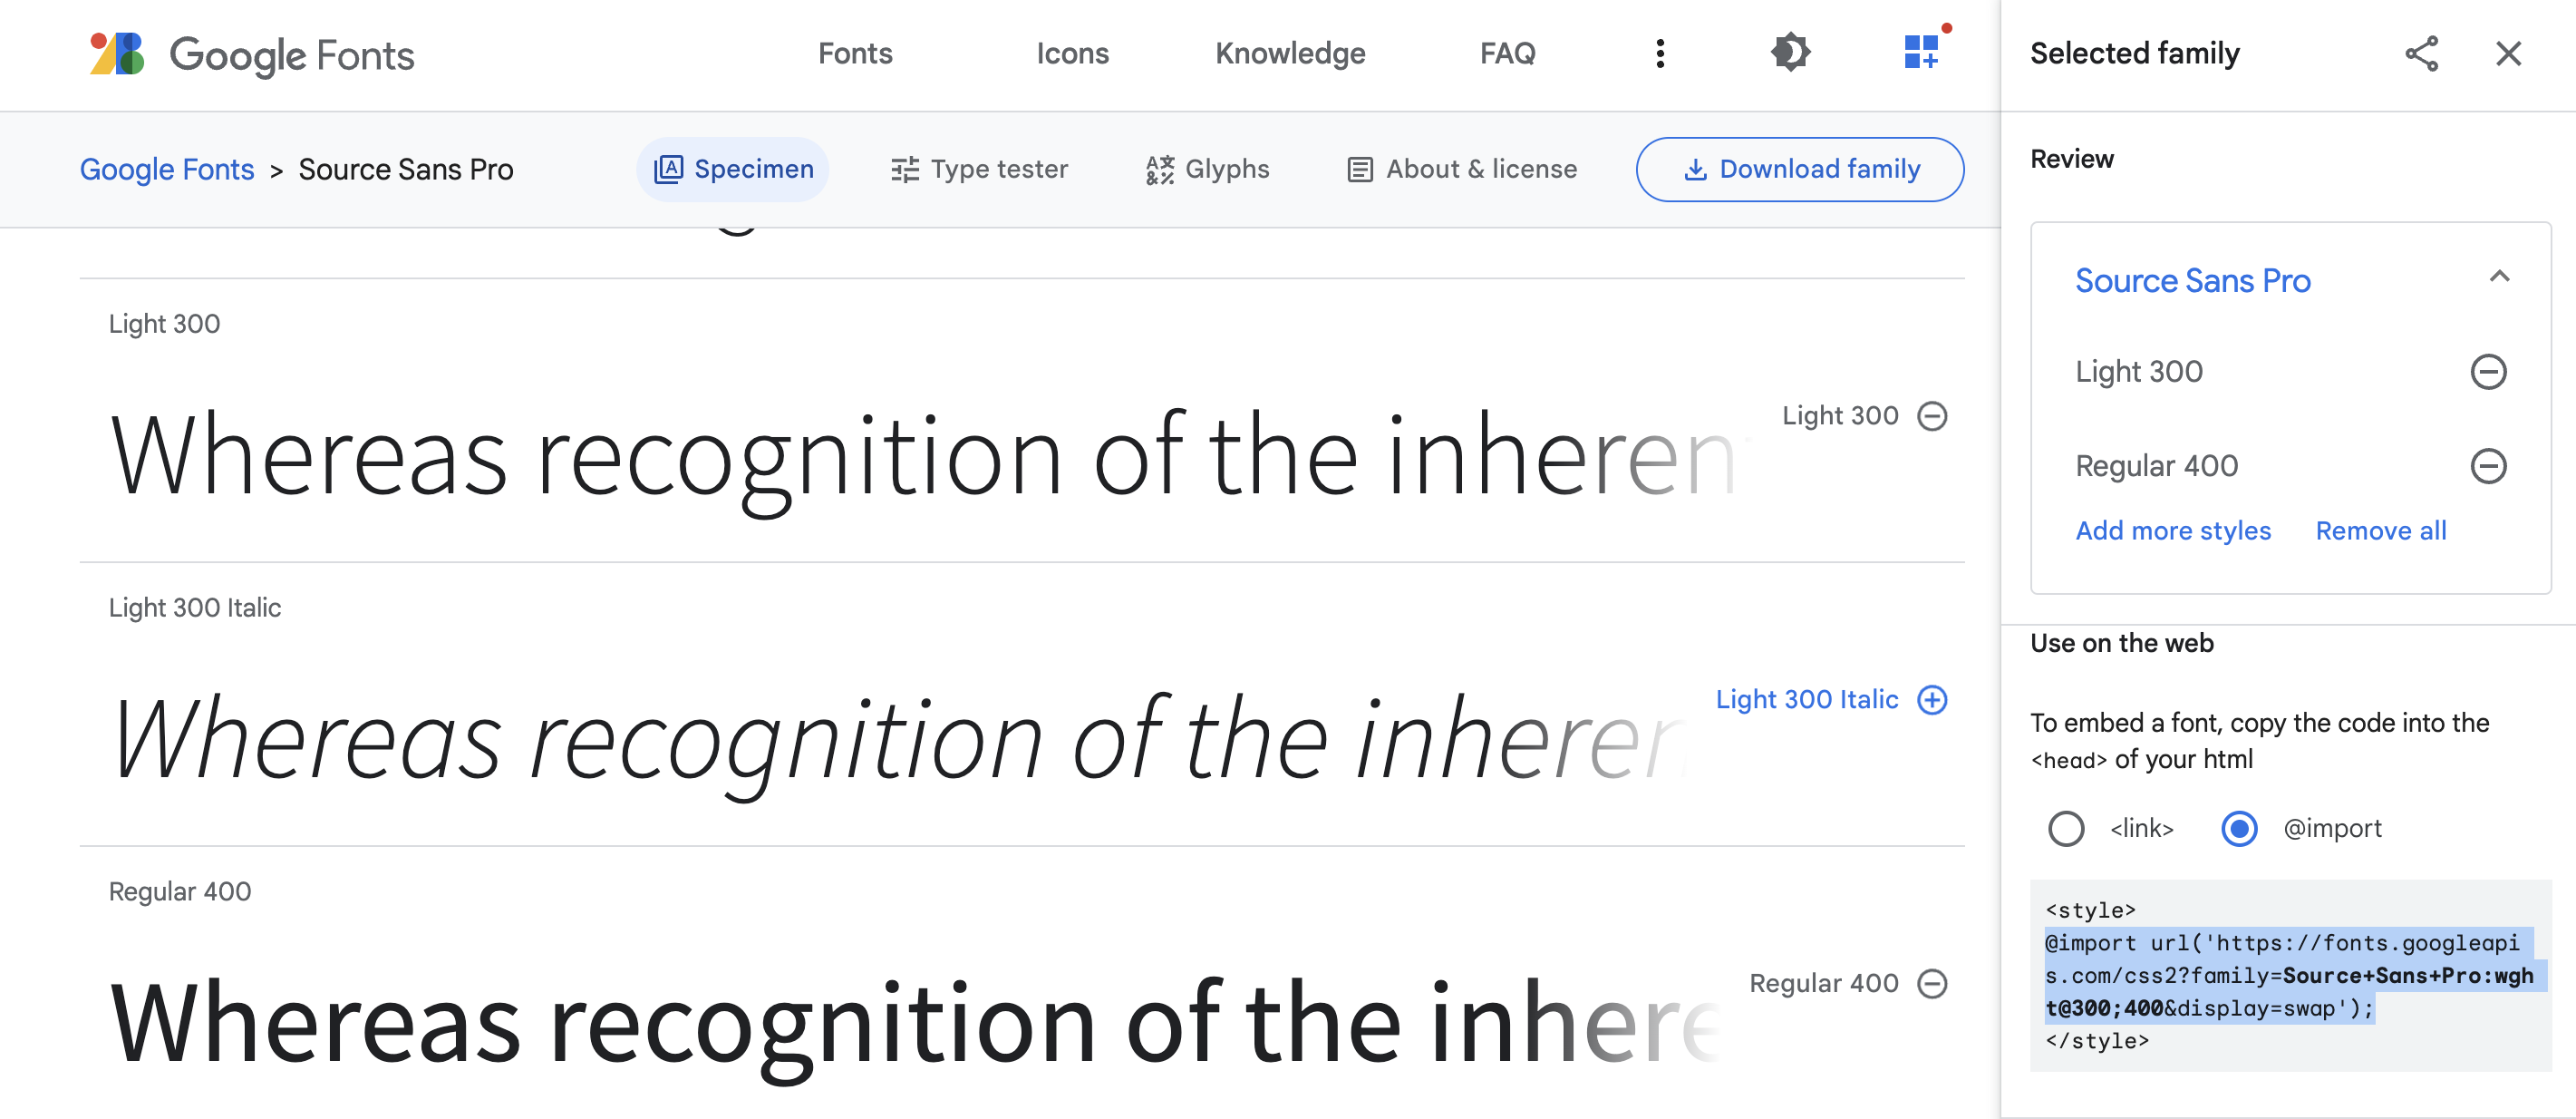
Use on the web → @import 선택 후 sylte 내부 복붙
-
GlobalStyle 내에 import문을 추가하자
const GlobalStyle = createGlobalStyle` @import url('https://fonts.googleapis.com/css2?family=Source+Sans+Pro:wght@300;400&display=swap'); html, body, div, span, applet, object, iframe, h1, h2, h3, h4, h5, h6, p, blockquote, pre, ... .. . `; -
Font 사용하기
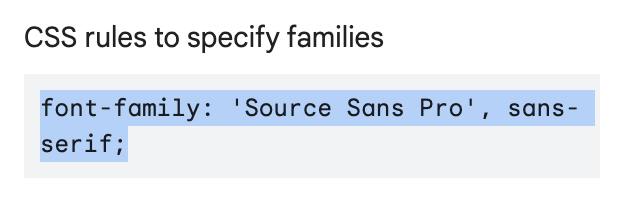
const GlobalStyle = createGlobalStyle`
	.
	..
	...
	*{
		boxsizing: border-box;
	}

	body{
		font-family: 'Source Sans Pro', sans-serif;
	}

	a{
		text-decoration: none;
	}
`;
테마 설정하기
- 테마 사이트 Flat UI Colors 2 - 14 Color Palettes, 280 colors 🎨 원하는 컬러를 클릭하면 복사완료

-
theme.ts
import { DefaultTheme } from 'styled-components'; export const theme: DefaultTheme = { bgColor: '#2f3640', textColor: '#f5f6fa', accentColor: '#9c88ff' }; -
styled.d.ts
// import original module declarations import 'styled-components'; // and extend them! declare module 'styled-components' { export interface DefaultTheme { textColor: string; bgColor: string; accentColor: string; } } -
App.tsx → GlobalStyle
body{ font-family: 'Source Sans Pro', sans-serif; background-color: ${(props) => props.theme.bgColor}; color: ${(props) => props.theme.textColor} } -
Coins.tsx
import styled from 'styled-components';

const Title = styled.h1`
	color: ${(props) => props.theme.accentColor};
`;

function Coins() {
	return <Title>코인</Title>;
}

export default Coins;
4.2 Home Part One
홈 화면의 스타일을 변경해보자
- Coins.tsx 스타일 변경
import styled from 'styled-components'; const Container = styled.div` padding: 0px 20px; `; const Header = styled.header` height: 10vh; display: flex; justify-content: center; align-items: center; `; const CoinsList = styled.ul``; const Coin = styled.li` background-color: white; color: ${(props) => props.theme.bgColor}; padding: 20px; border-radius: 15px; margin-bottom: 10px; `; const Title = styled.h1` font-size: 48px; color: ${(props) => props.theme.accentColor}; `; const coins = [ { id: 'btc-bitcoin', name: 'Bitcoin', symbol: 'BTC', rank: 1, is_new: false, is_active: true, type: 'coin' }, { id: 'eth-ethereum', name: 'Ethereum', symbol: 'ETH', rank: 2, is_new: false, is_active: true, type: 'coin' }, { id: 'hex-hex', name: 'HEX', symbol: 'HEX', rank: 3, is_new: false, is_active: true, type: 'token' } ]; function Coins() { return ( <Container> <Header> <Title>코인</Title> </Header> <CoinsList> {coins.map((coin) => ( <Coin key={coin.id}>{coin.id} →</Coin> ))} </CoinsList> </Container> ); } export default Coins;
Link 사용하기
to 프로퍼티를 추가 해줘야 한다
import { Link } from 'react-router-dom';
function Coins() {
return (
<Container>
<Header>
<Title>코인</Title>
</Header>
<CoinsList>
{coins.map((coin) => (
<Coin key={coin.id}>
<Link to={`/${coin.id}`}>{coin.id} →</Link>
</Coin>
))}
</CoinsList>
</Container>
);
}+) App.tsx에서 a태그 색상을 변경하자
inherit → 부모의 속성을 따른다.
a{
		text-decoration: none;
		color: inherit;
	}
Hover 사용하기
// Coins.tsx
const Coin = styled.li`
	background-color: white;
	color: ${(props) => props.theme.bgColor};
	padding: 20px;
	border-radius: 15px;
	margin-bottom: 10px;
	a {
		transition: color 0.2s ease-in;
		display: block;         // 박스 전체 클릭 시 효과 나타나도록
	}
	&:hover {
		a {
			color: ${(props) => props.theme.accentColor};
		}
	}
`;
4.3 Home Part Two
API를 fetch 해오자
data의 interface를 설정해주자
-
coins 삭제
-
인터페이스 설정
interface CoinInterface {
	id: string;
	name: string;
	symbol: string;
	rank: number;
	is_new: boolean;
	is_active: boolean;
	type: string;
}
-
state로 coins 추가
function Coins() { const [coins, setCoins] = useState<CoinInterface[]>([]); return ( <Container> <Header> <Title>코인</Title> </Header> <CoinsList> {coins.map((coin) => ( <Coin key={coin.id}> <Link to={`/${coin.id}`}>{coin.id} →</Link> </Coin> ))} </CoinsList> </Container> ); }
-
데이터를 가져오자
👀 useEffect 란 ?
: 특정한 시기에만 코드를 실행할 수 있도록 하는 함수. (시작, 끝, 렌더링 될 때마다)
- 시작 시에 함수가 실행되도록 하자
useEffect(() => {
		(async () => {
			const response = await fetch('https://api.coinpaprika.com/v1/coins');
			const json = await response.json();
			console.log(json);
		})();
	}, []);
-
100개만 가져와서 coins에 집어넣자
👀 배열의 일부만 가져오기 slice
: 배열.slice(시작 인덱스, 종료 인덱스) ⇒ 종료 인덱스는 포함 X
useEffect(() => {
		(async () => {
			const response = await fetch('https://api.coinpaprika.com/v1/coins');
			const json = await response.json();
			setCoins(json.slice(0, 100));
		})();
	}, []);
	console.log(coins);
Load State를 추가하자
state안에 coin들이 다 세팅되면 loading을 false로 바꾸자
const Loader = styled.span`
text-align: center;
display: block;
`;
function Coins() {
const [coins, setCoins] = useState<CoinInterface[]>([]);
const [loading, setLoading] = useState(true);
useEffect(() => {
(async () => {
const response = await fetch('https://api.coinpaprika.com/v1/coins');
const json = await response.json();
setCoins(json.slice(0, 100));
setLoading(false);
})();
}, []);
console.log(coins);
return (
<Container>
<Header>
<Title>코인</Title>
</Header>
{loading ? (
<Loader>'Loading...'</Loader>
) : (
<CoinsList>
{coins.map((coin) => (
<Coin key={coin.id}>
<Link to={`/${coin.id}`}>{coin.id} →</Link>
</Coin>
))}
</CoinsList>
)}
</Container>
);
}4.4 Route States
- crypto coin 아이콘 사이트 암호 화폐 코인 아이콘을 가져와준다 Crypto Icon API 사용방법 :
https://coinicons-api.vercel.app/api/icon/ + 코인의 symbol적용해보자// flex 위해 수정 const Coin = styled.li` background-color: white; color: ${(props) => props.theme.bgColor}; padding: 20px; border-radius: 15px; margin-bottom: 10px; a { display: flex; align-items: center; padding: 20px; transition: color 0.2s ease-in; } &:hover { a { color: ${(props) => props.theme.accentColor}; } } `; const Img = styled.img` width: 35px; height: 35px; margin-right: 10px; `; <CoinsList> {coins.map((coin) => ( <Coin key={coin.id}> <Link to={`/${coin.id}`}> <Img src={`https://coinicons-api.vercel.app/api/icon/${coin.symbol.toLowerCase()}`} /> {coin.id} → </Link> </Coin> ))} </CoinsList>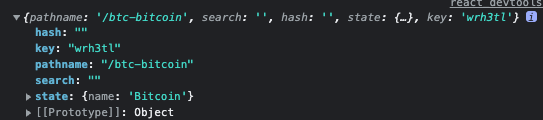
비하인드더씬 데이터(state)를 보내보자
// Coins.tsx
<Coin key={coin.id}>
<Link to={{ pathname: `/${coin.id}`, state: { name: coin.name } }}>
<Img src={`https://coinicons-api.vercel.app/api/icon/${coin.symbol.toLowerCase()}`} />
{coin.id} →
</Link>
</Coin>데이터(state)를 받아보자
// Coin.tsx
import { useState } from 'react';
import styled from 'styled-components';

interface RouteParams {
	coinId: string;
}

const Container = styled.div`
	padding: 0px 20px;
	max-width: 480px;
	margin: 0 auto;
`;

const Header = styled.header`
	height: 10vh;
	display: flex;
	justify-content: center;
	align-items: center;
`;

const Title = styled.h1`
	font-size: 48px;
	color: ${(props) => props.theme.accentColor};
`;

const Loader = styled.span`
	text-align: center;
	display: block;
`;

function Coin() {
	const [loading, setLoading] = useState(true);
	const { coinId } = useParams<RouteParams>();
	return (
		<Container>
			<Header>
				<Title>코인 {coinId}</Title>
			</Header>
			{loading ? <Loader>Loading...</Loader> : null}
		</Container>
	);
}

export default Coin;
👀 useLocation()을 사용해서 state를 얻자
// Coin.tsx
import { useLocation, useParams } from 'react-router-dom';

const location = useLocation();
console.log(location);
// Coin.tsx
interface RouteState {
	name: string;
}

function Coin() {
	const [loading, setLoading] = useState(true);
	const { coinId } = useParams<RouteParams>();
	const { state } = useLocation<RouteState>();
	return (
		<Container>
			<Header>
				<Title>{state.name}</Title>
			</Header>
			{loading ? <Loader>Loading...</Loader> : null}
		</Container>
	);
}
state는 Coins 화면을 열 때와, Coin 화면으로 넘어갈 때 생성된다.
📢 그냥 url을 쳐서 Coin 화면으로 들어가려고 하면?

⇒ 에러 발생 🤯
: Home(Coins) 화면을 먼저 열어야 Coin 화면이 state를 가질 수 있음
url로 바로 접속하게 되면 app 상에 state가 만들어지지 못한다
🪄 해결방법
⇒ 존재하지 않으면 Loading 화면을 띄워주자
<Header>
		<Title>{state?.name || 'Loading'}</Title>
	</Header>
4.5 Coin Data
Coin 화면(상세 페이지)에 뿌려줄 데이터를 가져오자
- 사용할 url
-
fetch
useEffect(() => { (async () => { const infoData = await (await fetch(`https://api.coinpaprika.com/v1/coins/${coinId}`)).json(); const priceData = await (await fetch(`https://api.coinpaprika.com/v1/tickers/${coinId}`)).json(); setLoading(false); })(); }, []); -
state를 설정하자
const [info, setInfo] = useState({});
const [priceInfo, setPriceInfo] = useState({});
4.6 Data Types
TypeScript에게 데이터 타입을 알려주자
-
인터페이스를 만들자
- 참고 : 인터페이스 변수명은 주로 앞에 i를 붙인다
-
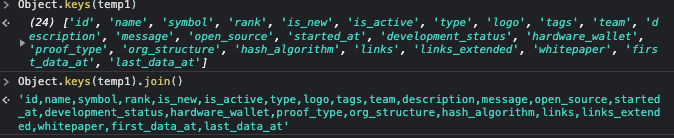
콘솔창으로 데이터 뽑아내기 ⇒ temp1에 infoData 저장

-
Object.keys(지정된 변수명).join()
⇒ 문자열 형태로 데이터가 저장된다.
-
key들을 interface에 저장
cmd + d로 모든 쉼표 선택 & 엔터

선택한 영역 다중 커서 단축키 :
option + shift + i -
value의 타입들을 가져오자
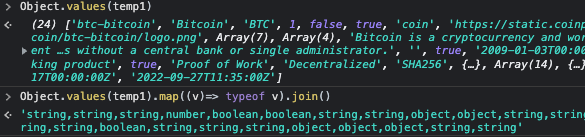
-
단, array 들은 따로 인터페이스 설정 필요
interface ITag { coin_counter: number; ico_counter: number; id: string; name: string; } interface InfoData { tags: ITag[]; } -
인터페이스를 state에 넣어주자
function Coin() {
	const [loading, setLoading] = useState(true);
	const { coinId } = useParams<RouteParams>();
	const { state } = useLocation<RouteState>();
	const [info, setInfo] = useState<InfoData>({});
	const [priceInfo, setPriceInfo] = useState({});
...}
- 참고 : 인터페이스 변수명은 주로 앞에 i를 붙인다
4.7 Nested Routes Part One
데이터를 다 받아왔으니 screen에 paint 해보자
Nested Router
라우트 안에 있는 또 다른 라우트
-
라우트를 추가하자
-
Price.tsx
function Price() { return <h1>Price</h1>; } export default Price; -
Chart.tsx
function Chart() {
	return <h1>Chart</h1>;
}

export default Chart;
-
-
Switch, Route를 추가하고, 경로를 설정하자
⇒ 하나만 나오게 할 거니까
// Coin.tsx

import { useLocation, useParams, Switch, Route } from 'react-router-dom';

function Coin() {
...
..
.
<Switch>
		<Route path={`/${coinId}/price`}>
			<Price />
		</Route>
		<Route path={`/${coinId}/chart`}>
			<Chart />
		</Route>
	</Switch>
)}
		</Container>
	);
}
4.8 Nested Routes part Two
price와 chart를 스위치 하는 탭을 만들어보자
Navigate 할 Link를 만들어주자
<Link to='/chart'>Chart</Link>
<Link to='/price'>Price</Link>
⇒ 오류 발생 🤯

- 우리는
localhost:3000/btn-bitcoin/chart로 가기를 희망하는데, 그냥 /chart로 가진다.
🪄 해결방법
<Link to={`/${coinId}/chart`}>Chart</Link>
<Link to={`/${coinId}/price`}>Price</Link>- style 생략
const Tabs = styled.div` display: grid; grid-template-columns: repeat(2, 1fr); margin: 25px 0px; gap: 10px; `; const Tab = styled.span` text-align: center; text-transform: uppercase; font-size: 12px; font-weight: 400; background-color: rgba(0, 0, 0, 0.5); padding: 7px 0px; border-radius: 10px; a { display: block; } `;<Tabs> <Tab> <Link to={`/${coinId}/chart`}>Chart</Link> </Tab> <Tab> <Link to={`/${coinId}/price`}>Price</Link> </Tab> </Tabs>
useRouteMatch
: 사용자가 특정한 URL에 있는지의 여부를 알려줌
내가 선택한 URL에 있다면 object를 받는다. 아님 null을 받음.
-
사용하기
import { useLocation, useParams, Switch, Route, Link, useRouteMatch } from 'react-router-dom';

function Coin() {
	const priceMatch = useRouteMatch('/:coinId/price');
	console.log(priceMatch);
-
Tab에 prop를 주자
const Tab = styled.span<{ isActive: boolean }>`
	text-align: center;
	text-transform: uppercase;
	font-size: 12px;
	font-weight: 400;
	background-color: rgba(0, 0, 0, 0.5);
	padding: 7px 0px;
	border-radius: 10px;
	color: ${(props) => (props.isActive ? props.theme.accentColor : props.theme.textColor)};
	a {
		display: block;
	}
`;

function Coin() {
	<Tabs>
		<Tab isActive={chartMatch !== null}>
			<Link to={`/${coinId}/chart`}>Chart</Link>
		</Tab>
		<Tab isActive={priceMatch !== null}>
			<Link to={`/${coinId}/price`}>Price</Link>
		</Tab>
	</Tabs>
4.9 React Query part One
react query에 대해 알아보자
React Query
Overview | TanStack Query Docs
React Query 사용하기
-
Index.tsx 세팅하기
import { QueryClient, QueryClientProvider } from 'react-query'; const queryClient = new QueryClient(); ReactDOM.render( <React.StrictMode> <QueryClientProvider client={queryClient}> <ThemeProvider theme={theme}> <App /> </ThemeProvider> </QueryClientProvider> </React.StrictMode>, document.getElementById('root') ); -
fetcher 함수 만들기
- fetcher 함수를 분리하자 api.ts
export function fetchCoins() {
	return fetch('https://api.coinpaprika.com/v1/coins').then((response) => response.json());
}
- fetcher 함수를 분리하자 api.ts
-
useQuery 사용
👀 useQuery
useQuery(”query의 고유식별자”, fetcher함수)
⇒ 로딩중 & 데이터를 한꺼번에 줌
// Coins.tsx function Coins() { const { isLoading, data } = useQuery<ICoin[]>('allCoins', fetchCoins); return ( <Container> <Header> <Title>코인</Title> </Header> {isLoading ? ( <Loader>Loading...</Loader> ) : ( <CoinsList> {data?.slice(0,100).map((coin) => ( <Coin key={coin.id}> <Link to={{ pathname: `/${coin.id}`, state: { name: coin.name } }}> <Img src={`https://coinicons-api.vercel.app/api/icon/${coin.symbol.toLowerCase()}`} /> {coin.id} → </Link> </Coin> ))} </CoinsList> )} </Container> ); }
👻 다시 home으로 갔을 때 로딩이 보이지 않는다?!
: react query가 데이터를 캐시에 저장해두기 때문 ⇒ 데이터를 유지한다!
4.10 React Query part Two
Devtools
캐시에 저장되어 있는 query를 볼 수 있다.
- App.tsx
import { ReactQueryDevtools } from 'react-query/devtools';

function App() {
	return (
		<>
			<GlobalStyle />
			<Router />
			<ReactQueryDevtools initialIsOpen={true} />
		</>
	);
}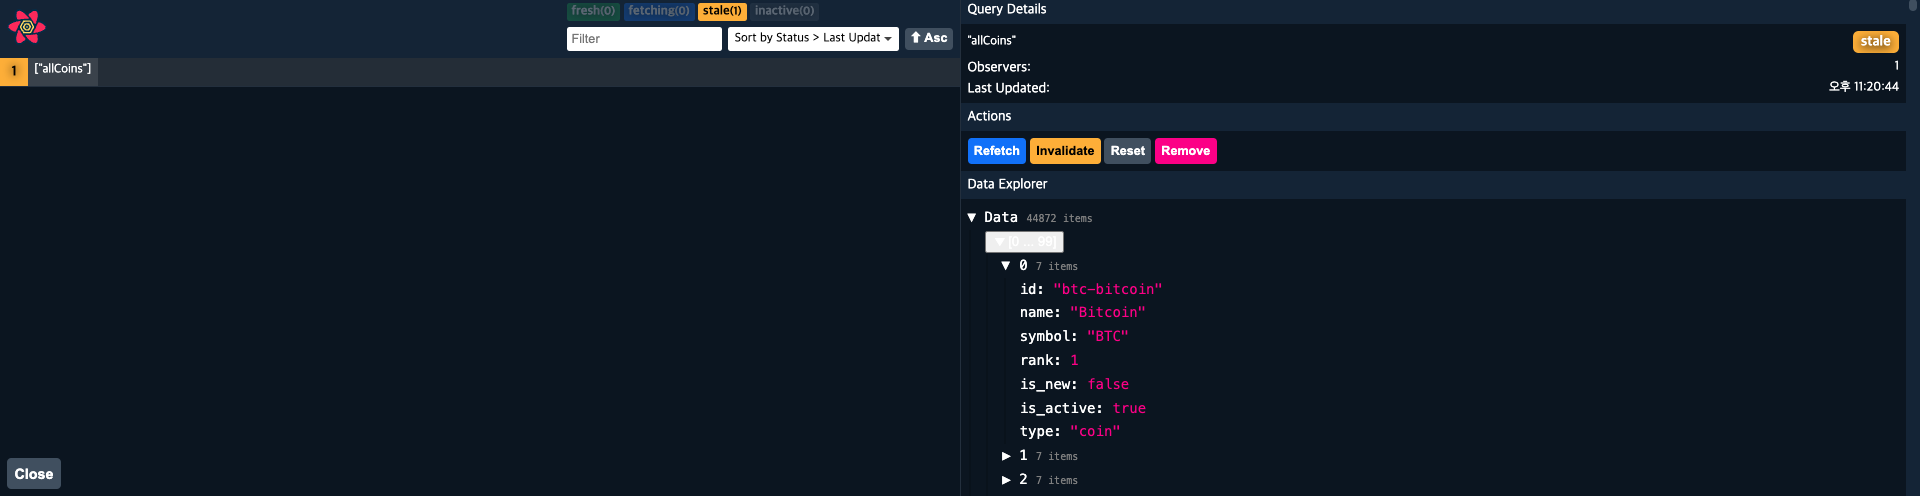
- Devtools로 확인가능한 것
- 가지고 있는 쿼리 확인
- 캐시에 가지고 있는 것
- trigger 가능 ⇒ refetch or reset
코드를 리액트 쿼리로 리팩토링 해보자
갔던 곳을 다시 가도 로딩이 안 생기게 해보자
-
api.ts
const BASE_URL = `https://api.coinpaprika.com/v1`; export function fetchCoins() { return fetch(`${BASE_URL}/coins`).then((response) => response.json()); } export function fetchCoinInfo(coinId: string) { return fetch(`${BASE_URL}/coins/${coinId}`).then((response) => response.json()); } export function fetchCoinTickers(coinId: string) { return fetch(`${BASE_URL}/tickers/${coinId}`).then((response) => response.json()); } -
Coin.tsx
function Coin() {
	const { coinId } = useParams<RouteParams>();
	const { state } = useLocation<RouteState>();
	const priceMatch = useRouteMatch('/:coinId/price');
	const chartMatch = useRouteMatch('/:coinId/chart');
	const { isLoading: infoLoading, data: infoData } = useQuery<InfoData>(['info', coinId], () => fetchCoinInfo(coinId));
	const { isLoading: tickersLoading, data: tickersData } = useQuery<PriceData>(['tickers', coinId], () => fetchCoinTickers(coinId));
	// const [loading, setLoading] = useState(true);
	// const [info, setInfo] = useState<InfoData>();
	// const [priceInfo, setPriceInfo] = useState<PriceData>();

	// useEffect(() => {
	// 	(async () => {
	// 		const infoData = await (await fetch(`https://api.coinpaprika.com/v1/coins/${coinId}`)).json();
	// 		const priceData = await (await fetch(`https://api.coinpaprika.com/v1/tickers/${coinId}`)).json();

	// 		setInfo(infoData);
	// 		setPriceInfo(priceData);
	// 		setLoading(false);
	// 	})();
	// }, [coinId]);

	const loading = infoLoading || tickersLoading;
	return (
		<Container>
			<Header>
				<Title>{state?.name ? state.name : loading ? 'Loading...' : infoData?.name}</Title>
			</Header>
			{loading ? (
				<Loader>Loading...</Loader>
			) : (
				<>
					<Overview>
						<OverviewItem>
							<span>Rank:</span>
							<span>{infoData?.rank}</span>
						</OverviewItem>
						<OverviewItem>
							<span>Symbol:</span>
							<span>${infoData?.symbol}</span>
						</OverviewItem>
						<OverviewItem>
							<span>Open Source:</span>
							<span>{infoData?.open_source ? 'Yes' : 'No'}</span>
						</OverviewItem>
					</Overview>
					<Description>{infoData?.description}</Description>
					<Overview>
						<OverviewItem>
							<span>Total Suply:</span>
							<span>{tickersData?.total_supply}</span>
						</OverviewItem>
						<OverviewItem>
							<span>Max Supply:</span>
							<span>{tickersData?.max_supply}</span>
						</OverviewItem>
					</Overview>
...
..
.
4.12 Price Chart part One
암호화폐 세부사항에서 차트를 보여주자
-
Coin.tsx 에서 coinId를 props로 넘겨주자
// Coin.tsx
<Route path={`/:coinId/chart`}>
	<Chart coinId={coinId} />
</Route>
// Chart.tsx interface CharProps { coinId: string; } function Chart({ coinId }: CharProps) { return <h1>Chart</h1>; } export default Chart; -
fetch function 만들기
// app.ts
export function fetchCoinHistory(coinId: string) {
	return fetch(`https://ohlcv-api.nomadcoders.workers.dev?coinId=${coinId}`).then((response) => response.json());
}
4.13 Price Chart part Two
API에서 받아온 주간 코인 data를 시작화 해보자
차트 라이브러리
ApexCharts.js - Open Source JavaScript Charts for your website
ApexChart 설치하기
-
설치하기
npm install --save react-apexcharts apexcharts -
Chart.tsx
import { useQuery } from 'react-query';
import { fetchCoinHistory } from '../api';
import ApexChart from 'react-apexcharts';

interface IHistorical {
	time_open: string;
	time_close: string;
	open: number;
	high: number;
	low: number;
	close: number;
	volume: number;
	market_cap: number;
}

interface CharProps {
	coinId: string;
}

function Chart({ coinId }: CharProps) {
	const { isLoading, data } = useQuery<IHistorical[]>(['ohlcv', coinId], () => fetchCoinHistory(coinId));
	return (
		<div>
			{isLoading ? (
				'Loading chart...'
			) : (
				<ApexChart
					type='line'
					series={[{ name: 'Price', data: data?.map((price) => price.close) ?? [] }]}
					options={{
						theme: { mode: 'dark' },
						chart: { height: 300, width: 500, toolbar: { show: false }, background: 'transparent' },
						grid: { show: false },
						stroke: { curve: 'smooth', width: 4 },
						yaxis: {
							show: false
						},
						xaxis: {
							axisBorder: { show: false },
							axisTicks: { show: false },
							labels: { show: false }
						}
					}}
				/>
			)}
		</div>
	);
}

export default Chart;
4.14 Price Chart part Three
label에 서식을 지정해보자
fill
: 선에 그라데이션을 적용할 수 있다.
fill: {
type: 'gradient',
gradient: { gradientToColors: ['blue'] }
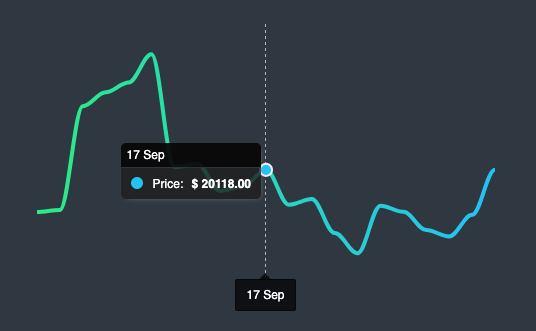
},tooltip
: 마우스를 올렸을 때 보이는 부분
tooltip: {
		y: {
			formatter: (value) => `$ ${value.toFixed(2)} `
		}
	}
xaxis
xaxis: {
	axisBorder: { show: false },
	axisTicks: { show: false },
	labels: { show: false },
	type: 'datetime',
	categories: data?.map((price) => new Date(price.time_close * 1000).toISOString())
},
4.15 Final Touches
스크린을 실시간처럼 느껴지도록 만들어보자
-
Opensource → tickersData
<OverviewItem> <span>Price:</span> <span>{tickersData?.quotes.USD.price.toFixed(3)}</span> </OverviewItem> -
useQuery 훅의 3번째 argument를 써보자
{ refetchInterval: 5000 }: query를 5초마다 refetch 한다.const { isLoading: tickersLoading, data: tickersData } = useQuery<PriceData>(['tickers', coinId], () => fetchCoinTickers(coinId), { refetchInterval: 5000 });
상단의 React App을 없애보자
: react helmet 사용 ⇒ helmet 안에 내용이 head로 간다
react-helmet
-
npm i react-helmet -
helmet을 import
import {Helmet} from "react-helmet";

<Container>
			<Helmet>
				<title>{state?.name ? state.name : loading ? 'Loading...' : infoData?.name}</title>
			</Helmet>
...
..
.

4.16 Conclusions
💪 Challenge
- 뒤로가기 버튼 만들기
- price 탭을 구현하기
- line 차트를 Candlestick 차트로 변경하기