Solidity
스마트 컨트랙트의 코드를 건드리면, 이미 민팅된 NFT 의 이미지나
Attributes 를 변경시킬 수 있다.
opensea 같은 NFT 거래사이트는 ERC-721 의 tokenURI 함수의
값을 반환받아 이미지를 띄워주고, 데이터를 보여준다.
따라서, tokenURI 함수 부분만 오버라이딩 해준다면 쉽게 바꿀 수 있겠다.
이미지와 json 은 각 2개씩 준비하고 pinata 에 업로드 해둔다.
그리고 아래의 컨트랙트를 배포하며 uri 를 입력해준다.
contract mint721token is ERC721Enumerable {
string public Before_URI;
string public After_URI;
mapping(uint => bool) public status;
constructor(string memory b_uri, string memory a_uri) ERC721("changeable","CH"){
Before_URI = b_uri;
After_URI = a_uri;
}
function setTokenStatus(uint _number, bool _status) public {
status[_number] = _status;
}
function mintNFT(uint _tokenID) public {
_mint(msg.sender, _tokenID);
}
function tokenURI(uint _ID) public view override returns(string memory){
if(status[_ID] == false){
return string(abi.encodePacked(Before_URI,'/b',Strings.toString(_ID), '.json'));
} else {
return string(abi.encodePacked(After_URI,'/a',Strings.toString(_ID), '.json'));
}
}
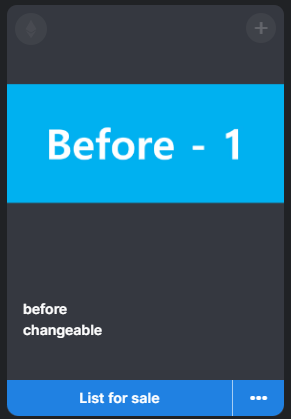
}처음 배포되었을 땐, Before 이미지가 보이도록 만들었다.
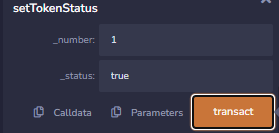
그리고, setTokenStatus 함수를 사용해 true 로 바꿔주면, 특정 tokenId 의 메타데이터를 After 로 변경시킨다.
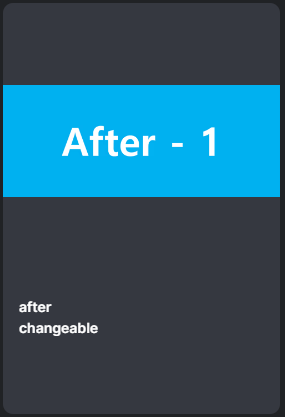
아래와 같이 after 로 바뀌는 것을 볼 수 있다.
NFT Mint with React, web3.js
위의 컨트랙트를 이용해서 React 에서 NFT 민팅이 가능하도록 만들어 보았다.
먼저 아래의 코드를 사용했다.
import Web3 from "web3";
import abi3 from "./abi.json";
import ethers from "ethers";
import { useState } from "react";

function App() {
  const [account, setAccount] = useState();

  const web3 = new Web3("API");
  const web3_2 = new Web3("wss API");

  const abi = abi3;
  const ca = `0xc14a923dc3a85c8ee2c26f89ae6dd3a95280ed1f`;
  const contract = new web3.eth.Contract(abi, ca);

  async function connect() {
    if (window.ethereum) {
      try {
        const res = await window.ethereum.request({
          method: "eth_requestAccounts",
        });
        setAccount(res[0]);
      } catch (err) {
        console.error(err);
      }
    } else {
      console.log("Install metamask");
    }
  }

  connect();

  async function mintNFT(e) {
    e.preventDefault();
    const data = new FormData(e.target);

    var _value = web3.utils.numberToHex(Number(data.get("number")));

    await window.ethereum.request({
      method: "eth_sendTransaction",
      params: [
        {
          from: account,
          to: ca,
          value: _value,
          data: contract.methods.mintNFT(data.get("tokenID")).encodeABI(),
        },
      ],
    });
  }

  return (
    <div className="bg-red-100">
      <h2>wallet Address {account}</h2>
      <form onSubmit={mintNFT}>
        <input type="text" name="tokenID"></input>
        <input type="text" name="number" />
        <button type="submit">MINT</button>
      </form>
      <h1>NFT Minting</h1>
    </div>
  );
}

export default App;
form 태그의 input, button 태그를 넣고 submit 으로 타입을 지정해주었다.
form 태그는 onsubmit 로, 클릭하면 mintNFT 함수를 실행하도록 했고,
form 태그의 input 값을 text 로 받아 민팅할 tokenId, 민팅비를 입력하도록 했다.
컨트랙트의 코드는 mintNFT 부분에 require 를 넣어 100 wei 이상의 value 를 받지 못하면, NFT 민팅을 중지하고 initial state 로 되돌린다.
    function mintNFT(uint _tokenID) public {
    	require(msg.value >= 100);
        _mint(msg.sender, _tokenID);
    }
여기서, msg.value 는 remix 에서는 좌측 상단에서 쉽게 사용해서 보낼 수 있었는데, 프론트엔드에서는 form, input 태그를 사용하면된다.
컨트랙트는 16진수 값을 인식하기 때문에 16진수로 바꾸어주어야 한다.
이 코드를 사용하면, 10진수를 16진수로 바꾸어준다.
web3.utils.numberToHex(Number(data.get("number")));
하지만, input 태그의 타입은 string 이다. 그러므로 Number() 를 이용해 10진수로 만든 값을 16진수로 변환시켜주면 된다.
ethers.js
ether.js 를 사용할 때, 너무 큰 값을 input 으로 받게되면, 아래와 같이 overflow error 가 발생한다.
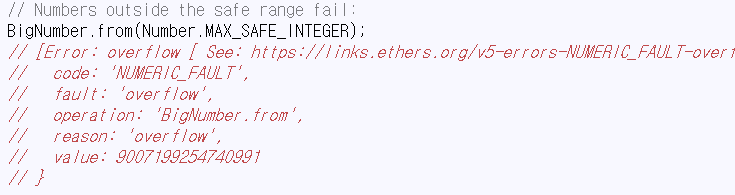
이러한 에러는 ethers.js 공식문서에서 확인할 수 있다.
실제 TX 에서도 이러한 에러를 볼 수 있다.
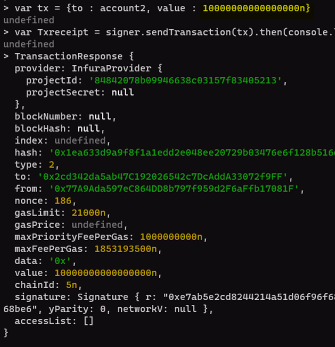
아래의 사진을 보면, 10^16 값을 value 로 넣고 TX 를 보내자, 오버플로우 에러가 발생한다.
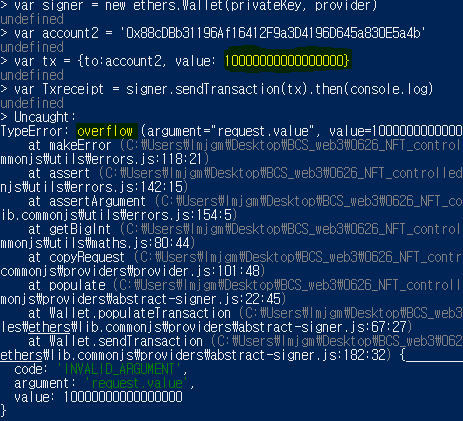
이러한 에러를 마주했을 땐, value 의 숫자 맨 뒤에n 을 붙여주면 정상적으로 TX 을 보낼 수 있다.
아래 사진처럼 n 을 붙이면 정상적으로 TX 을 보낼 수 있다.