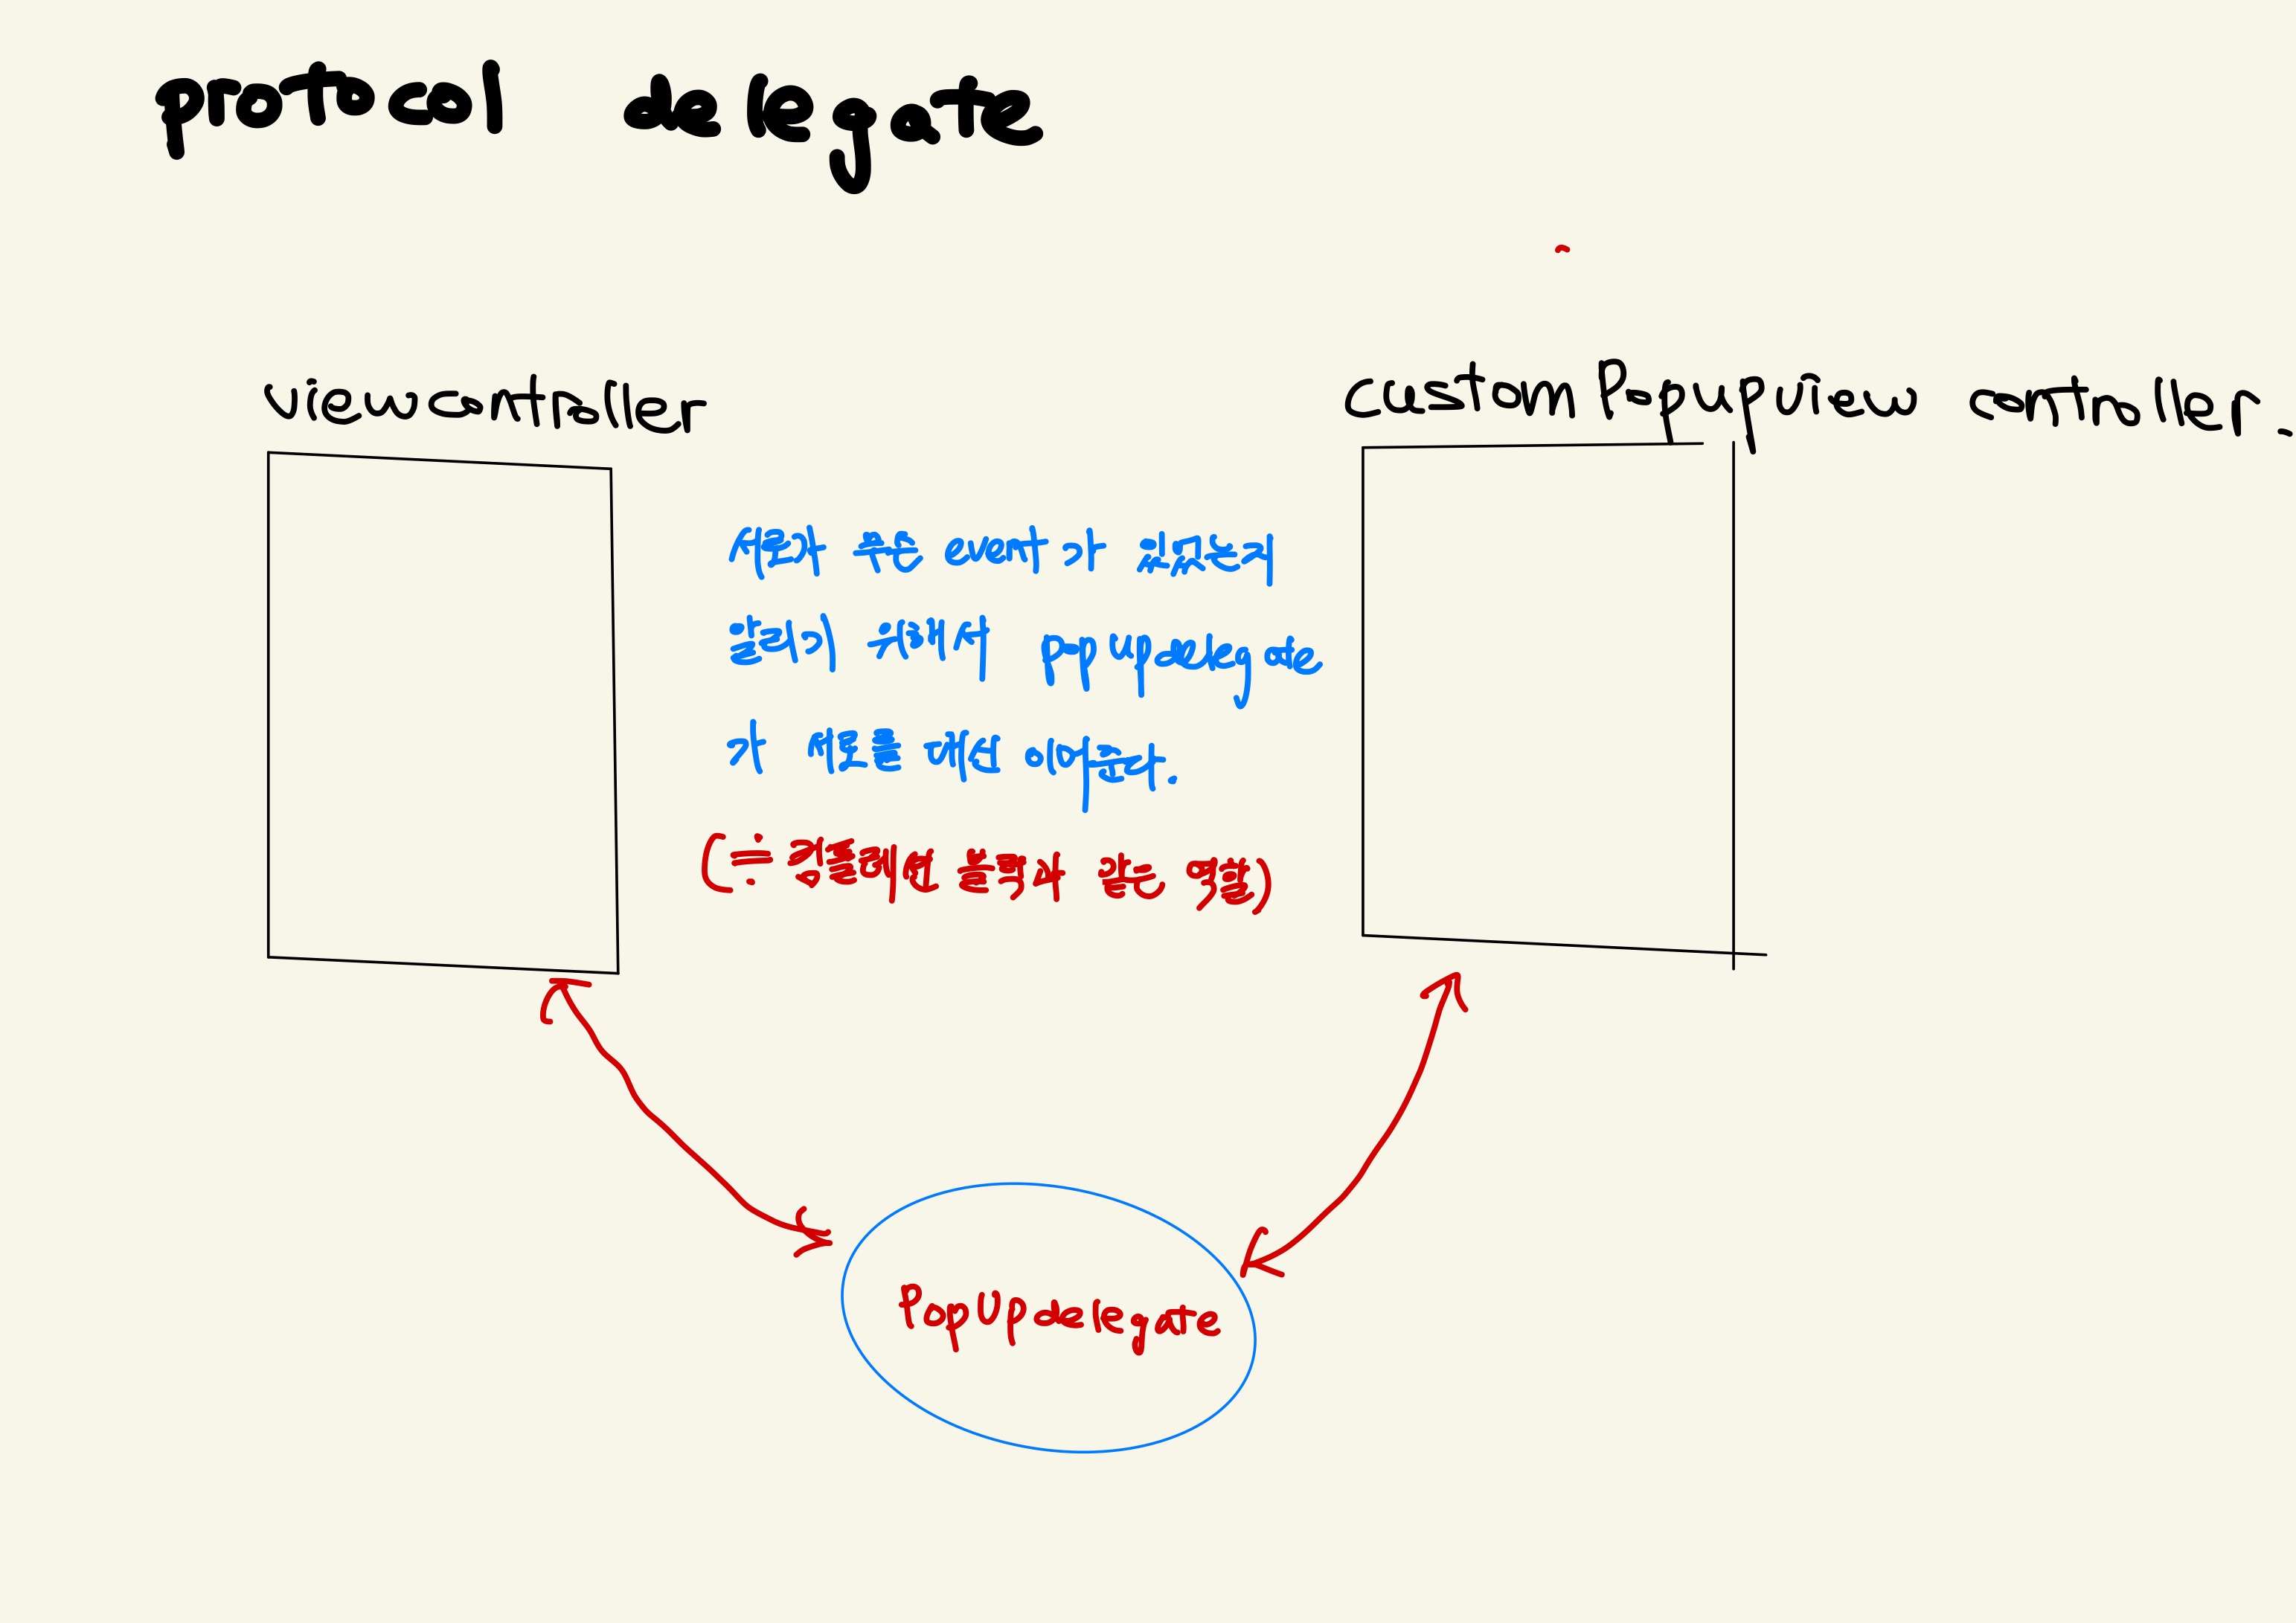
Protocol Delegate pattern
앞에서 배웠던 컴플레션 블럭과 같은 역할을 하는 장치이다!

PopUp 스토리보드에 추가하기

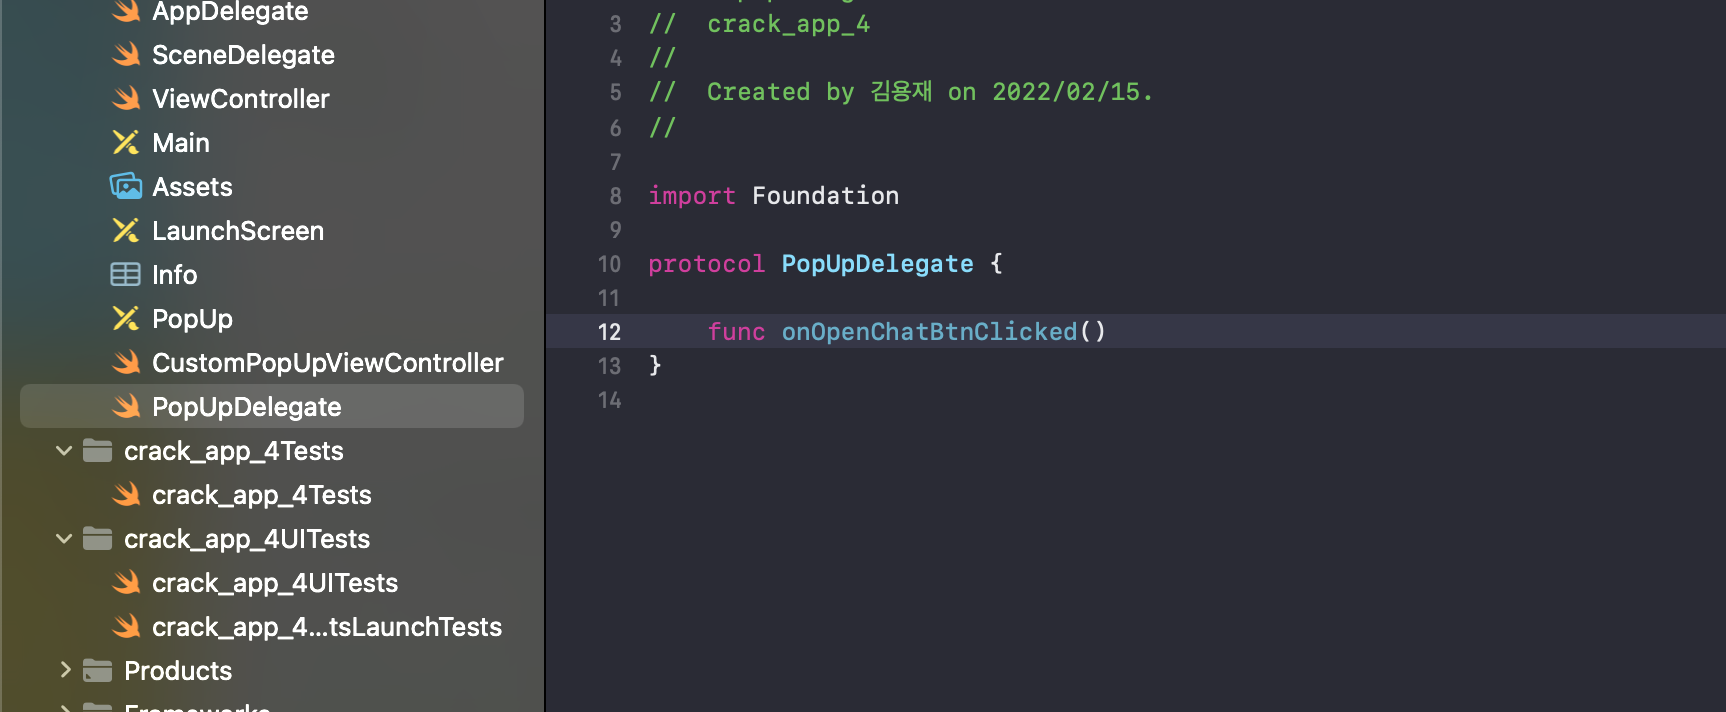
PopUpDelegate 파일을 만든다

위와 같이 PopUpDelegate 프로토콜을 만들어준다
protocol PopUpDelegate {

    func onOpenChatBtnClicked()
}
CustomPopUpViewController에 버튼이랑 변수 추가해주기
 @IBOutlet weak var openChatBtn: UIButton!

 var myPopUpDelegate : PopUpDelegate?
ViewController와 CustomPopUpViewController 연결해주기
먼저 ViewController 클래스에 PopUpDelegate을 연결해준다.
그리고 customPopUpVC.myPopUpDelegate = self 을 통해서 최종적으로 연결을 해준다 그리고 ViewController 클래스에 PopUpDelegate를 연결해주면, 알아서 onOpenChatBtnClicked() 가 생성이된다. 그러면 onOpenChatBtnClicked() 코드를 작성해준다.
class ViewController: UIViewController, PopUpDelegate {
    @IBOutlet weak var myWebView: WKWebView!

    @IBOutlet weak var createPopUpBtn: UIButton!

    override func viewDidLoad() {
        super.viewDidLoad()
        // Do any additional setup after loading the view.
    }


    @IBAction func onCreatePopUpBtnClicked(_ sender: UIButton){
        print("ViewController - onCreatePopUpBtnClicked() called")

        // 팝업띄우기를 눌렀을 경우 -> 스토리보드(PopUp) 가져오기
        let storyboard = UIStoryboard.init(name: "PopUp", bundle: nil)

        // 스토리보드를 통해 뷰 컨트롤러 가져오기
        let customPopUpVC = storyboard.instantiateViewController(withIdentifier: "AlertPopUpVC") as! CustomPopUpViewController

        // 팝업효과(보여지는) 설정 --> 뷰 컨트롤러가 보여지는 스타일
        customPopUpVC.modalPresentationStyle = .overCurrentContext

        // 뷰컨트롤러가 사라지는 스타일 (스르르 사라지는 스타일로 설정!)
        customPopUpVC.modalTransitionStyle = .crossDissolve

        // CustomPopUpViewController에서 한 일을 main에서도 알게 해준다!! -> 컴플레션 블럭을 사용한다!
        customPopUpVC.subscribeBtnCompletionClosure = {
            print("컴플레션 블럭이 호출되었습니다.")

            let urlStr = "https://www.youtube.com/c/이스타TV"
            // 한글 포함된 url 디코딩하기

            let encodedStr = urlStr.addingPercentEncoding(withAllowedCharacters: .urlQueryAllowed)!
            let url = URL(string: encodedStr)!
            // myWebView에 load를 한다. --> 느낌표를 한 이유는 값이 꼭 있을 거라고 넘겨준것이다!
            self.myWebView.load(URLRequest(url: url))

            self.createPopUpBtn.isHidden = true
        }

        // self - PopUpDelegate

        customPopUpVC.myPopUpDelegate = self

        // present-> 최종적으로 현재 있는 뷰 컨트롤러에서 다른 컨트롤러를 보여준다
        self.present(customPopUpVC, animated: true, completion: nil)

        // 팝업 띄우기를 없애기


    }
    //MARK: PopUpDelegate methods
    func onOpenChatBtnClicked() {
        print("ViewController - onOpenChatBtnClicked() called")
        let urlStr = "https://open.kakao.com/o/gxOOKJec"
        // 한글 포함된 url 디코딩하기

        let encodedStr = urlStr.addingPercentEncoding(withAllowedCharacters: .urlQueryAllowed)!
        let url = URL(string: encodedStr)!
        // myWebView에 load를 한다. --> 느낌표를 한 이유는 값이 꼭 있을 거라고 넘겨준것이다!
        self.myWebView.load(URLRequest(url: url))

        self.createPopUpBtn.isHidden = true
    }
}
CustomPopUpViewController에 action함수 코드 작성해주기
    @IBAction func onOpenChatBtnClicked(_ sender: UIButton) {
        print("CustomerPopUpViewController - onOpenChatBtnClicked() called")

        myPopUpDelegate?.onOpenChatBtnClicked()

        self.dismiss(animated: true, completion: nil)
    }
최종 코드는 아래와 같다
ViewController
import UIKit
import WebKit


class ViewController: UIViewController, PopUpDelegate {
    @IBOutlet weak var myWebView: WKWebView!

    @IBOutlet weak var createPopUpBtn: UIButton!

    override func viewDidLoad() {
        super.viewDidLoad()
        // Do any additional setup after loading the view.
    }


    @IBAction func onCreatePopUpBtnClicked(_ sender: UIButton){
        print("ViewController - onCreatePopUpBtnClicked() called")

        // 팝업띄우기를 눌렀을 경우 -> 스토리보드(PopUp) 가져오기
        let storyboard = UIStoryboard.init(name: "PopUp", bundle: nil)

        // 스토리보드를 통해 뷰 컨트롤러 가져오기
        let customPopUpVC = storyboard.instantiateViewController(withIdentifier: "AlertPopUpVC") as! CustomPopUpViewController

        // 팝업효과(보여지는) 설정 --> 뷰 컨트롤러가 보여지는 스타일
        customPopUpVC.modalPresentationStyle = .overCurrentContext

        // 뷰컨트롤러가 사라지는 스타일 (스르르 사라지는 스타일로 설정!)
        customPopUpVC.modalTransitionStyle = .crossDissolve

        // CustomPopUpViewController에서 한 일을 main에서도 알게 해준다!! -> 컴플레션 블럭을 사용한다!
        customPopUpVC.subscribeBtnCompletionClosure = {
            print("컴플레션 블럭이 호출되었습니다.")

            let urlStr = "https://www.youtube.com/c/이스타TV"
            // 한글 포함된 url 디코딩하기

            let encodedStr = urlStr.addingPercentEncoding(withAllowedCharacters: .urlQueryAllowed)!
            let url = URL(string: encodedStr)!
            // myWebView에 load를 한다. --> 느낌표를 한 이유는 값이 꼭 있을 거라고 넘겨준것이다!
            self.myWebView.load(URLRequest(url: url))

            self.createPopUpBtn.isHidden = true
        }

        // self - PopUpDelegate

        customPopUpVC.myPopUpDelegate = self

        // present-> 최종적으로 현재 있는 뷰 컨트롤러에서 다른 컨트롤러를 보여준다
        self.present(customPopUpVC, animated: true, completion: nil)

        // 팝업 띄우기를 없애기


    }
    //MARK: PopUpDelegate methods
    func onOpenChatBtnClicked() {
        print("ViewController - onOpenChatBtnClicked() called")
        let urlStr = "https://open.kakao.com/o/gxOOKJec"
        // 한글 포함된 url 디코딩하기

        let encodedStr = urlStr.addingPercentEncoding(withAllowedCharacters: .urlQueryAllowed)!
        let url = URL(string: encodedStr)!
        // myWebView에 load를 한다. --> 느낌표를 한 이유는 값이 꼭 있을 거라고 넘겨준것이다!
        self.myWebView.load(URLRequest(url: url))

        self.createPopUpBtn.isHidden = true
    }
}
PopUpDelegate
import Foundation

protocol PopUpDelegate {

    func onOpenChatBtnClicked()
}
CustomPopUpViewController
import UIKit

class CustomPopUpViewController: UIViewController {

    @IBOutlet weak var subscribeBtn: UIButton!

    @IBOutlet weak var bgBtn: UIButton!

    @IBOutlet weak var contentView: UIView!

    @IBOutlet weak var openChatBtn: UIButton!


    // 컴플레션 블럭을 생성한다. --> 보면 알 수 있드시 Main과 PopUp은 서로 나누어져 있다. 따라서 PopUp에서 일어나는 일을 Main에도 알려야된다.
    var subscribeBtnCompletionClosure: (() -> Void)?

    // PopUpDelegate과 연관된 변수 설정해주기

    var myPopUpDelegate : PopUpDelegate?


    override func viewDidLoad() {
        super.viewDidLoad()

        print("CustomerPopUpViewController - viewdidload()가 생성됨")
        contentView.layer.cornerRadius = 30
        subscribeBtn.layer.cornerRadius = 10
        openChatBtn.layer.cornerRadius = 10
    }
    //MARK: - IBActions


    // BgBtn을 클릭했을 경우!
    @IBAction func onBgBtnClicked(_ sender: UIButton) {
        print("CustomPopUpViewController - onBgBtnClicked() called")

        // dismiss --> 현재 창을 닫아준다
        self.dismiss(animated: true, completion: nil)
    }
    // 구독하러가기를 클릭했을 경우!
    @IBAction func onSubScribeBtnClicked(_ sender: UIButton) {
        print("CustomPopUpViewController - onSubScribeBtnClicked() called")

        self.dismiss(animated: true, completion: nil)


        // 컴플레션 블럭 호출
        if let subscribeBtnCompletionClosure = subscribeBtnCompletionClosure {
            // 메인에 알린다.
            subscribeBtnCompletionClosure()
        }
    }
    @IBAction func onOpenChatBtnClicked(_ sender: UIButton) {
        print("CustomerPopUpViewController - onOpenChatBtnClicked() called")

        myPopUpDelegate?.onOpenChatBtnClicked()

        self.dismiss(animated: true, completion: nil)
    }
}