
WebGL과 Three.js는 무엇인가
Three.js는 3D Javascript 라이브러리이다.
개발자가 web에서 3D 경험을 개발할 수 있도록 해준다.
WebGL로 작동한다.
WebGL이란
- Javascript API
- 삼각형을 매우 빠른 속도로 render한다.
<canvas>에 결과물을 그릴 수 있다.- 브라우저들과 호환 가능하다.
- GPU를 사용한다.
점들을 배치 및 어떻게 그려줄지 정해주는 것이 shaders이다.
모든 점들과 픽셀을 컨트롤 해야하기 때문에 WebGL은 힘들다
이를 보완하기 위해서 나온 것이 Three.js이다.
Three.js란
- Javascript library
- MIT license
- WebGL 바로 위 단계이다.
WebGL과 상호작용 가능하다.
shader를 직접 만들 수 있다.
First Three.js Project
Node.JS
Vite
Three.js
4가지 요소
- Scene
- Objects
- Camera
- Renderer
Scene
objects, models, particles, lights, etc등을 보관하는 container
Objects
objects, models, particles, lights, etc등이 될 수 있다.
Mesh - geometry, material
Transform
- position
- scale
- rotation
- quaternion
position
- x - 오른쪽 왼쪽
- y - 위 아래
- z - 뒤 앞
Vector3 메소드
- length() - 0,0,0 원점으로부터의 길이 구해오기
- distanceTo() - 특정 Vector3로 부터의 길이 구해오기
- normalize() - 특정 Vector3 지점으로부터 거리가 1이 되도록 변경
- set() - Vector3 위치로 이동
3차원 에서 배치하기 어려울 때
- Axes helper
Scale Object
- Vector 3
- x, y, z property
Rotate Object
- rotation
- quaternion
Rotation
- x,y,z property
- Euler not Vector3
- 180도를 돌리고 싶으면 Math.PI를 사용해라
- YXZ 순서로 rotation을 해주어야지 자연스럽다.
- object.rotation.reorder('YXZ')
Quaternion
- 위의 reorder를 해결하기 위한 방법
LookAt메소드
- camera.lookAt(Vector3)
- 특정 지점을 향하도록 하는 메소드
Group
- 특정 object들을 group으로 관리하기 위한 방법
Animations
- requestAnimationFrame
requestAnimationFrame
- requestAnimationFrame의 주된 목적은 매 프레임 마다 코드를 실행하는 것이 아니다.
- 주된 목적은 다음 프레임에 function을 실행시키는 것이다.
- 같은 function을 다음 프레임에 실행시키면 매 프레임 마다 실행되는 것이다.
시간을 활용한 Animations
- Date.now()를 활용해서 timestamp 값을 가져올 수 있다.(1970년 1월 1일 이후의 timestamp)
- 최근 timestamp를 이전 frame timestamp에서 빼서 deltaTime 값을 사용할 수 있다.
Three.js에서 제공하는 Clock
- Three.js 내장된 기능 중 시간 계산을 해주는 Clock이 있다.
- Clock의 내장 메소드 중에서 getElapsedTime()은 Clock이 생성된 이후 몇 초가 지났는지 return해준다.
GSAP
- GSAP은 animation 라이브러리이다.
- GSAP도 animation의 선택지 중에서 하나이다.
Camera
Camera 종류
- ArrayCamera
- StereoCamera
- CubeCamera
- OrthographicCamera
- PerspectiveCamera
ArrayCamera
- 여러개의 카메라의 화면을 나누어서 보여줄 때 사용
StereoCamera
- 양안시와 같이 두개의 카메라를 통하여 화면을 render한다.
- 깊이감을 주기에 좋다.
- VR, 빨강 파랑 안경과 같은 결과물을 함께 사용하면 좋다.
CubeCamera
- 6 render를 사용한다.
- 앞, 뒤, 좌, 우, 위, 아래 6 면에서 render를 생성한다.
- 반사면이나 그림자 등을 표현할 때 유용하다.
OrthographicCamera
- 카메라와 물체와의 거리랑 상관 없이 물체가 같은 크기로 보여주어야할 때 사용
PerspectiveCamera
- 실제 사용되는 카메라를 모방한 종류의 카메라
PerspectiveCamera의 특징 및 활용
- 4개의 파라미터 활용
- 1번째 파라미터는 FOV(field of view)
- 2번째 파라미터는 Aspect ratio
- 3번째는 Near
- 4번째는 Far
FOV
- 카메라의 수직각을 조절하는 값
- 작은 수직각을 사용하면 장거리 효과
- 긴 수직각을 사용하면 좁은 시각효과
- 45에서 75 정도가 적당하다
Aspect ratio
- 가로 길이를 세로로 나눈 값이다.
- 보통은 canvas 사이즈를 const로 선언해서 canvas를 설정할 때랑 Aspect ratio를 설정할 때 사용한다.
Near and Far
- 3,4번째의 Near, Far은 카메라에 보여지는 가장 가깝고 먼 물체의 길이 설정값이다.
- 보통은 0.1과 100으로 설정하고, 카메라로 부터 0.1보다 멀고 100보다는 가까운 물체들만 카메라에 보여진다.
OrthographicCamera
- orthographic 카메라는 perspective 카메라와 다르게 perspective가 없다.
- 카메라와 물체와의 거리와 상관 없이 물체는 같은 크기를 가진다.
- 6가지 파라미터를 가진다.
- 왼쪽, 오른쪽, 위, 아래, near, far
- 왼쪽, 오른쪽, 위, 아래의 값들은 얼마나 멀리까지 카메라가 볼 수 있는지를 의미한다.
OrthographicCamera를 canvas aspect ratio 맞추는 법
- aspect ratio와 orthographicCamera의 화면 비가 맞지 않으면 물체를 원본처럼 보기 어렵다.
- 따라서 canvas의 aspect ratio를 맞추거나, orthographicCamera의 left,right,top,bottom 값을 맞추는 것이다.
- 가장 많이 사용하는 방법은 left,right를 aspectRatio 값으로 곱하는 것이다.
const aspectRatio = sizes.width / sizes.height
const camera = new THREE.OrthographicCamera(- 1 * aspectRatio, 1 * aspectRatio, 1, - 1, 0.1, 100)
Controls
- Custom Controls
- Built in Controls
Custom Controls
- 아래와 같이 카메라의 포지션을 바꾸면 control를 할 수 있다.
const tick = () => {
    camera.position.x = Math.sin(cursor.x*Math.PI*2)*2
    camera.position.z = Math.cos(cursor.x*Math.PI*2)*2
    camera.position.y = cursor.y*3
    camera.lookAt(mesh.position)

    renderer.render(scene, camera)

    window.requestAnimationFrame(tick)
}

// Cursor
const cursor = {
    x: 0,
    y: 0
}

window.addEventListener('mousemove', (event) => {
    cursor.x = event.clientX / sizes.width - 0.5
    cursor.y = -(event.clientY / sizes.height - 0.5)
})

tick()
Built in Controls
- DeviceOrientationControls //https://threejs-journey.com/lessons/cameras#deviceorientationcontrols
- FlyControls //https://threejs-journey.com/lessons/cameras#flycontrols
- FirstPersonControls //https://threejs-journey.com/lessons/cameras#firstpersoncontrols
- PointerLockControls //https://threejs-journey.com/lessons/cameras#pointerlockcontrols
- OrbitControls //https://threejs-journey.com/lessons/cameras#orbitcontrols
- TrackballControls //https://threejs-journey.com/lessons/cameras#trackballcontrols
- TransformControls //https://threejs-journey.com/lessons/cameras#transformcontrols
- DragControls //https://threejs-journey.com/lessons/cameras#dragcontrols
OrbitControls
- OrbitControls class를 가져오기 위해서는 import해야한다.
- new OrbitControls(camera, canvas)
- 카메라가 바라보는 target을 설정할 수 있다. update()를 같이 사용해주어야한다.
import { OrbitControls } from 'three/examples/jsm/controls/OrbitControls.js'에서 가져온다.

const controls = new OrbitControls(camera, canvas)

controls.target.y = 2
controls.update()
Damping
- 애니메이션을 자연스럽게하기 위해서 dmping을 사용한다.
// Controls
const controls = new OrbitControls(camera, canvas)
controls.enableDamping = true

// ...

const tick = () =>
{
    // ...

    // Update controls
    controls.update()

    // ...
}
FullScreen and Resizing
FullScreen
- 웹 브라우저의 기본 margin, padding을 없애야한다.
- canvas의 위치를 고정해야한다.
- canvas의 outline을 없애야한다.
- scroll 가능해지는 overflow 부분을 없애야한다.
*
{
    margin: 0;
    padding: 0;
}
.webgl
{
    position: fixed;
    top: 0;
    left: 0;
    outline: none;
}
html,
body
{
    overflow: hidden;
}
Resize
- window.addEventListener('resize')를 활용한다.
- camera.aspect를 새로운 창의 사이즈로 변경하고
- camera.updateProjectionMatrix()로 업데이트된 내용을 camera에 전달한다.
- renderer.setSize()를 활용하여 renderer에도 해당 내용을 전달한다.
pixel ratio
- 다양한 종류의 해상도를 가진 화면이 나오면서 pixel ratio를 조절하는 것도 중요하다.
- 이를 조절하지 않으면 계단 현상과 같은 문제가 발생한다.
- renderer.setPixelRatio(Math.min(window.devicePixelRatio, 2))와 같이 설정해준다.
- 2보다 크지 않게 해주는 이유는 퍼포먼스 이슈와 배터리 이슈 때문이다.
window.addEventListener('resize', () =>
{
    // Update sizes
    sizes.width = window.innerWidth
    sizes.height = window.innerHeight

    // Update camera
    camera.aspect = sizes.width / sizes.height

    // Update renderer
    renderer.setSize(sizes.width, sizes.height)
    renderer.setPixelRatio(Math.min(window.devicePixelRatio, 2))
})
Geometry
- 점과 면으로 구성되어있는 물체
- built-in geometry가 있다.
Built-in Geometries
- 정말 많은 종류가 있다.
https://threejs.org/docs/#api/en/geometries/BoxGeometry

BufferGeometry
- 우리만의 geometry를 만들어야할 때 사용된다.
- 이를 위해서는 BufferGeometry와 Float32Array가 필요하다.
- 하나의 vertex 마다 3개의 좌표값이 있는 이유는 x,y,z값이기 때문이다.
- 만들어진 Array를 BufferGeometry로 보내기 전에, BufferAttribute로 변경해야한다.
- BufferAttribute를 geometry의 setAttribute 함수를 활용하여 설정한다.
- setAttribute 함수의 첫번째 parameter는 position으로 설정하면, Three.js의 내장된 shader로 인식할 수 있기 때문이다.
// Create an empty BufferGeometry
const geometry = new THREE.BufferGeometry()

// Create a Float32Array containing the vertices position (3 by 3)
const positionsArray = new Float32Array([
    0, 0, 0, // First vertex
    0, 1, 0, // Second vertex
    1, 0, 0  // Third vertex
])

// Create the attribute and name it 'position'
const positionsAttribute = new THREE.BufferAttribute(positionsArray, 3)
geometry.setAttribute('position', positionsAttribute)
Debug UI
- 색상, 속도등 여러가지등을 조정하기 위해서 사용된다.
Debut UI 종류
- dat.GUI
- lil-gui
- control-panel
- ControlKit
- Uil
- Tweakpane
- Guify
- Oui
lil-gui
- 가장 많이 사용되고 업데이트가 주기적이다.
https://lil-gui.georgealways.com/
lil-gui 세팅법
- npm install lil-gui
- lil-gui import 해오기
- GUI 변수로 실행시키기
import GUI from 'lil-gui'

/**
 * Debug
 */
const gui = new GUI()
기능 조절 종류
- Range
- Color
- Text
- Checkbox
- Select
- Button
tweaks gui에 추가하는 법
- gui.add()함수 사용
- gui.add()함수는 첫 번째 parameter는 object, 두번째 parameter는 그 object의 property이다.
const mesh = new THREE.Mesh(geometry, material)
scene.add(mesh)

gui.add(mesh.position, 'y')- 아래와 같이 최소, 최대, 단위, 이름을 변경할 수 있다.
gui
    .add(mesh.position, 'y')
    .min(- 3)
    .max(3)
    .step(0.01)
.name('elevation')- boolean 값을 gui에 추가하면 체크박스로 표시된다.
gui.add(mesh, 'visible')
gui.add(material, 'wireframe')
Color
- gui.addColor(material,'color')를 활용해서 색상을 변경한다.
- Three.js에서 색상을 적용하고 rendering하는 과정에서 에러가 있다.
- 결과적으로 tweak에서의 색상과 적용된 color가 다른 문제가 있다.
첫번째 방법
- color가 변경되면 변경된 값의 getHexString()값을 적용하기
gui
    .addColor(material, 'color')
    .onChange((value) =>
    {
        console.log(value.getHexString())
    })
두번째 방법
- object에 색상 값을 저장해서 해당 값을 mesh에 적용하고 값이 변경되면 변경된 값을 다시 적용해주는 것이다.
gui
    .addColor(debugObject, 'color')
    .onChange(() =>
    {
        material.color.set(debugObject.color)
    })
Function / Button
- 가끔 요청에 의해서 행동을 실행하는 경우가 있다. 예를 들면, 큐브를 한바큐 돌리는 행위
- gui를 활용해서 이를 테스트해 볼 수 있다.
debugObject.spin = () =>
{
    gsap.to(mesh.rotation, { duration: 1, y: mesh.rotation.y + Math.PI * 2 })
}
gui.add(debugObject, 'spin')
Geometry 변경
- 물체 subdivision, 물체 변경 등의 Geometry 변경을 gui를 활용해서 가능하다.
- subdivision의 경우, 이미 생성된 물체의 subdivision을 하면 에러가 발생한다.
- 따라서, 새로 생성해주면 된다.
- 그러나, 이전의 물체를 지우지 않으면 gpu에 부화가 가기 때문에, 지워야한다.
gui
    .add(debugObject, 'subdivision')
    .min(1)
    .max(20)
    .step(1)
    .onFinishChange(() =>
    {
        mesh.geometry.dispose()
        mesh.geometry = new THREE.BoxGeometry(
            1, 1, 1,
            debugObject.subdivision, debugObject.subdivision, debugObject.subdivision
        )
    })
folder
- 추가된 gui들을 folder를 활용해서 관리할 수 있다.
const cubeTweaks = gui.addFolder('Awesome cube')

cubeTweaks
    .add(mesh.position, 'y')
    // ...

cubeTweaks
    .add(mesh, 'visible')

cubeTweaks
    .add(material, 'wireframe')

cubeTweaks
    .addColor(material, 'color')
    // ...

// ...
cubeTweaks
    .add(debugObject, 'spin')

// ...
cubeTweaks
    .add(debugObject, 'subdivision')
    // ...
gui h키로 끄고 키는 코드
window.addEventListener('keydown', (event) =>
{
    if(event.key == 'h')
        gui.show(gui._hidden)
})
Textures
Textures 종류
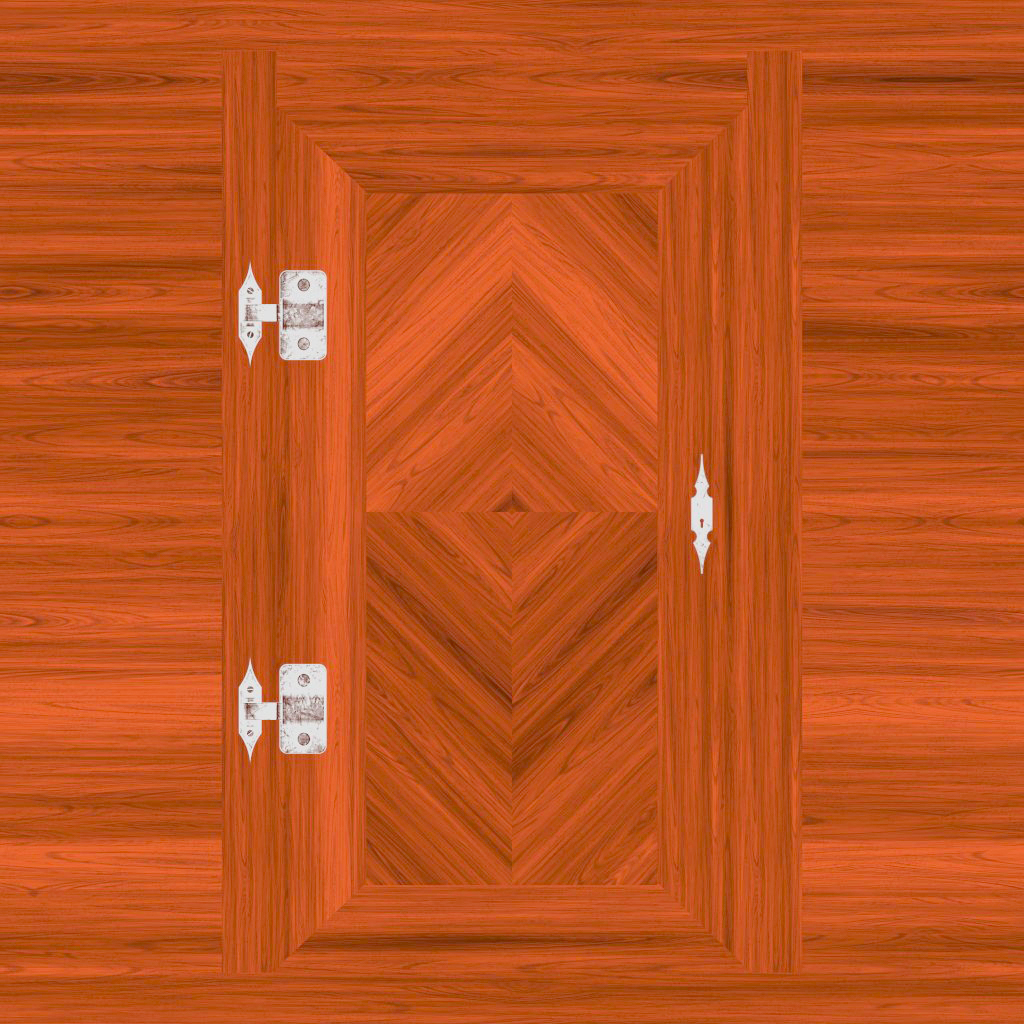
Color
- 텍스쳐의 픽셀을 적용 시키는 texture
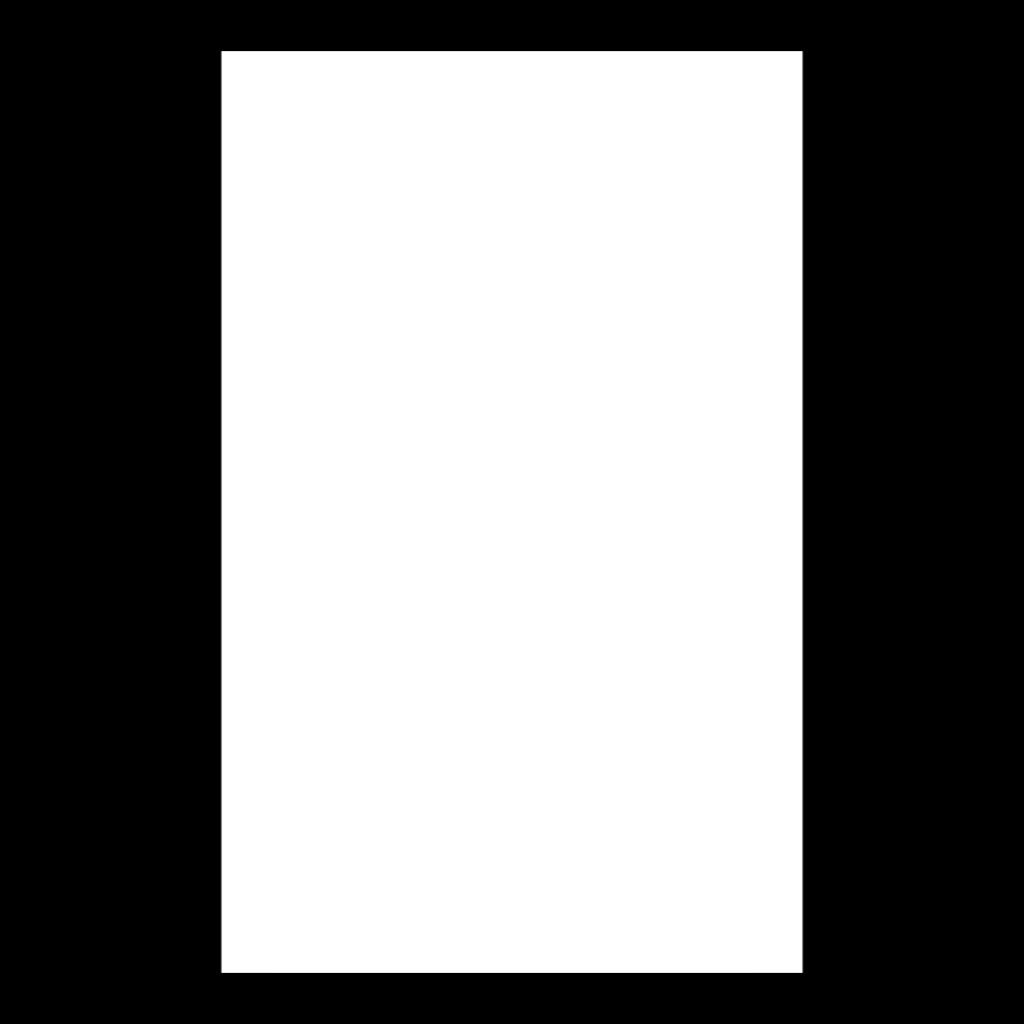
Alpha
- 흑백
- 흑 - 보이지 않음
- 백 - 보임
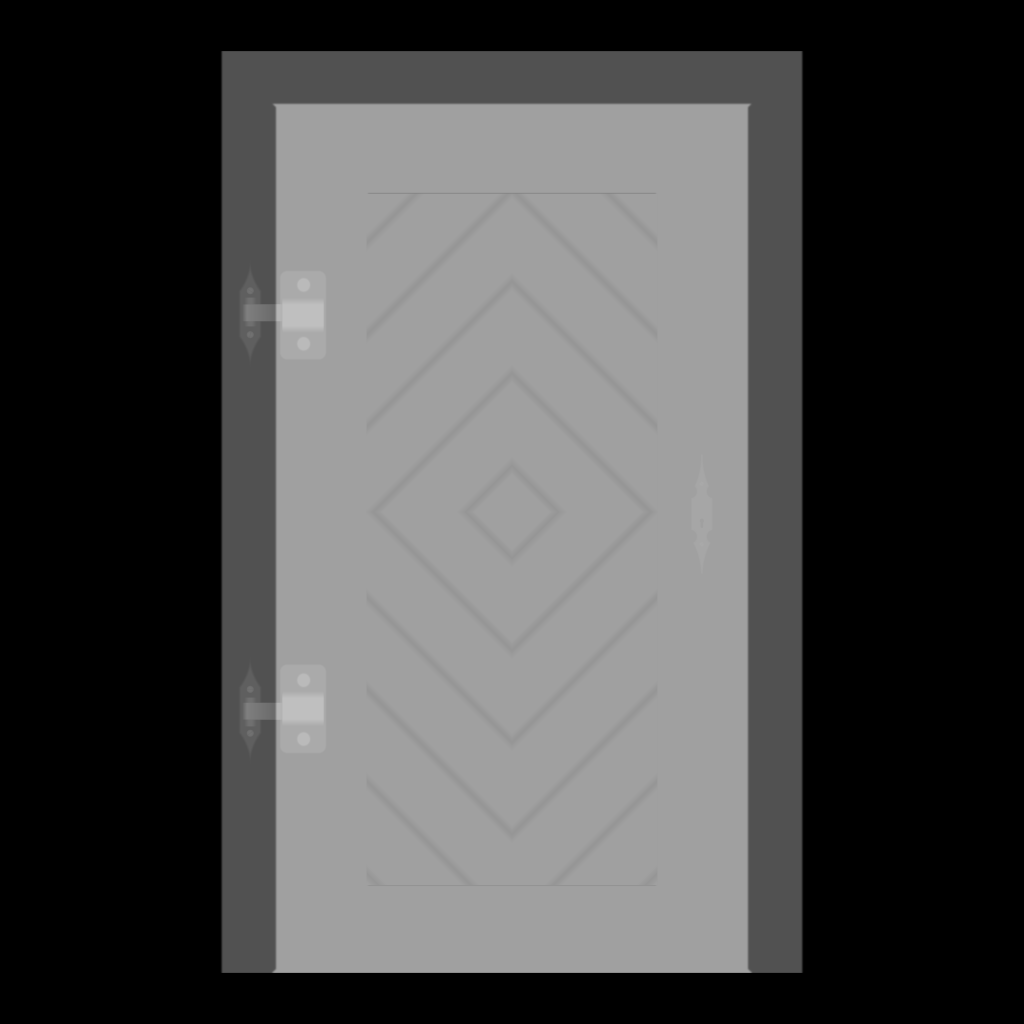
Height
- 흑백
- Height texture의 흑백에 따라서 3D 상에서 vertex가 움직임
- 잘 적용되기 위해서는 충분한 subdivision이 필요하다
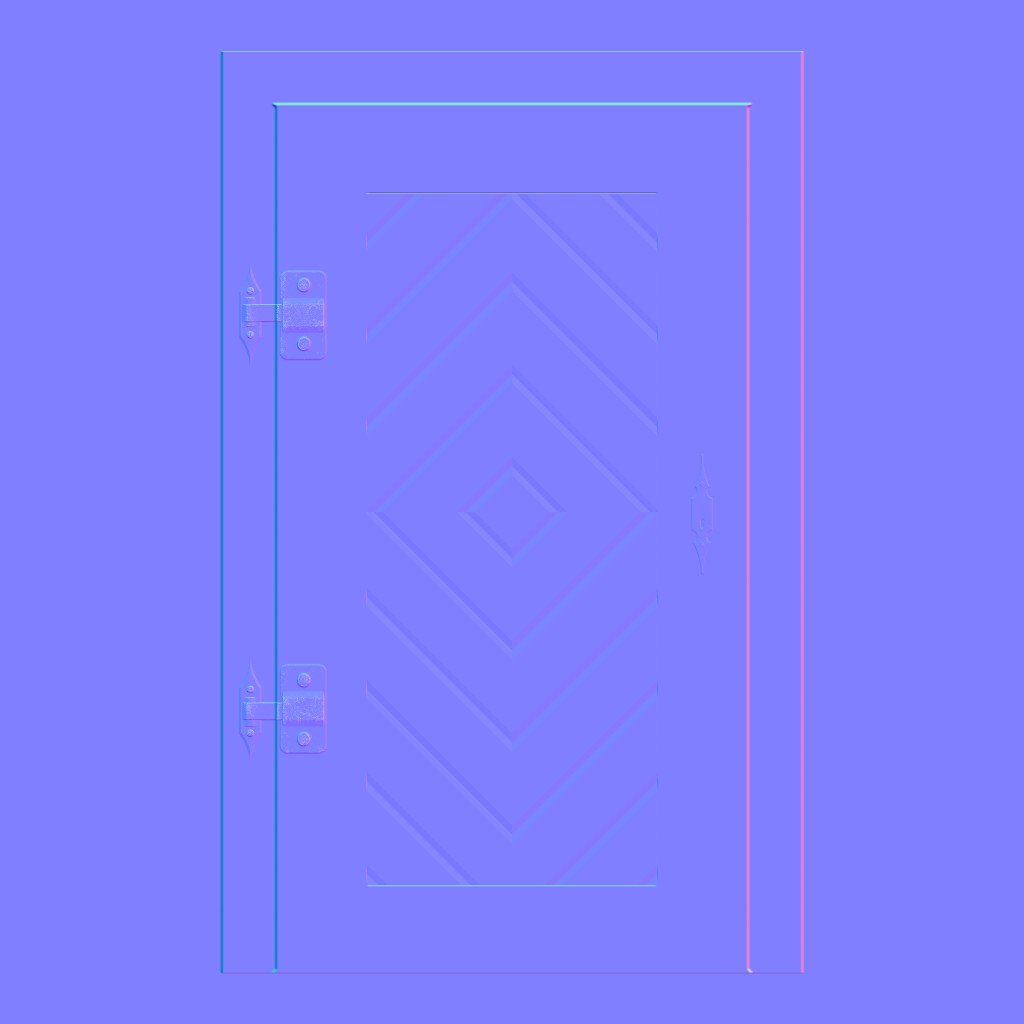
Normal
- lighting을 활용하는 texture
- subdivision이 필요 없다.
- Height texture 보다 효과적이고 효율적이다
Ambient Collusion
- 흑백
- 가짜 그림자를 생성
- 물리적으로 정확하지는 않다
Metalness
- 흑백
- 백 - metalic
- 흑 - non metalic
- 빛 반사에 주로 사용됨

Roughness
- 흑백
- 흑 - smooth
- 백 - rough
- Metalness랑 같이 사용
PBR
- Physically Based Rendering
https://marmoset.co/posts/basic-theory-of-physically-based-rendering/
https://marmoset.co/posts/physically-based-rendering-and-you-can-too/
Texture 로드하는 법
- Native Javascript
Javascript로 Texture 로딩하는 법
- Image 객체 생성
- Texture 객체 생성
- Image onload 시에 texture update 시켜주기
const image = new Image()
const texture = new THREE.Texture(image)

image.onload = () => {
    texture.needsUpdate = true
}

image.src = '/door/color.jpg'

const material = new THREE.MeshBasicMaterial({ map: texture })
TextureLoader로 Texture 로딩하는 법
- TextureLoader 객체 생성
- TextureLoader로 texture 로드해주기
const textureLoader = new THREE.TextureLoader()
const texture = textureLoader.load('/door/color.jpg')

const material = new THREE.MeshBasicMaterial({ map: texture })
TextureLoader의 특징
- THREE에 내장된 객체이다.
- 4개의 parameter를 가질 수 있다.
- 1번째 paramter는 texture image의 url
- 2번째 paramter는 load될 때 실행되는 함수
- 3번째 paramter는 progress 때 실행되는 함수
- 4번째 paramter는 error 때 실행되는 함수
const textureLoader = new THREE.TextureLoader()
const texture = textureLoader.load(
    '/textures/door/color.jpg',
    () =>
    {
        console.log('loading finished')
    },
    () =>
    {
        console.log('loading progressing')
    },
    () =>
    {
        console.log('loading error')
    }
)
LoadingManager
- 위에 textureLoader에서 load, progress, error는 보통 잘 사용하지 않는다.
- 대신에 LoadingManager를 사용해서 컨트롤한다.
const loadingManager = new THREE.LoadingManager()
loadingManager.onStart = () =>
{
console.log('loading started')
}
loadingManager.onLoad = () =>
{
console.log('loading finished')
}
loadingManager.onProgress = () =>
{
console.log('loading progressing')
}
loadingManager.onError = () =>
{
console.log('loading error')
}
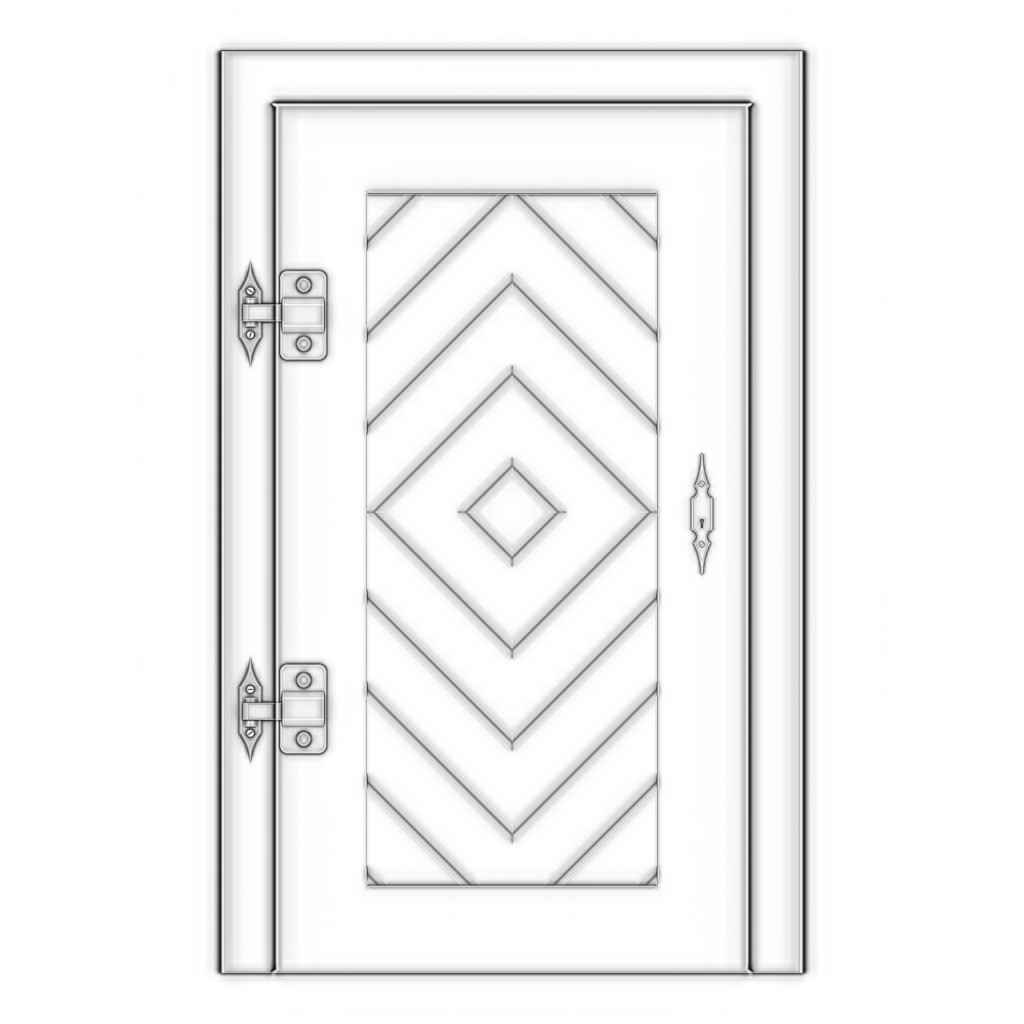
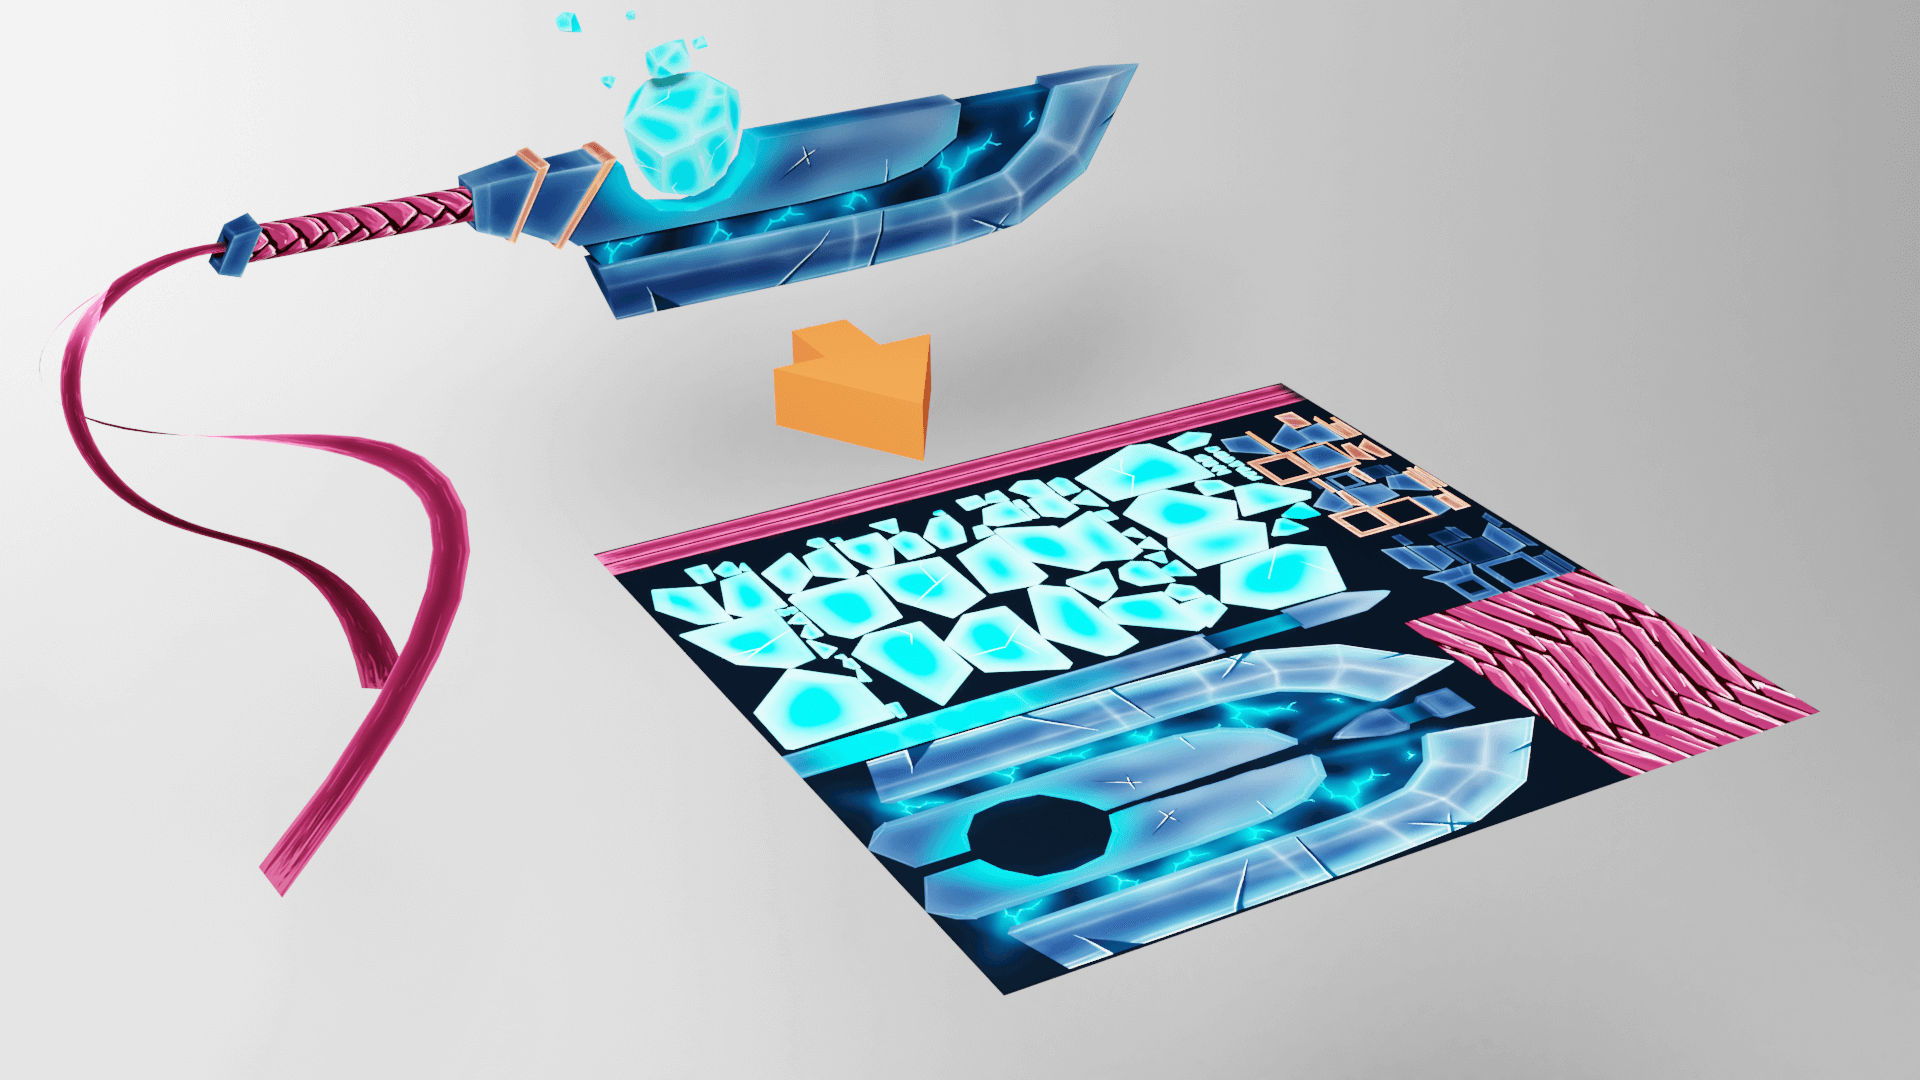
const textureLoader = new THREE.TextureLoader(loadingManager)UV unwrapping
- 3D 모델의 texture를 붙이는 방식은 UV unwrapping을 통해서 이루어진다.
- 아래와 같이 2차원 평면위에 texture가 형성되고, 해당 texture의 vertex값이 저장된다.
- texture 적용시에 해당 vertex의 값을 통해서 3d 모델에 texture가 적용된다.

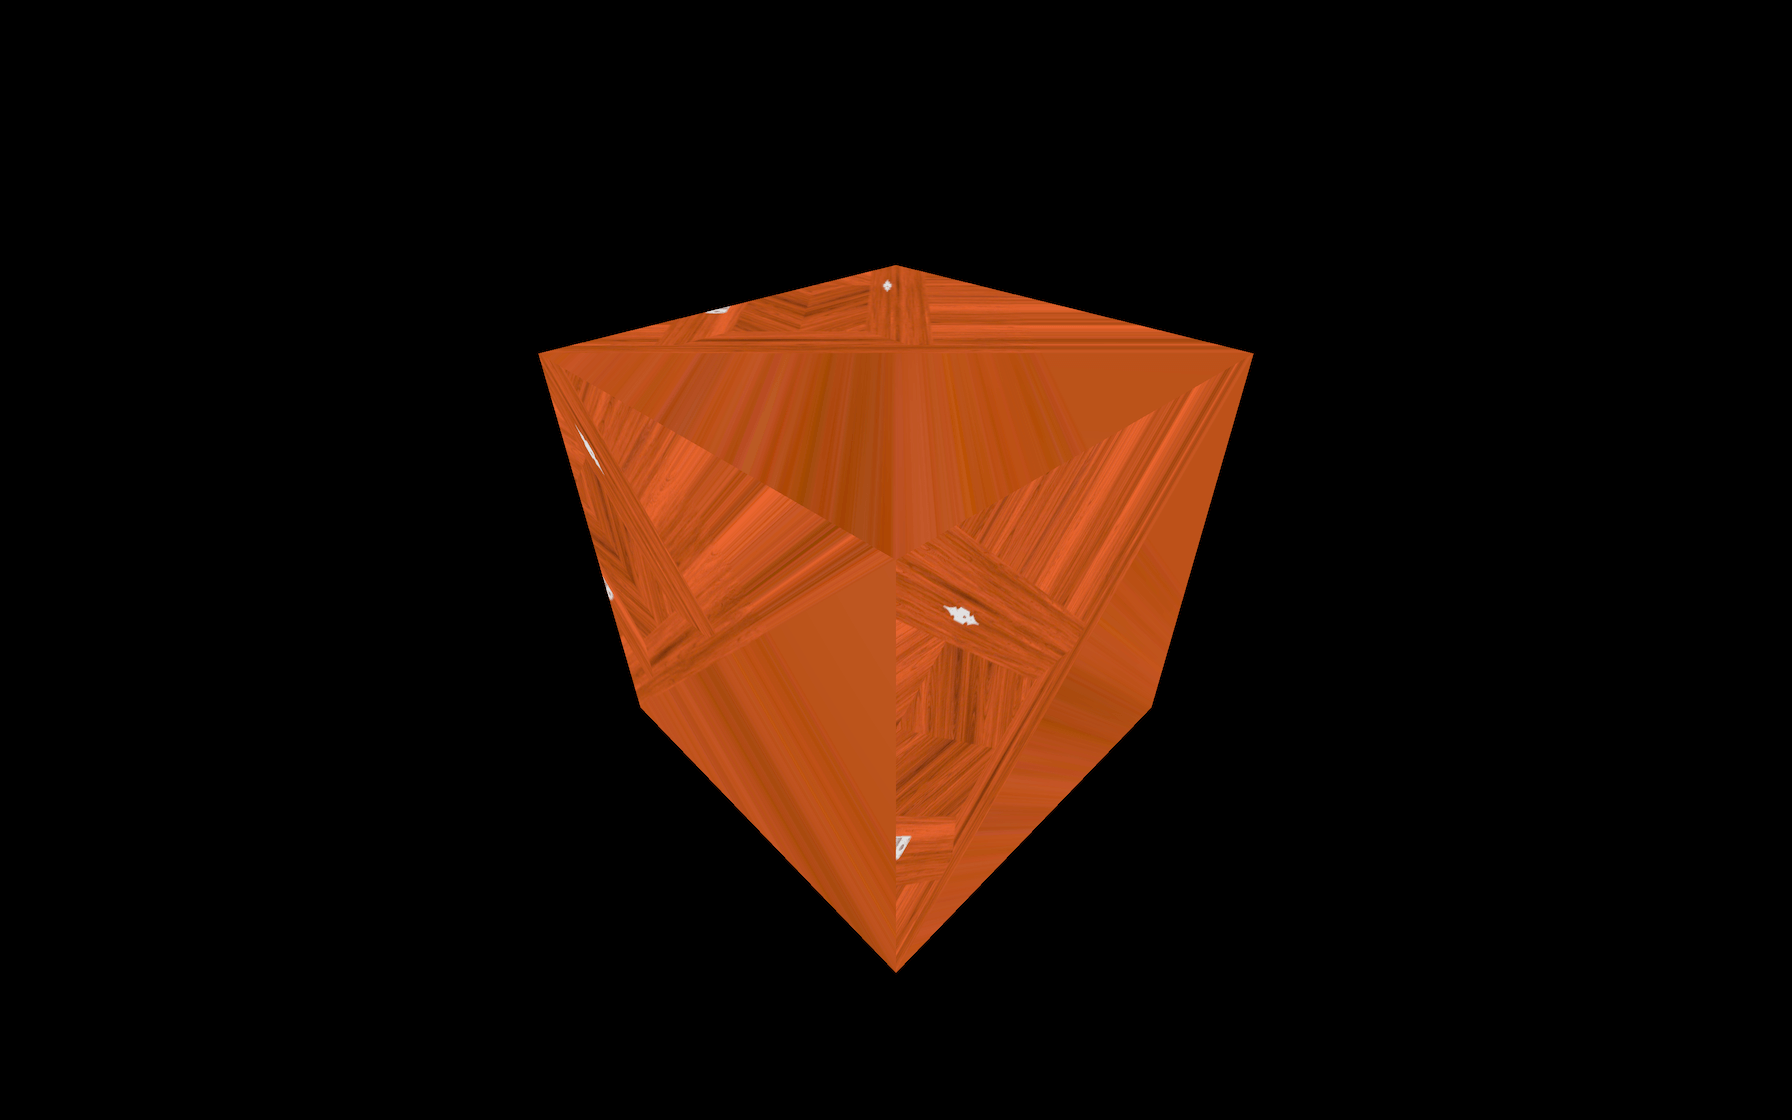
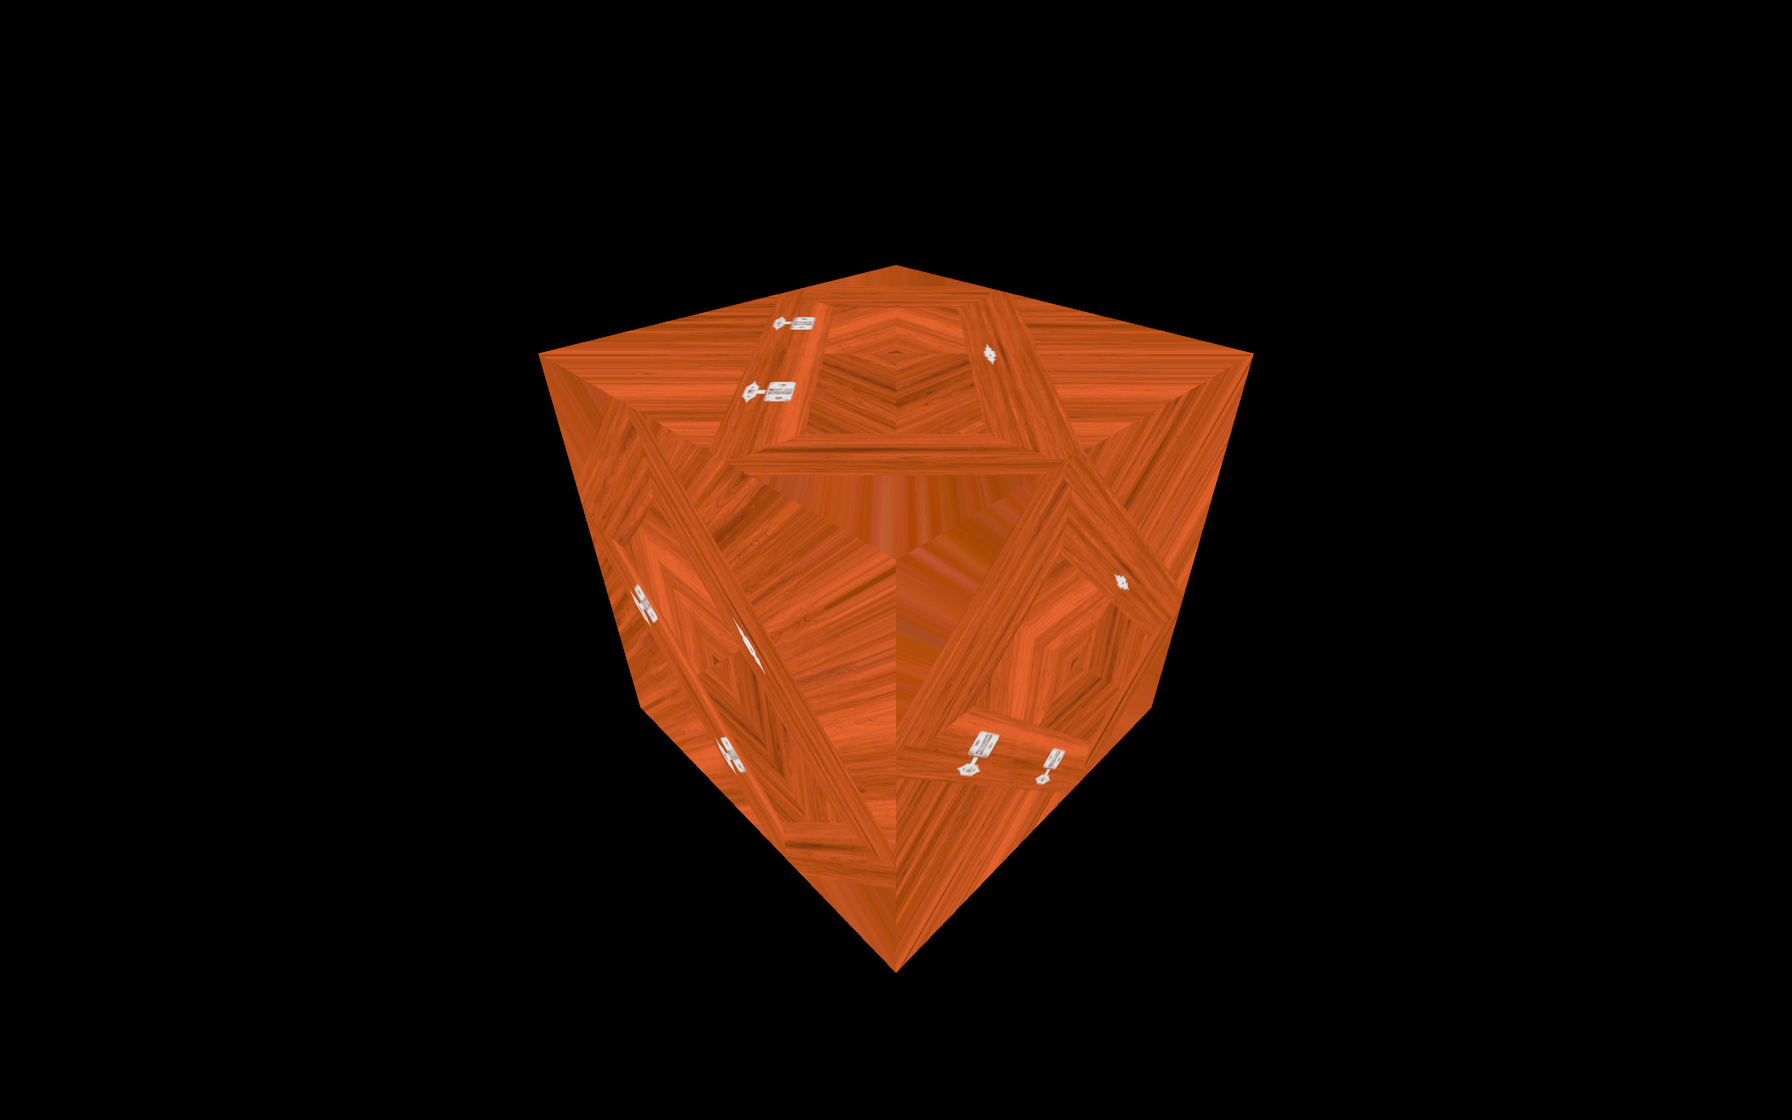
Texture Transforming
- Repeat
- Offset
- Rotation
Reapeat
- texture를 repeat 시킬 수 있다.
- x,y 가로, 세로로 해당 텍스쳐를 반복할 수 있다.
- repeat.x, repeat.y만 사용하면 텍스쳐의 크기는 줄어들기만한다.
- 해당 texture를 반복하기 위해서는 wrapS, wrapT를 사용해주어야한다.
- MirroredRepeatWrapping를 사용하면 단순 좌우 대칭 및 상하 대칭으로 변경된다.
const textureLoader = new THREE.TextureLoader(loadingManager)
const colorTexture = textureLoader.load('/door/color.jpg')
colorTexture.colorSpace = THREE.SRGBColorSpace
colorTexture.repeat.x = 2
colorTexture.repeat.y = 3
colorTexture.wrapS = THREE.RepeatWrapping
colorTexture.wrapT = THREE.RepeatWrapping
colorTexture.wrapS = THREE.MirroredRepeatWrapping
colorTexture.wrapT = THREE.MirroredRepeatWrapping
Offset
- texture에 offset을 줄 수 있다.
- x,y 가로, 세로로 해당 텍스쳐를 offset해줄 수 있다.
colorTexture.offset.x = 0.5
colorTexture.offset.y = 0.5
Rotation
- texture에 rotation을 줄 수 있다.
- rotation의 단위는 radians 값을 활용한다.
- 그냥 돌리는 것 보다 center값을 변경해서 돌리면 더 자연스럽다.
Filtering and Mipmapping
- gpu가 texture를 처리하면서 blurry 효과가 생겨난다.
- 이를 해결하기 위해서 minification filter와 magnification filter를 사용해야한다.
Minification filter
- render 시의 pixel과 texture의 pixel이 다른 경우가 있다.
- render pixel이 texture pixel보다 크면 즉, texture가 cover하는 surface 보다 크면 minification filter가 발생한다.
- 아래 6가지의 값을 변경해서 조절할 수 있다.
- default 값은 THREE.LinearMipmapLinearFilter 이다.
- 각 filter들에 따라서 blurriness, detail, spatial aliasing, temporal aliasing, blocking 등이 다르게 표현된다.
THREE.NearestFilter
THREE.LinearFilter
THREE.NearestMipmapNearestFilter
THREE.NearestMipmapLinearFilter
THREE.LinearMipmapNearestFilter
THREE.LinearMipmapLinearFilter
colorTexture.minFilter = THREE.NearestFilter
Magnification filter
- render 시의 pixel과 texture의 pixel이 다른 경우가 있다.
- render pixel이 texture pixel보다 작으면 즉, texture가 cover하는 surface 보다 작으면 Magnification filter가 발생한다.
- texture가 blurry해지는 것을 방지해주는 filter이다.
colorTexture.magFilter = THREE.NearestFilter
mipmap과 minFilter를 같이 사용할 필요는 없다.
아래와 같이 minFilter를 NearestFilter로 사용하면 mipmaps은 꺼도 된다.
colorTexture.generateMipmaps = false
colorTexture.minFilter = THREE.NearestFilter
Texture format과 최적화
- weight
- size
- data
Weight
- jpg, png 같은 포맷을 사용하라
- 가능한 가벼운 이미지를 사용해라
- https://tinypng.com/ 와 같은 페이지에서 압축 후 사용해라
Size
- 이미지의 Size, 해상도를 최소화해라
- 2의 제곱수로 해상도를 설정해라
- 아니면 Three.js에서 강제로 가장 가까운 2의 제곱수로 변경한다.
Data
- texture에서 투명도를 제공한다.
- alpha 채널을 활용해서 r,g,b등의 채널만 활용할 수 있다.
Material
- geometry의 각 pixel에 어떤 색상을 넣을지 정해주는 것이 Material이다.
- shader는 각 pixel에 어떤 색상을 넣어줄 지 결정하는 algorithm이다.
Material Setting법
- Material을 적용할 Mesh가 필요하다
- TextureLoader 생성 후, TextureLoader로 Texture 이미지를 불러온다.
- material에 Texture Image를 적용해준다.
- map, matcap으로 사용되는 Texture의 경우에은 sRGB로 encode해주어야한다.
const textureLoader = new THREE.TextureLoader()

const doorColorTexture = textureLoader.load('./textures/door/color.jpg')
doorColorTexture.colorSpace = THREE.SRGBColorSpace

const material = new THREE.MeshBasicMaterial({map: doorColorTexture})

const sphere = new THREE.Mesh(
    new THREE.SphereGeometry(0.5,16,16),
    material
)
MeshBasicMaterial
- Map
- Color
- Wireframe
- Opacity
- AlphaMap
- Side
Map
- geometry의 표면의 texture를 적용 시킬 property
material.map = doorColorTextureColor
- geometry 전체에 통일된 색상을 적용
- Color property를 변경하려면 Color class를 생성후에 사용해야한다.
material.color = new THREE.Color('#ff0000')
material.color = new THREE.Color('#f00')
material.color = new THREE.Color('red')
material.color = new THREE.Color('rgb(255, 0, 0)')
material.color = new THREE.Color(0xff0000)
Wireframe
- geometry의 구성 요소를 vertex로 보여줍니다.
material.wireframe = true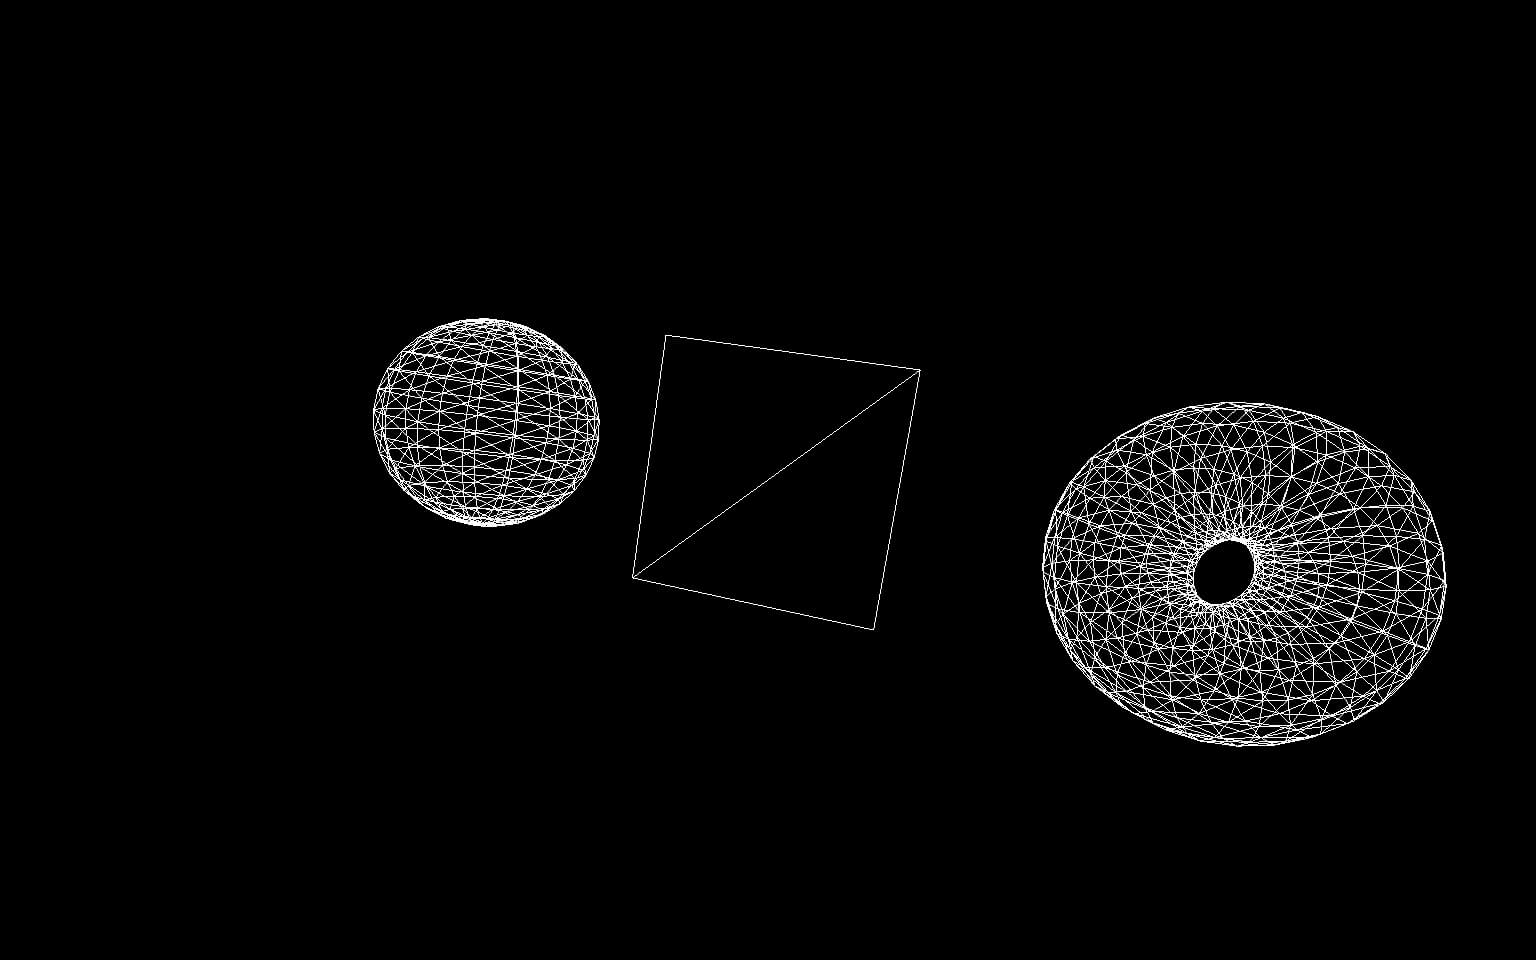
Opacity
- 투명도를 관리합니다.
- Opacity를 사용하기 위해서는 transparent 속성을 true로 변경해야합니다.
material.transparent = true
material.opacity = 0.5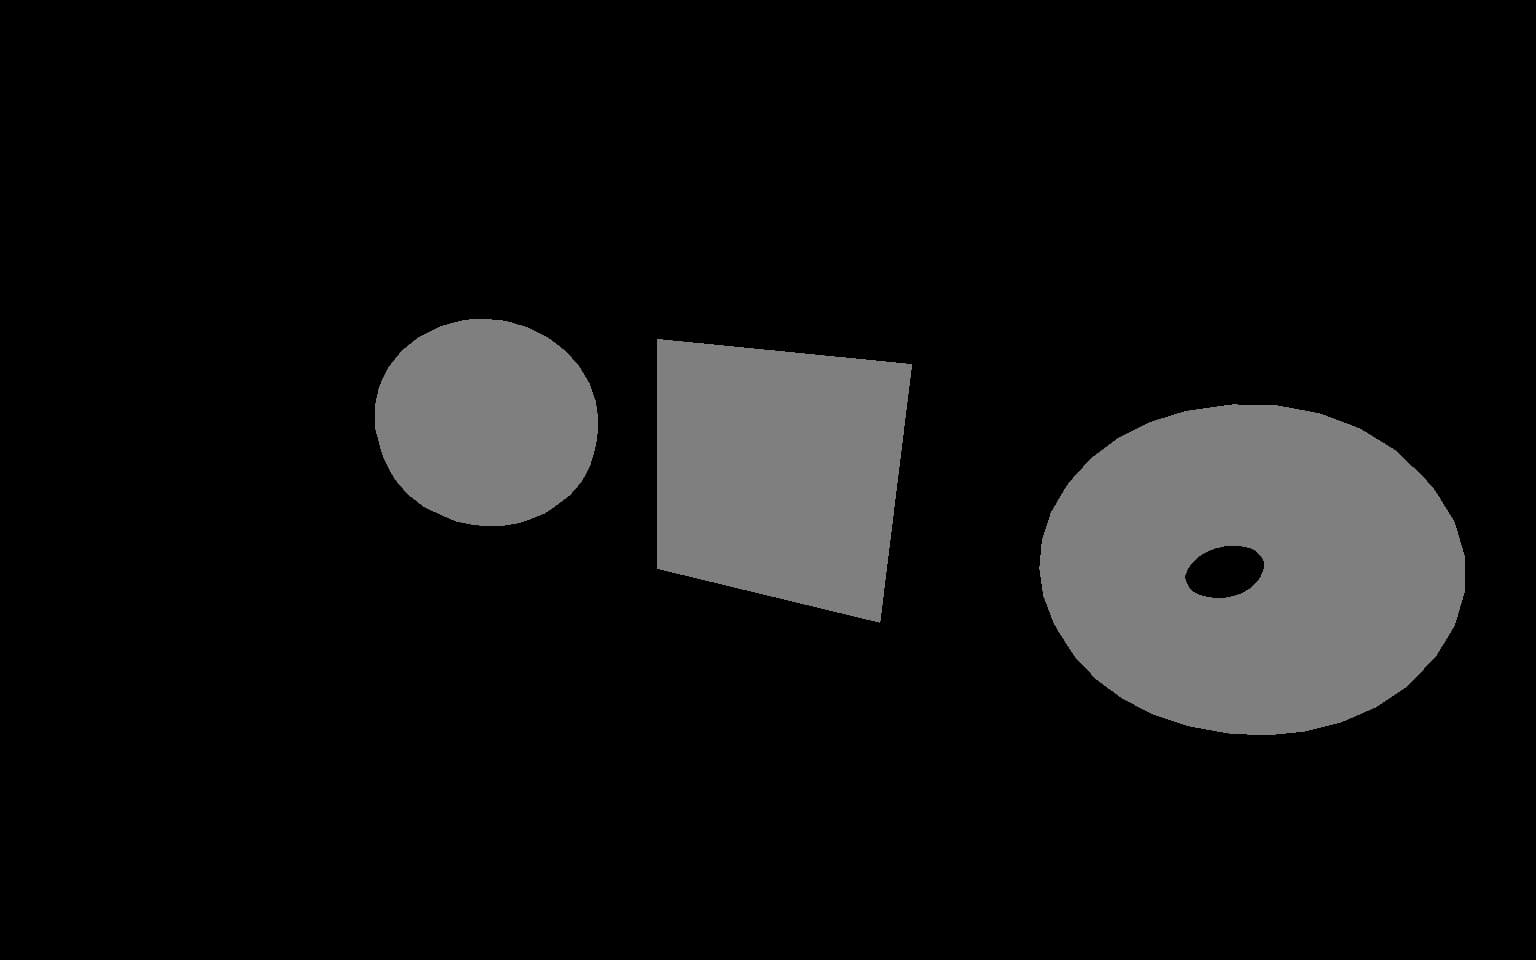
위 예시그림에서 투명도가 없는 이유는 배경이 검정이기 때문이다.
AlphaMap
- Opacity와 같이 transparent 속성을 true로 바꾸고 alphaMap Texture를 적용하면, alphaMap Texture에서 흰색은 보여지고 검정색은 보이지 않게 된다.
material.transparent = true
material.alphaMap = doorAlphaTexture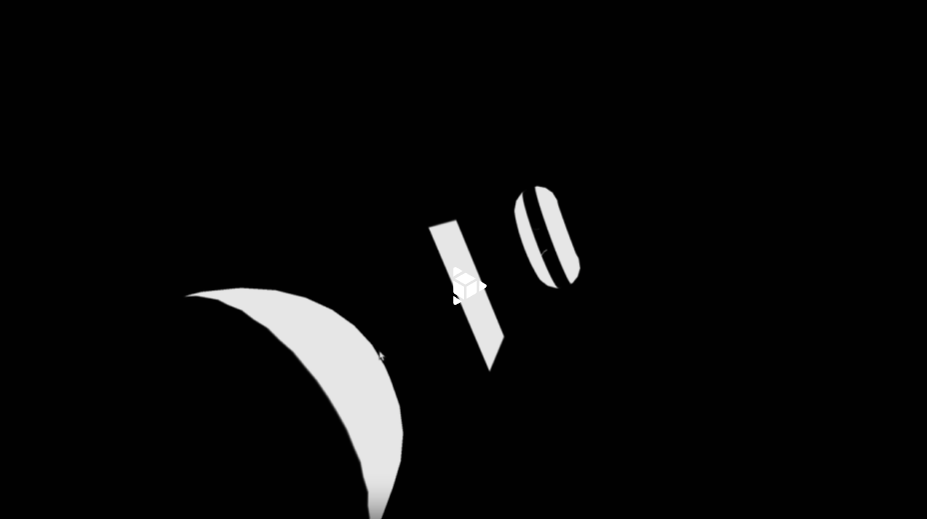
Side
- side property는 어느 면이 보이도록 할지 결정한다.
- default 값은 THREE.FrontSide이고, THREE.BackSide,THREE.DoubleSide 가 존재한다.
- DoubleSide는 많은 rendering 자원이 추가적으로 들어가므로, 신중하게 사용해야한다.
MeshNormal Material
- Normal은 geometry의 vertex들의 outside 방향 정보를 가진 texture이다.
- MeshBasix Material 처럼 wireframe, transparent, opacity, side 속성을 사용할 수 있다.
- flatShading 속성이 있다.
// MeshNormalMaterial
const material = new THREE.MeshNormalMaterial()
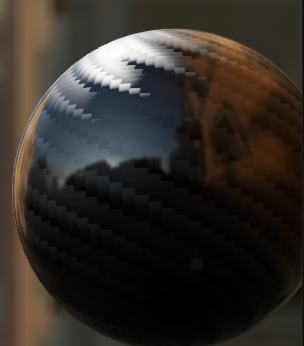
material.flatShading = trueMeshMatcap Material
- 빛 없이도 빛이 있는 연출을 할 수 있다.
- texture가 필요하다.
- illusion이기 때문에 정확한 것은 아니다.
- matcap을 사용하면 빛, 그림자를 적게 사용하므로 performance에서 좋다.
https://github.com/nidorx/matcaps
// MeshMatcapMaterial
const material = new THREE.MeshMatcapMaterial()
material.matcap = matcapTexture
MeshDepth Material
- 가까우면 하얗고, 멀면 어둡게 표현되는 material
// MeshDepthMaterial
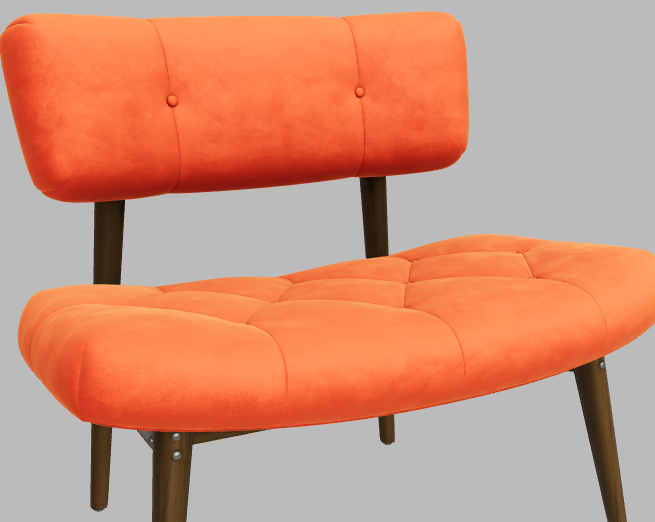
const material = new THREE.MeshDepthMaterial()MeshLambert Material
- 빛을 필요로하는 material
- 빛을 잘 표현하는 material
// MeshLambertMaterial
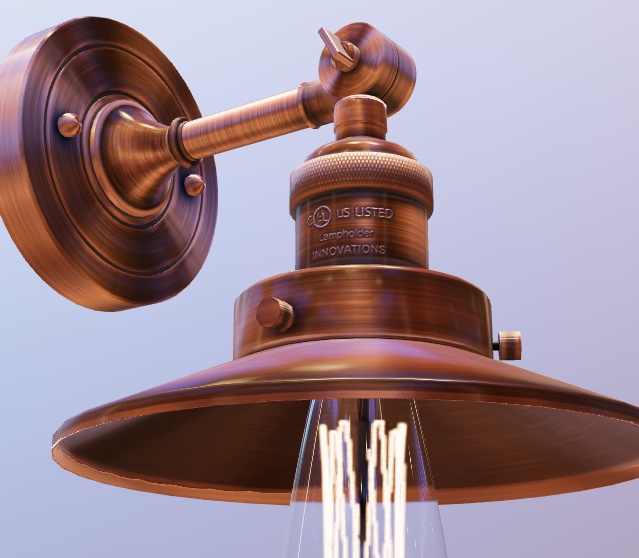
const material = new THREE.MeshLambertMaterial()MeshPhong Material
- MeshLambert Material 처럼 빛을 표현하는 material
- shininess 속성은 빛의 반사정도를 조절하고, specular 속성은 반사광의 색상을 조절한다.
// MeshPhongMaterial
const material = new THREE.MeshPhongMaterial()
material.shininess = 100
material.specular = new THREE.Color(0x1188ff)
MeshToon Material
- MeshLambert Material과 비슷한 결과처럼 보이면서, cartoon 스타일로 표현된다.
- 기본적으로 2가지 색상으로 구성된다. shadow, light
- 더 많은 단계를 추가하려면 gradientTexutre를 gradientMap 속성에 추가하면 된다.
- geometry에 gradientTexture를 적용하기 위해서는 GPU가 강제로 사용하는 minFilter, magFilter를 바꾸어야한다.
- 그리고 사용하지 않는 Mipmafps를 false로 변경하여야한다.
// MeshToonMaterial
const material = new THREE.MeshToonMaterial()
gradientTexture.minFilter = THREE.NearestFilter
gradientTexture.magFilter = THREE.NearestFilter
gradientTexture.generateMipmaps = false
material.gradientMap = gradientTexture
MeshStandard Material
- Physically based rendering 을 기반으로하는 material
- roughness, metalness 속성을 변경할 수 있다.
- map 속성에는 colorTexture와 연결된다.
- aoMap 속성에는 AmbientOcclusionTexture 와 연결된다. 그 정도는 aoMapIntensity 속성을 활용한다.
- displacementMap 속성은 HeightTextture 와 연결된다. 그 정도는 displacementScale 속성을 활용한다.
- metalnessMap 속성은 MetalnessTexture 와 연결된다. 그 정도는 metalness 속성을 활용한다.
- roughnessMap 속성은 RoughnessTexture 와 연결된다. 그 정도는 roughness 속성을 활용한다.
- normalMap 속성은 NormalTexture 와 연결된다. 그 정도는 normalScale.set 속성을 활용한다. Vector2 값이여야한다.
- alphaMap 속성은 AlphaTexture 와 연결된다. 사용 이전에 transparent 속성을 true로 해야한다.
const material = new THREE.MeshStandardMaterial()
material.metalness = 1
material.roughness = 1
material.map = doorColorTexture
material.aoMap = doorAmbientOcclusionTexture
material.aoMapIntensity = 1
material.displacementMap = doorHeightTexture
material.displacementScale = 0.1
material.metalnessMap = doorMetalnessTexture
material.roughnessMap = doorRoughnessTexture
material.normalMap = doorNormalTexture
material.normalScale.set(0.5, 0.5)
material.transparent = true
material.alphaMap = doorAlphaTexture
material.clearcoat = 1
material.clearcoatRoughness = 0
Environment map
- scene을 두르는 전체적인 이미지
- 빛의 reflection, refracion에 사용된다.
const rgbeLoader = new RGBELoader()
rgbeLoader.load('/environmentMaps/0/2k.hdr', (environmentMap) =>
{
environmentMap.mapping = THREE.EquirectangularReflectionMapping
scene.background = environmentMap
scene.environment = environmentMap
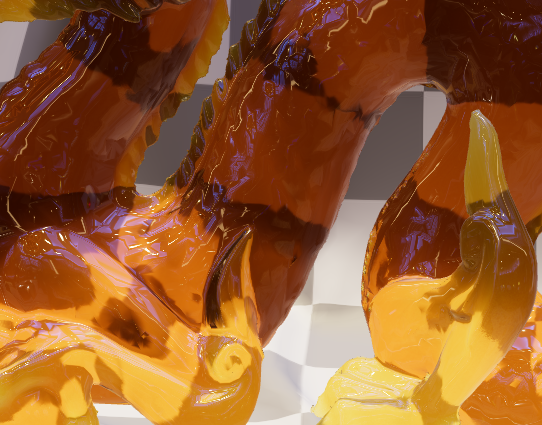
})MeshPhysical Material
- MeshStandard Material과 비슷하지만(상속 받았다), 더 많은 효과를 낼 수 있다.
- clearcoat - 광이 나는 효과 표현, clearcoat, clearcoatRoughness 속성을 가진다.
- sheen - 모직과 같은 종류의 material을 표현, sheen, sheenRoughness, sheenColor 속성을 가진다.
- iridescence - 빛이 무지개 형태로 비취는 표현, iridescence, iridescenceIOR, iridescenceThicknessRange 속성을 가진다.
- transmission - 투명하게 해주는 표현, transmission, ior, thickness 속성을 가진다.
// Clearcoat
material.clearcoat = 1
material.clearcoatRoughness = 0
clearcoat
sheen
iridescence
transmission
3D Text
FontLoader
- THREE object에 FontLoader가 있다.
- fontLoader의 load 함수를 사용해야한다.
- load 함수의 첫번째 paramter는 font의 url이고
- 두번째 parameter는 font가 load되면 실행되는 callback 함수이다.
- font가 load된 이후에 textGeometry와 textMaterial을 만들어서 scene에 추가하면 된다.
import {FontLoader} from 'three/examples/jsm/loaders/FontLoader'

const fontLoader = new FontLoader()

fontLoader.load(
    '/fonts/helvetiker_regular.typeface.json',
    (font) =>
    {
        const textGeometry = new TextGeometry(
            'Hello Three.js',
            {
                font: font,
                size: 0.5,
                height: 0.2,
                curveSegments: 12,
                bevelEnabled: true,
                bevelThickness: 0.03,
                bevelSize: 0.02,
                bevelOffset: 0,
                bevelSegments: 5
            }
        )
        const textMaterial = new THREE.MeshBasicMaterial()
        textMaterial.wireframe = true
        const text = new THREE.Mesh(textGeometry,textMaterial)
        scene.add(text)
    }
)
Bounding
- Three.js에서 3d object들은 bounding을 가진다.
- screen에 해당 3d object를 보일지 말지를 bounding에 영역이 포함되어있는지에 따라서 결정된다.
- 이를 frustum culling이라고 한다.
- Three.js에서 default bounding은 shpere boudning이다.
- 이를 box bounding으로 바꾸려면 아래와 같은 코드를 사용한다.
textGeometry.computeBoundingBox()Center Text
-
위에서 boundingBox로 변경한 이유는 Text를 Center하기 위해서이다.
-
boudningBox의 center를 변경해주어야한다.
-
buffer geometry의 translate 함수를 활용해서 움직여준다.
-
가장 쉬운 방법은 .center() 함수를 사용하는 것이다.
textGeometry.translate(
    - (textGeometry.boundingBox.max.x - 0.02) * 0.5, // Subtract bevel size
    - (textGeometry.boundingBox.max.y - 0.02) * 0.5, // Subtract bevel size
    - (textGeometry.boundingBox.max.z - 0.03) * 0.5  // Subtract bevel thickness
)

textGeometry.center()
const donutGeometry = new THREE.TorusGeometry(0.3, 0.2, 20, 45)
for(let i=0;i<1000;i++){
const donut = new THREE.Mesh(donutGeometry,material)
donut.position.x = (Math.random()-0.5) *10
donut.position.y = (Math.random()-0.5) *10
donut.position.z = (Math.random()-0.5) *10
const scale = Math.random()
donut.scale.set(scale,scale,scale)
donut.rotation.x = Math.random() *Math.PI
donut.rotation.y = Math.random() *Math.PI
scene.add(donut)
}