📗 개요 - Nginx - K8s - standalone
최소 구성으로 PV, Ingress 제외하하고 테스트 시 활용. 예를 들어, Nginx Ingress Controller 테스트 시 사용
🏳️🌈 [궁금한점]
- Nginx bitnami 차트 설치 방법
🔗[목차]
1️⃣ 준비
Nginx 차트 다운로드
helm repo add bitnami https://charts.bitnami.com/bitnami
helm repo update

helm pull oci://registry-1.docker.io/bitnamicharts/nginx --untar

Pulled: registry-1.docker.io/bitnamicharts/nginx:20.0.7
Digest: sha256:1449692e778bf269197cd98f73c19ebd2172c756e0f0459a5e0076fa95497528
Error: failed to untar: a file or directory with the name nginx already exists
2️⃣ 설정
Nginx 사용자 Values 파일 생성
cp values.yaml dev-nginx-values.yaml- prd-values.yaml 파일 편집
- 아래 내용 남기고 삭제
replicaCount: 1

containerPorts:
  http: 8081
  https: 8443

service:
  type: NodePort
  port: 80

resources:
  limits:
    cpu: 100m
    memory: 128Mi
  requests:
    cpu: 50m
    memory: 64Mi

persistence:
  enabled: false

metrics:
  enabled: false
3️⃣ 설치
Nginx 설치 (standalone)
cd nginx
helm install my-nginx . -n my-dev --create-namespace -f dev-nginx-values.yaml

NAME: my-nginx
LAST DEPLOYED: Sun Jun  8 14:10:34 2025
NAMESPACE: my-dev
STATUS: deployed
REVISION: 1
TEST SUITE: None
NOTES:
CHART NAME: nginx
CHART VERSION: 20.0.3
APP VERSION: 1.28.0

Did you know there are enterprise versions of the Bitnami catalog? For enhanced secure software supply chain features, unlimited pulls from Docker, LTS support, or application customization, see Bitnami Premium or Tanzu Application Catalog. See https://www.arrow.com/globalecs/na/vendors/bitnami for more information.

** Please be patient while the chart is being deployed **
NGINX can be accessed through the following DNS name from within your cluster:

    my-nginx.my-dev.svc.cluster.local (port 80)

To access NGINX from outside the cluster, follow the steps below:

1. Get the NGINX URL by running these commands:

    export NODE_PORT=$(kubectl get --namespace my-dev -o jsonpath="{.spec.ports[0].nodePort}" services my-nginx)
    export NODE_IP=$(kubectl get nodes --namespace my-dev -o jsonpath="{.items[0].status.addresses[0].address}")
    echo "http://${NODE_IP}:${NODE_PORT}"

WARNING: There are "resources" sections in the chart not set. Using "resourcesPreset" is not recommended for production. For production installations, please set the following values according to your workload needs:
  - cloneStaticSiteFromGit.gitSync.resources
+info https://kubernetes.io/docs/concepts/configuration/manage-resources-containers/
Nginx POD 확인
kubectl get pods -n my-dev -l app.kubernetes.io/instance=my-nginx

NAME                        READY   STATUS    RESTARTS   AGE
my-nginx-6587b665d8-cltx9   1/1     Running   0          4m46s
Nginx 차트 버전
helm ls -n my-dev

NAME            NAMESPACE       REVISION        UPDATED                                 STATUS
my-nginx        my-dev          2               2025-06-08 14:12:58.5532725 +0900 KST   deployed        nginx-20.0.
4️⃣ 검증
Nginx 서비스 포트 확인
kubectl get svc -l app.kubernetes.io/instance=my-nginx -n my-dev

NAME       TYPE       CLUSTER-IP     EXTERNAL-IP   PORT(S)                      AGE
my-nginx   NodePort   10.108.24.42   <none>        80:31258/TCP,443:30748/TCP   6m24s
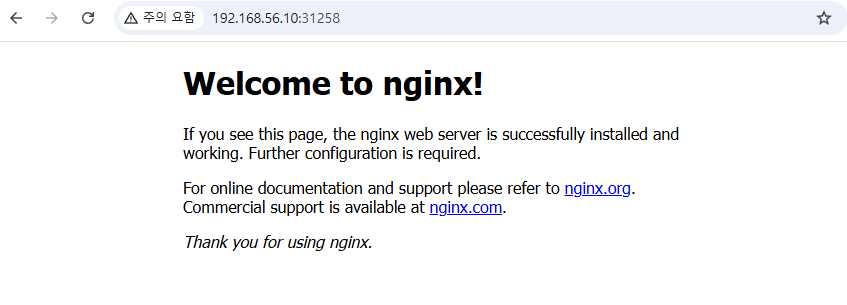
Nginx 콘솔 접속
참고
자주 쓰는 명령어
# helm 삭제 후 재 생성
helm delete my-nginx -n my-dev
helm install my-nginx . -n my-dev -f dev-nginx-values.yaml --create-namespace
khagor