Controlling LG Heat Pump via Modbus on Home Assistant

I have an LG Therma V heat pump (inside unit: HN0916T.NB1, outside unit: HU091MR.U44) with a 200L DHW (Domestic Hot Water) tank, and I wanted to integrate it with Home Assistant. After some research, I found that the heat pump supports Modbus communication, which opened up a lot of possibilities.
In this post, I'll share how I connected everything and what configuration worked for me.
The Architecture
Here's an overview of my setup:

The data flows like this:
- Modbus ↔ Home Assistant: Two-way communication with the heat pump (reading sensors, sending commands)
- Home Assistant → InfluxDB: Storing historical data for analysis
- Grafana ← InfluxDB: Visualizing the data in dashboards
What is Modbus?
Modbus is an industrial communication protocol that's been around since 1979. It's simple, reliable, and widely used in industrial equipment – including heat pumps.
There are two main types:
- Modbus RTU: Uses serial communication (RS485 wires)
- Modbus TCP: Uses ethernet/IP network
The LG heat pump uses Modbus RTU, but Home Assistant works better with Modbus TCP. To bridge the gap, I needed a Modbus TCP/IP gateway module.
Hardware I Used
Here's what I gathered for this project:
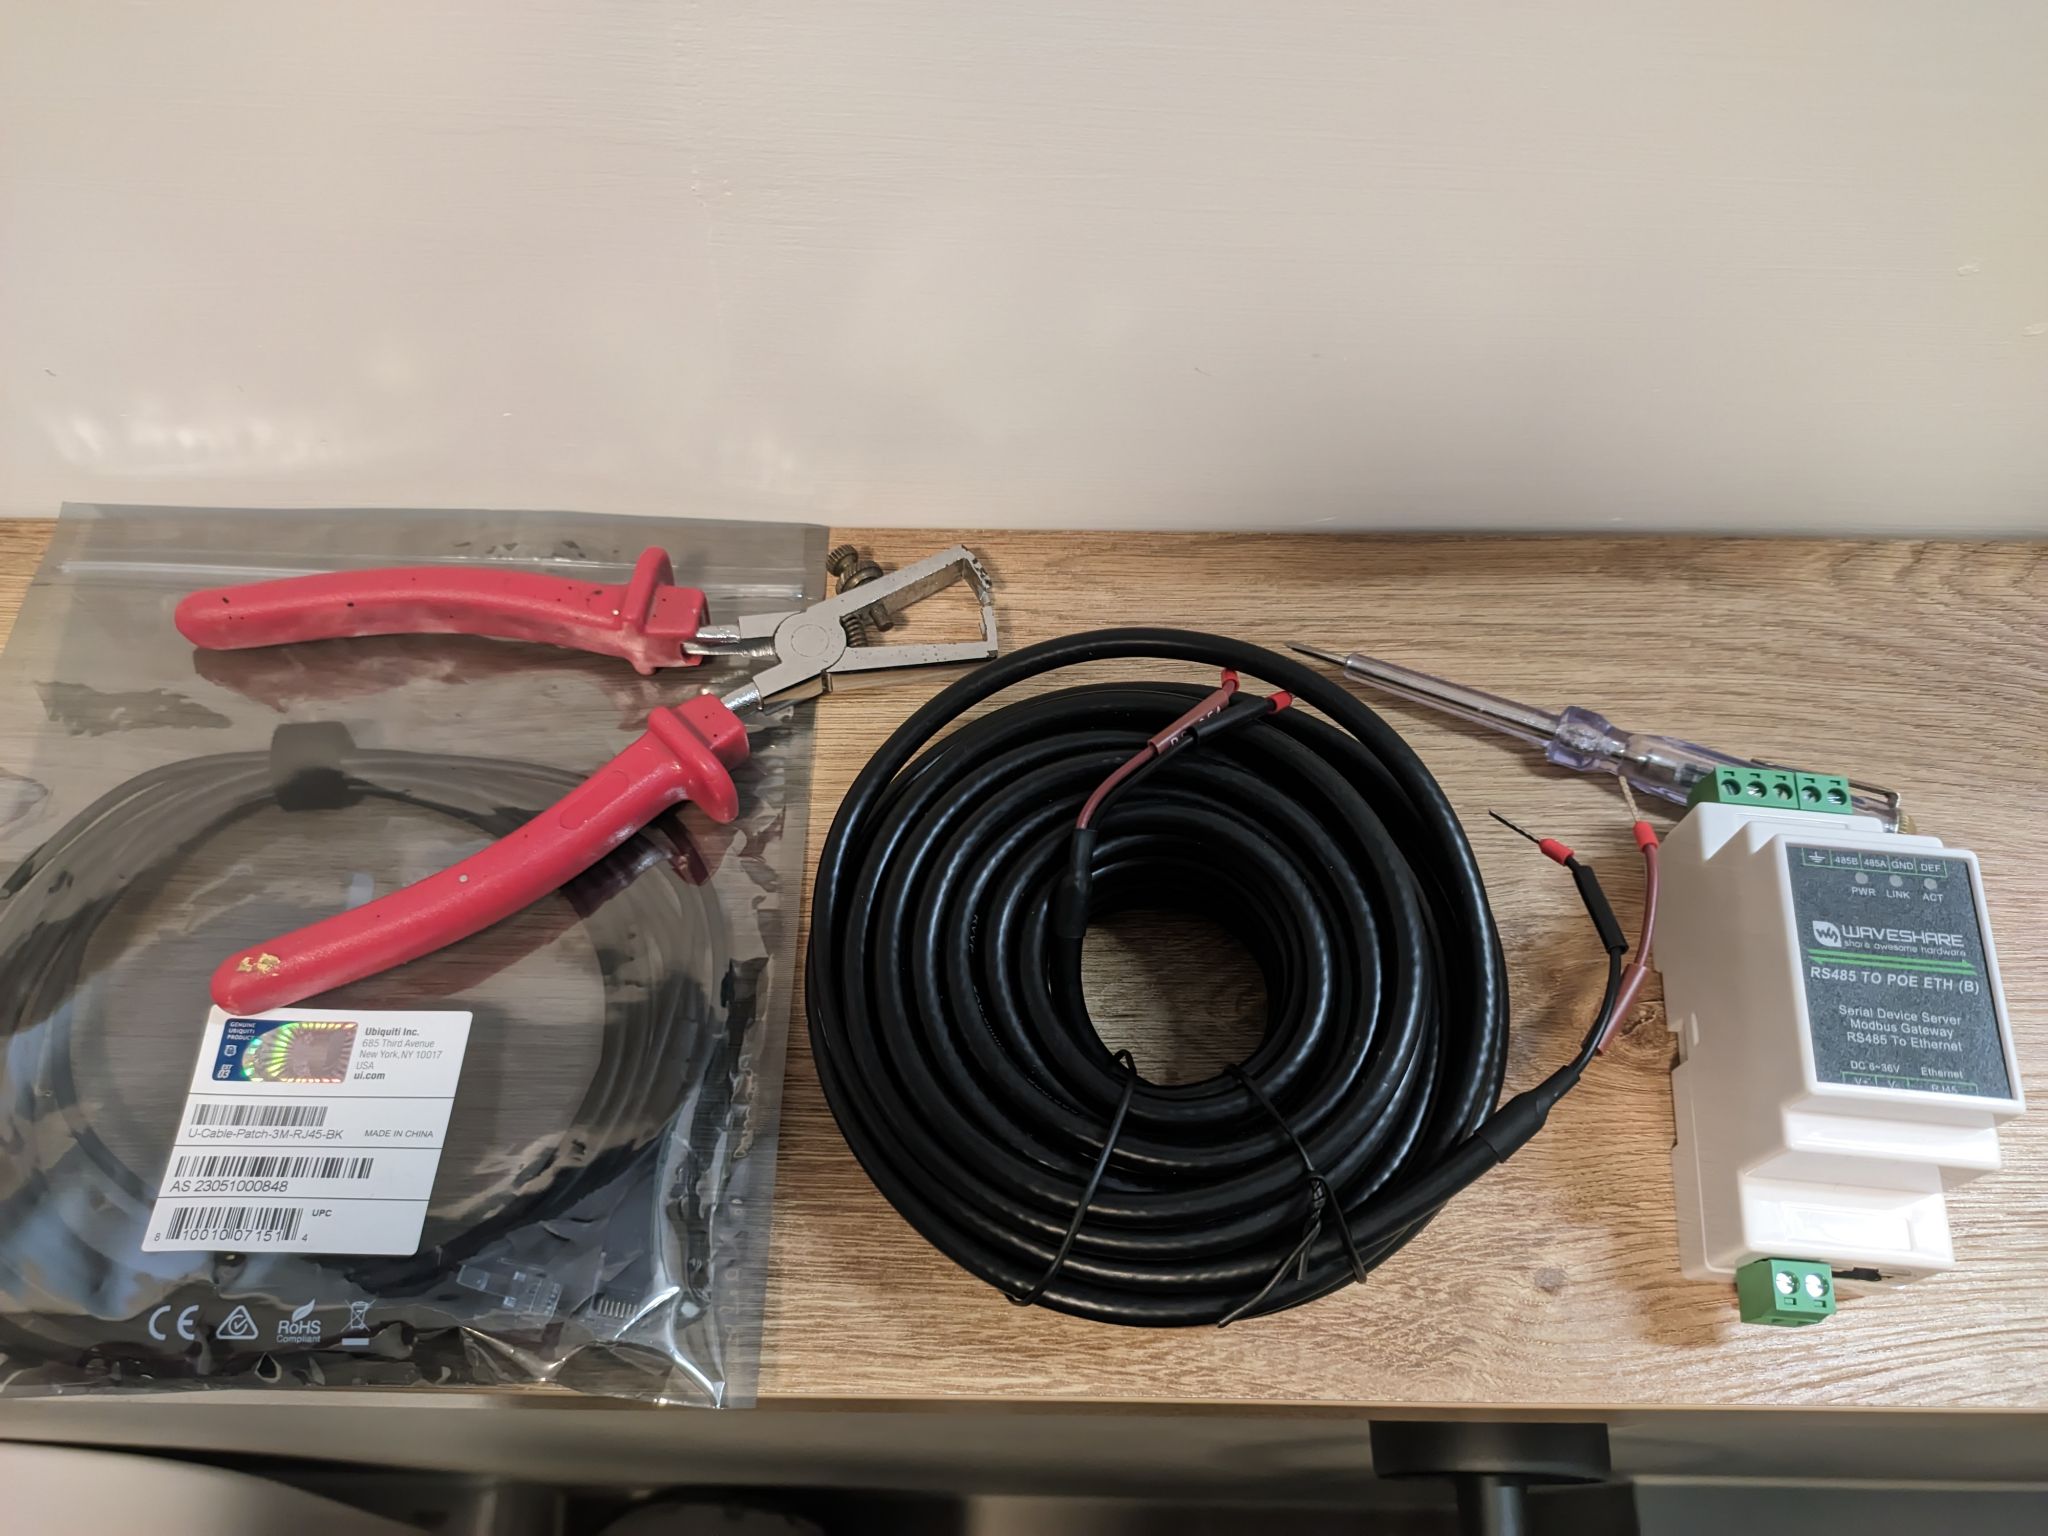
- Ethernet cable – To connect the gateway to my network
- RS485 cable – The communication line between the heat pump and the gateway
- Waveshare RS485 to PoE ETH module – This converts Modbus RTU to Modbus TCP
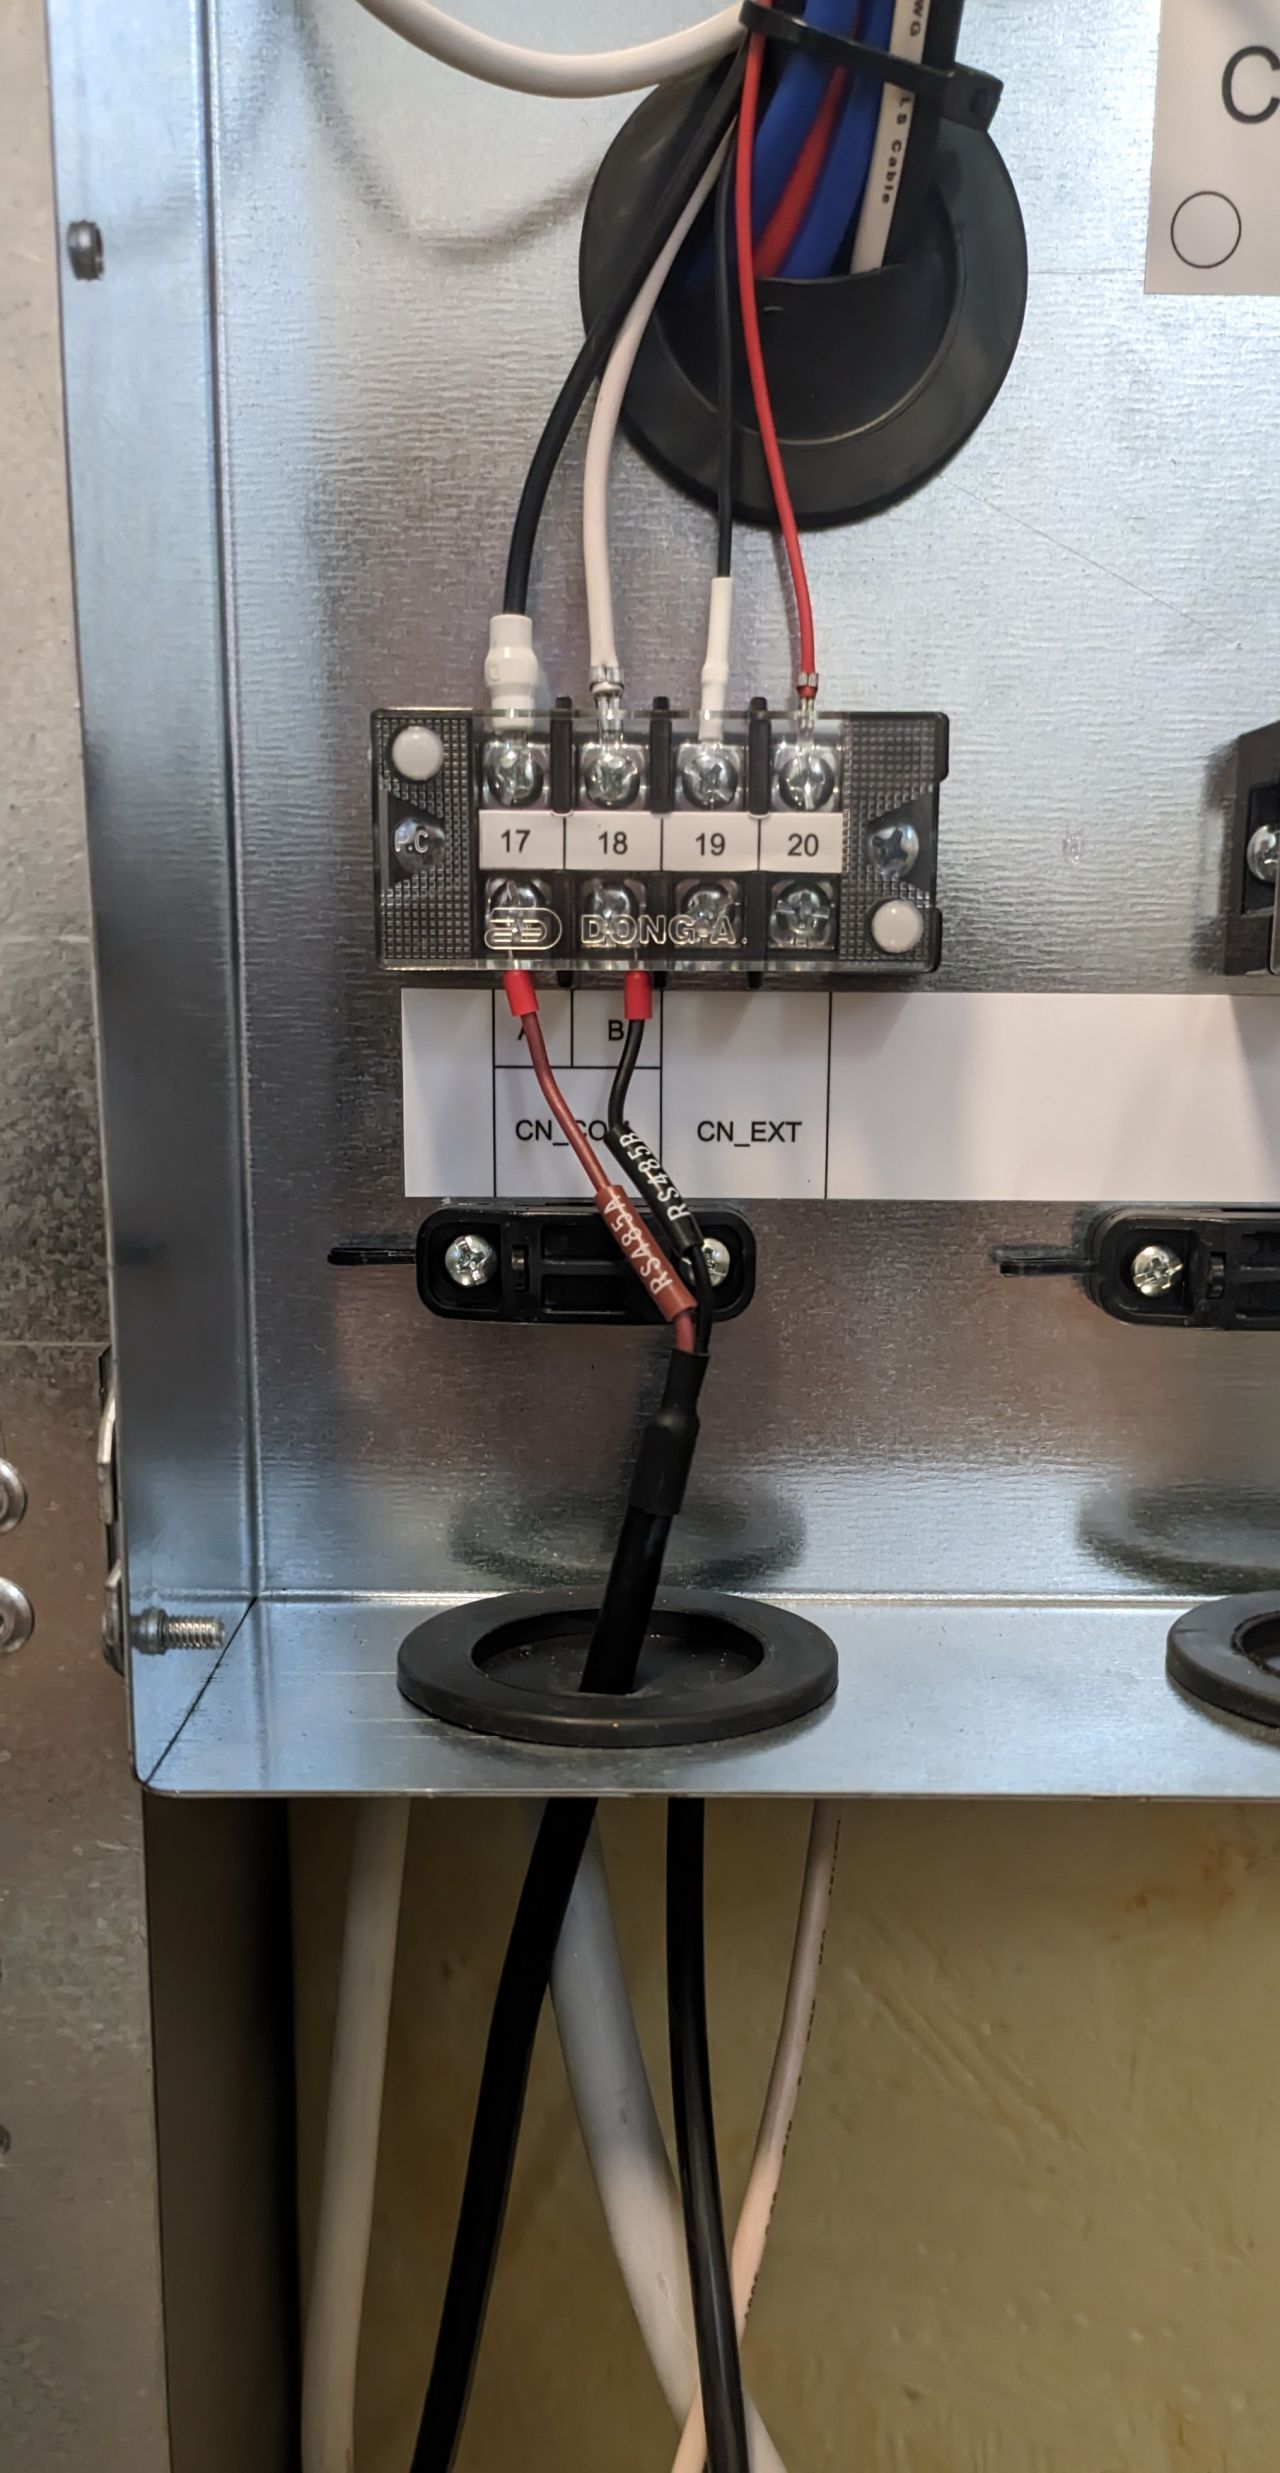
Making the Connection
Here's how I connected the RS485 cable inside the heat pump's control board:
Home Assistant Configuration
With the hardware in place, I moved on to configuring Home Assistant.
Basic Modbus Connection
I added this to my /homeassistant/configuration.yaml:
modbus:
  - name: "LG Therma V"
    delay: 1
    timeout: 14
    message_wait_milliseconds: 200
    host: "device-ip-address-on-local-lan"
    port: 4196
    type: tcp
Here's what each setting does:
- name: A friendly name for the connection
- delay: Wait time in seconds before the first request
- timeout: How long to wait for a response (14 seconds works well for heat pumps)
- message_wait_milliseconds: Pause between messages to avoid overwhelming the device
- host: The Modbus gateway's IP address (I set a static IP for this)
- port: The TCP port (4196 is the default for Waveshare modules)
- type: TCP connection type
Writing Modbus Queries
To find the correct register addresses, I consulted the LG manual for my model. It lists all the Modbus registers and what data they contain.
Binary Sensors
For monitoring on/off states like whether the pump is running, I configured a binary sensor:
modbus:
  binary_sensors:
    - name: "LG Therma V Pump Running"
      unique_id: "lg_therma_v_pump_running"
      address: 1
      slave: 1
      scan_interval: 20
      device_class: running
      input_type: discrete_input
Key settings:
- address: The Modbus register address from the LG manual
- slave: Set to 1 for single-device setups
- scan_interval: Polling frequency in seconds (20 seconds is reasonable)
- input_type:
discrete_inputfor read-only binary values
Sensors
For reading temperature values, I set up sensors like this one for DHW temperature:
modbus:
  sensors:
    - name: "LG Therma V DHW Temp"
      unique_id: "lg_therma_v_dhw_temperature"
      scale: 0.1
      precision: 1
      scan_interval: 20
      address: 5 # reg 6
      slave: 1
      unit_of_measurement: °C
      device_class: temperature
      input_type: input
Important settings:
- scale: LG reports temperature as integers (e.g., 445 = 44.5°C), so I multiply by 0.1
- precision: Number of decimal places to display
- device_class: Tells Home Assistant this is a temperature sensor
- input_type:
inputfor read-only registers
Switches
To control the heat pump, I configured switches like:
modbus:
  switches:
    - name: "LG Therma V Underflow"
      unique_id: "lg_therma_v_underflow_on_off"
      slave: 1
      address: 0
      write_type: coil
      command_on: 1
      command_off: 0
      verify:
        input_type: coil
        address: 0
        state_on: 1
        state_off: 0
Key settings:
- write_type:
coilfor boolean writes - verify: Reads back the state to confirm the command was executed
Climate Entities
For a complete thermostat experience with current temperature and target adjustment, I used a climate entity:
modbus:
  climates:
    - name: "LG Therma V Underflow"
      unique_id: "lg_therma_v_underflow"
      address: 7
      slave: 1
      input_type: input
      max_temp: 33
      min_temp: 16
      offset: 0
      precision: 0
      scale: 0.1
      target_temp_register: 2
      temp_step: 1
      temperature_unit: C
      hvac_mode_register:
        address: 0
        values:
          state_heat: 4
This creates a proper thermostat card in Home Assistant where I can see the current temperature and adjust the target.
Bonus: Recording Data to InfluxDB
I wanted to keep historical data for analysis, so I added InfluxDB to my setup.
What is InfluxDB?
InfluxDB is a time-series database designed specifically for data that changes over time (like temperatures and power consumption). It handles large amounts of time-stamped data efficiently.
Home Assistant + InfluxDB Integration
Home Assistant has built-in support for InfluxDB. I added this to my configuration.yaml:
influxdb:
  api_version: 2
  ssl: false
  host: your-ip
  port: 8086
  token: influxdb-token
  organization: your-org
  bucket: homeassistant
  tags:
    source: HA
  tags_attributes:
    - friendly_name
  default_measurement: units
Configuration notes:
- api_version: Version 2 for modern InfluxDB installations
- ssl: Set to
trueif using HTTPS - token: Generated in InfluxDB's web interface
- organization & bucket: These need to be created in InfluxDB first
- tags: Useful for filtering data later
With this configuration, every sensor update in Home Assistant gets automatically logged to InfluxDB.
Grafana: Visualizing the Data
To create dashboards from the stored data, I use Grafana. It connects to InfluxDB and provides flexible visualization options.
Here's my current dashboard:
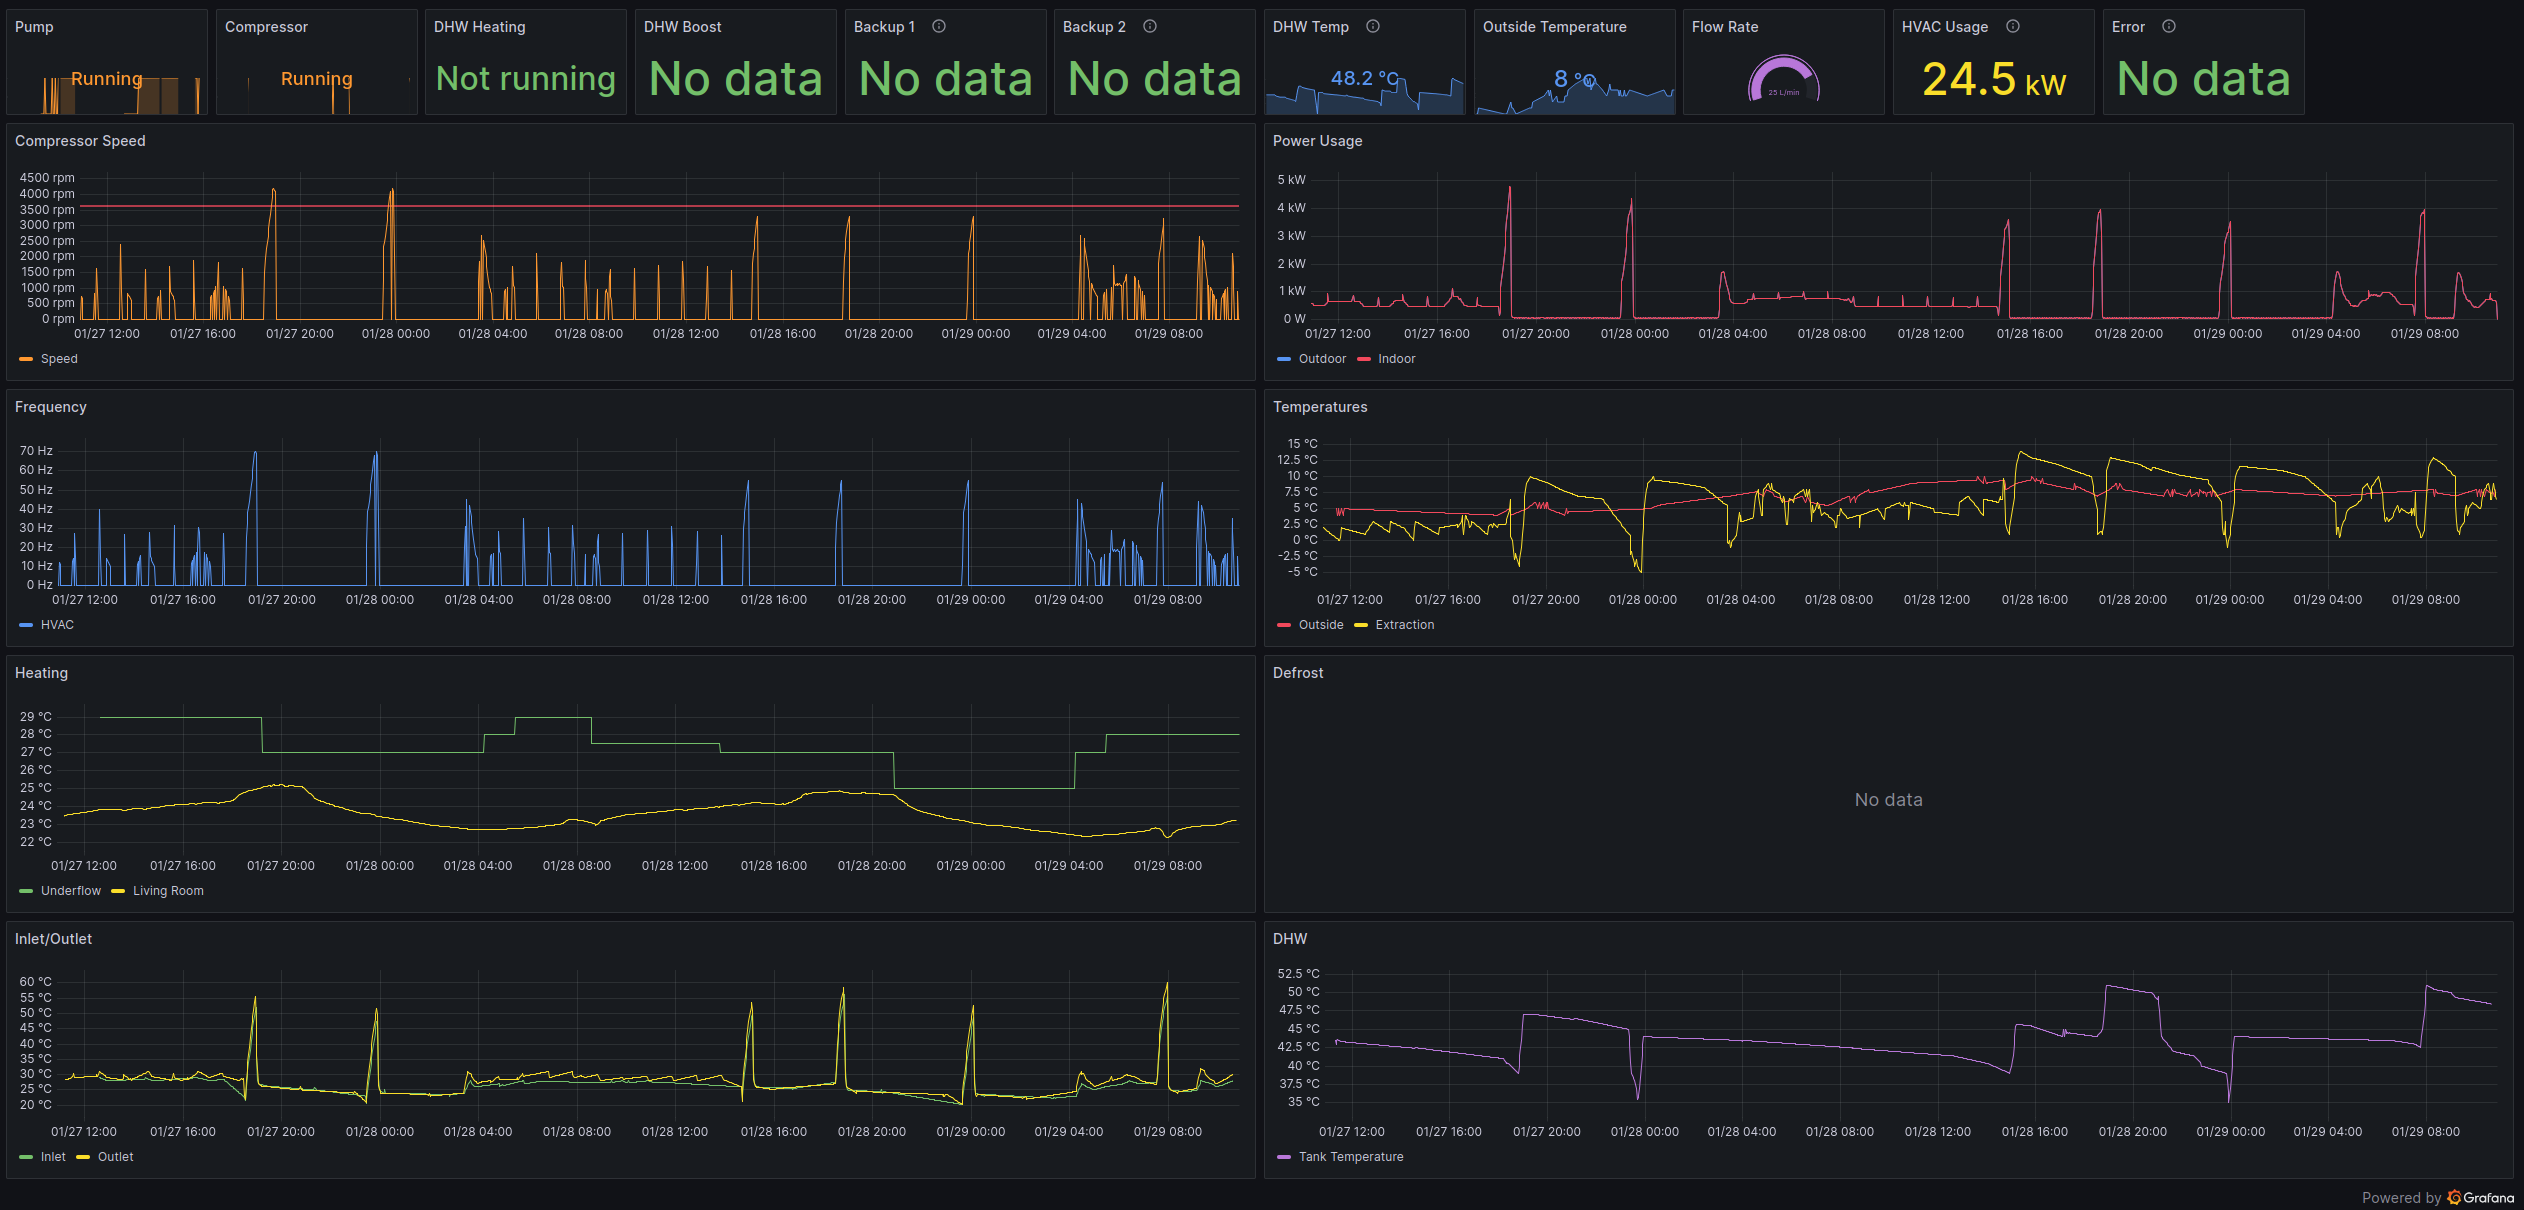
I can monitor:
- Pump and compressor status
- DHW temperature over time
- Power consumption
- Flow rates
- And more
Setting up Grafana involves:
1. Installing Grafana (I used Docker)
2. Adding InfluxDB as a data source
3. Creating dashboards and panels
Summary
This setup gives me full visibility and control over my LG Therma V heat pump through Home Assistant. I can:
- Monitor temperatures and status in real-time
- Control the heat pump remotely
- Store historical data for analysis
- Visualize everything in Grafana dashboards
The total cost was much lower than LG's official smart home solutions, and I have complete control over my data.
감사합니다 for reading! If you have questions or spot any issues, feel free to leave a comment.