
안녕하세요. 별똥별🌠입니다!
지난 시간에는 양방향 바인딩(Bidirectional Binding)을 활용하여 SwiftUI와 TCA를 결합하는 사례를 살펴보았습니다. 이번 시간에는 Optional State를 다루는 OptionalBasics 예제를 통해 TCA에서 선택적 상태 관리와 조건부 UI 구성을 어떻게 구현하는지 알아보겠습니다.
Optional State in TCA
TCA에서 Optional State는 특정 상태가 존재하거나 존재하지 않는 조건을 처리해야 할 때 유용합니다. OptionalBasics는 이러한 선택적 상태를 활용하여 카운터 상태를 토글하는 예제를 제공합니다.
1️⃣ Reducer 정의
OptionalBasics Reducer는 선택적 상태(optionalCounter)를 관리하며, 이를 통해 상태 변경 로직을 처리합니다.
@Reducer
struct OptionalBasics {
    @ObservableState
    struct State: Equatable {
        var optionalCounter: Counter.State? // 선택적 상태
    }

    enum Action {
        case optionalCounter(Counter.Action) // Counter Reducer와 연동
        case toggleCounterButtonTapped       // 상태 토글 액션
    }

    var body: some Reducer<State, Action> {
        Reduce { state, action in
            switch action {
            case .toggleCounterButtonTapped:
                // 상태를 토글: `nil` <-> `Counter.State`
                state.optionalCounter = state.optionalCounter == nil ? Counter.State() : nil
                return .none

            case .optionalCounter:
                // Counter 액션 처리 (ifLet로 세부 처리 연결)
                return .none
            }
        }
        .ifLet(\.optionalCounter, action: \.optionalCounter) {
            Counter() // Counter Reducer와 상태 연결
        }
    }
}
주요 포인트
- State 정의
- optionalCounter: Counter.State? 타입의 선택적 상태로 정의합니다.
상태가 nil일 경우 UI에 아무것도 표시되지 않으며, 상태가 존재하면 CounterView가 활성화됩니다.
- Action 정의
- toggleCounterButtonTapped: 버튼을 눌러 상태를 nil과 Counter.State() 사이에서 토글합니다.
optionalCounter: Counter.Action을 위임 처리하기 위한 액션입니다.
- Reducer 로직
- toggleCounterButtonTapped: state.optionalCounter가 nil이면 새로운 Counter.State()를 생성, 아니면 nil로 설정해 상태를 비활성화합니다.
ifLet 활용: 선택적 상태가 존재할 경우에만 Counter Reducer를 결합합니다.
2️⃣ View 구현
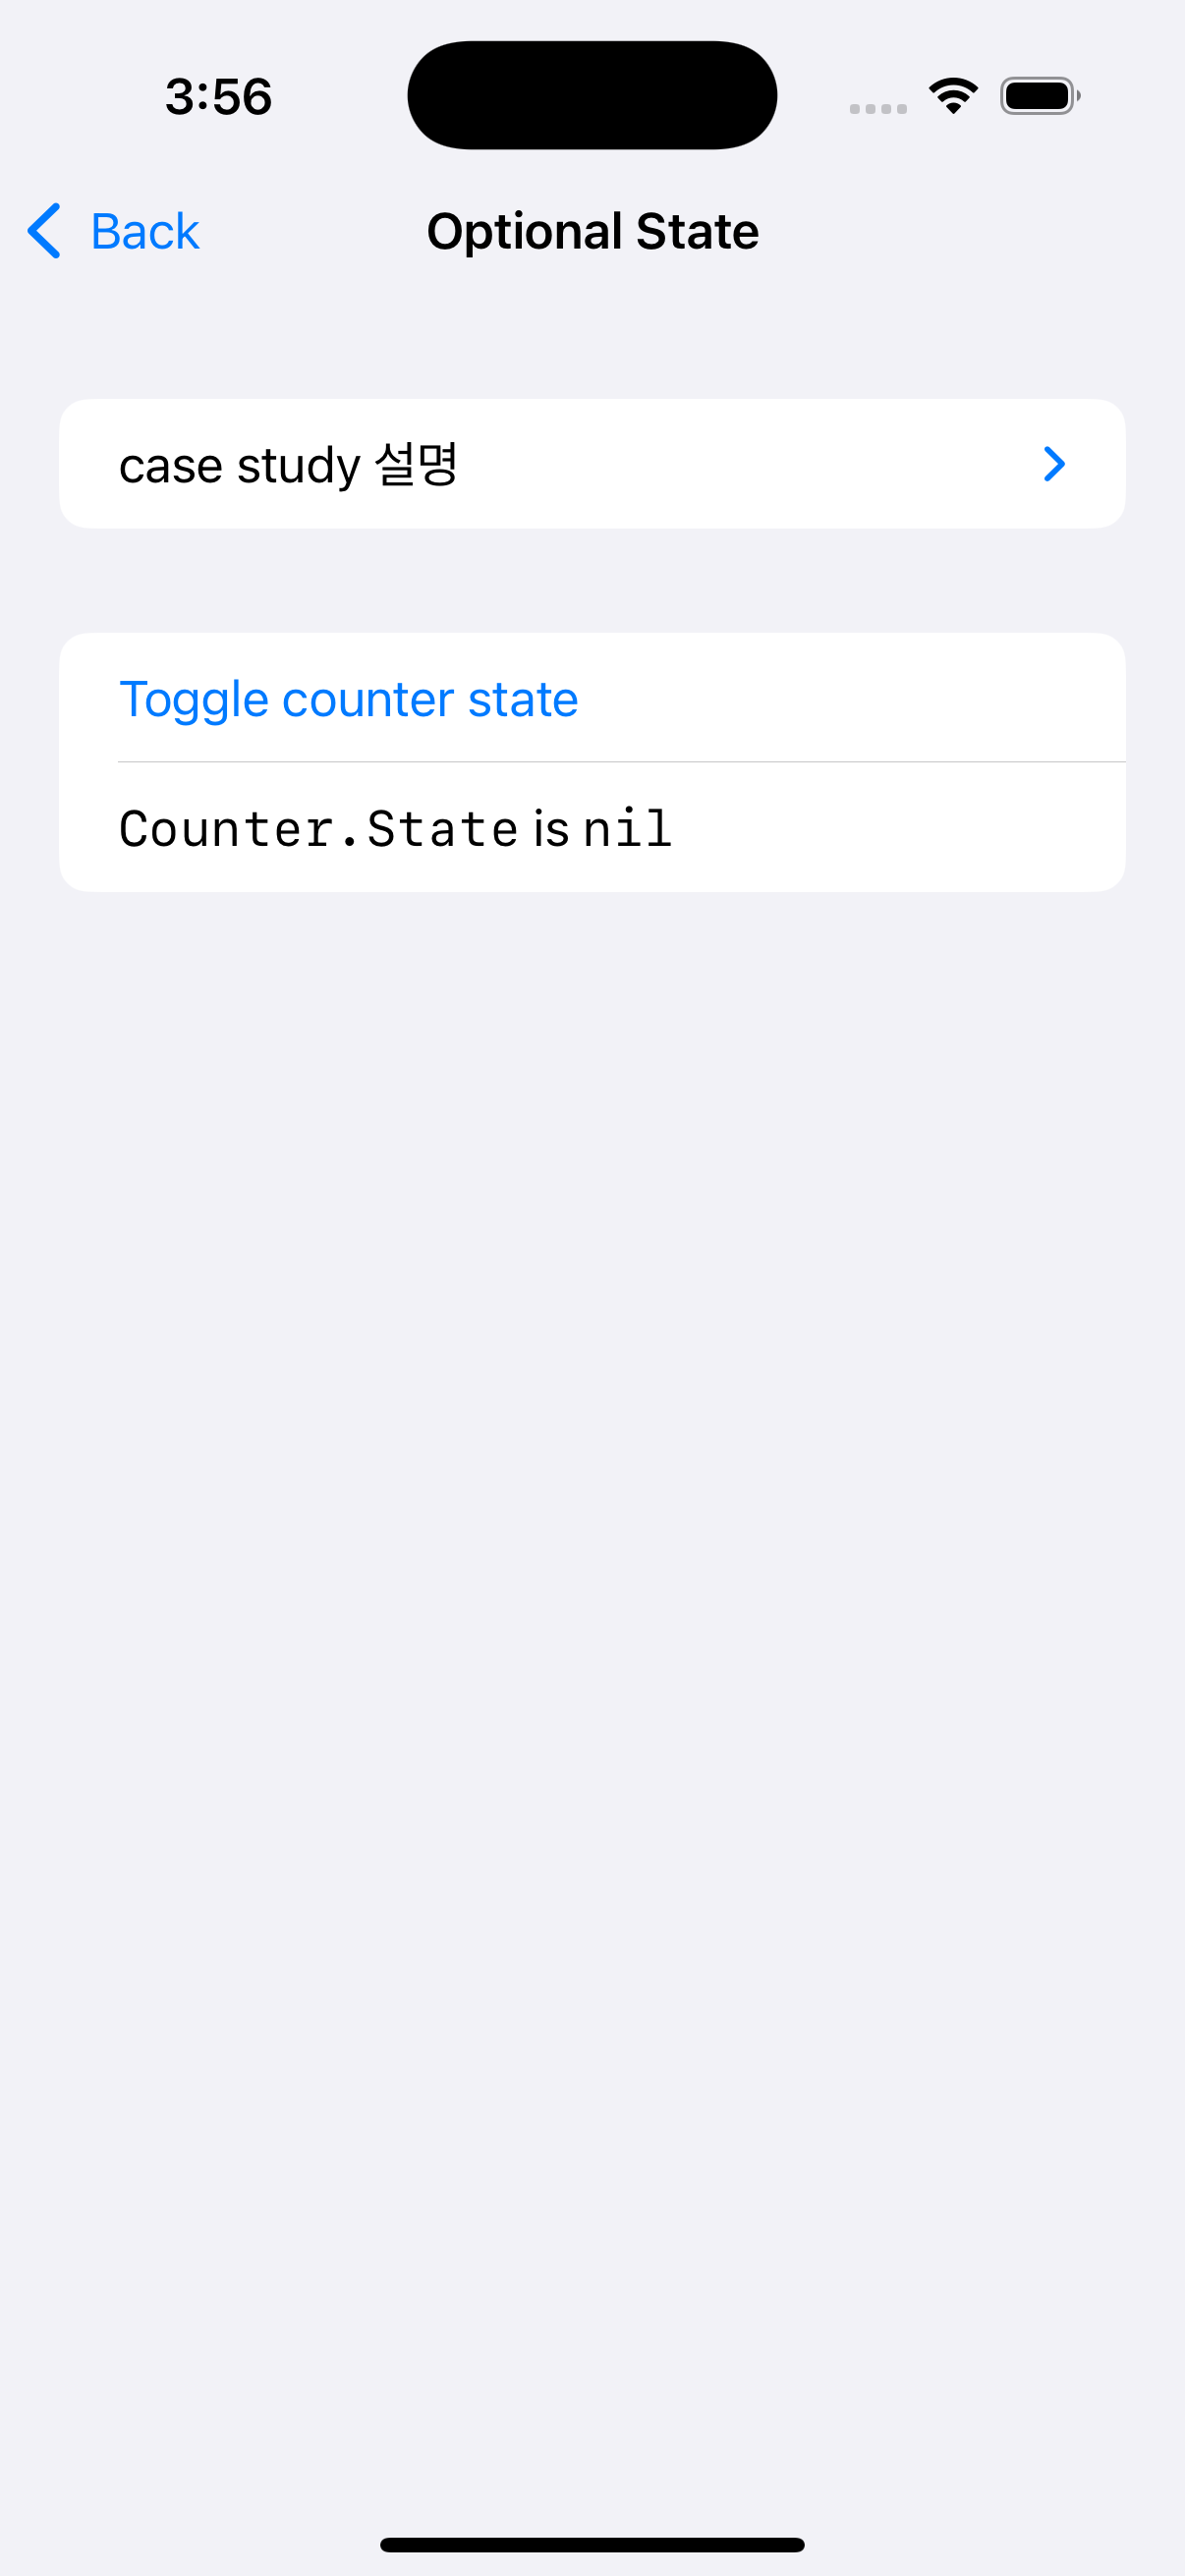
OptionalBasicsView는 상태의 존재 여부에 따라 UI를 동적으로 구성합니다.
struct OptionalBasicsView: View {
    let store: StoreOf<OptionalBasics>

    var body: some View {
        Form {
            Section {
                AboutView(readMe: readMe)
            }

            // 상태 토글 버튼
            Button("Toggle counter state") {
                store.send(.toggleCounterButtonTapped)
            }

            // 선택적 상태에 따른 UI
            if let store = store.scope(state: \.optionalCounter, action: \.optionalCounter) {
                Text(template: "`Counter.State` is non-`nil`")
                CounterView(store: store) // CounterView 연결
                    .buttonStyle(.borderless)
                    .frame(maxWidth: .infinity)
            } else {
                Text(template: "`Counter.State` is `nil`") // 상태가 없을 때
            }
        }
        .navigationTitle("Optional State")
    }
}
주요 포인트
- 상태 토글 버튼
- 버튼을 눌렀을 때 .toggleCounterButtonTapped 액션을 전송해 상태를 토글합니다.
- 조건부 UI
- store.scope를 사용해 선택적 상태(optionalCounter)를 추출합니다.
상태가 존재하면 CounterView를 표시하고, 상태가 없으면 "Counter.State is nil" 메시지를 표시합니다.
- CounterView 연결
- 상태가 존재할 경우 CounterView에 하위 스토어를 전달하여 UI를 활성화합니다.
3️⃣ Preview 구현
Preview를 통해 UI와 상태 변화를 시각적으로 테스트합니다.
#Preview {
    NavigationStack {
        OptionalBasicsView(store: Store(initialState: OptionalBasics.State(), reducer: {
            OptionalBasics()
        }))
    }
}
핵심 포인트 정리
- Optional State 관리
- 선택적 상태(optionalCounter)를 사용해 UI 활성화 여부를 동적으로 결정합니다.
상태 변경은 항상 Reducer를 통해 이루어지며, 상태의 존재 여부를 안전하게 관리할 수 있습니다.
- 조건부 UI 구성
- store.scope를 활용해 선택적 상태가 존재하는 경우에만 하위 뷰를 렌더링합니다.
상태가 없을 경우 기본 메시지를 표시하여 UI 상태를 명확히 표현합니다.
- ifLet의 활용
- Reducer에서 .ifLet을 사용해 선택적 상태를 하위 Reducer와 연결합니다.
선택적 상태가 존재하지 않을 경우, 하위 Reducer는 호출되지 않아 불필요한 연산을 방지합니다.
🌟 BindingBasics와의 차이점
| 항목 | Binding Basics | Optional Basics |
|---|---|---|
| 주요 기능 | SwiftUI 양뱡향 바운딩 및 상태 관리 | 선택적 상태를 사용한 동적 UI 관리 |
| 상태 | 모든 상태가 항상 존재(sliderView, text 등) | 상태가 nil일 수 있음(optionalCounter) |
| Reducer 구조 | 단순 상태 변경 로직(textChanged, toggleChanged 등) | 선택적 상태와 조건부 상태 연결 (ifLet 활용) |
| View 구성 | 모든 UI 요소가 항상 표시됨 | 선택적 상태에 따라 조건부 UI 표시(ifLet) |
이번 사례를 통해 TCA에서 선택적 상태와 조건부 UI를 효과적으로 관리하는 방법을 살펴보았습니다. 이를 활용하면 더 복잡한 상태 관리와 UI 구성을 효율적으로 구현할 수 있습니다. 😊
다음 시간에도 더 유익한 사례로 돌아오겠습니다!

밍밍