필요한 목록
- src -> main -> java -> com.mycompany.myapp -> domain -> [DB 테이블과 연결할 class 파일]
- src -> main -> java -> com.mycompany.myapp -> repository -> [repository interface 파일]
- src -> main -> java -> com.mycompany.myapp -> web.rest -> [resource 파일(http request를 받아오는 곳)]
- src -> main -> resources -> config -> liquibase -> changelog -> [.xml파일(테이블 구조)]
- src -> main -> resources -> config -> liquibase -> master.xml(만들어준 .xml 파일 include)
- src -> main -> webapp -> app -> layouts -> navbar -> navbar.component.html(메뉴 추가)
- src -> main -> webapp -> app -> shared -> model -> [.model.ts 파일]
- module 파일(만들어 준 후, 상위 모듈에서 import)
- route 파일
- service 파일
- component.ts 파일(CRUD 각각)
- component.html 파일(CRUD 각각)
Navbar에 만들어 줄 게시판 메뉴 추가하기
[src -> main -> webapp -> app -> layout -> navbar] 의 경로에 있는 파일들이 JHipster 페이지의 헤더부분이다.

이 부분에 custom board를 추가해서, 클릭시 만들어 줄 CRUD 게시판으로 연결시키도록 하겠다.
[navbar.compontent.html] 을 보면 Home, Entities 같은 메뉴들이 어떻게 생성되어있는지 확인할 수 있다. 비슷한 형식으로 아래와 같이 추가해준다. routerLink="board" 옵션을 통해 원하는 페이지로 연결시켜준다.
<li class="nav-item" routerLinkActive="active" [routerLinkActiveOptions]="{exact: true}">
                <a class="nav-link" routerLink="board" (click)="collapseNavbar()">
                    <span>
                        <fa-icon icon="file"></fa-icon>
                        <span>Custom Board</span>
                    </span>
                </a>
</li>- JHipster는 fontawesome 아이콘을 사용할 수 있도록 되어있다. 원하는 fontawesome 아이콘을 사용하기 위해 [... app -> vendor.ts]에서 import 해준후, library에 추가해주면 된다.(jhipster update 이후 아래의 과정을 거치지 않아도 아이콘 사용이 되는 듯하다)
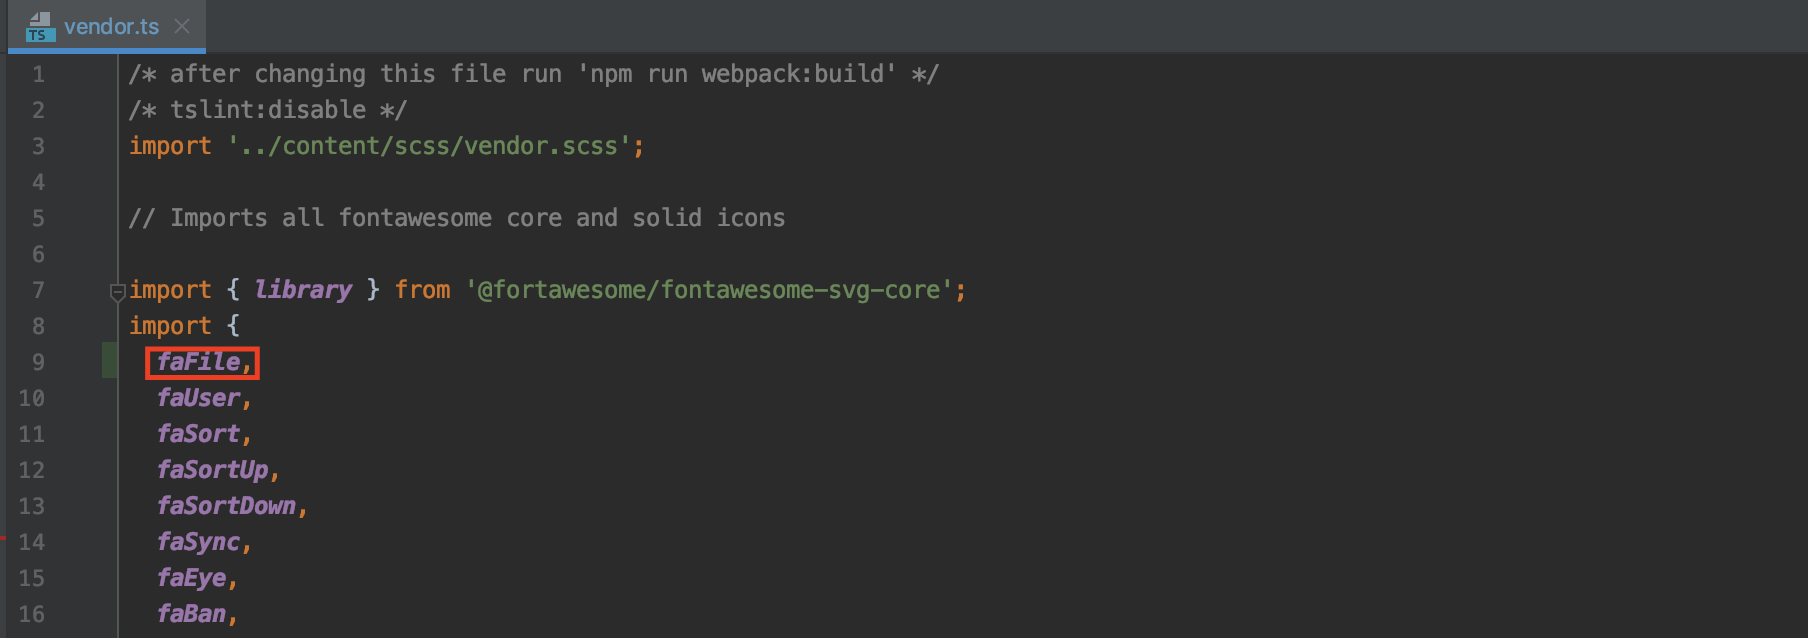

그 후 위의 html 코드에서 <fa-icon icon="file"></fa-icon> 이런식으로 사용할 수 있다. 위의 작업을 하지 않을 경우, 아이콘이 보여지지 않는다.
Custom Board가 추가된 것을 볼 수 있다. 지금은 클릭하면 error가 발생한다.

front end 생성하기
게시판을 생성하는 방법은 여러가지가 있지만, jhipster entity명령어를 사용하지 않고, 하나하나 만들어보도록 하겠다.
먼저, [webapp -> app]에 ng g module [이름] 명령어로 디렉토리와 모듈을 만들어준다. 생성된 디렉토리로 들어가서 ng g component [이름] 명령어로 component를 만들어준다.(만들어준 module에 자동 import 된다) .route.ts파일도 임의로 만들어준다.(기능을 구별하면 관리하기 편하기 때문. module에 바로 route를 적어줘도 상관은 없다)
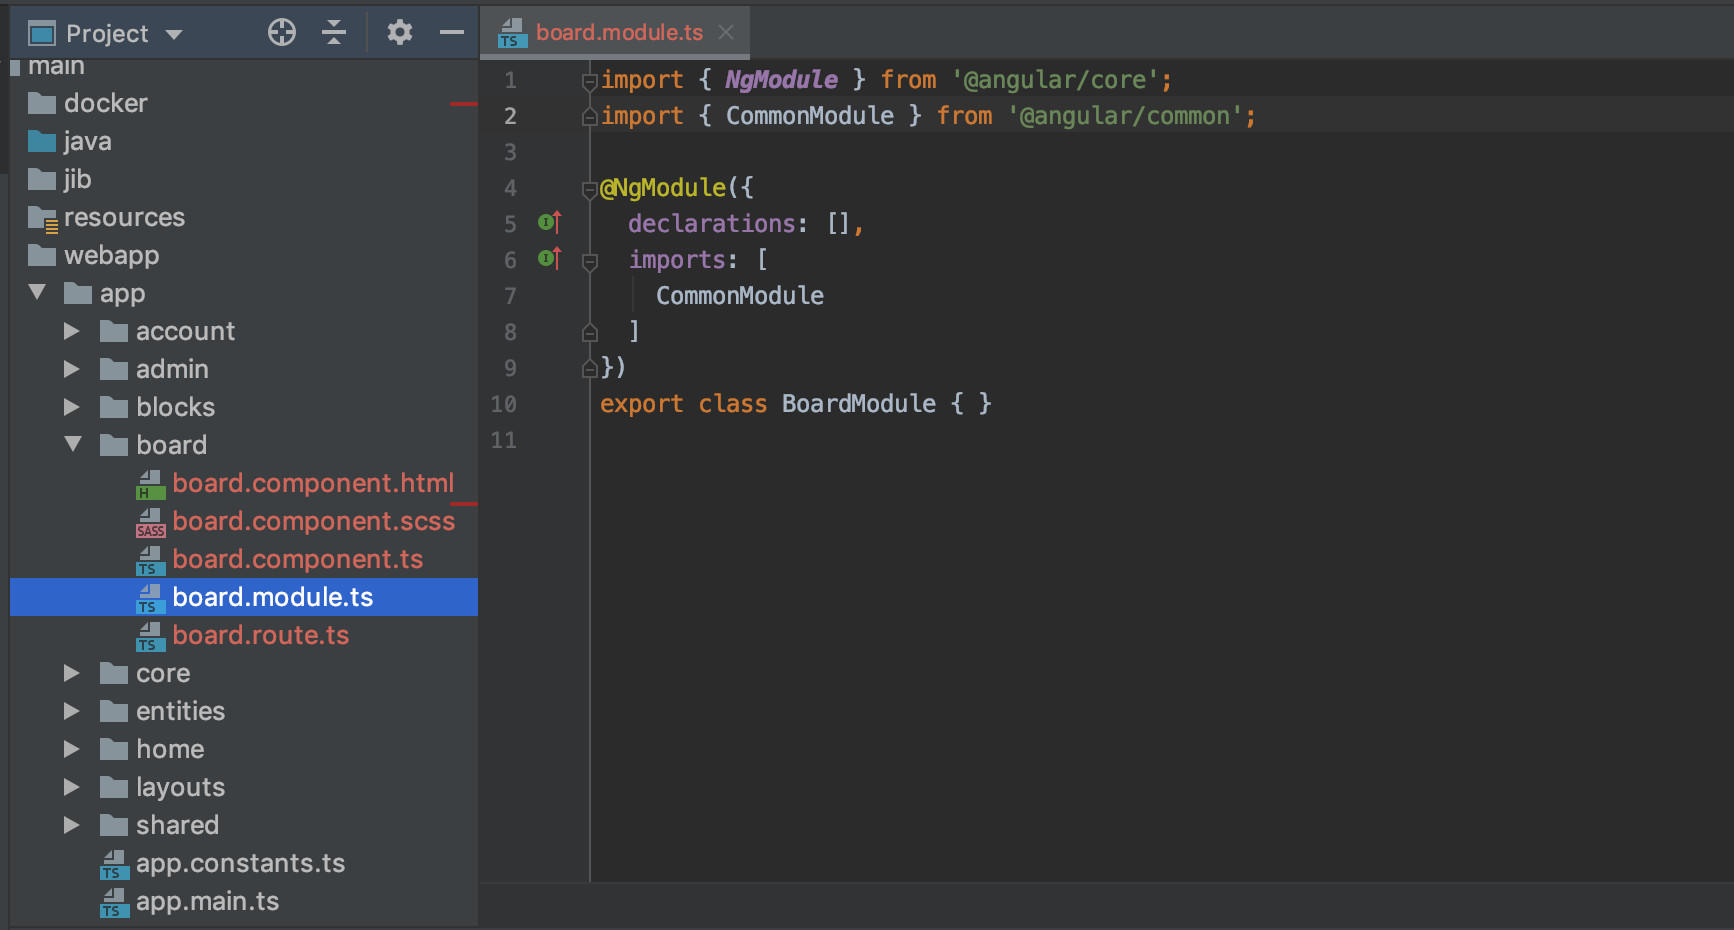
declarations 부분에 생성해준 BoardComponent를 넣어주고, imports 부분에, JhipsterBoardTest1SharedModule 과 라우터를 넣어준다.

라우터 파일은 아래와 같다.

[app-routing.module.ts]에 만들어준 BoardModule을 imports에 넣어준다. 아까 Navbar에 추가해준 html의 routerLink 값이 board였으므로, path 값은 board이다.
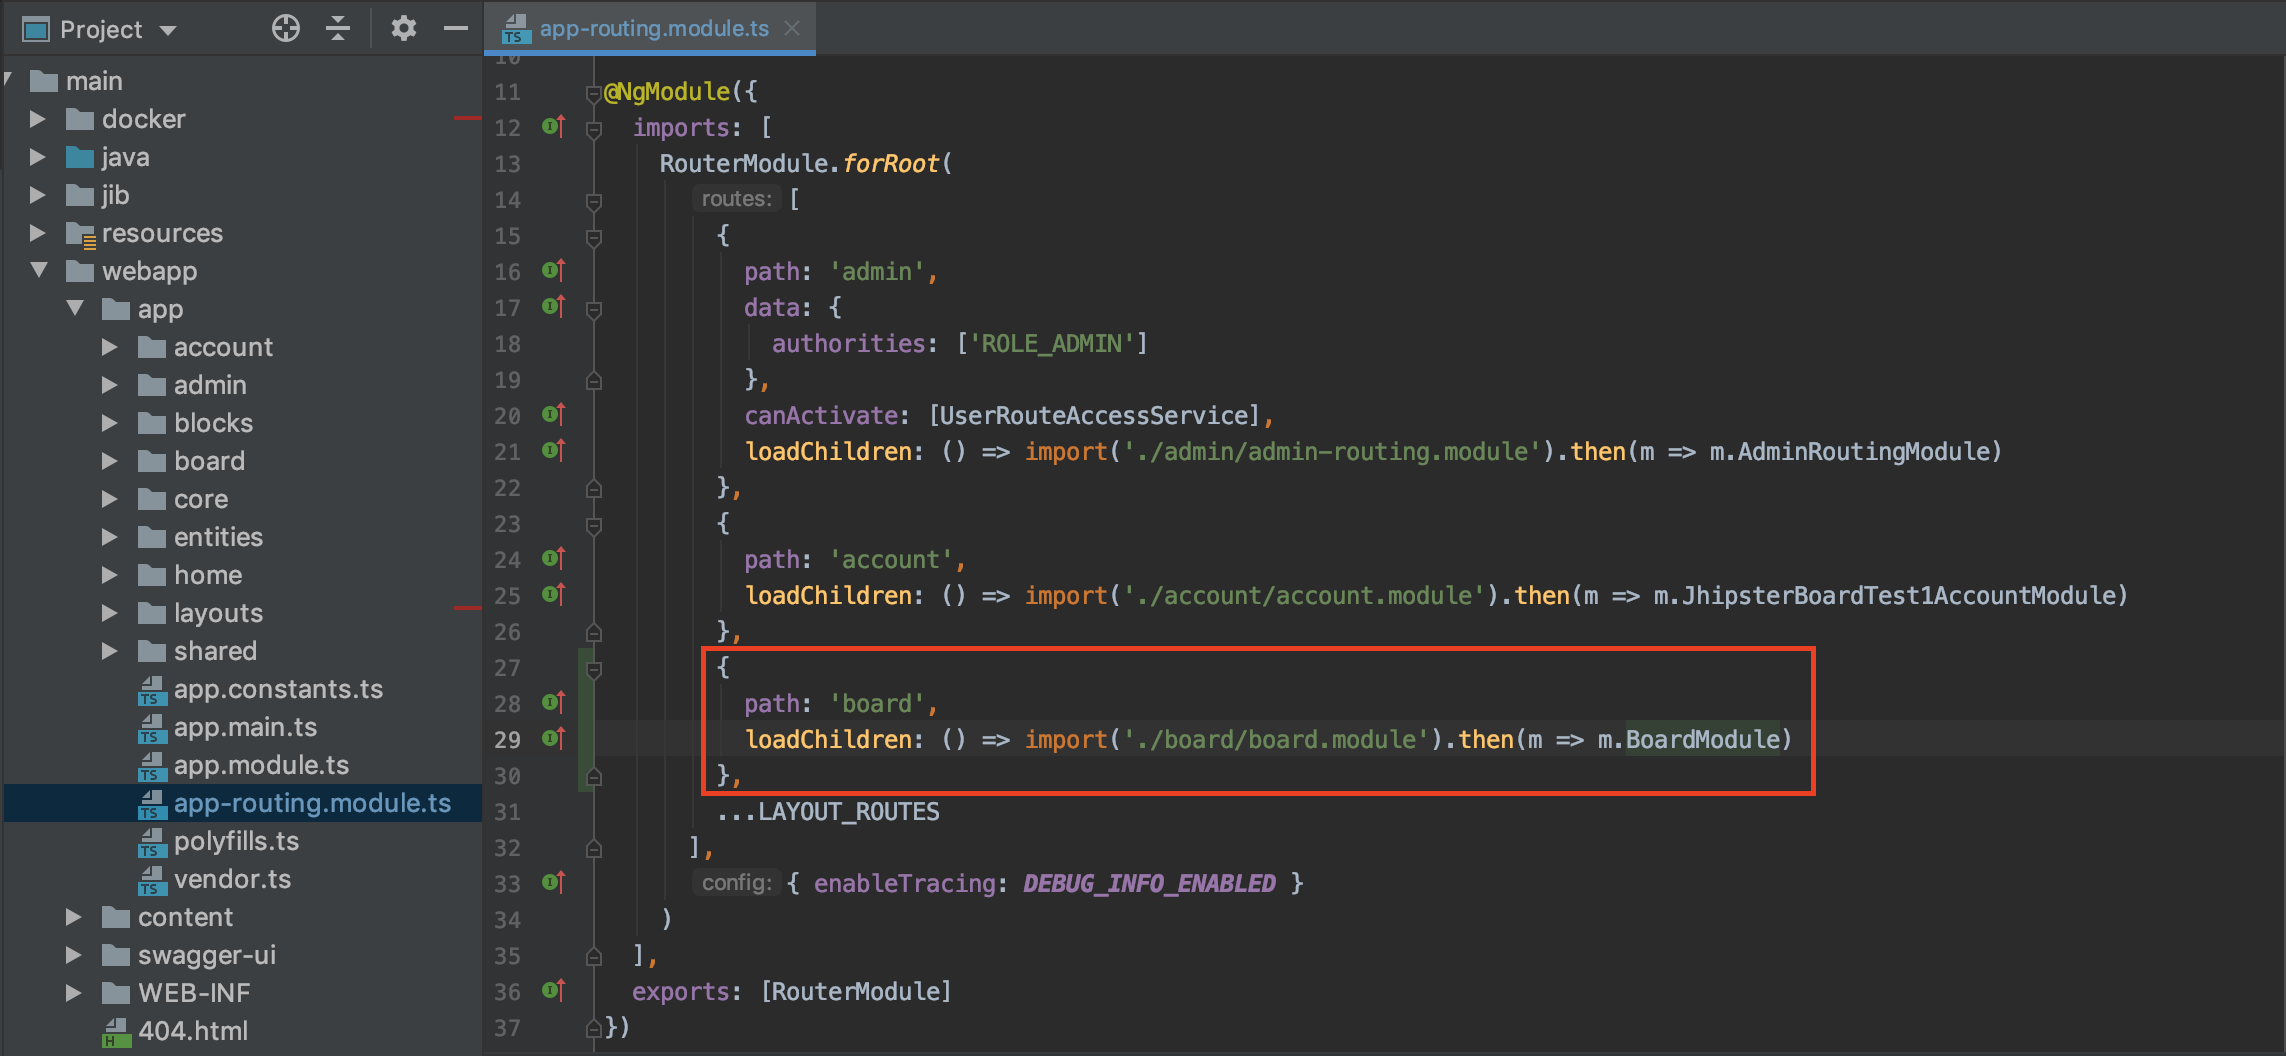
- navbar에 메뉴 추가 -> 디렉토리 생성(component, module, route) -> app-routing.module에 등록(flow: app.module -> app-routing.module -> board.module -> board.component)
메뉴의 board를 누르면, 새로 만들어진 페이지로 이동함을 볼 수 있다.

<참고>
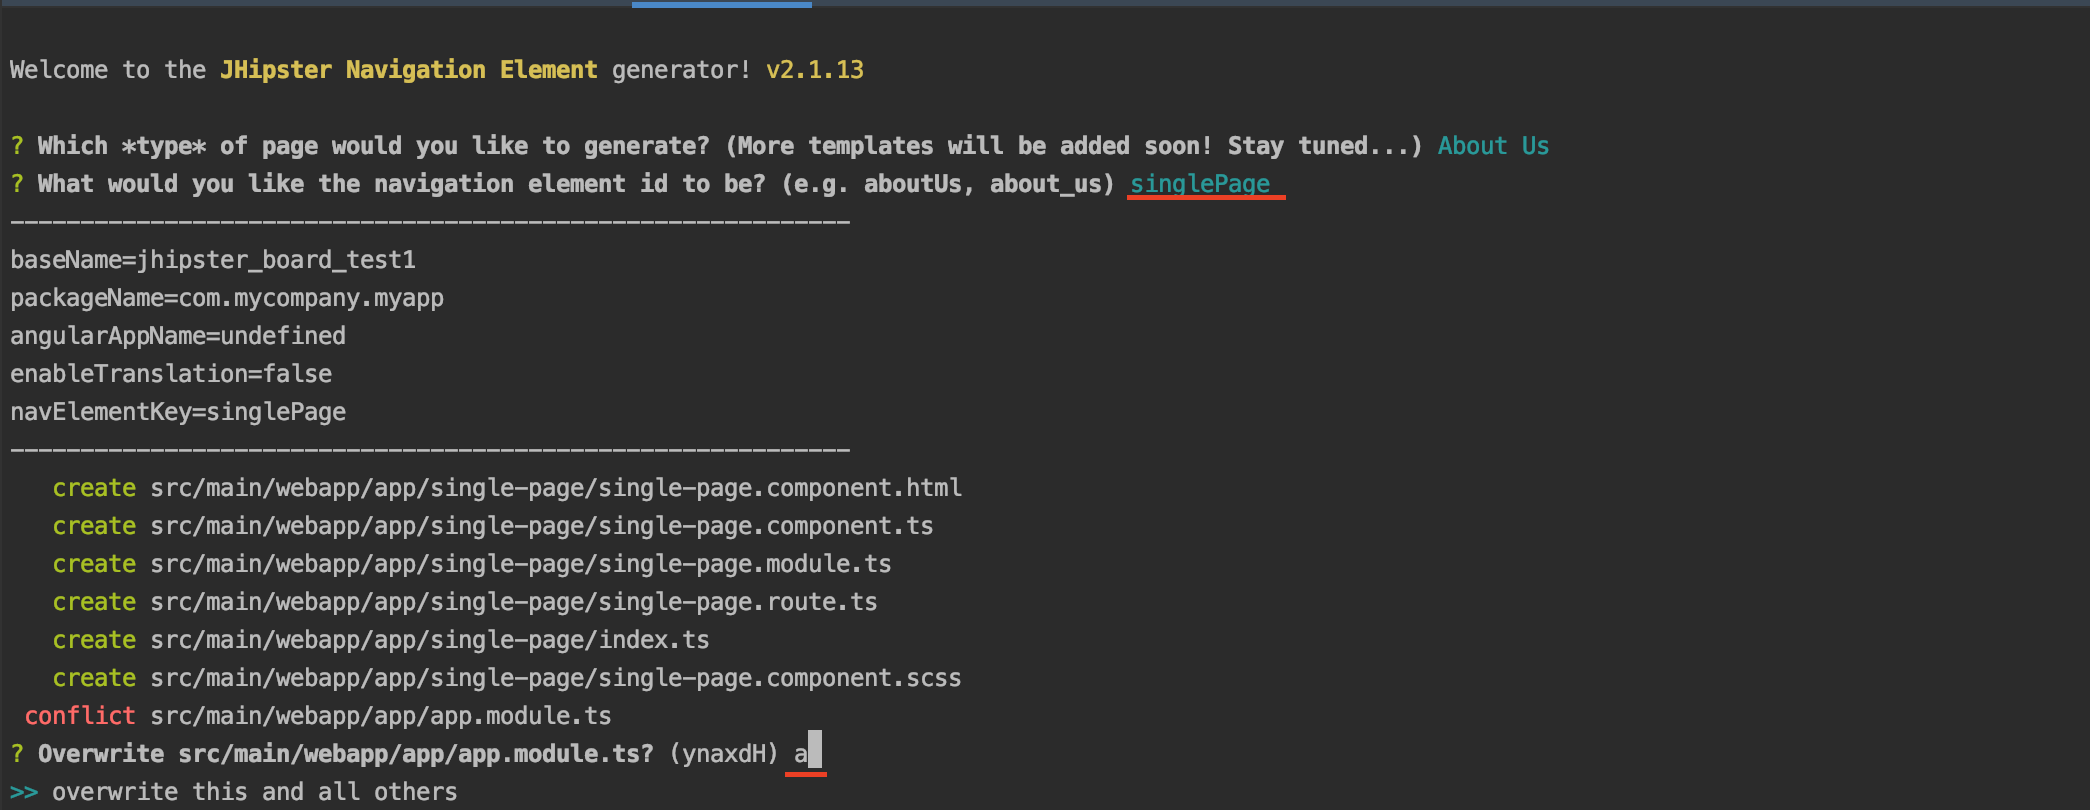
'generator-jhipster-nav-element' 라는 jhipster module을 설치하여, 바로 메뉴를 만들어 줄 수도 있다.
npm install -g generator-jhipster-nav-element 명령어로 module을 설치해준다.
(update: npm update -g generator-jhipster-nav-element)
터미널에 yo jhipster-nav-element 명령어를 치면, 메뉴를 생성할 수 있다.

두 가지 옵션이 있다.
1. About Us: single
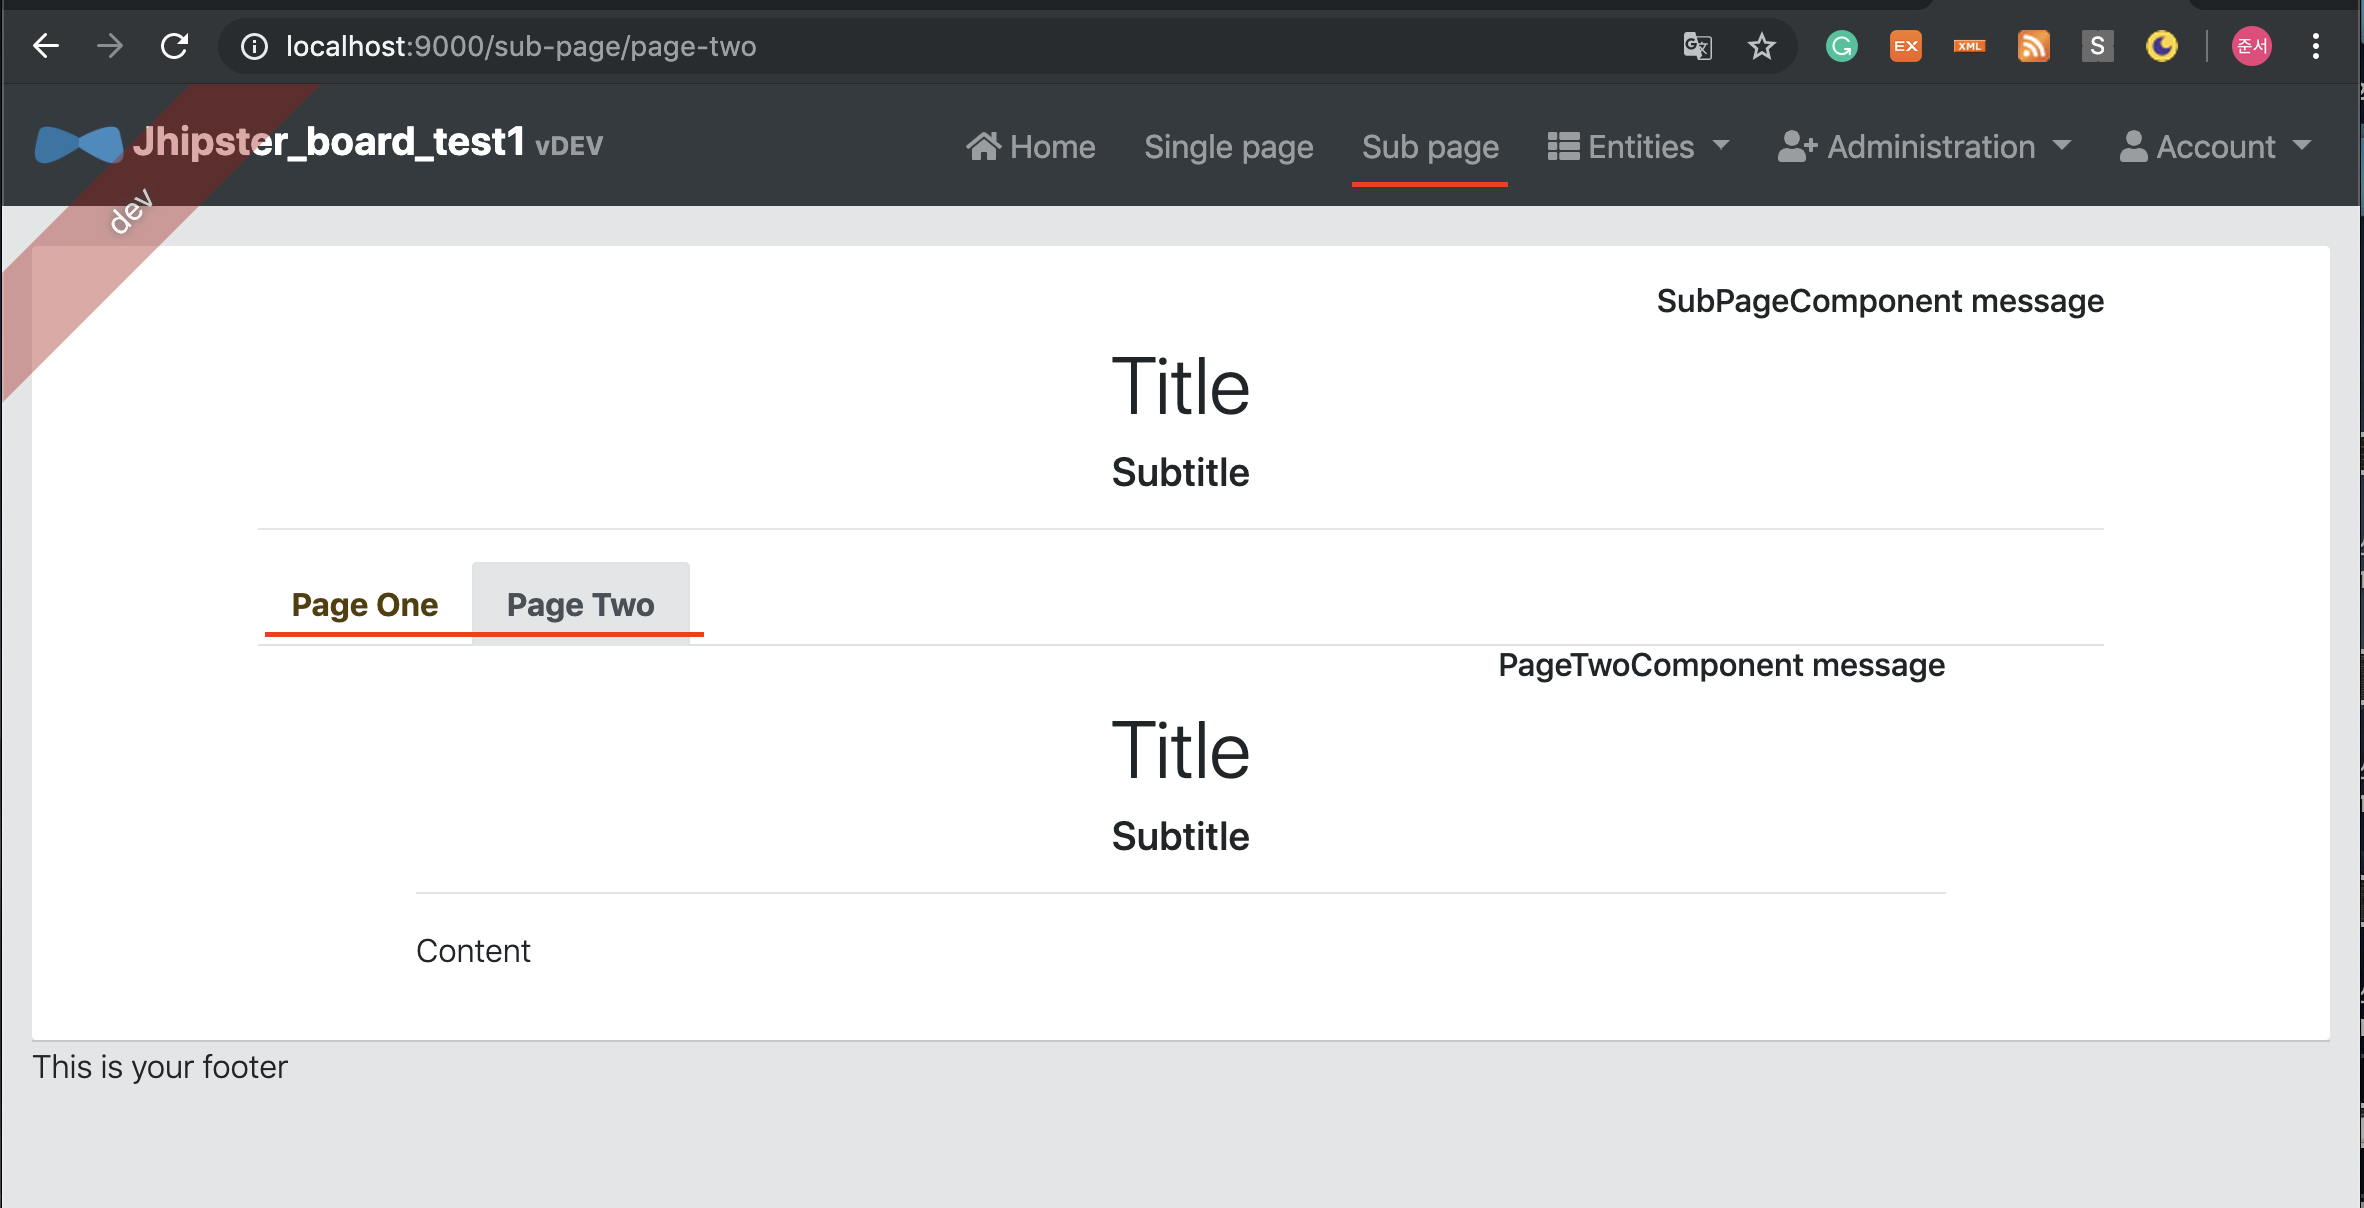
2. Page with nested routes: 2 tabs(sub components/pages)
옵션을 선택하면, 해당 메뉴의 이름을 적어주면 된다. 그 후, app.module에 덮어쓰면 된다.(jhipster update(v6.4.1) 후, 명령어로 인해 생성된 .route파일과 .module 내부의 import 경로를 조금 수정해주어야한다.)
.route 파일
...
import { UserRouteAccessService } from 'app/core/auth/user-route-access-service';
...
.module 파일
...
import { JhipsterBoardTest1SharedModule } from '../shared/shared.module';
...
About Us Option

Page with nested routes Option
