
😵💫😵💫 정리 안 하면 절대 까먹을 것 같아서 실습하면서 정리...
0️⃣ EC2 설정하기
AWS EC2의 가상환경에서 진행해기 위해 간단한 설정을 해준다.
sudo apt-get install virtualenv
virtualenv airflow
cd airflow
source ./bin/activate
deactivatesudo apt-get install python3.11
sudo apt install python3-pip1️⃣ Airflow 설치 및 설정
경로 및 환경변수 설정
export AIRFLOW_HOME=~/airflow
export AIRFLOW_VERSION=2.7.3
export PYTHON_VERSION=3.11CONSTRAINT_URL="https://raw.githubusercontent.com/apache/airflow/constraints-${AIRFLOW_VERSION}/constraints-${PYTHON_VERSION}.txt"
pip install "apache-airflow==${AIRFLOW_VERSION}" --constraint "${CONSTRAINT_URL}"
DB 초기화
airflow db init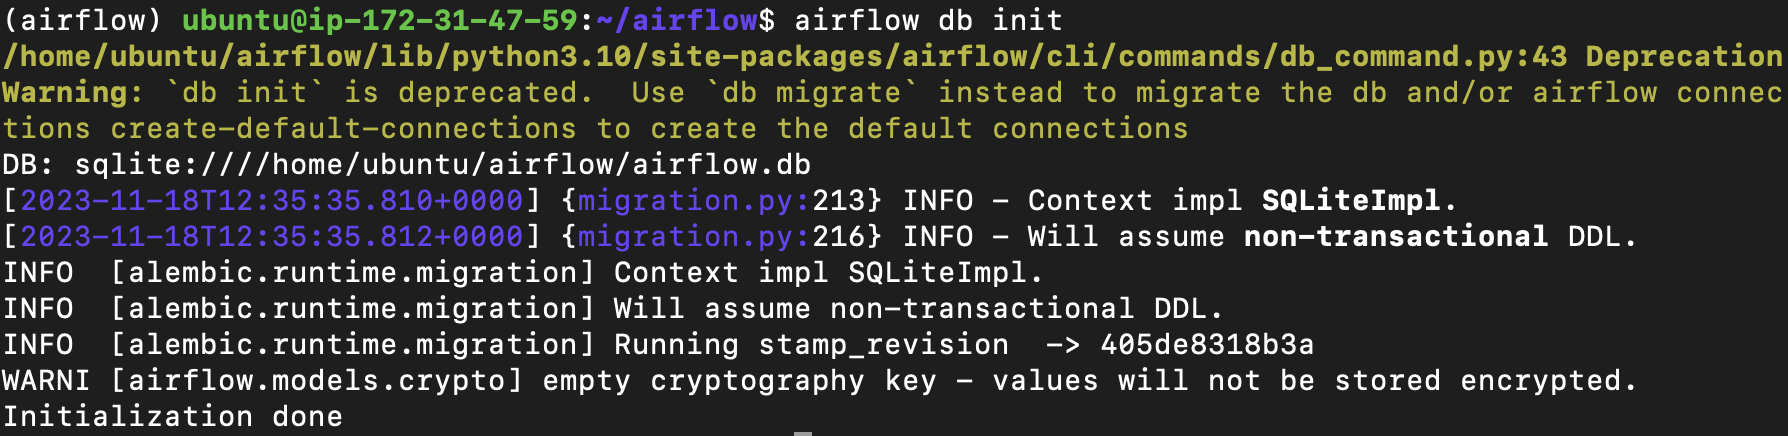
+수정!!! 지금은 이렇게 하면 안 되고
airflow db migrate 이렇게 해주자.
airflow db migrate is giving TypeError: SqlAlchemySessionInterface.init() missing 6 required positional
이런 오류가 나면
pip3 install Flask-Session==0.5.0 를 하고 다시 airflow db migrate 명령어를 실행하면 잘 작동한다!!
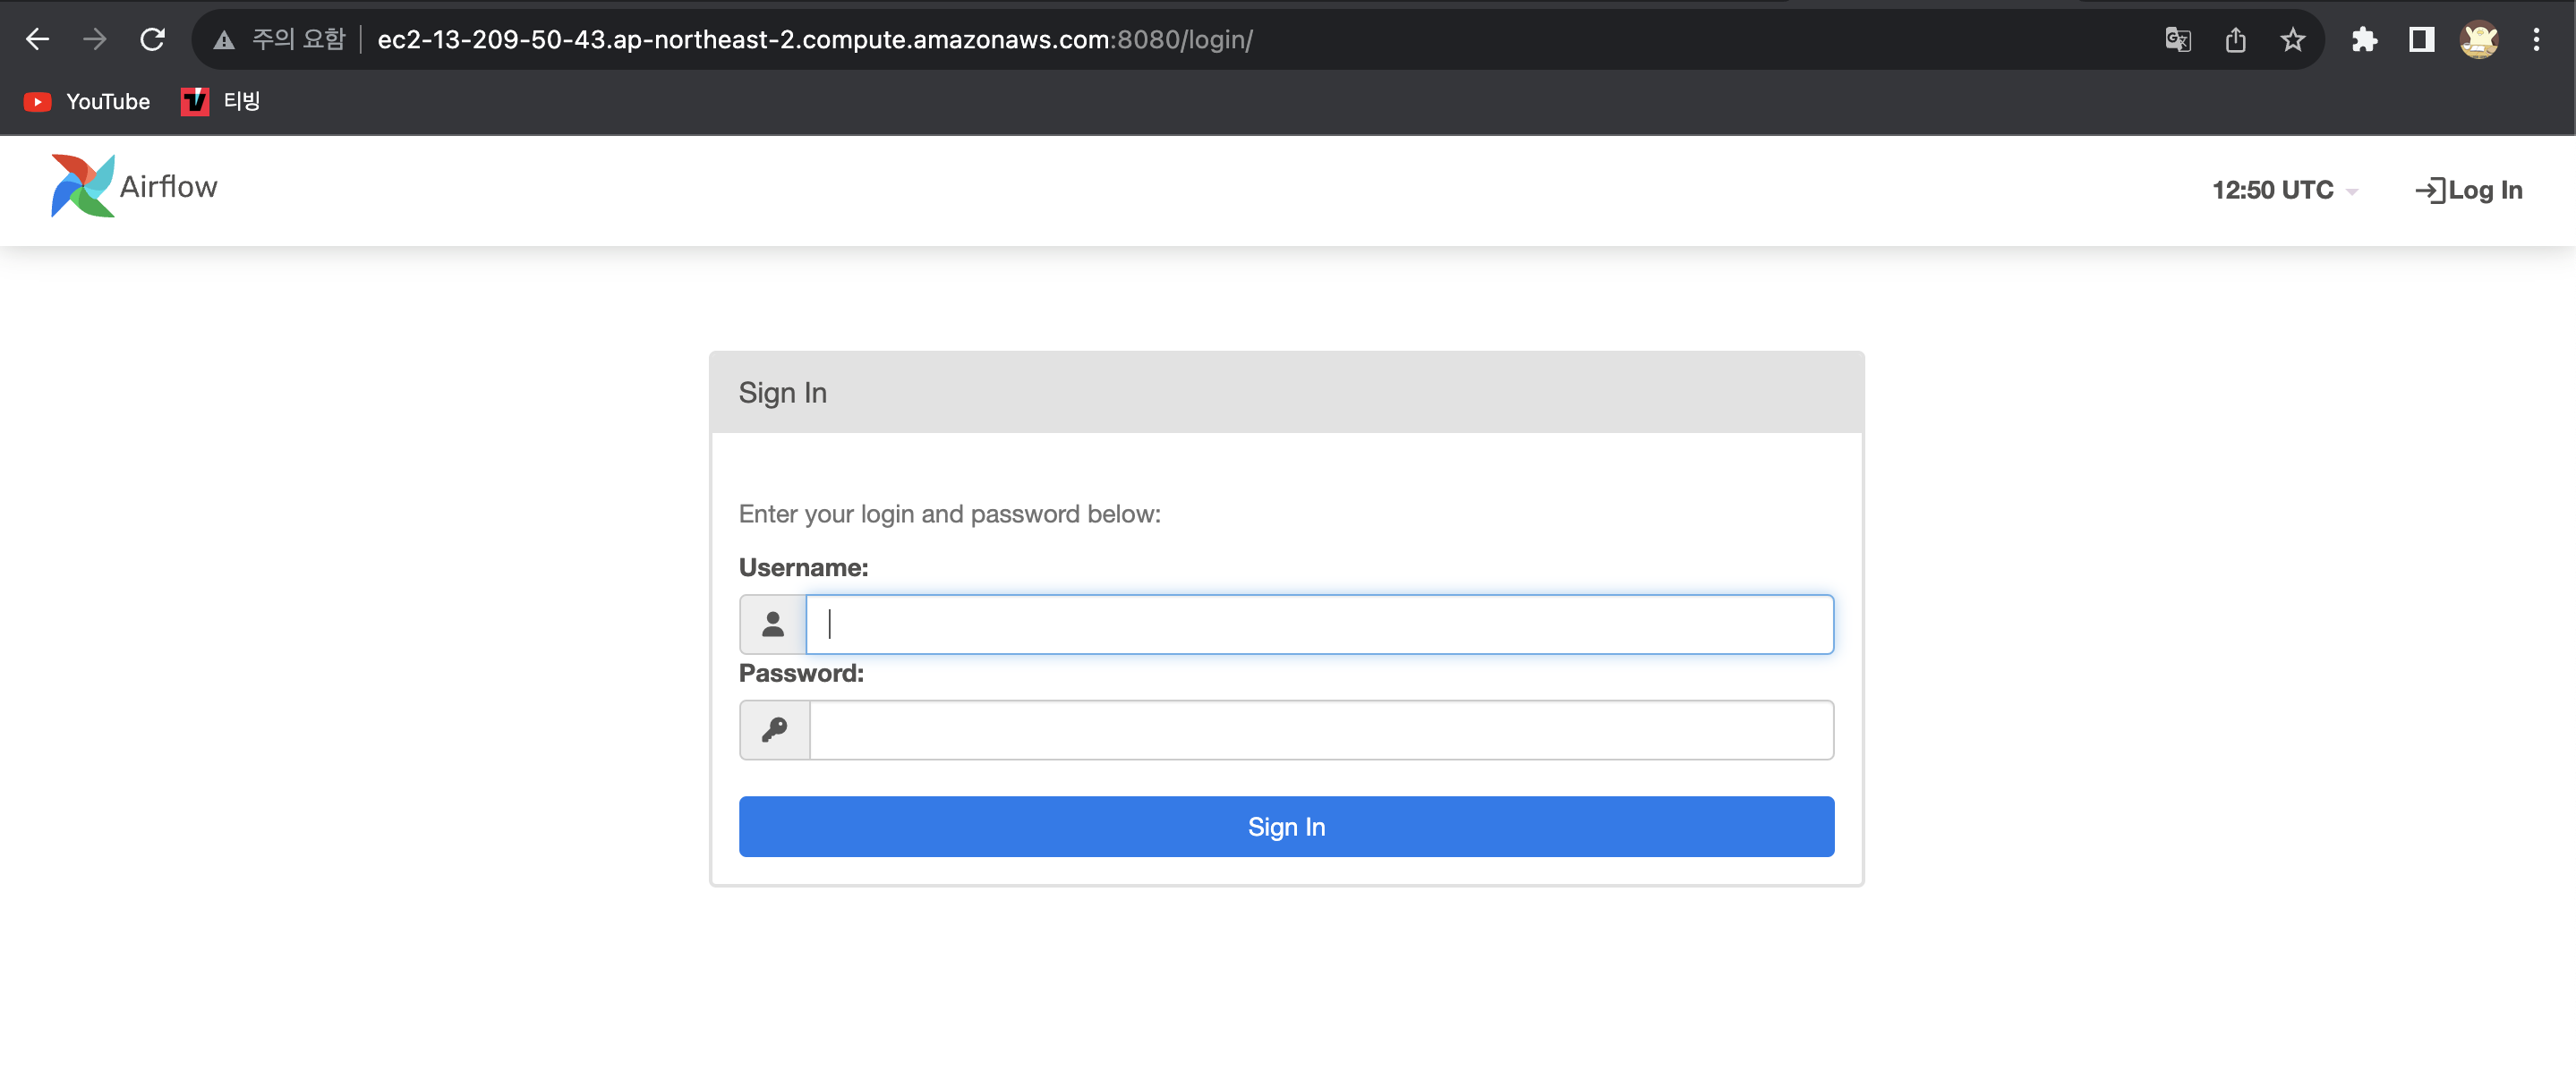
계정 생성
airflow users create \
    --username admin \
    --firstname myeongeun \
    --lastname noh \
    --role Admin \
--email nme0529@khu.ac.kr- 비밀번호도 추가로 설정해준다
실행
airflow webserver --port 8080airflow 웹서버를 실행시킨다.
- EC2에서는 보안그룹에 22, 8080 포트를 열어둬야 한다.
- { EC2 인스턴스의 퍼블릭 IPv4 DNS }:8080 으로 접속
- 방금 생성한 계정으로 로그인한다 (username : admin)
2️⃣ 예제 실행해보기
-
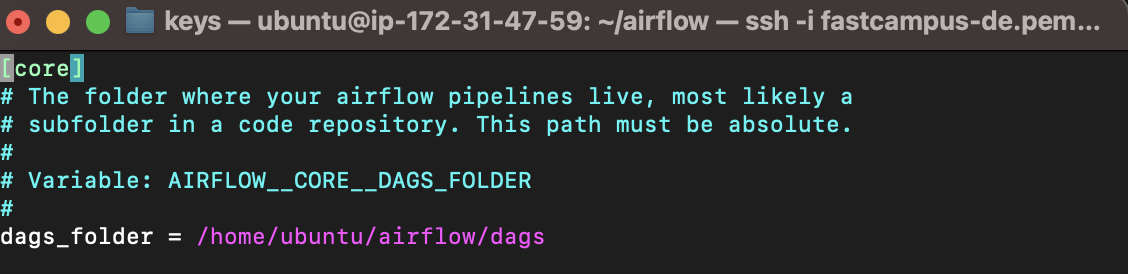
airflow.cfg 파일의 dags_folder에서 DAG를 관리하는 디렉토리를 설정할 수 있다.
-
Airflow 공식 문서 에 나와있는 예제 코드 " airflow/example_dags/tutorial.py "를 실행해보자.
(1) 모듈 임포트
from datetime import datetime, timedelta
from textwrap import dedent

# The DAG object; we'll need this to instantiate a DAG
from airflow import DAG

# Operators; we need this to operate!
from airflow.operators.bash import BashOperator
(2) Default Argument 설정
: DAG를 구성할 때 필요한 default arguments를 지정해준다.
# These args will get passed on to each operator
# You can override them on a per-task basis during operator initialization
default_args={
    "depends_on_past": False, # True면 이전 인스턴스에 sequentially하게 실행
    "email": ["airflow@example.com"],
    "email_on_failure": False,
    "email_on_retry": False,
    "retries": 1,
    "retry_delay": timedelta(minutes=5),
    # 'queue': 'bash_queue', >> job을 실행할 큐 지정
    # 'pool': 'backfill', >> 태스크가 실행될 slot pool
    # 'priority_weight': 10, >> 우선순위
    # 'end_date': datetime(2016, 1, 1), >> 이후로는 실행x
    # 'wait_for_downstream': False, >> 이전 태스크 기다림
    # 'sla': timedelta(hours=2), >> job 성공 기대 시간
    # 'execution_timeout': timedelta(seconds=300), >> 최대 실행 허용 시간
    # 'on_failure_callback': some_function, # or list of functions
    # 'on_success_callback': some_other_function, # or list of functions
    # 'on_retry_callback': another_function, # or list of functions
    # 'sla_miss_callback': yet_another_function, # or list of functions
    # 'trigger_rule': 'all_success'
},
자세한 설명은 Airflow 공식 문서 : Base Operator Arguments 를 찾아보자
- depends_on_past (bool)
: True면 이전 인스턴스가 성공적으로 종료 or 스킵됐을 때 sequentially 하게 실행 - retries (int | None)
: FAIL 처리하기 전에 시도해볼 횟수 - retry_delay (datetime.timedelta | float)
: 리트라이 사이 대기 시간
(3) DAG 초기화
: DAG 객체를 생성해주고 다음과 같은 내용들을 명시해준다.
- DAG를 구분하는 string dag_id
- Default arguments
- 스케줄 간격 (schedule interval)
with DAG(
    "tutorial",
    # These args will get passed on to each operator
    # You can override them on a per-task basis during operator initialization
    default_args={
        "depends_on_past": False,
        "email": ["airflow@example.com"],
        "email_on_failure": False,
        "email_on_retry": False,
        "retries": 1,
        "retry_delay": timedelta(minutes=5),
        # 'queue': 'bash_queue',
        # 'pool': 'backfill',
        # 'priority_weight': 10,
        # 'end_date': datetime(2016, 1, 1),
        # 'wait_for_downstream': False,
        # 'sla': timedelta(hours=2),
        # 'execution_timeout': timedelta(seconds=300),
        # 'on_failure_callback': some_function, # or list of functions
        # 'on_success_callback': some_other_function, # or list of functions
        # 'on_retry_callback': another_function, # or list of functions
        # 'sla_miss_callback': yet_another_function, # or list of functions
        # 'trigger_rule': 'all_success'
    },
    description="A simple tutorial DAG",
    schedule=timedelta(days=1),
    start_date=datetime(2021, 1, 1),
    catchup=False,
    tags=["example"],
) as dag:
(4) Operator와 Task 설정하기
- Operator : 수행할 일을 처리하는 템플릿처럼 사용가능한 클래스
- Task : Operator를 구현해서 수행할 일을 정의한 것
t1 = BashOperator(
    task_id="print_date",
    bash_command="date",
)

t2 = BashOperator(
    task_id="sleep",
    depends_on_past=False,
    bash_command="sleep 5",
    retries=3,
)
(5) Templating with Jinja
templated_command = dedent(
    """
{% for i in range(5) %}
    echo "{{ ds }}"
    echo "{{ macros.ds_add(ds, 7)}}"
{% endfor %}
"""
)

t3 = BashOperator(
    task_id="templated",
    depends_on_past=False,
    bash_command=templated_command,
)
(6) Adding DAG and Tasks documentation
t1.doc_md = dedent(
"""\
#### Task Documentation
You can document your task using the attributes `doc_md` (markdown),
`doc` (plain text), `doc_rst`, `doc_json`, `doc_yaml` which gets
rendered in the UI's Task Instance Details page.

**Image Credit:** Randall Munroe, [XKCD](https://xkcd.com/license.html)
"""
)
dag.doc_md = __doc__ # providing that you have a docstring at the beginning of the DAG; OR
dag.doc_md = """
This is a documentation placed anywhere
""" # otherwise, type it like this
가볍게 재밌던 거 기록해요