실습 내용
1. 아이디(이메일) & 비밀번호 입력후 '회원가입' 버튼 클릭 시, 서버에 HTTP Request 전달 => 성공 message console창 수신
    fetch('http://10.58.2.215:8000/user/login', {
        method: 'POST',
        body: JSON.stringify({
          email: this.state.id,
          password: this.state.pw,
          account: '',
        }),
      })
        .then((res) => res.json())
        .then((data) => {
          console.log(data);
         this.props.history.push('/mainPark');
}); 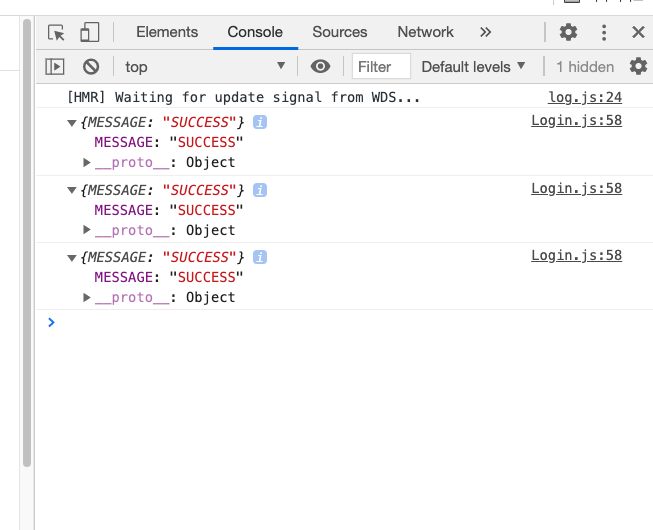
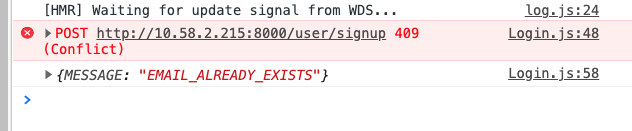
- 만일 같은 id & pw로 회원가입 시도하면 아래와 같은 response 수신
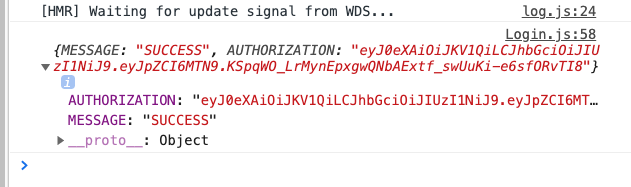
2. 이제 가입된 id & pw로 로그인을 시도해보자
- Fetch 함수의 endpoint 주로 말단을 'login'으로 변경
- 로그인 성공 response 수신 + 다른 페이지에서도 회원임을 인식하기 위해서 암호화 access token 발행
- 전달 받은 access token은 localStorage에 저장
fetch('http://10.58.2.215:8000/user/login', {
        method: 'POST',
        body: JSON.stringify({
          email: this.state.id,
          password: this.state.pw,
          account: '',
        }),
      })
        .then((res) => res.json())
        .then((data) => {
          console.log(data);
          if (data.AUTHORIZATION) {
             localStorage.setItem('test-token', data.AUTHORIZATION);
          }
         this.props.history.push('/mainPark');
        });
3. 다음 번 로그인, 혹은 다른 페이지에서 회원임을 인식하도록 하기 위해 발행 받은 access token을 request 송신
- access token으로 reqeus 송신에 성공하면 콘솔창에 '12'을 받도록 테스트 해보았음 => 성공
    let token = localStorage.getItem('test-token') || '';

     fetch('http://10.58.2.215:8000/posting', {
       method: 'POST',
       headers: {
         AUTHORIZATION: token,
       },
     })
       .then((res) => res.json())
       .then((data) => {
         console.log(data);
     });


21c Carpenter