Storybook은 사용자 접근성 테스틀 통과하는 라이브러리도 제공하고 있다. 이 Accessbility를 직접 사용해보자.
1. Accessibility 라이브러리 설치
1-1. 명령어로 설치하기
우선 다음 명령어로 라이브러리를 설치한다.
npx install @storybook/addon-a11y1-2. main.ts 파일 수정하기
.storybook/main.ts 에 위 라이브러리를 추가해준다.
  addons: [
    '@storybook/addon-onboarding',
    '@storybook/addon-links',
    '@storybook/addon-essentials',
    '@chromatic-com/storybook',
    '@storybook/addon-interactions',
    '@storybook/addon-themes',
    '@storybook/addon-a11y', // 여기 추가
  ],
1-3. accessibility 확인
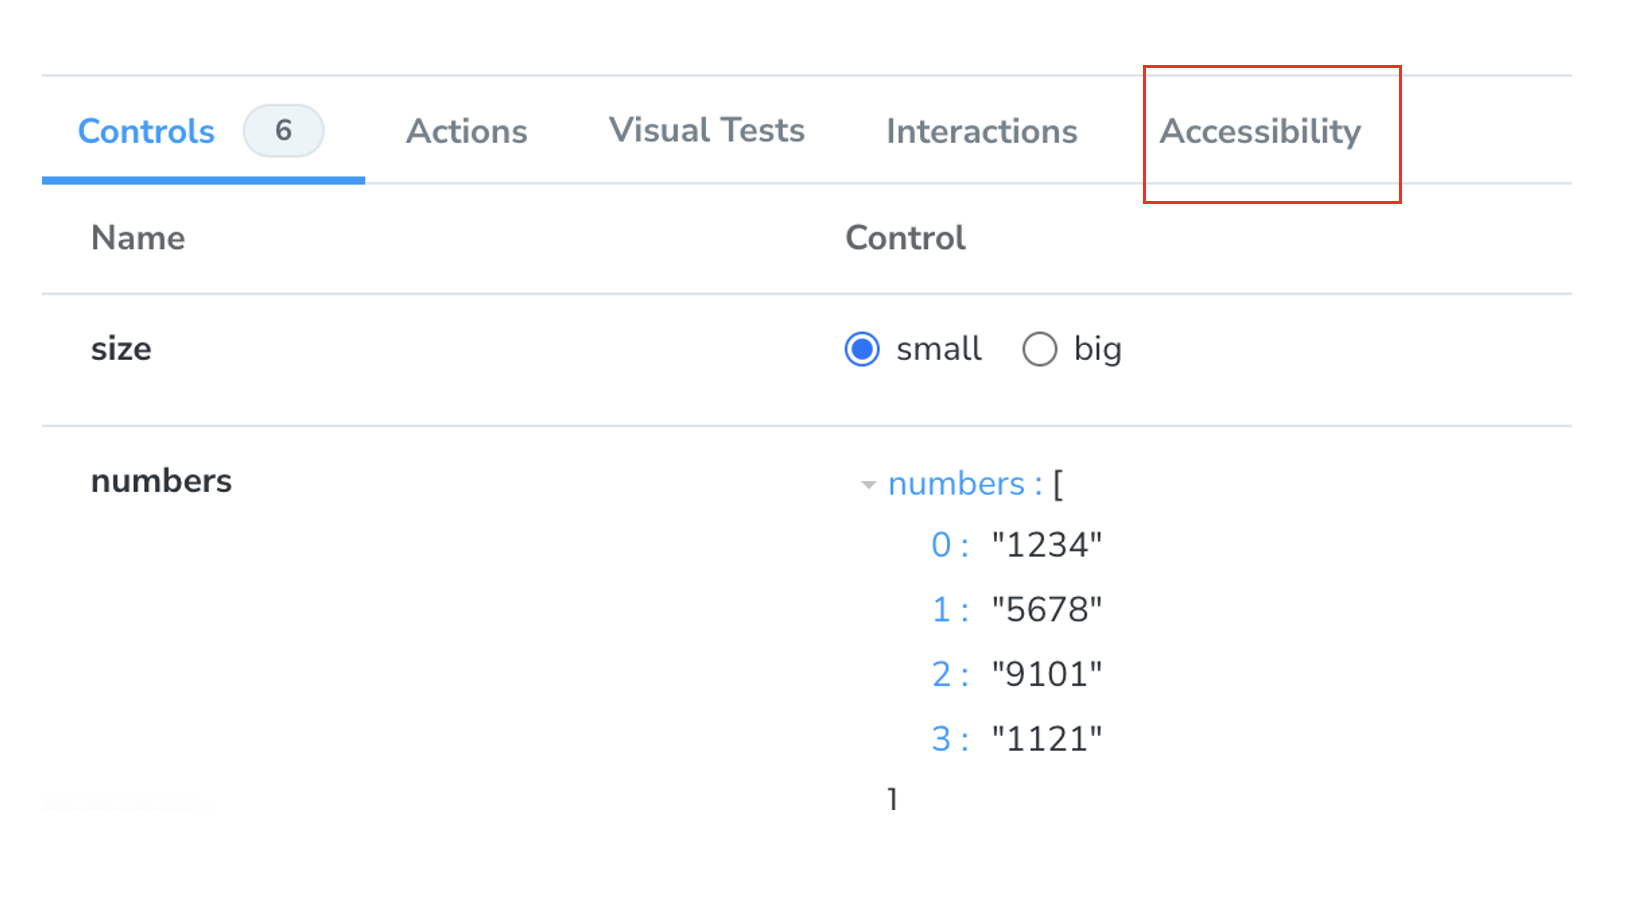
제대로 설치가 되었다면 Accessibility라는 영역이 새로 생긴것을 확인할 수 있다.
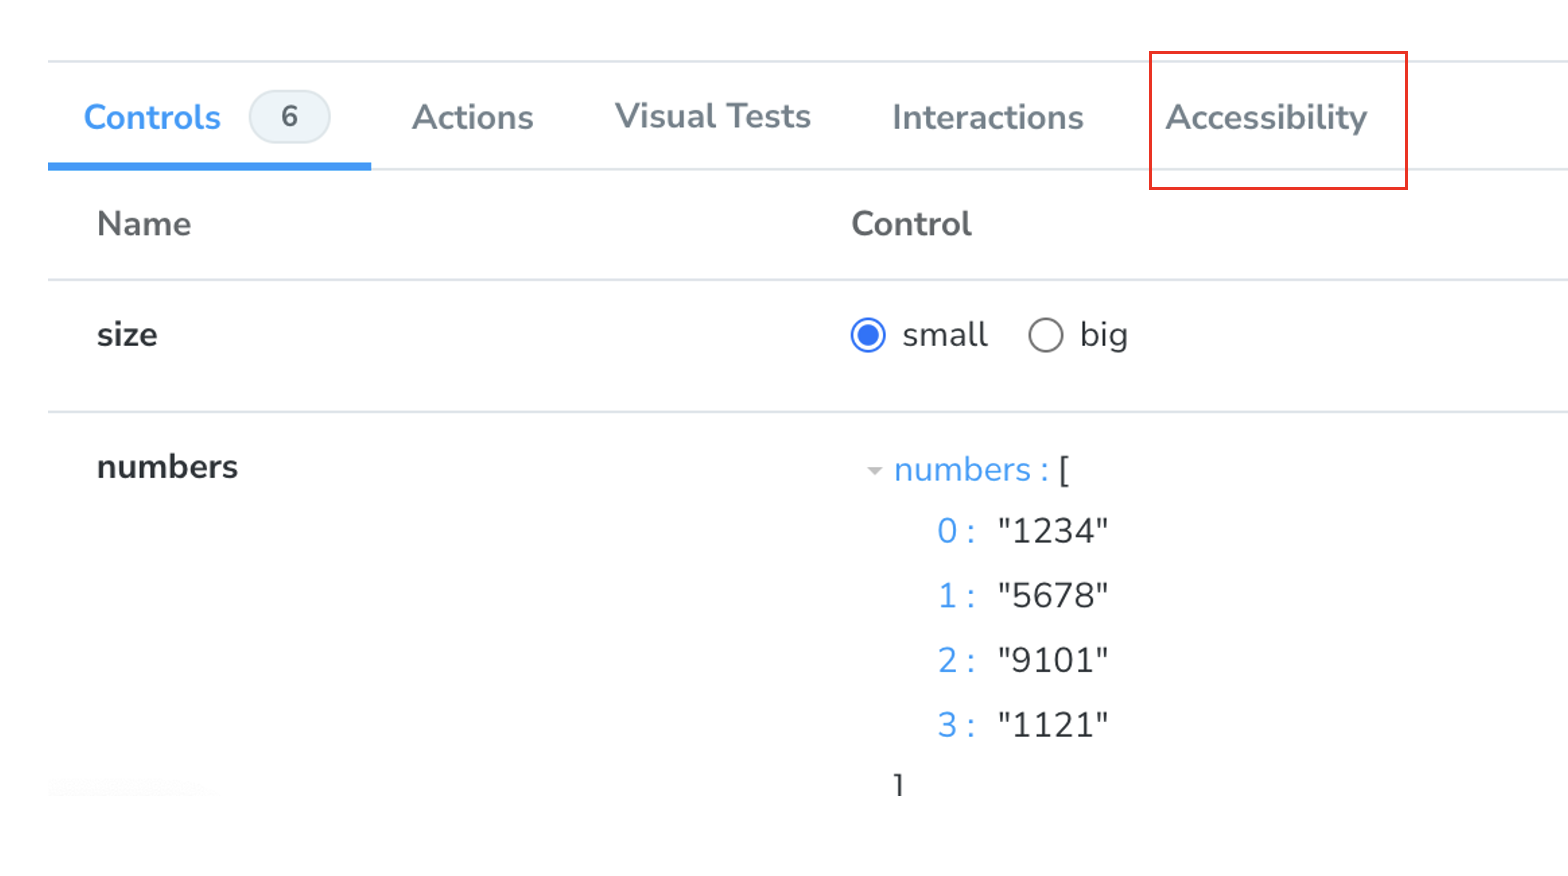
이걸 눌러 확인해보면... 어떤 게 사용자 접근성을 패스하는지, 아닌지 나온다.
2. 배포 설정하기
이 테스트들이 통과하지 못하면 배포가 되지 않도록 하는 것이 안정성 측면에서 좋을 것이다.
2-1. 명령어 설치하기
npm i -D axe-playwright @storybook/test-runner2-2. configuration 설정하기
.storybook 폴더 아래에 test-runner.ts 파일을 만들고 아래 configuration을 붙여넣는다.
import type { TestRunnerConfig } from '@storybook/test-runner';
import { injectAxe, checkA11y } from 'axe-playwright';

const config: TestRunnerConfig = {
  async preVisit(page) {
    await injectAxe(page);
  },
  async postVisit(page) {
    await checkA11y(page, '#storybook-root', {
      detailedReport: true,
      detailedReportOptions: {
        html: true,
      },
    });
  },
};

export default config;
2-3. pakage.json에 명령어 추가하기
test-storybook 명령어를 package.json 파일에 추가해준다.
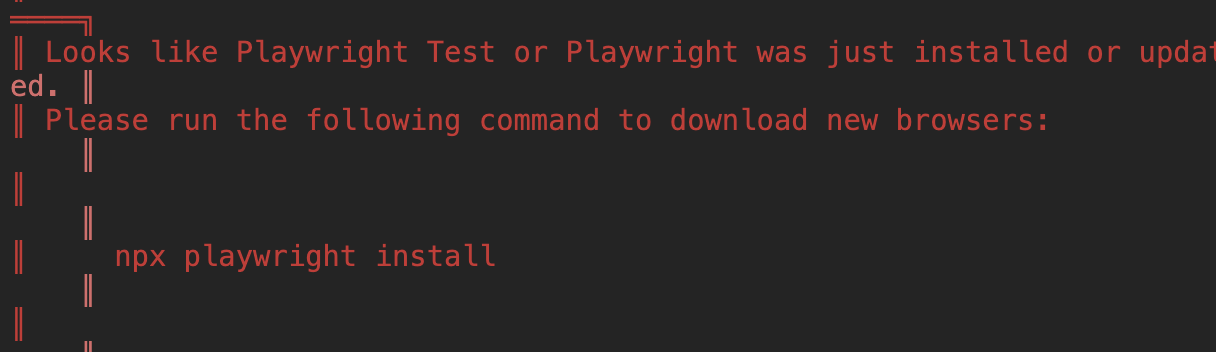
"test-storybook": "test-storybook",🚨 axe-playwright 에러
바로 test-storybook 명령어를 실행시켰는데 아래와 같은 에러가 발생했다. 그래서 맨 아래에 있는npx playwright install을 추가로 또 입력해주니 정상적으로 동작했다.
2-4. 테스트 통과 결과 확인하기
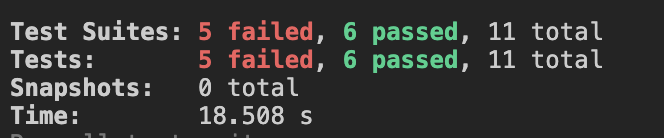
npm run test-storybook 명령어를 실행시켰더니 test 통과 결과가 나온다.
2-5. 이 test를 사용해서 github workflow 작성하기
test-runner는 배포된 스토리북을 대상으로 테스트를 한다. 그래서 storybook Docs를 보면 배포된 스토리북 링크를 넣는 것을 확인할 수 있다.
# .github/workflows/storybook-tests.yml

name: Storybook Tests
on: deployment_status
jobs:
  test:
    timeout-minutes: 60
    runs-on: ubuntu-latest
    if: github.event.deployment_status.state == 'success'
    steps:
      - uses: actions/checkout@v4
      - uses: actions/setup-node@v4
        with:
          node-version-file: '.nvmrc'
      - name: Install dependencies
        run: yarn
      - name: Install Playwright
        run: npx playwright install --with-deps
      - name: Run Storybook tests
        run: yarn test-storybook
        env:
          TARGET_URL: '${{ github.event.deployment_status.target_url }}'
그리고 또 다른 방법으론 스토리북을 임의로 배포한다음 그 임의의 스토리북을 참조하는 방법이 있다.
# .github/workflows/storybook-tests.yml

name: 'Storybook Tests'
on: push
jobs:
  test:
    timeout-minutes: 60
    runs-on: ubuntu-latest
    steps:
      - uses: actions/checkout@v4
      - uses: actions/setup-node@v4
        with:
          node-version-file: '.nvmrc'
      - name: Install dependencies
        run: yarn
      - name: Install Playwright
        run: npx playwright install --with-deps
      - name: Build Storybook
        run: yarn build-storybook --quiet
      - name: Serve Storybook and run tests
        run: |
          npx concurrently -k -s first -n "SB,TEST" -c "magenta,blue" \
            "npx http-server storybook-static --port 6006 --silent" \
            "npx wait-on tcp:127.0.0.1:6006 && yarn test-storybook"
여기서 주의해야 할 점! node-version-file 속성을 보면 .nvmrc 라고 적혀진 것을 확인할 수 있다.
로컬에서 통과된 테스트를 배포된 환경에서 통과되도록 해야하므로 node의 버전을 작성해줘야 한다. 최상위 폴더에 .nvmrc 파일을 만들고, 현재 사용하는 node 버전을 작성해주자.
// .nvmrc
20.15.1
이렇게 한 뒤 레포지토리에 push를 하면 test action만 불통과하는 것을 확인할 수 있다.
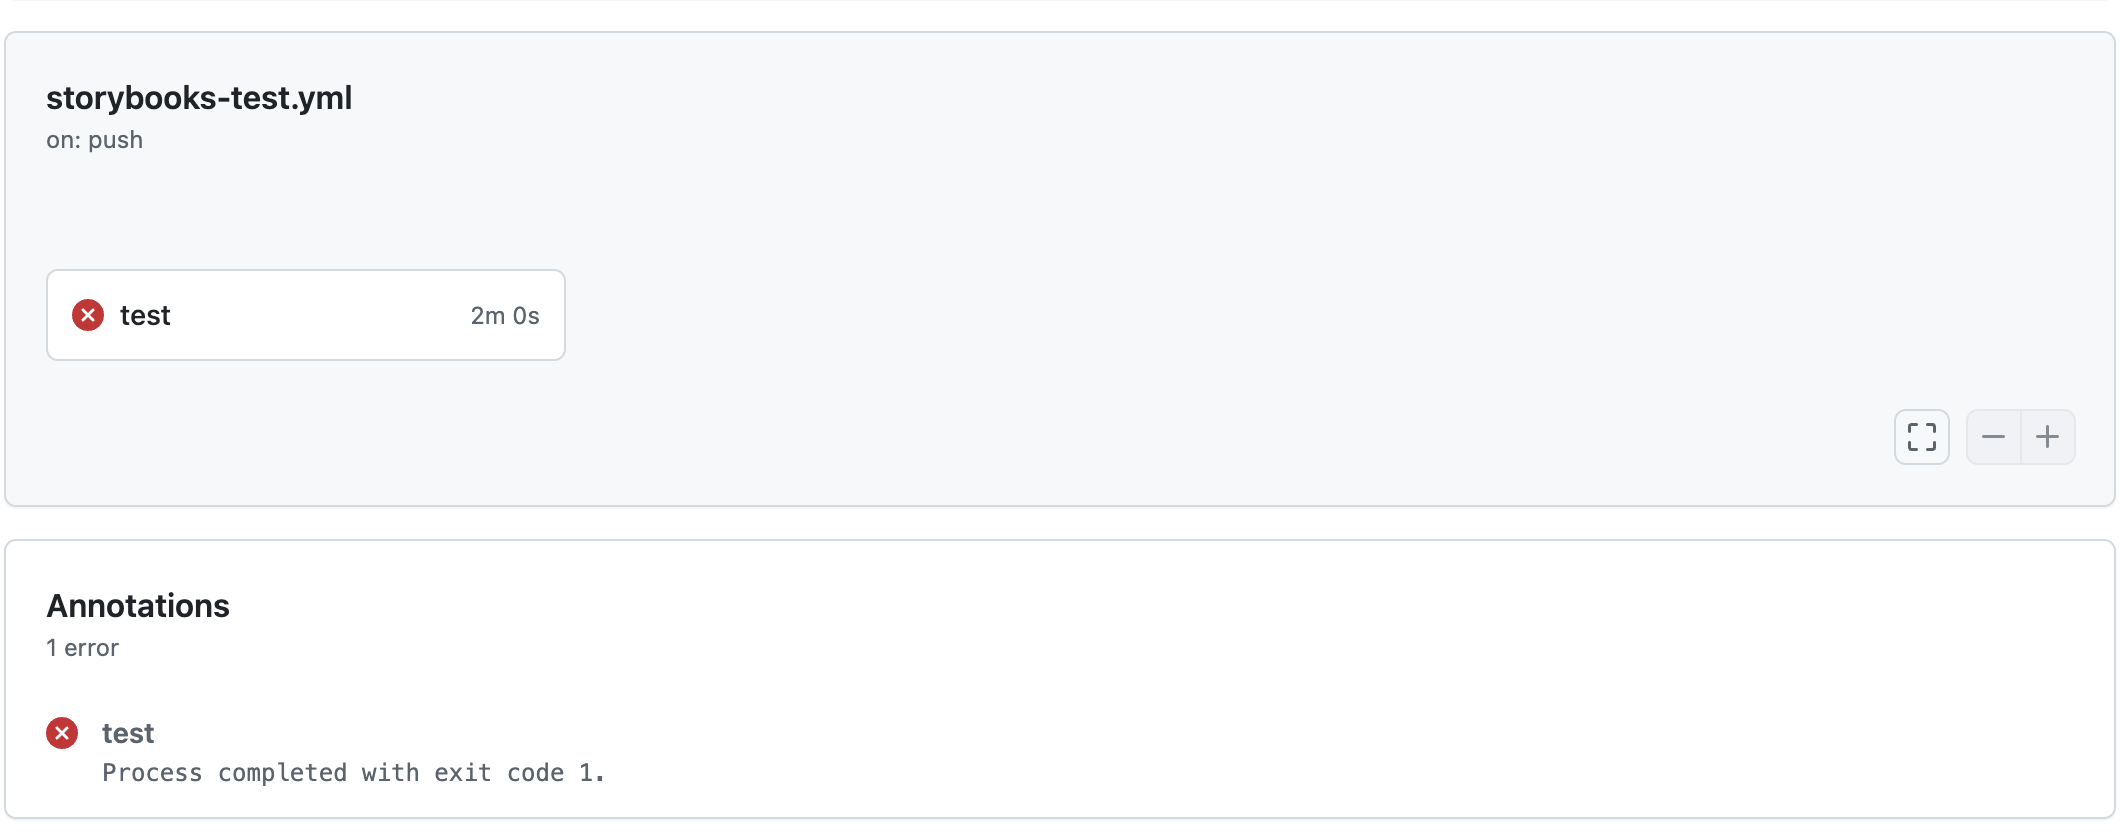
3. 오류 수정하기
3-1. 시멘틱 태그 수정
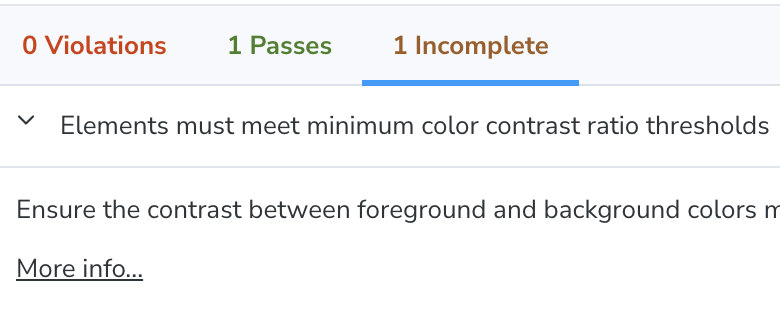
Ensure the contrast between foreground and background colors meets WCAG 2 AA minimum contrast ratio thresholds
전경색과 배경색 간의 대비가 WCAG 2 AA 최소 대비 비율 임계값을 충족하는지 확인합니다.
분명 contrast는... 충족을 하는데 뭐가 문제인건가 싶었더니, 요소 내부에 문자가 아닌 아이콘, 기호 등이 들어갈 경우 리더기들이 파악하지 못한다는 것이 문제였다.
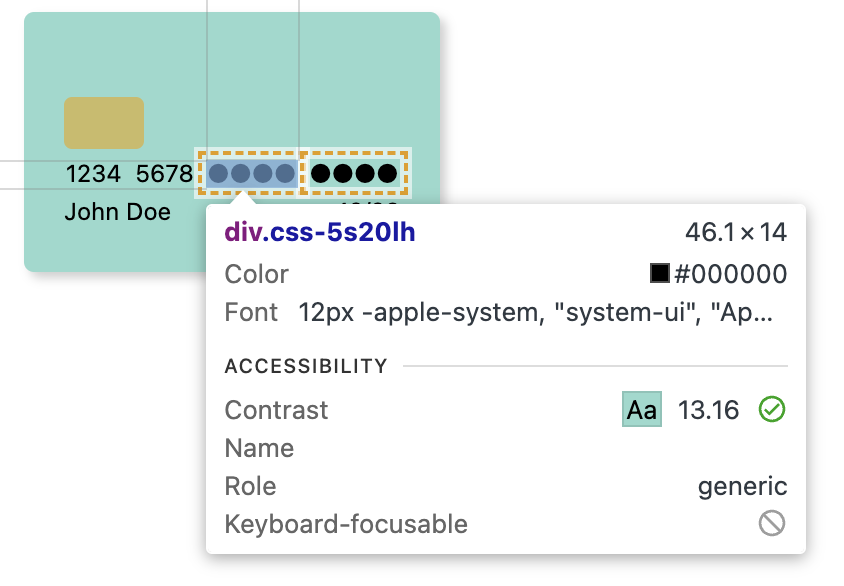
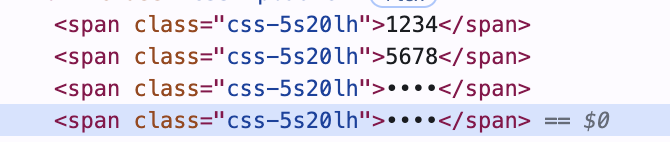
그래서 div 대신 Input 태그의 password를 사용하기로 했다.
{numbers?.map((number, index) =>
  index < 2 ? (
    <S.CardNumberItem key={index}>{number}</S.CardNumberItem>
  ) : (
    <S.PasswordInput
      styleType={'ghost'}
      value={number}
      type='password'
      readOnly
      />
	),
)}
이렇게 바꾸었더니 기존의 에러는 사라지고.. 또 다른 에러가 생겼다. 😫
Element has insufficient color contrast of 1.45 (foreground color: #04c09e, background color: #94dacd, font size: 12.0pt (16px), font weight: normal). Expected contrast ratio of 4.5:1
이렇게 하니 다시 또 contrast 를 충족하지 못한다는 에러가 발생했다. 더불어 label 등 input과 필수적으로 쓰일 태그가 없어서 오류가 나기도 했다.
그래서 Input 태그를 다시 한 번 버리고...! 혹시나 하는 마음으로 <span> 태그를 썼더니 오류가 해결되었다.

그 이유를 gpt에게 물어보니 시멘틱 태그 사용과 관련이 있었다. <div> 태그는 레이아웃을 나눌 때 사용하므로 기본적으로 비의미적 요소 이기 때문에 리더기가 이 의미를 해석하지 못할 수 있기 때문에 난 에러였다.
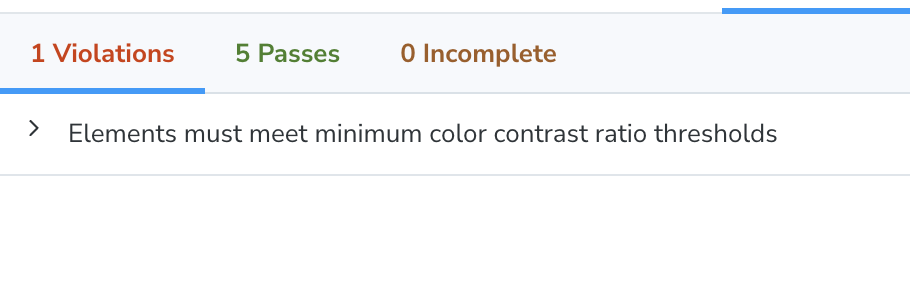
3-2. contrast 수정
디자인에서 제공하는 색상이 contrast를 만족하지 않는 문제가 있다. 이를 최소 대비율일 4.5를 충족할 정도로만 수정해주면 통과하게 된다.

3-3. Form 에 Label 설정해주기
Input을 사요할 때 Label 태그를 제대로 사용하지 않아도 에러가 난다!
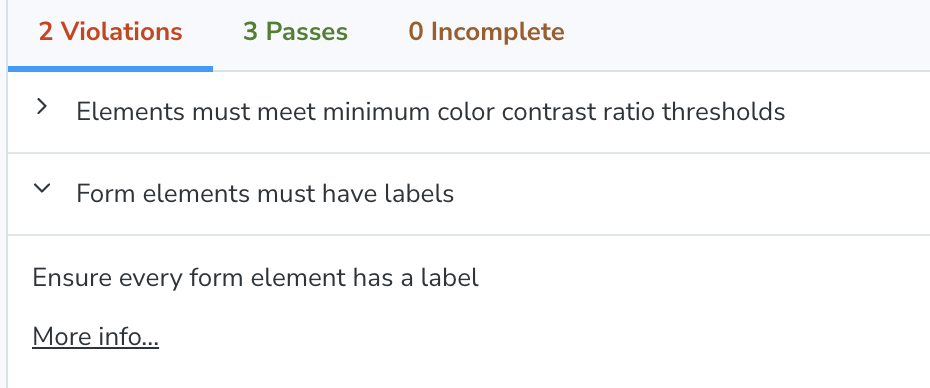
label에 htmlFor 속성을 제대로 입력해주니 에러가 사라지는 걸 확인할 수 있었다.
<Field.Root {...args}>
  <Field.Label htmlFor='storybook-input'>Label</Field.Label>
  <Field.Input id='storybook-input' placeholder='' />
    <Field.ErrorText>Error</Field.ErrorText>
</Field.Root>
나머지 에러는 #eeeeee 백그라운드에 한번 바꾼 녹색 색상이 또 다시 대비율이 낮아 발생한 에러여서... 조금 칙칙하긴 하지만 내부 글자 색상을 검은색으로 바꿔줌으로써 해결했다.
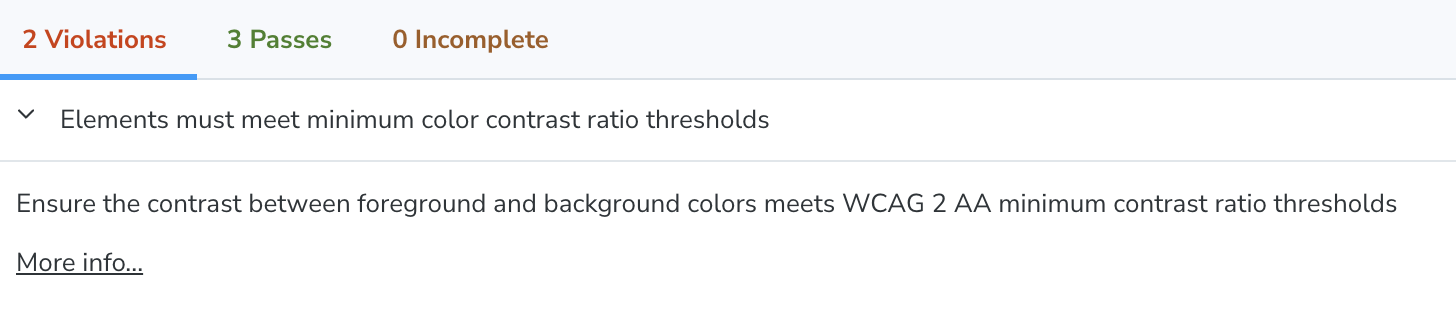
3-4. 테스트 통과 확인하기

로컬에선 테스트가 잘 통과하는 것을 확인할 수 있다.

그리고 마찬가지로 github 레포지토리에서도 테스트가 잘 통과한다!
Chromatic으로 스토리북 정적 배포를 하고, PR을 올릴 때 마다 새로 정적배포를 하는 데 이어 사용자 접근성 테스트를 추가했다. 그리고 그 접근성 테스트가 성공하지 않으면 배포하지 못하도록 Action을 추가했다.
그런데...스토리북 테스트를 통과하지 않아도 Vercel의 페이지는 새로 배포되는 것처럼 보여서 모든 테스트가 통과해야만 배포가 되도록 하려면 어떻게 해야할지 알아보고 다음번엔 해당 내용을 포스트해야겠다!