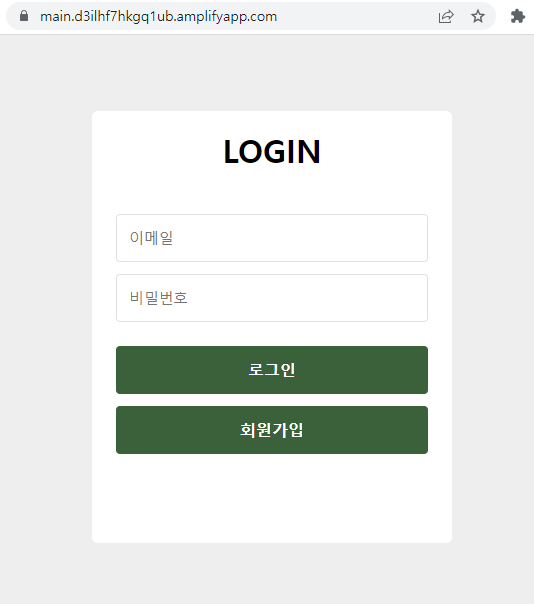
AWS에 next 프로젝트를 배포하는 방법은 여러가지 입니다.
S3에 배포하거나 EC2에 배포할 수도 있습니다.
S3에 배포하는 경우에는 정적파일로 뽑아서 빌드 된 파일을 배포하기 때문에 SSR적용이 안됩니다.
대신 Amplify로 배포하게 되면 업로드 후, 빌드, 배포 과정을 거치기 때문에 SSR적용이 가능합니다.
Amplify로 front만 배포하거나 back서버만 구축할 수도 있지만,
저는 프론트와 백서버 배포를 함께하는 과정을 포스팅하겠습니다.
그리고 이 전 포스팅에서 만든 Cognito 사용자 풀을 임포트해서 그대로 사용할 것 입니다.
Amplify cli 설치
Amplify cli설치를 위해서는 12.x버전 이상의 node와 6.x버전 이상의 npm이 설치되어 있어야 합니다.
> npm install -g @aws-amplify/cliIAM 사용자 생성
Amplify 배포하기 위해서는 IAM 사용자여야 합니다.
터미널에 amplify configure 명령어를 실행하거나 AWS에 직접 접속하여 IAM사용자를 생성할 수 있습니다. (이미 생성되어 있으면 건너뛰어도 됩니다.)
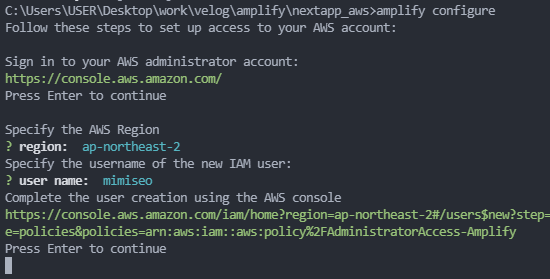
vscode 터미널에 위 이미지 순서로 선택하면 AWS의 IAM 사용자 추가 페이지가 열립니다.
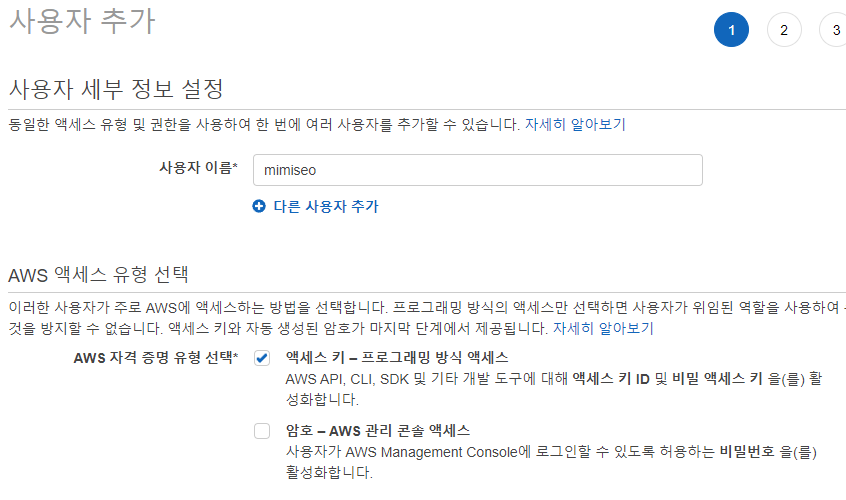
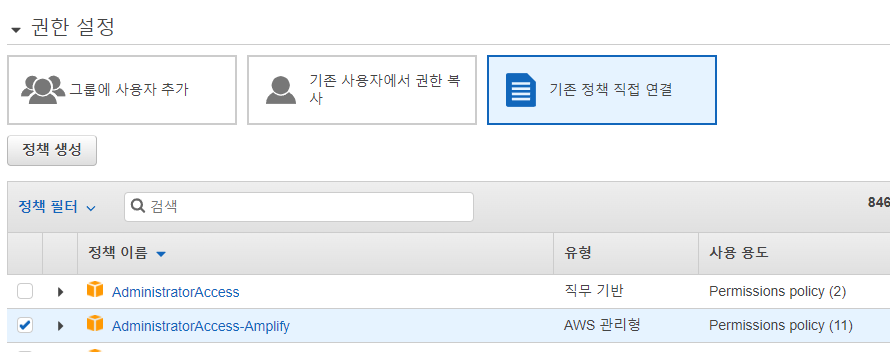


비밀 키는 생성 시에만 보거나 다운로드 할 수 있으므로, csv파일을 다운로드 후 잘 보관해두시길 바랍니다. 비밀 키를 모를 경우에는 새 엑세스 키를 생성하여야 합니다.
vscode 터미널에 생성한 액세스키와 비밀키를 입력하고 로컬에 AWS 프로필을 생성합니다.

Amplify 프로젝트 초기화
amplify init 명령어를 실행하여 프로젝트를 생성합니다.
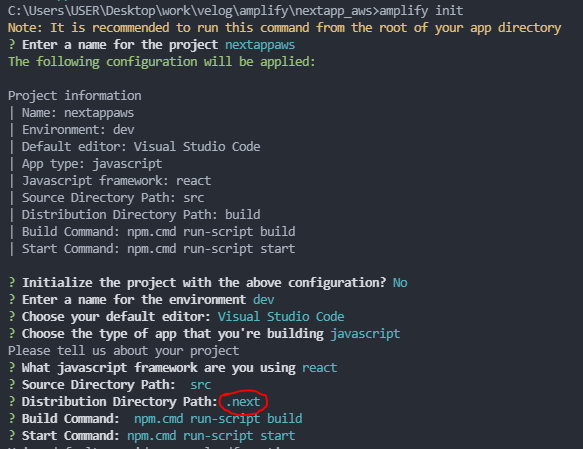
다른 속성은 기본값을 그대로 사용하나, Distribution Directory Path는 .next로 변경해야 합니다.


IAM 사용자 추가 시 만든 프로필이나 액세스 키를 사용하여 인증합니다.
(저는 액세스 키를 사용 했습니다.)
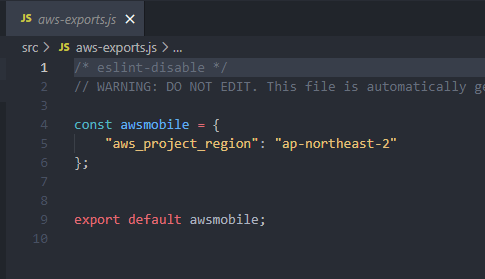
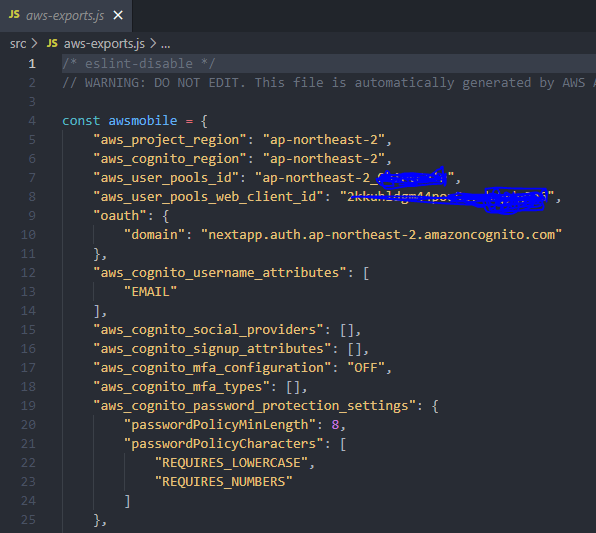
작업 폴더 내에 amplify폴더와 src폴더가 생성되고, src폴더에 aws-exports.js 파일이 생성됩니다.
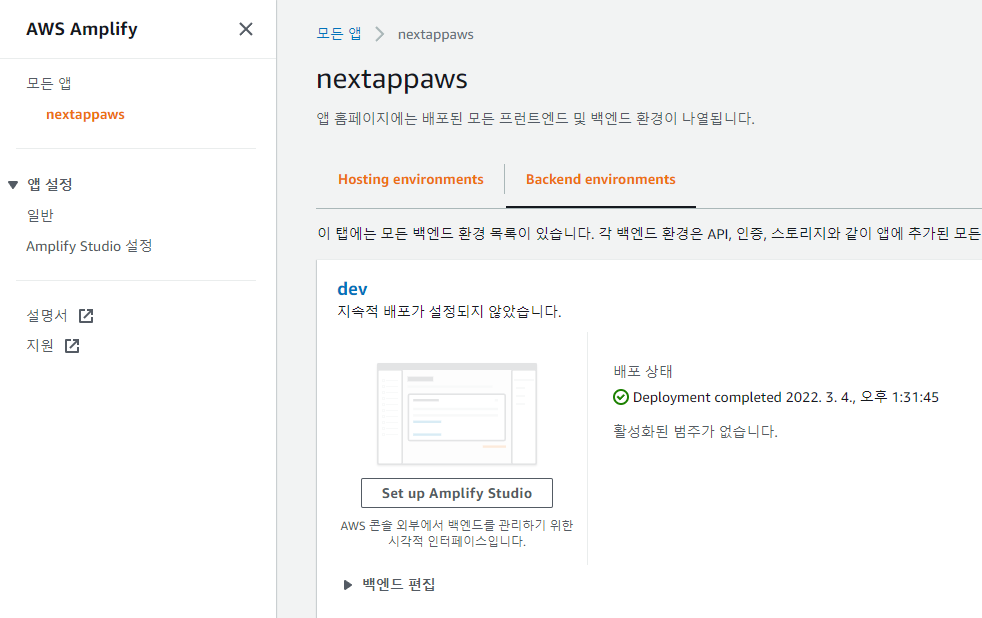
AWS Amplify에서 생성한 앱을 확인 할 수 있습니다.
사용자 인증 추가
amplify add auth 명령어를 실행하여 사용자 인증을 추가합니다.

그러면 AWS Cognito에 새로운 사용자 풀이 생성됩니다.
하지만 저는 이 전 포스팅에서 생성한 사용자 풀을 사용할 것이므로 amplify import auth 명령어를 실행하여 기존 사용자풀을 가져 오겠습니다.


Amplify 프로젝트 리소스 업데이트
로컬에서 사용자 인증을 추가했으므로 amplify push auth 명령어를 실행하여 Amplify 프로젝트에 리소스를 업데이트 합니다.
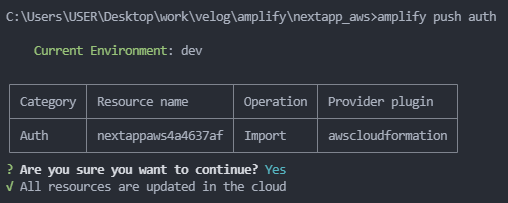
로컬과 amplfiy 앱의 속성이 동기화됩니다.
aws-amplify 패키지 설치
https://github.com/seomimi/nextapp/tree/awsamplify
> npm i aws-amplify

//pages/_app.tsx
import Amplify from 'aws-amplify';
import awsmobile from '../src/aws-exports';
Amplify.configure(awsmobile);
회원 가입하기
//components/SignupForm.tsx
import { Auth } from 'aws-amplify';
Auth.signUp({ username: email, password, attributes: { email } })
    .then((response) => {
        console.log(response);
        alert('가입완료! 이메일 인증 후 로그인 하세요.');
    })
    .catch((error) => {
        console.log(error);
        if (error.code === 'UsernameExistsException') {
            alert('이미 가입 된 이메일입니다.');
        }
    });
로그인 하기
//components/LoginForm.tsx
import { Auth } from 'aws-amplify';
Auth.signIn(email, password)
    .then((response) => {
        setUserId(response.attributes.email);
    })
    .catch((error) => {
        if (error.message == 'User is not confirmed.') {
            alert('가입한 이메일을 인증해주세요.');
        } else if (error.message == 'Incorrect username or password.') {
            alert('이메일 또는 비밀번호가 틀렸습니다.');
        }
    });
로그아웃 하기
//pages/index.tsx
import { Auth } from 'aws-amplify';
Auth.signOut()
    .then(() => setUserId(null))
    .catch((error) => console.log(error));
SSR 적용
새로고침 시 로그인 한 회원정보를 불러와서 로그인을 유지하는 기능을 서버사이드 렌더링으로 추가합니다.
//pages/_app.tsx
import Amplify from 'aws-amplify';
import awsmobile from '../src/aws-exports';
Amplify.configure({ ...awsmobile, ssr: true });
amplify 구성에 ssr: true를 추가 합니다.
//pages/index.tsx
import type { NextPage, GetServerSideProps } from 'next';
import { Auth, withSSRContext } from 'aws-amplify';
export const getServerSideProps: GetServerSideProps = async (context) => {
    const { Auth } = withSSRContext(context);
    const user = await Auth.currentUserInfo()
        .then((response: any) => {
            return response?.attributes.email || null;
        })
        .catch((error: Error) => {
            console.log(error);
            return null;
        });
    return { props: { user } };
};
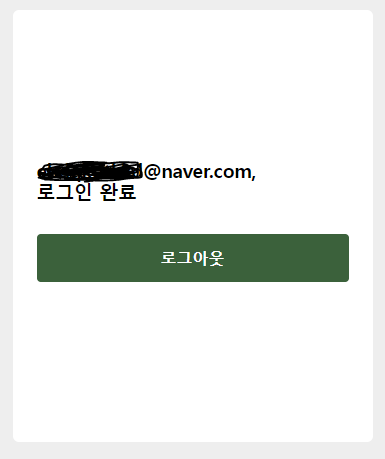
로그인 후 새로고침 시, 풀림없이 로그인이 유지되는 것을 확인 할 수 있습니다.
Amplify 호스팅 추가하기(프론트 배포)
amplify add hosting 명령어를 실행하여 백엔드에 호스팅 리소스를 추가합니다.

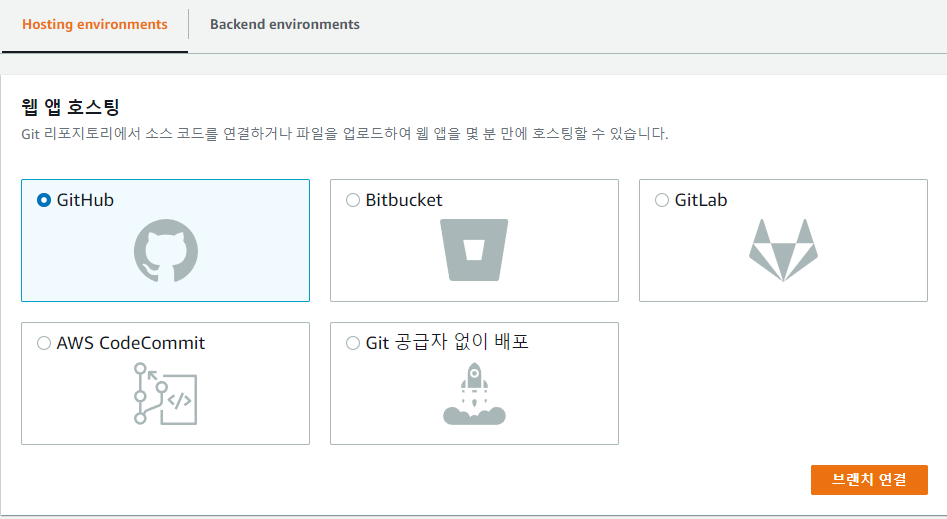
AWS amplify 호스팅 업로드 페이지가 열립니다.
깃헙에 업로드한 코드를 가져오므로, 그 전에 깃헙에 커밋해주세요
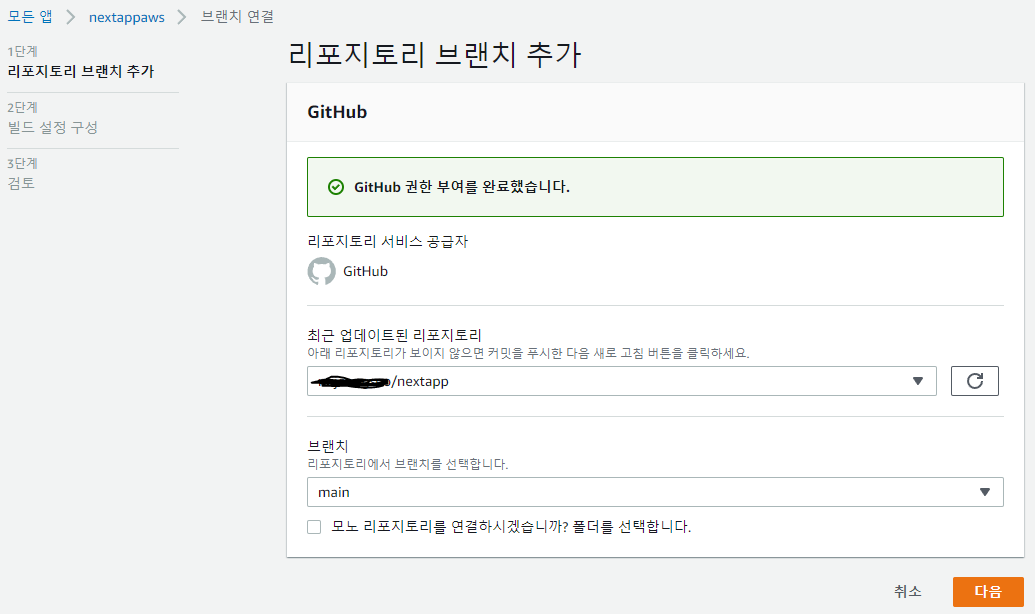
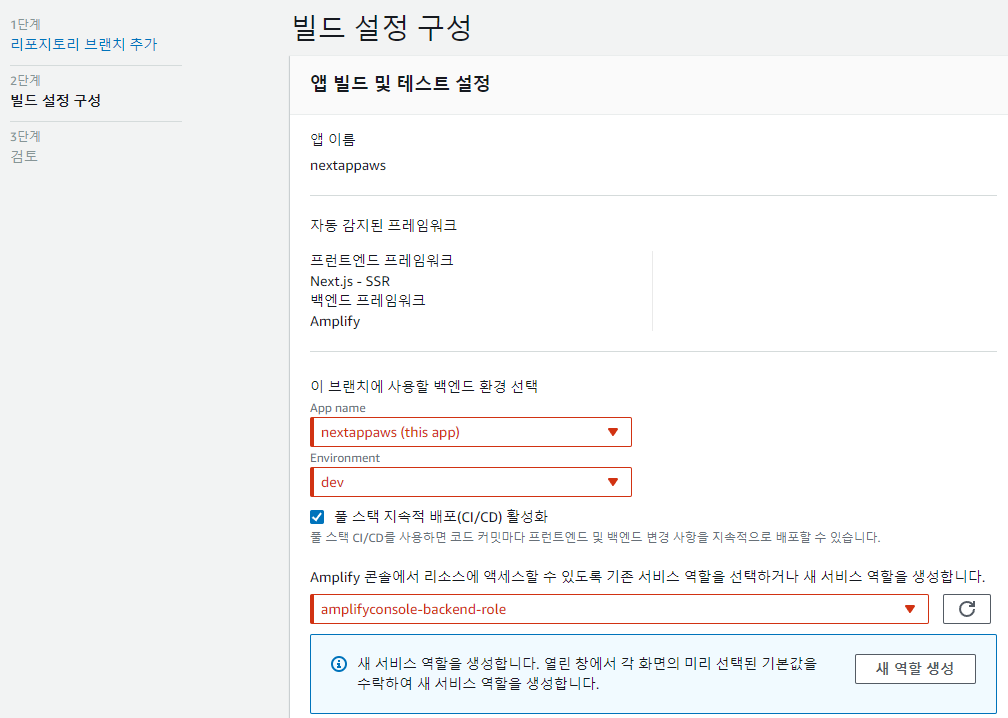
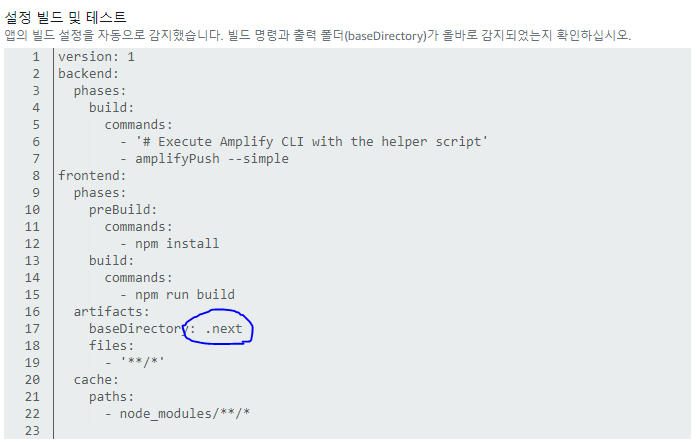
빌드 설정에 baseDirectory가 .next로 되어있어야 합니다. (추후에 수정 가능)
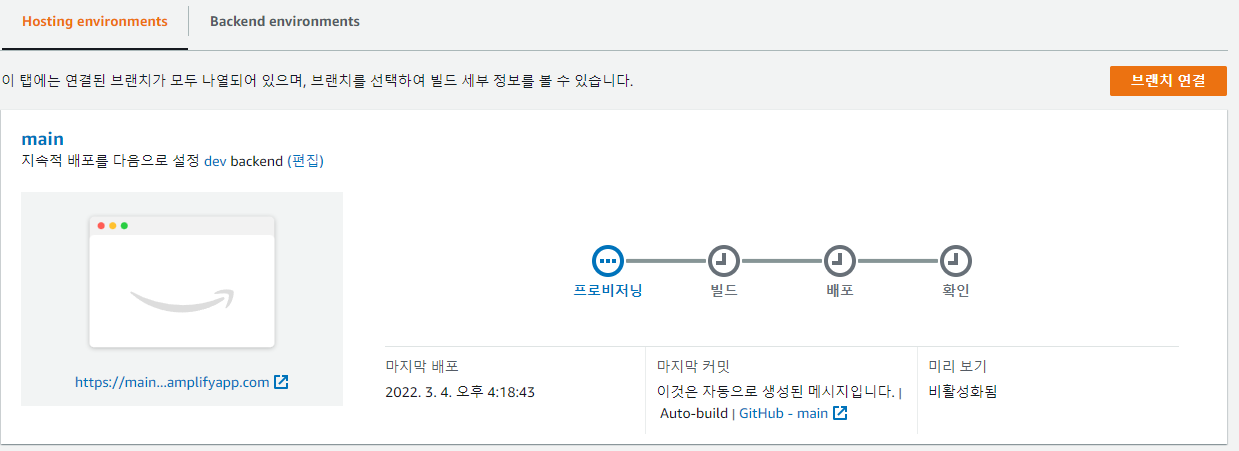
이대로 빌드를 하면 백엔드 빌드 시 오류가 생깁니다.
빌드 로그에서 오류에 관한 정보를 확인할 수 있습니다.
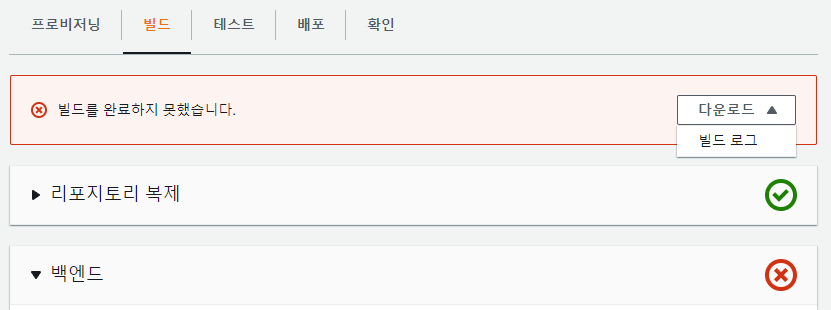
[WARNING]: ✖ There was an error initializing your environment.
[INFO]: Failed to pull the backend.
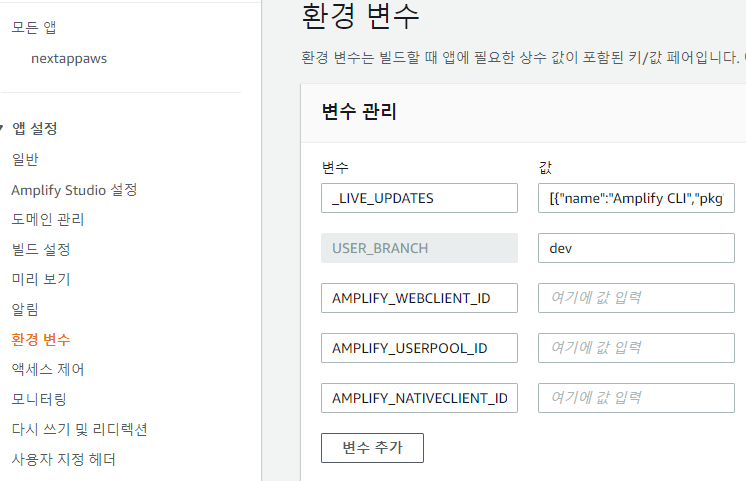
[INFO]: auth headless is missing the following inputParams userPoolId, webClientId, nativeClientId
[INFO]: Error: auth headless is missing the following inputParams userPoolId, webClientId, nativeClientId
userPoolId, webClientId, nativeClientId 파라미터가 없어서 뜨는 오류인데 환경변수에 값들을 추가하여 빌드하면 해당 오류가 뜨지 않습니다. (nativeClientId는 webClientId와 동일한 값을 사용해도 됩니다.)

무사히 빌드 및 배포가 끝나고 나면 제공 된 도메인으로 접속 가능합니다.
