[Flutter] Socket.io를 이용한 통신 보드게임 어플 만들기 (게임 로직 구현-2)
✨건물 구매 기능
이번 포스팅에서는 건물을 구매하는 내용에 대해서 다루겠습니다. 카드 클릭시 카드가 강조되고 구매 버튼이 생기는 위젯은 앞선 포스팅을 참고해주세요. 만약 오류가 나거나 잘 안되는 부분이 있다면 댓글을 남겨주세요.
📕ExpandedCardOverlay
    if (selectedCardPath != null)
      ExpandedCardOverlay(
        cardImagePath: selectedCardPath!,
        onClose: () {
          setState(() {
            selectedCardPath = null;
          });
        },
        onPurchase: () {
          setState(() {
          	// 선택한 카드가 중앙 건물 카드인지 확인
            if (selectedCardPath != null &&
                selectedCardPath!.startsWith('assets/center_card')) {
              // 선택된 카드 이미지 경로와 game.dart에서 정의한 중앙 건물 카드 이미지 경로 중
              // 같은걸 찾아서 해당 카드를 selectedCard에 저장
              CenterBuildingCard selectedCard = game.centerCards.firstWhere((
                  card) => card.imagePath == selectedCardPath);
              // selectedCard의 game.centerCards에서의  인덱스값 저장
              int selectedIndex = game.centerCards.indexOf(selectedCard);
              // 건물이 모두 팔렸는지 검사
              if (selectedCard.availableCount > 0) {
                // 건물을 사려는 플레이어가 충분한 돈을 가지고 있는지 검사
                // 해당 검사까지 완료되면 건물 구매 진행
                if (selectedCard.cost <=
                    game.players[game.currentPlayerIndex]
                        .money) {
                  // 건물을 구매한 플레이어 돈 지불하기
                  game.players[game.currentPlayerIndex]
                      .money -= selectedCard.cost;
                  // 건물 개수 1개 줄이기
                  selectedCard.availableCount -= 1;
                  // 보드판에서 남은 카드 갯수 만큼 표시하기
                  cardCounts[selectedCardPath!] =
                      selectedCard.availableCount;
                  // 건물을 구매한 플레이어에게 건물 제공하기
                  game.players[game.currentPlayerIndex]
                      .centerBuildings
                      .add(game.centerCards.firstWhere(
                          (card) =>
                      card.imagePath == selectedCardPath));
                  // 턴 넘기기
                  game.nextTurn();
                }
                else if (selectedCard.cost >
                    game.players[game.currentPlayerIndex]
                        .money) {
                  _showCustomDialog(context, "돈이 모자라요!");
                } else { print("오류 발생"); }
              }
              else if (selectedCard.availableCount <= 0) {
                _showCustomDialog(context, "카드가 이미 다 팔렸어요!");
              } else { print("오류 발생"); }
            }
            // 선택한 카드가 주요 건물 카드인지 확인
            else if (selectedCardPath != null &&
            		selectedCardPath!.startsWith('assets/major_card')) {
               // 선택된 카드 이미지 경로와 game.dart에서 정의한 주요 카드 이미지 경로 중
              // 같은걸 찾아서 해당 카드의 인덱스 값을 selectedIndex 저장 (앞면, 뒷면 모두 비교)
              int selectedIndex = game.majorCards.indexWhere(
                      (card) => card.backImagePath ==
                  	selectedCardPath || card.frontImagePath == selectedCardPath);
              // 플레이어가 이미 구매한 주요 건물인지 검사
              if (!game.players[game.currentPlayerIndex]
                  .majorBuildings[selectedIndex].isActive) {
                // 건물을 사려는 플레이어가 충분한 돈을 가지고 있는지 검사
                // 해당 검사까지 완료되면 건물 구매 진행
                if (game.majorCards[selectedIndex].cost <=
                    game.players[game.currentPlayerIndex].money) {
                  // 건물을 구매한 플레이어 돈 지불하기
                  game.players[game.currentPlayerIndex]
                      .money -= game.majorCards[selectedIndex].cost;
                  // 구매한 주요건물 활성화 하기
                  game.players[game.currentPlayerIndex]
                      .majorBuildings[selectedIndex]
                      .isActive = true;

                  // 승리 조건 판단하기
                  int victoryCount = 0;
                  for (int i = 0; i < 4; i++) {
                    if (game.players[game.currentPlayerIndex]
                            .majorBuildings[i].isActive) {
                      victoryCount += 1;
                    }
                  }
                  // 활성화된 주요건물이 4개이상이면 승리
                  if (victoryCount >= 4) {
                    _showVictoryDialog(context,
                        "player${[game.currentPlayerIndex]}이(가) 승리했어요!");
                  }
                  // 턴 넘기기
                  game.nextTurn();
                } else if (game.majorCards[selectedIndex].cost >
                    game.players[game.currentPlayerIndex]
                        .money) {
                  // 돈이 모자라서 못산다는 메세지 띄우기
                  _showCustomDialog(context, "돈이 모자라요!");
                }
              } else if (game.players[game.currentPlayerIndex]
                  .majorBuildings[selectedIndex].isActive) {
                // 이미 구매한 건물이라는 메세지 띄우기
                _showCustomDialog(
                    context, "이미 구매한 주요 건물이에요!");
              }
            }
          });
        },
      )
    ,
건물 구매 이벤트에 대한 상세한 내용은 모두 주석으로 정리하였습니다.
전체적인 카드 구매 로직에 대해서 설명하자면, selectedCardPath의 값을 game.dart에서 정의한 centerCards.imagePath 혹은 majorCards.imagePath와 비교하여 어떤 카드를 선택했는지 판단하고 해당 카드의 정보를 사용하여 카드 구매 로직을 진행합니다.
game.players[game.currentPlayerIndex]를 이용해 현재 턴을 진행중인 플레이어 객체를 중심으로 카드 구매 이벤트를 진행합니다. game.currentPlayerIndex]가 0이라면 0번째 플레이어의 턴, 1이라면 1번째 플레이어의 턴이 되는 것입니다.
지금 코드를 보면 굉장히 복잡해보이고 더러워 보입니다. 후에 코드 리팩토링을 추가적으로 공부하여 코드를 깔끔하게 수정하는 방법에 대해서 포스팅하겠습니다. 불편해도 일단은 가볍게 참고해주세요😥
📘_showCustomDialog, _showVictoryDialog
class _GameScreenState extends State<GameScreen>
with SingleTickerProviderStateMixin, WidgetsBindingObserver {
...
...
void initState() {
...
...
}
Widget build(BuildContext context) {
...
return Scaffold(
...
);
}
_showCustomDialog(BuildContext context, String dialogText) async {
double screenHeight = MediaQuery.of(context).size.height;
double screenWidth = MediaQuery.of(context).size.width;
showDialog(
context: context,
barrierDismissible: false,
builder: (context) => Dialog(
shape: RoundedRectangleBorder(
borderRadius: BorderRadius.circular(20.0),
),
elevation: 5.0,
child: Container(
width: screenWidth * 0.5,
height: screenHeight * 0.3,
padding: EdgeInsets.all(16.0),
child: Center(
child: Text(
dialogText,
style: TextStyle(fontSize: 18, fontWeight: FontWeight.bold),
textAlign: TextAlign.center,
),
),
),
),
);
await Future.delayed(Duration(seconds: 1));
Navigator.of(context).pop();
}
void _showVictoryDialog(BuildContext context, String dialogText) {
double screenHeight = MediaQuery.of(context).size.height;
double screenWidth = MediaQuery.of(context).size.width;
showDialog(
context: context,
barrierDismissible: false, // Dialog 바깥을 터치했을 때 Dialog가 닫히지 않도록 설정
builder: (context) => Dialog(
shape: RoundedRectangleBorder(
borderRadius: BorderRadius.circular(20.0),
),
elevation: 5.0,
child: Container(
width: screenWidth * 0.5,
height: screenHeight * 0.3,
padding: EdgeInsets.all(16.0),
child: Column(
mainAxisAlignment: MainAxisAlignment.center,
children: [
Text(
dialogText,
style: TextStyle(fontSize: 18, fontWeight: FontWeight.bold),
textAlign: TextAlign.center,
),
SizedBox(height: 16.0),
ElevatedButton(
onPressed: () {
Navigator.of(context).popUntil((route) => route.isFirst);
},
child: Text('확인'),
),
],
),
),
),
);
}
...
}해당 _showCustomDialog와 _showVictoryDialog를 통해 대화상자를 보여줍니다.
_showCustomDialog의 경우 다음 코드를 통해 1초뒤에 자동으로 꺼지도록 만들었습니다. await Future.delayed(Duration(seconds: 1));을 통해 1초를 기다리고 Navigator.of(context).pop();으로 대화상자를 끄는 것입니다.
await Future.delayed(Duration(seconds: 1));
Navigator.of(context).pop();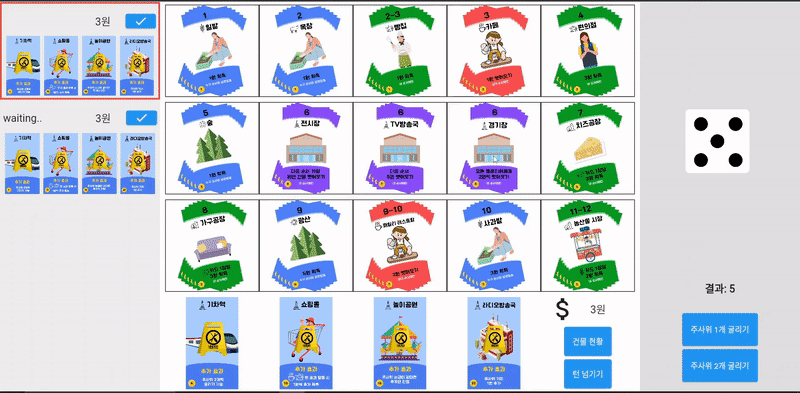
1초 뒤에 대화상자가 자동으로 꺼지기 때문에 barrierDismissible: false, 을 사용하여 화면을 탭하며 대화상자를 끄지 못하도록 하였습니다. 만약 이 코드를 생략하고 탭을 하여 대화상자를 끈다면 게임이 종료될 수 있습니다.
_showVictoryDialog은 자동으로 꺼지는 기능을 없애는 대신 확인 버튼을 눌렀을 때 게임이 종료되고 메인 페이지로 넘어가도록 설계되었습니다.
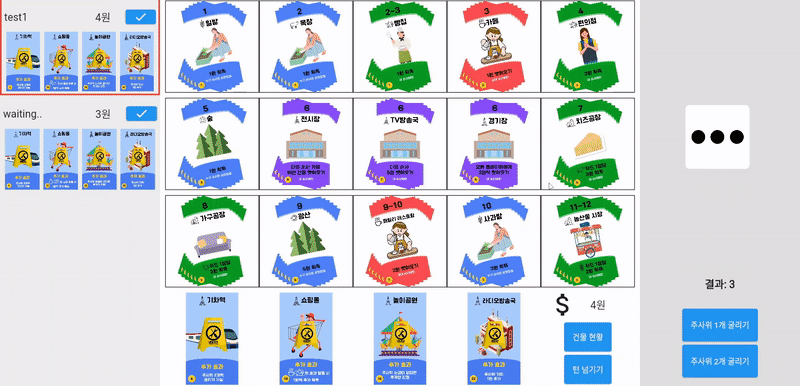
📘_showPlayerBuildingStatusDialog
class _GameScreenState extends State<GameScreen>
with SingleTickerProviderStateMixin, WidgetsBindingObserver {
...
...
void initState() {
...
...
}
Widget build(BuildContext context) {
...
return Scaffold(
body: Row(
children: [
//게임스크린 (플레이어 영역)
Container(
width: sideSpaceWidth,
color: Colors.grey[200],
child: Column(
children: playerWidgets,
),
),
//게임스크린 (게임 보드 영역)
Expanded(
child: Padding(
padding: EdgeInsets.symmetric(horizontal: 10.0),
child: Stack(
children: [
Column(
children: [
// 그리드 뷰 영역
Expanded(
flex: 3,
...
),
Expanded(
flex: 1,
child: Row(
mainAxisAlignment: MainAxisAlignment.spaceEvenly,
children: [
...
),
Expanded(
flex: 1,
child: Column(
mainAxisAlignment: MainAxisAlignment.center,
children: [
Expanded(
flex: 9,
...
),
),
Expanded(
flex: 1,
child: SizedBox(),
),
Expanded(
flex: 9,
child: ElevatedButton(
onPressed: () {
_showPlayerBuildingStatusDialog(context,
game.players[game.currentPlayerIndex].id);
},
child: AutoSizeText(
'건물 현황',
minFontSize: 5,
style: TextStyle(fontSize: 15.0),
// 시작할 폰트 크기
maxLines: 1, // 최대 줄 수
),
),
),
Expanded(
flex: 1,
child: SizedBox(),
),
Expanded(
flex: 9,
),
Expanded(
flex: 1,
child: SizedBox(),
),
],
),
),
],
),
),
],
),
...
],
),
)),
//게임스크린 (주사위 영역)
Container(
...
),
],
),
),
}
...
Widget _playerWidget(
String playerName, int playerID, int currentPlayerIndex) {
bool nowTurn = false;
if (playerID == currentPlayerIndex) {
nowTurn = true;
}
return Container(
padding: EdgeInsets.all(5.0),
// margin: EdgeInsets.only(
// left: 40,
// ),
decoration: BoxDecoration(
border: nowTurn
? Border.all(
color: Colors.red, width: 3) // 현재 플레이어의 차례일 때 빨간색 테두리 적용
: Border.all(color: Colors.transparent), // 그렇지 않으면 투명한 테두리 적용
),
child: Column(
children: [
// 프로필 아이콘과 이름
Expanded(
flex: 1,
child: Row(
children: [
Expanded(
flex: 2,
child: AutoSizeText(
playerName,
minFontSize: 5,
style: TextStyle(fontSize: 20.0), // 시작할 폰트 크기
maxLines: 1, // 최대 줄 수
),
),
Expanded(
flex: 1,
child: SizedBox(),
),
Expanded(
flex: 1,
child: AutoSizeText(
'${game.players[playerID].money}원',
minFontSize: 5,
style: TextStyle(fontSize: 20.0), // 시작할 폰트 크기
maxLines: 1, // 최대 줄 수
),
),
Expanded(
flex: 1,
child: ElevatedButton(
onPressed: () {
_showPlayerBuildingStatusDialog(context, playerID);
},
child: FittedBox(
fit: BoxFit.cover,
child: Icon(Icons.check, size: 100),
),
),
),
],
),
),
// 4장의 카드
Expanded(
flex: 2,
child: Row(
mainAxisAlignment: MainAxisAlignment.spaceEvenly,
children: [
Expanded(
flex: 1,
child: _playerMajorCardImage(playerID, 0),
),
Expanded(
flex: 1,
child: _playerMajorCardImage(playerID, 1),
),
Expanded(
flex: 1,
child: _playerMajorCardImage(playerID, 2),
),
Expanded(
flex: 1,
child: _playerMajorCardImage(playerID, 3),
),
],
),
),
],
),
);
}
void _showPlayerBuildingStatusDialog(BuildContext context, int playerID) {
final playerBuildings = game.players[playerID].centerBuildings;
// 건물의 이름을 기반으로 건물의 수를 카운트
final Map<String, int> buildingCounts = {};
for (var building in playerBuildings) {
if (buildingCounts.containsKey(building.name)) {
buildingCounts[building.name] = buildingCounts[building.name]! + 1;
} else {
buildingCounts[building.name] = 1;
}
}
showDialog(
context: context,
builder: (context) => Dialog(
shape: RoundedRectangleBorder(
borderRadius: BorderRadius.circular(20.0),
),
elevation: 5.0,
child: Padding(
padding: const EdgeInsets.all(16.0),
child: Column(
mainAxisSize: MainAxisSize.min, // 컨텐츠에 따라 크기 조절
children: [
Text(
'${playerName[playerID]}의 건물 현황',
style: TextStyle(fontSize: 18, fontWeight: FontWeight.bold),
),
SizedBox(height: 16.0),
...buildingCounts.entries
.map((entry) => Text('${entry.key}: ${entry.value}개')),
SizedBox(height: 16.0),
ElevatedButton(
onPressed: () {
Navigator.of(context).pop();
},
child: Text('닫기'),
),
],
),
),
),
);
}
}_showPlayerBuildingStatusDialog를 통해 앞서 만든 _showCustomDialog처럼 대화상자의 형태로 플레이어의 건물 현황에 대해서 알려주는 대화상자를 보여줍니다.

매개변수로 받아오는 playerID를 통해 어떤 플레이어의 건물 현황을 보여줄 것인지 결정할 수 있습니다.
그리고 건물 이름을 키로 가지고 그 건물의 개수를 값으로 가지는 final Map<String, int> buildingCounts = {};를 선언하여 건물 현황 정보를 가져옵니다.
buildingCounts.entries는 buildingCounts Map의 모든 엔트리(키와 값의 쌍)를 반환합니다.
.map((entry) => Text('${entry.key}: ${entry.value}개'))은 이 엔트리들을 Text 위젯으로 변환합니다. 각 Text 위젯은 '건물 이름: 건물 개수' 형식의 문자열을 표시합니다.
스프레드 연산자 ...은 생성된 모든 Text 위젯을 개별 위젯으로 Column의 children 속성에 직접 추가합니다. 만약 buildingCounts에 세 개의 엔트리가 있다면, 세 개의 Text 위젯이 Column의 자식으로 추가됩니다.
다음 포스팅은 미니빌 게임의 핵심인 주사위 로직을 구현해보겠습니다. 만약 오류 해결이 안 되거나 헷갈리는 부분이 있다면 댓글을 달아주세요. 지적 또한 환영입니다😎
