[Android / Kotlin]ViewModel + LiveData + DataBinding

ViewModel
ViewModel을 사용하는 이유는 UI와 로직의 분리이다. 왜 분리 시키면 좋을까?
Activity와 Fragment는 UI를 업데이트 하는데만 집중할 수 있고, ViewModel에 있는 데이터는 Activity와 Fragment의 수명주기로부터 자유로워진다.
따라서 UI와 데이터 처리 로직을 분리시키면 유지보수와 개발 효율이 높아지는 것이다.
또한 ViewModel에 있는 데이터는 마치 Sington 객체 처럼 사용이 가능해서 Fragment 사이에서 ViewModel을 이용해 데이터를 쉽게 공유할 수 있다.
LiveData
LiveData(살아있는 데이터?) 쉽게 설명하면 LifeCycle을 알고 있는 데이터 타입이라 생각하면 이해하기 쉽다.
Android JetPack 중 하나인 LiveData는 Activity와 Fragment 등의 LifeCycle을 인식하여 LifeCycle 내에서만 동작하는 요소로 LifeCycle이 종료되면 같이 삭제된다. 그러므로 메모리 누출이 없고 수명주기에 따른 데이터 관리를 개발자가 직접하지 않아도 된다는 장점을 갖고 있다.
즉, 스스로 수명 주기를 인식하기 때문에 다양한 장점 및 특징이 존재한다.
- UI와 데이터 상태의 일치 보장
Observer 패턴에 따라 데이터 변경이 일어날 때마다 Observer 객체에 알려줌.- 메모리 누출 없음
- 비정상 종료가 없음
- 수명주기를 자동으로 관리
- 최신의 데이터 유지
- 액티비티나 프래그먼트가 재생성되어도 데이터의 변화가 없음
LiveData는 ViewModel과 함께 사용해야 그 효과가 커진다. ViewModel 안에 있는 LiveData 객체를 DataBinding을 통해 UI에서 관찰만 할 수 있도록 만들면 Activity나 Fragment에서 일일히 데이터를 갱신할 필요 없이 알아서 UI에 최신 데이터가 보이게 된다.
MutableLiveData
Mutable의 사전적 정의는 변하기 쉬운이라는 뜻으로 LiveData를 상속하고 LiveData.setValue와 LiveData.postValue를 구현한 클래스이다.
- setValue() : Main thread에서 즉시 값 변경하고 Observer로 데이터 변경을 알려줌.
- postValue() : Runnable로 데이텨 변경 요청, Runnable이 실행될 때 데이터 변경, back ground thread에서 값을 설정. Main thread에서 runnable이 실행되기전에 post value가 여러번 호출되도 마지막 변경된 값만 전달.
즉, MutableLiveData는 setValue,postValue 메서드를 이용해서 값 변경이 가능한 LiveData라고 생각하면 이해가 쉽다. (LiveData는 값을 변경하려면 MutableLiveData로 형변환 필요)
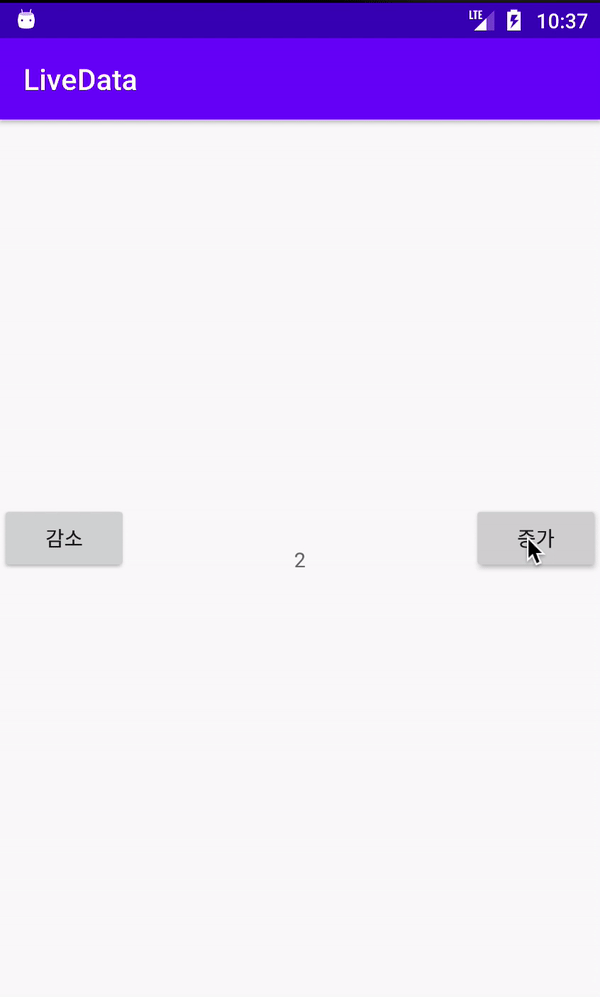
LiveData 실습
버튼을 누를 때마다 숫자가 +1 or -1 되는 실습을 진행
1. 준비 과정
📌 DataBindin을 위해 다음과 같이 작성한다.
android {
        buildFeatures{
        	dataBinding true
    }
}
📌 build.gradle (Module: app)에 종속 항목 추가
        def lifecycle_version = "2.2.0"
    // ViewModel
    implementation "androidx.lifecycle:lifecycle-viewmodel-ktx:$lifecycle_version"
    // LiveData
    implementation "androidx.lifecycle:lifecycle-livedata-ktx:$lifecycle_version"
    implementation "androidx.activity:activity-ktx:1.1.0"
2. xml
숫자가 나올 TextView와 증가, 감소 Button을 다음과 같이 셋팅해준다.
activity_main.xml
<?xml version="1.0" encoding="utf-8"?>
<androidx.constraintlayout.widget.ConstraintLayout
    xmlns:android="http://schemas.android.com/apk/res/android"
    xmlns:tools="http://schemas.android.com/tools"
    xmlns:app="http://schemas.android.com/apk/res-auto"
    android:layout_width="match_parent"
    android:layout_height="match_parent"
    tools:context=".MainActivity">
    <TextView
        android:id="@+id/txt_result"
        android:layout_width="wrap_content"
        android:layout_height="wrap_content"
        app:layout_constraintBottom_toBottomOf="parent"
        app:layout_constraintLeft_toLeftOf="parent"
        app:layout_constraintRight_toRightOf="parent"
        app:layout_constraintTop_toTopOf="parent" />

    <Button
        android:id="@+id/minus_btn"
        android:layout_width="wrap_content"
        android:layout_height="wrap_content"
        android:text="감소"
        app:layout_constraintBottom_toBottomOf="@+id/txt_result"
        app:layout_constraintStart_toStartOf="parent"/>

    <Button
        android:id="@+id/plus_btn"
        android:layout_width="wrap_content"
        android:layout_height="wrap_content"
        android:text="증가"
        app:layout_constraintBottom_toBottomOf="@+id/txt_result"
        app:layout_constraintEnd_toEndOf="parent"/>
  </androidx.constraintlayout.widget.ConstraintLayout>
3. ViewModel 생성
LiveData가 관리될 ViewModel을 다음과 같이 생성. 여기서 class의 상속을 해야 하는데 ViewModel()과 AndroidViewModel() 두 개를 상속받을 수 있다.
일단 AndroidViewModel을 상속받아 생성해 보았다.
MainViewModel.kt
package com.example.livedata

import android.app.Application
import androidx.lifecycle.AndroidViewModel
import androidx.lifecycle.MutableLiveData

class MainViewModel(application : Application) : AndroidViewModel(application){

    var count = MutableLiveData<Int>()

    init{
        count.value = 0
    }

    fun plus(){
        count.value = count.value?.plus(1)
    }

    fun minus(){
        count.value = count.value?.minus(1)
    }
}
ViewModel에 LiveData를 생성해주고 init으로 0으로 초기화를 시킨다.
plus(), minus() 함수를 선언해 count값을 1씩 증가 or 감소 시키는 함수를 만들어준다.
4. DataBinding
아까 만든 xml에서 ViewModel을 데이터 바인딩 시켜주는 작업을 한다.
activity_main.xml
<?xml version="1.0" encoding="utf-8"?>
<layout
    xmlns:android="http://schemas.android.com/apk/res/android"
    xmlns:tools="http://schemas.android.com/tools"
    xmlns:app="http://schemas.android.com/apk/res-auto">

    <data>
        <variable
            name="viewModel"
            type="com.example.livedata.MainViewModel"/>
    </data>

    <androidx.constraintlayout.widget.ConstraintLayout
        android:layout_width="match_parent"
        android:layout_height="match_parent"
        tools:context=".MainActivity">
        <TextView
            android:id="@+id/txt_result"
            android:layout_width="wrap_content"
            android:layout_height="wrap_content"
            android:text="@{Integer.toString(viewModel.count)}"
            app:layout_constraintBottom_toBottomOf="parent"
            app:layout_constraintLeft_toLeftOf="parent"
            app:layout_constraintRight_toRightOf="parent"
            app:layout_constraintTop_toTopOf="parent" />

        <Button
            android:id="@+id/minus_btn"
            android:layout_width="wrap_content"
            android:layout_height="wrap_content"
            android:onClick="@{()->viewModel.minus()}"
            android:text="감소"
            app:layout_constraintBottom_toBottomOf="@+id/txt_result"
            app:layout_constraintStart_toStartOf="parent"/>

        <Button
            android:id="@+id/plus_btn"
            android:layout_width="wrap_content"
            android:layout_height="wrap_content"
            android:onClick="@{()->viewModel.plus()}"
            android:text="증가"
            app:layout_constraintBottom_toBottomOf="@+id/txt_result"
            app:layout_constraintEnd_toEndOf="parent"/>
      </androidx.constraintlayout.widget.ConstraintLayout>
</layout>
최상위 Layout을 layout으로 감싸주고 variable은 해당 layout에서 사용할 변수 or 객체를 의미하며 위에서 생성한 MainViewModel을 name과 type(패키지명)을 추가해준다.
TextView에 text 속성엔 viewModel의 객체인 count를 세팅해주고
각각의 Button의 onClick 속성에 함수들을 바인딩 시켜준다.
5. 메인 액티비티 작성
MainActivity.kt
package com.example.livedata

import androidx.appcompat.app.AppCompatActivity
import android.os.Bundle
import androidx.activity.viewModels
import androidx.databinding.DataBindingUtil
import com.example.livedata.databinding.ActivityMainBinding

class MainActivity : AppCompatActivity() {

    private lateinit var binding: ActivityMainBinding
    private val viewModel: MainViewModel by viewModels()

    override fun onCreate(savedInstanceState: Bundle?) {
        super.onCreate(savedInstanceState)
        binding = DataBindingUtil.setContentView(this, R.layout.activity_main)

        binding.lifecycleOwner = this
        binding.viewModel = viewModel
    }
}
MainActivity에서 xml을 바인딩 시켜주고 lifecycleOwner를 통해 수명주기 관리를 설정해주면 알아서 UI에 변경된 값을 관찰해 실시간으로 변화를 준다.
기존처럼 각 버튼 마다 일일히 setOnClickListenter를 선언하고 변수를 다 바꿔주는 일을 하지 않고, 알아서 UI에서 데이터를 감지하게 되어 코드가 깔끔하게 작성될 수 있다.