
들어가면서∙∙∙
저번 강의에서는 파일을 전송해서 화면을 구성하는 법을 알아봤다.
화면을 구성하려면 여러 페이지가 필요한데,
여러 파일의 공통적인 부분을 하나로 묶어주고 그 안에 들어간 바뀐내용만 다르게 표현해줄 수 있는 template Engine 을 이용하는 실습을 진행했다.
템플릿 엔진으로는 EJS, Pug, Nunjucks 가 쓰인다.
이 강의에서 실습은 nunjucks 로 진행했다!
(express에서 res.render 호출시 보내는 변수를 nunjucks가 처리해줌.)

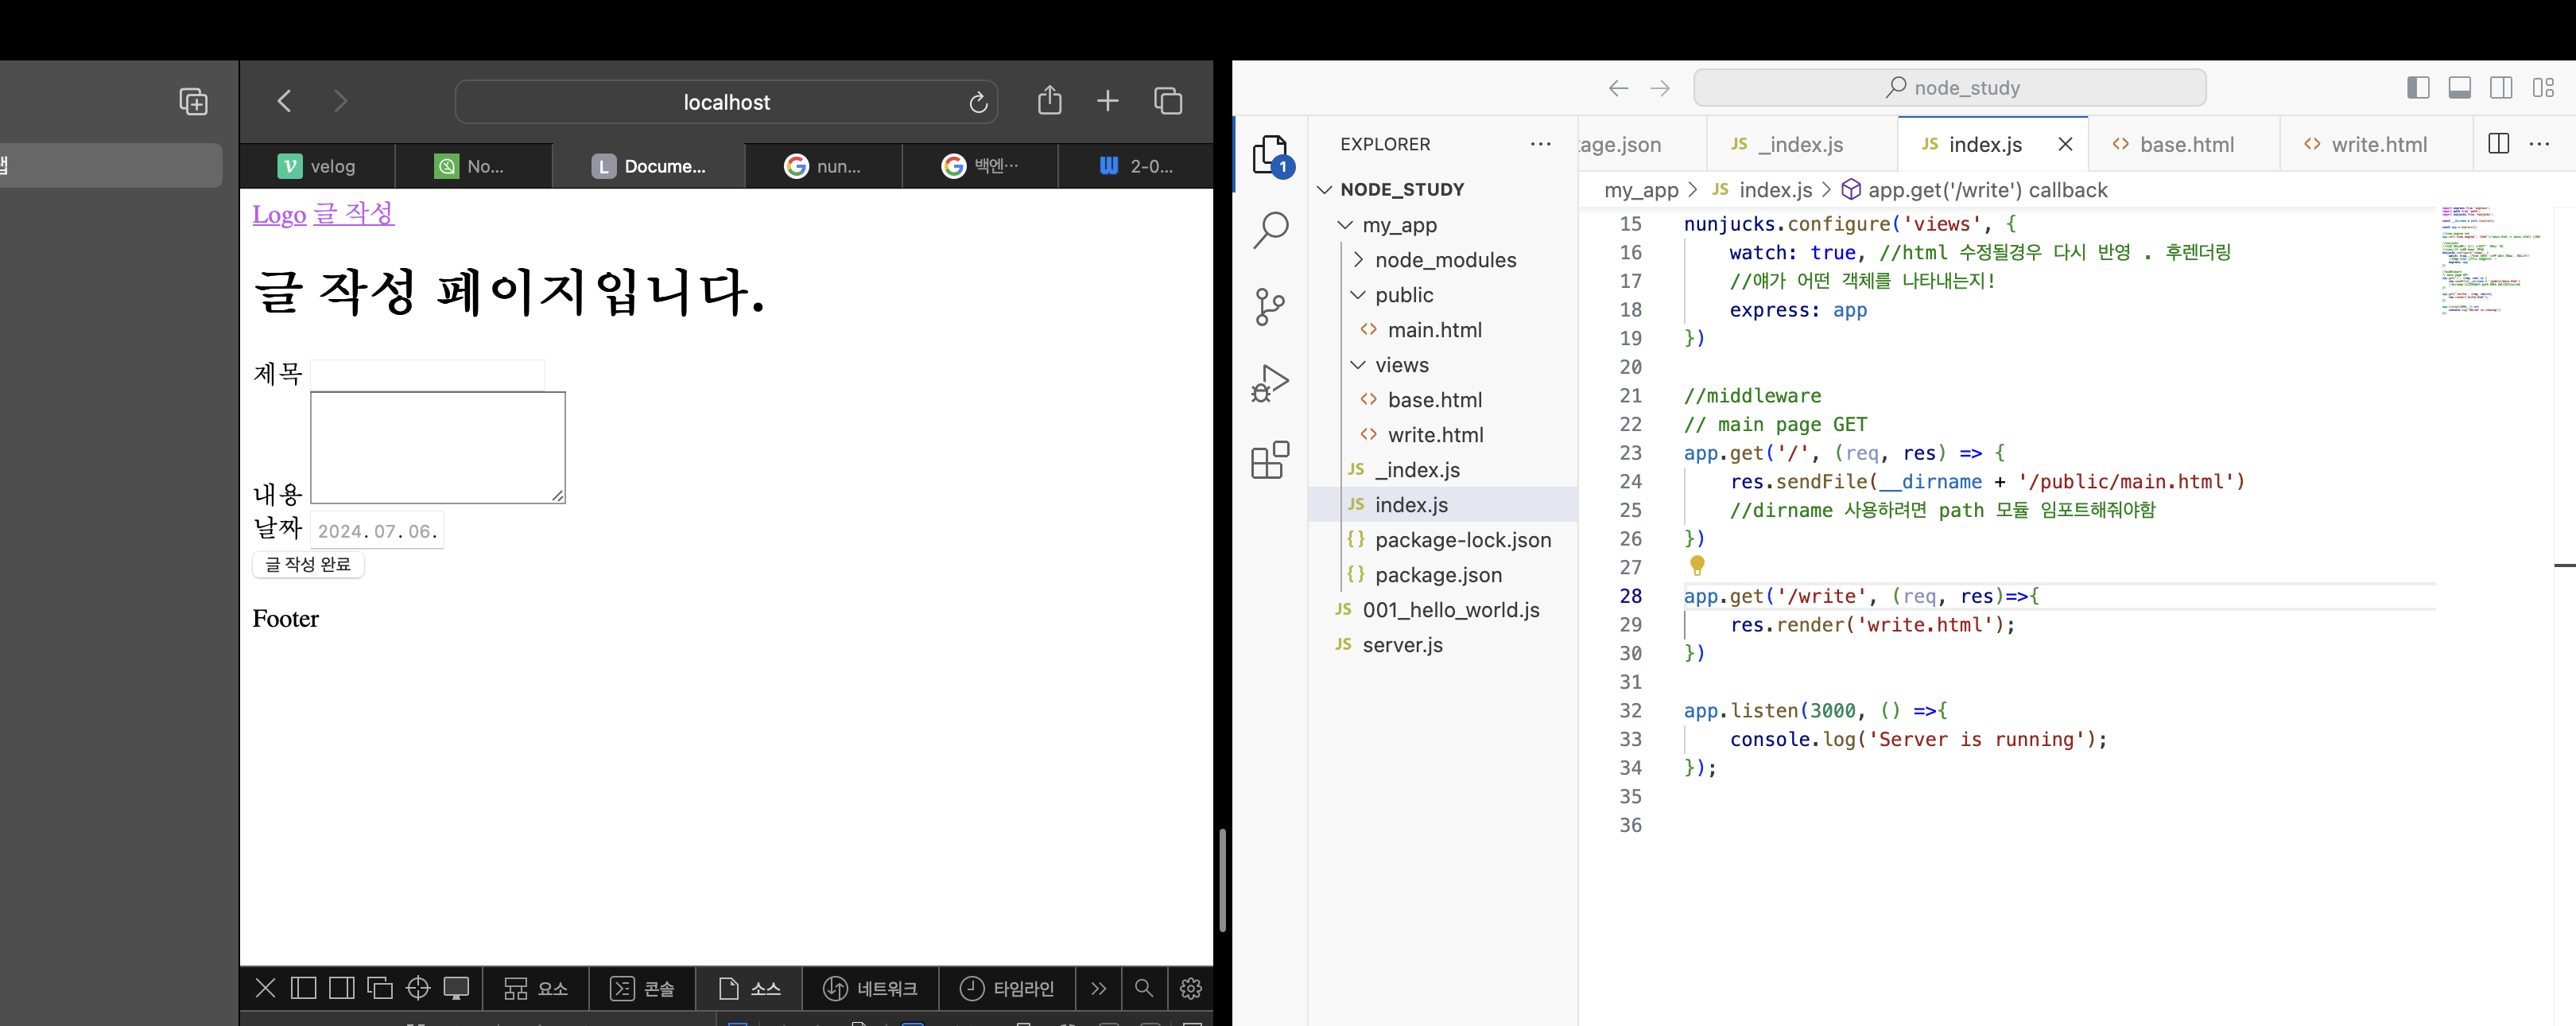
index.js
import express from 'express';
import path from 'path';
import nunjucks from 'nunjucks';

const __dirname = path.resolve();

const app = express();

app.set('view engine', 'html')

nunjucks.configure('views', {
    watch: true,
    express: app
})

app.get('/', (req, res) => {
    res.sendFile(__dirname + '/public/main.html')
})

app.get('/write', (req, res)=>{
    res.render('write.html');
})

app.listen(3000, () =>{
    console.log('Server is running');
});
먼저, import nunjucks from 'nunjucks'; 를 작성하여 nunjucks를 import해주었다.
app.set('view engine', 'html')//main.html -> main(.html) 생략!engine set을 보여주는 코드.
이렇게 하면 main.html 을 main이라고만 작성해도 html로 인식한다.
nunjucks.configure('views', {
    watch: true, //html 수정될경우 다시 반영 . 후렌더링
    //얘가 어떤 객체를 나타내는지!
    express: app
})
어떤 위치에서 파일을 찾을건지 위치를 지정해줘야함!!
views 라는 파일에 입력해줄거라 views로 설정했다.
html이 수정될 경우에 다시 반영후 렌더링 해주기 위해 watch: true 코드를 넣어주고, express가 어떤 객체를 나타내는지 (여기서는 app) 설정해주기 위해
express: app 코드도 추가해준다.
html
html 파일로 base.html 과 write.html 을 만들어 주었다.
base.html
<!-- 모두 공통으로 들어가는 레이아웃-->
<!DOCTYPE html>
<html lang="en">
<head>
    <meta charset="UTF-8">
    <meta name="viewport" content="width=device-width, initial-scale=1.0">
    <title>Document</title>
</head>
<body>
    <!-- 공통된 요소 -->
    <nav>
        <a href="">Logo</a>
        <a href="">글 작성</a>
    </nav>
    <!-- 바뀌는 요소 (블럭단위의 콘텐츠로)-->
    {% block content %}
    {% endblock %}
    <footer>
        <p>Footer</p>
    </footer>
</body>
</html>
write.html
{% extends 'base.html' %}

{% block content %}
<h1>글 작성 페이지입니다.</h1>
<form action="/write" method="post">
    <label for="title">제목</label>
    <input type="text" name="title" id="title">
    <br>
    <label for="contents">내용</label>
    <textarea name="contents" id="contents" cols="20" rows="5"></textarea>
    <br>
    <label for="date">날짜</label>
    <input type="date" name="date" id="date">
    <br>
    <!-- input submit -->
    <input type="submit" value="글 작성 완료">
</form>
{% endblock %}다시 index.js 코드
app.get('/write', (req, res)=>{
    res.render('write.html');
})
write 주소를 새로입력해준다!
render 는 서버에서 렌더링해준다는 의미
내가 사용할 파일 경로 입력해주는데
템플릿엔진 위치를 views 로 입력했기 때문에 write.html 이라고만 입력해도 된다!

공부..일기....