Section 1 | 강의 소개
- AWS, Azure, GCP 등의 cloud 배포 플랫폼을 low level 언어로, Heroku, Fly.io, Vercel, Netlify 등의 플랫폼들을 high level 언어로 이해하면 된다.
- low level 일 수록 알아야 할 것들이 많고 시간도 오래 걸리지만 대신 개발자가 조정할 수 있는 것들이 많음. high level일 수록 빠른 시간 내에 손쉽게 배포할 수 있지만 개발자가 조절할 수 있는 것은 많지 않음. 예를 들어 vercel은 웹소켓 지원이 안됨 (몰랐다,, 지난번에 운좋게 Netlify를 쓴거였네). 또한, 결국 실제 사용으로 들어가면 high level 플랫폼들은 AWS 비용 + DevOps 관리비용까지 지불하는 셈이므로 무조건 AWS보다 더 비쌈.
- 초반에는 설정이 복잡한 ECS보다는, 좀 더 간단한 Lightsail을 가지고 이것저것 서버 세팅을 배울 예정임.
- 최종적으로는 AWS의 ECS를 사용하는 것이 목표!
Section 2 | 배포용 간단한 백엔드 만들기
초반 환경 설정
- build 과정을 위해 TypeScript를 추가함 (js에서 ts로 빌드하는 과정이 있음..)
- test 과정을 위해서는 Jest를 사용함

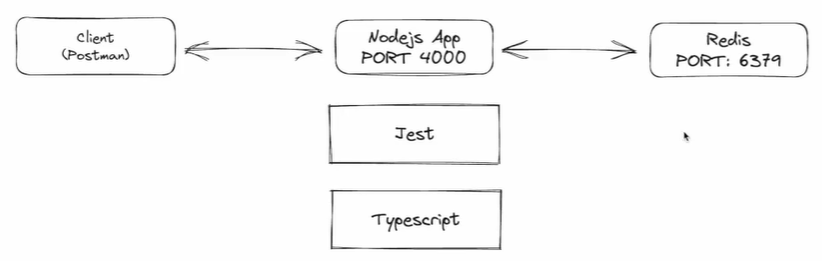
- Node.js 설치, VSCode, Postman 설치 (API 테스트용)
Redis 설치
- WSL 설치
- powershell을 관리자권한으로 실행
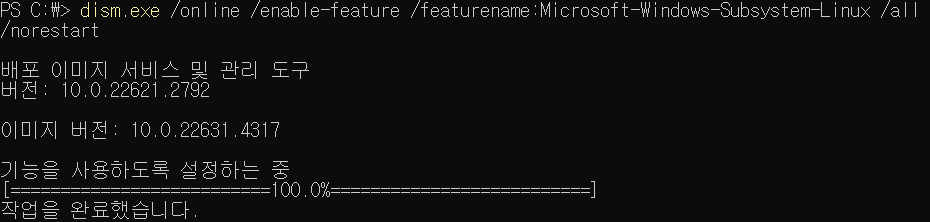
- Linux용 Windows 하위 시스템 사용:
dism.exe /online /enable-feature /featurename:Microsoft-Windows-Subsystem-Linux /all /norestart입력 (Window 10 ver 이상)
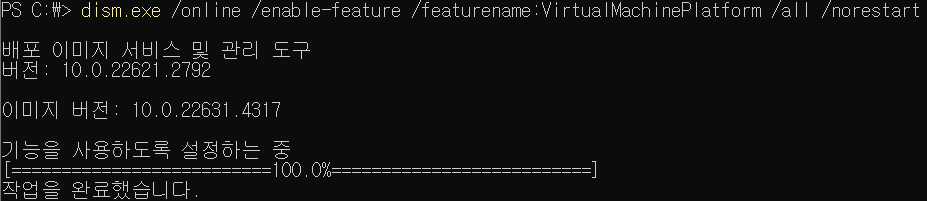
- Virtual Machine 기능 사용:
dism.exe /online /enable-feature /featurename:VirtualMachinePlatform /all /norestart
- Linux 커널 업데이트 패키지 다운로드 및 실행:
x64 머신용 최신 WSL2 Linux 커널 업데이트 패키지
- default version으로 WSL 2 설정:
wsl --set-default-version 2 - Microsoft Store에서 Ubuntu LTS version 설치 (22.04.5로 진행함)
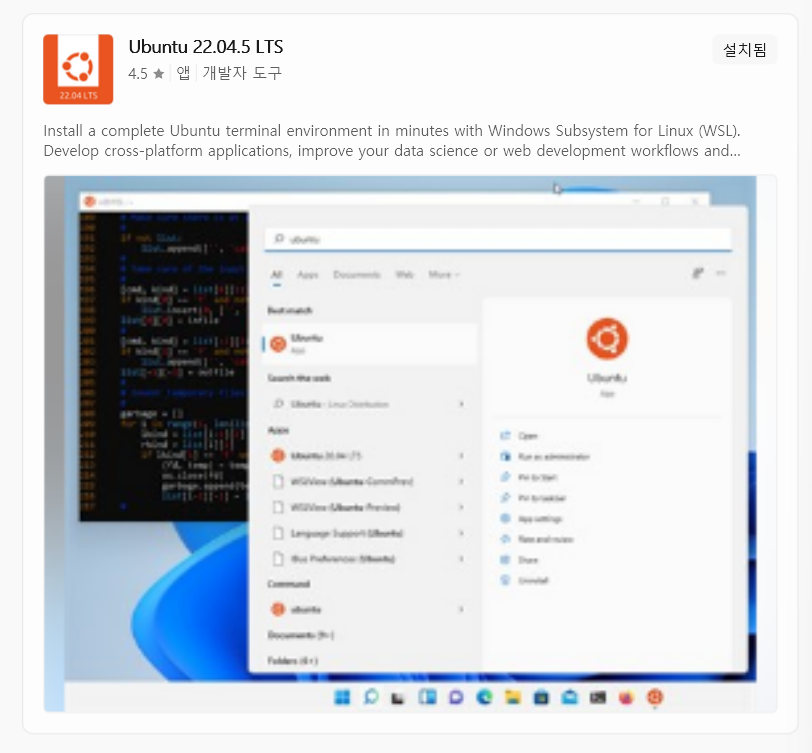
- Redis 설치 (at Ubuntu terminal)
- Update Package Lists:
sudo apt-get update - Redis 설치:
sudo apt-get install redis-server
- Redis 실행: VSCode에서 Linux 터미널을 켠 후 실행
sudo service redis-server start입력redis-cli입력ping입력 →pong답변 확인

Typescript 프로젝트 생성하기
npm init -y로 json 파일 생성npm i typescript로 타입스크립트 설치
json 파일과 같은 레벨에서tsconfig.json파일 생성 후 아래와 같이 설정
{
  "compilerOptions": {
    "target": "ES2016",
    "module": "CommonJS",
    "outDir":"./build",
    "esModuleInterop": true,
    "forceConsistentCasingInFileNames": true,
    "strict": true
  },
  "include": ["app/**/*.ts"] // app 폴더 안에 있는 어떤 파일이던 .ts 로 끝나면 적용해라
}
npx tsc명령어 실행 시 build 폴더가 생기고 그 아래에 index.js 파일이 생김
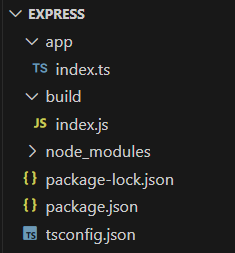
✨ 현재 설정 정리: npm run build로 타입스크립트 파일을 자바스크립트로 바꿔주고, npm run start로 생성된 자바스크립트 파일을 실행해줌.
nodemon 설정
- nodemon, Concurrently를 개발자 설정으로 설치해주기
npm i -D nodemon concurrently - script 다시한번 업데이트
{
  "name": "express",
  "version": "1.0.0",
  "description": "",
  "main": "index.js",
  "scripts": {
    "start": "node build/index.js",
    "build": "npx tsc",
    "dev": "concurrently \"npx tsc --watch\" \"nodemon build/index.js\" "
  },
  "keywords": [],
  "author": "",
  "license": "ISC",
  "dependencies": {
    "typescript": "^5.6.3"
  },
  "devDependencies": {
    "concurrently": "^9.1.0",
    "nodemon": "^3.1.7"
  }
}tsc는 app 폴더 안의 파일들이 바뀌고 있는지 관찰하면서 바뀔 때마다 ts → js로 변경해줌
"concurrently \"npx tsc --watch\"nodemon은 변환된 것을 확인했을 때 바로 restart
\"nodemon build/index.js\"Ctrl + C로 켰던 nodemon 서버를 꺼줄 수 있음
Express로 간단한 웹서버 만들기
- express 관련 설정 설치
npm i -D @types/node @types/express index.ts파일에 express import해서 서버파일 작성
import express from "express";

const app = express();

app.use(express.json()); // json 형식으로 데이터를 받을 것이므로 json 파싱

app.get("/", (req, res) => {
  res.status(200).send("Hello from Express");
});

const PORT = 4000;

app.listen(PORT, () => {
  console.log(`App listening at port ${PORT}...`);
});- postman으로
GET http://localhost:4000으로 요청 보내서Hello from Express출력 확인
Redis 서버 구동
VSCode에서 Redis 열기
- Remote - WSL extension 설치
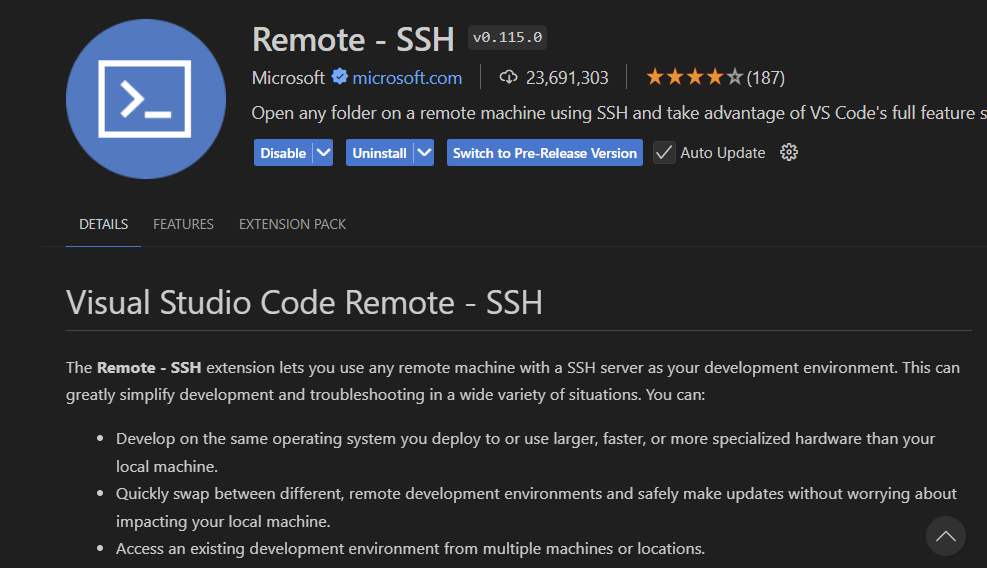
- 왼쪽 모서리에 생긴 아이콘 클릭 → 드롭다운 메뉴에서 WSL 선택
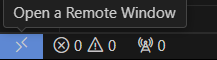
- WSL 연결
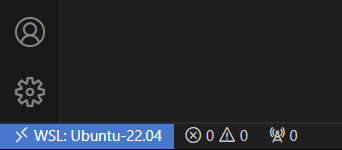
- 다시 원래 폴더로 돌아와서
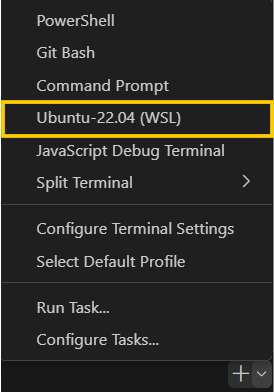
Ctrl + J로 터미널 열고, 그림과 같이 powershell에서 ubuntu로 변경하기
redis-server로 열기
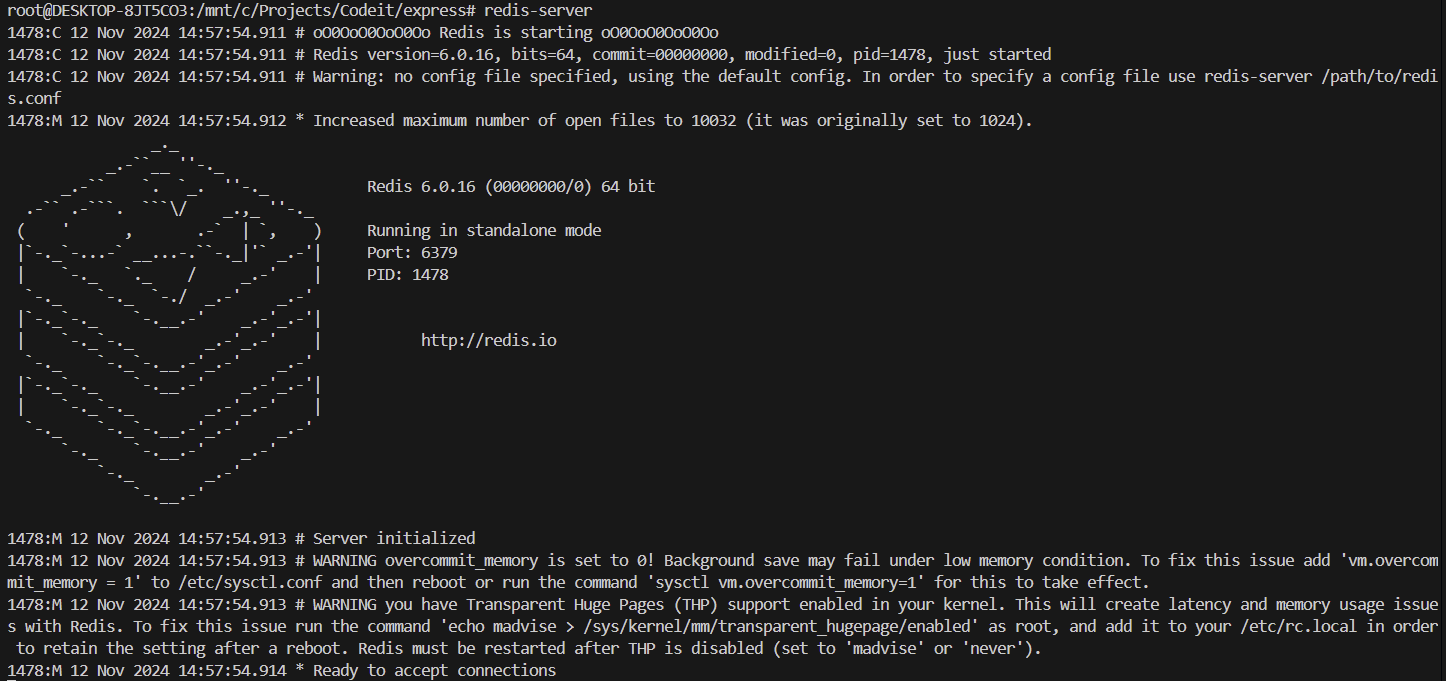
✨ 만약 실행되지 않으면 아래의 명령어 반복- Update Package Lists:
sudo apt-get update - Redis 설치:
sudo apt-get install redis-server
실습
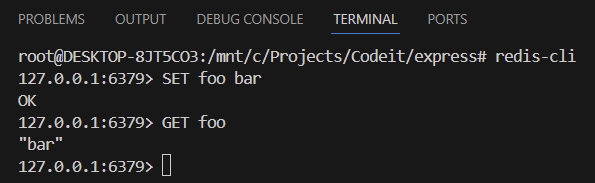
SET,GET사용:SET으로는SET 키 값형태로 입력해서 키의 이름과 값을 설정할 수 있고,GET으로는GET 키 이름을 입력하면키 값이 반환되게 됨
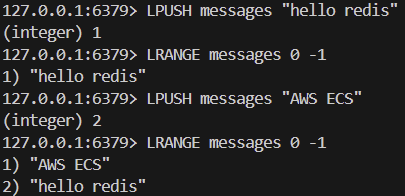
LPUSH,LRANGE사용
서버 끄는 법
Ctrl + C

✨ 그런데 서버를 켜두기 위해 항상 터미널을 켜두는 것은 번거로우므로 자동으로 늘 켜두자
- 서버 켜기:
redis-server --daemonize yes - cli창:
redis-cli - 서버 끄기 (CLI창에서):
shutdown
Redis 활용한 간단한 API 만들기
npm i redis설치- 서버 코드 수정
// index.ts
import express from "express";
import * as redis from "redis";

const PORT = 4000;
const LIST_KEY = 'messages'

const createApp = async() => {
  const app = express();
  const client = redis.createClient({ url: "redis://localhost:6379" });
  await client.connect();

  app.use(express.json());

  app.get("/", (req, res) => {
    res.status(200).send("hello from express");
  });

  // end point
  app.post("/messages", async(request, response) => {
    const { message } = request.body;
    await client.lPush(LIST_KEY, message);
    response.status(200).send("Message added to list");
  });

  app.get("/messages", async(request, response) => {
    const messages = await client.lRange(LIST_KEY, 0, -1);
    response.status(200).send(messages);
  });

  return app;
};

createApp().then((app) => {
  app.listen(PORT, () => {
    console.log(`App listening at port ${PORT}...`);
  });
}); - postman에서 api 테스트
http://localhost:4000/messages
📌redis-cli로 작성한 메시지들은 보이지 않음.. 그치만 일단 GET, POST requst는 작동함
아래와 같이 "message"라는 key값과 함께 값을 제시해야 정상적으로 전송됨!

{
  "message": "hello redis"
}
이후 GET 요청도 POST 요청내용을 올바르게 잘 반영해서 나옴

테스트코드 개발 준비하기
- Jest 설치
npm i -D jest @types/jest ts-jest- json 파일 scripts 업데이트
"test": "jest --watchAll"jest.config.js파일 추가
module.exports = {
  preset: "ts-jest/presets/js-with-ts",
  testEnvironment: "node",
};- Dummy test 작성
app폴더에index.test.ts테스트 파일 생성
describe("jest", () => {
    it("should work", () => {
        expect(200).toBe(200);
    });
});-
저장 시 자동으로 테스트 결과가 나옴
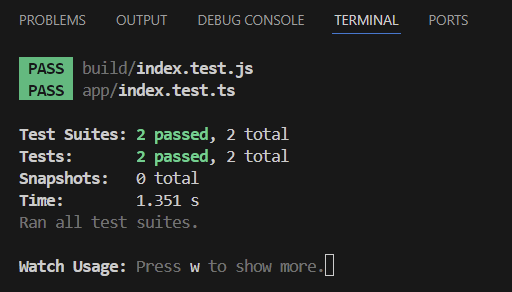
-
테스트 파일 수정 시 서버 rebuild를 방지하기 위해서
ts.config.json파일에"exclude": ["**.test.ts"]추가
⭐ 동기(Synchronous)와 비동기(Asynchronous)
동기 (Synchronous)
동기 처리는 순차적으로 작업을 수행합니다. 어떤 작업이 완료되기 전까지 다음 작업이 실행되지 않으며, 각 작업이 직렬로 실행됩니다. 예를 들어, 1번 작업이 끝나야 2번 작업이 시작될 수 있고, 2번 작업이 끝나야 3번 작업이 시작될 수 있습니다. 이런 구조는 코드가 실행되는 순서가 보장되기 때문에 이해하기 쉽지만, 특정 작업이 오래 걸리면 전체 프로그램이 멈춰버리는 단점이 있습니다.
function task1() {
  console.log("Task 1 시작");
  for (let i = 0; i < 1e9; i++); // 긴 작업
  console.log("Task 1 완료");
}

function task2() {
  console.log("Task 2 시작");
}

task1();
task2();
Task 1 시작
Task 1 완료 (시간 소요)
Task 2 시작비동기 (Asynchronous)
비동기 처리는 특정 작업이 끝날 때까지 기다리지 않고 다음 작업을 실행합니다. 예를 들어, 네트워크 요청이나 파일 읽기처럼 시간이 오래 걸릴 수 있는 작업을 비동기로 처리하면, 결과를 기다리는 동안 다른 작업을 할 수 있습니다. JavaScript에서는 비동기 작업이 완료되면 콜백 함수를 통해 결과를 처리하거나, Promise 또는 async/await 문법을 사용하여 비동기를 구현합니다.
function task1() {
  console.log("Task 1 시작");
  setTimeout(() => {
    console.log("Task 1 완료");
  }, 3000); // 3초 후 실행
}

function task2() {
  console.log("Task 2 시작");
}

task1();
task2();
Task 1 시작
Task 2 시작
Task 1 완료 (3초 후)- task1이 지연되는 동안 task2는 바로 실행됩니다.
async와 await
async와 await는 JavaScript에서 비동기 작업을 쉽게 다루기 위해 제공하는 문법입니다. async 키워드를 함수 앞에 붙이면 해당 함수는 항상 Promise를 반환합니다. 함수 내부에서 await 키워드를 사용하면 Promise가 완료될 때까지 해당 줄에서 기다리게 됩니다. 이는 마치 동기 코드처럼 보이게 만들지만 실제로는 비동기적으로 처리되어 코드의 가독성을 높입니다.
async function fetchData() {
  console.log("데이터 가져오는 중...");
  const response = await fetch("https://jsonplaceholder.typicode.com/todos/1");
  const data = await response.json();
  console.log("데이터 가져오기 완료:", data);
}

fetchData();
console.log("다른 작업 수행 중");
데이터 가져오는 중...
다른 작업 수행 중
데이터 가져오기 완료: { ... }- 즉, 오래 걸릴만한 작업 앞에
await을 붙여서 오래 걸리는 작업이 실행중이더라도 그 다음코드가 함께 실행될 수 있도록 함 - 이 때, 만약 함수 안에서
await를 사용하는 경우에 함수 앞에async를 붙여줘야 함
비동기 처리 사용하는 경우
- 네트워크 요청, 파일 입출력, 타이머와 같이 시간이 오래 걸릴 수 있는 작업을 할 때.
- 사용자가 기다리지 않도록 백그라운드에서 작업을 처리해야 할 때.
- 예를 들어, 데이터베이스에 저장된 정보를 가져오는 동안 UI는 계속 반응해야 하는 경우 비동기를 - 사용하여 데이터를 가져오는 동안 다른 작업을 처리할 수 있도록 합니다.
- 멀티태스킹이 필요할 때, 즉 여러 작업을 동시에 처리하고 각 작업이 완료되는 즉시 결과를 사용할 수 있도록 하는 경우.
Supertest로 API 엔드포인트 테스트하기
- Supertest 설치
npm i -D supertest @types/supertest
- 앞서 생성해둔
app폴더 >index.test.ts파일에 본격적으로 테스트 코드 작성
아래에서 강의와는 달리 supertest가 업데이트된 부분이 있어서 수정
import request from "supertest";
import createApp from ".";

// let app: Express.Application;
import { App } from "supertest/types";
let app: App;

beforeAll(async() => {
    app = await createApp()
  })

describe("POST /messages", () => {
  it("responds with a success message", async() => {
    const response = await request(app)
        .post("/messages")
        .send({ message: "testing with redis" });
    expect(response.statusCode).toBe(200);
    expect(response.text).toBe("Message added to list");
  })
})

describe("GET /messages", () => {
	it("responds with all messages", async () => {
    	const response = await request(app).get("/messages")
        expect(response.statusCode).toBe(200);
        // expect(response.body).toEqual([]);
    });
});expect(response.body).toEqual([]);를 넣어서 실행해보면 초기의 response의 body는 빈 배열이어야 하는데, 테스트를 실행할 때마다 post에서 보낸 메시지가 계속 출력되고 있음을 알 수 있음..
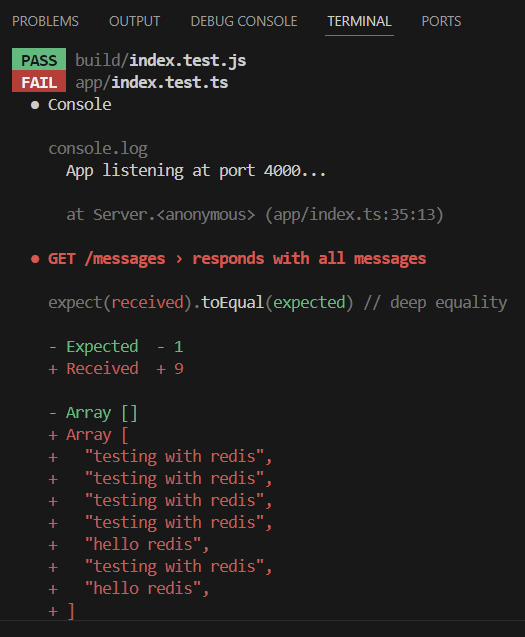
- 그리고 실패로그를 더 읽어보면 서버가 계속 무한 loop을 돌며 port 4000번에서 연달아 켜지고 있는 것을 확인할 수 있음 (그러나 우리는 서버를 켤 필요 없이 요청만 보내보며 테스트하면 됨)
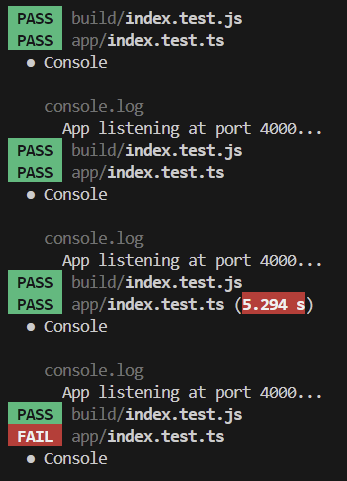
➡️ 테스트 코드를 위한 일관된 환경을 구축해보자!
테스트 코드를 위한 일관된 환경을 구축
// index.test.ts
import request from "supertest";
import createApp, { RedisClient } from "./app";
import * as redis from "redis";
import { LIST_KEY } from "./app";

// let app: Express.Application;
import { App } from "supertest/types";
let app: App;
let client: RedisClient;

beforeAll(async() => {
    client = redis.createClient({ url: "redis://localhost:6379" });
    await client.connect();
    app = createApp(client)
})

beforeEach(async() => {
    await client.flushDb();
})

afterAll(async() => {
    await client.flushDb();
    await client.quit()
})

describe("POST /messages", () => {
  it("responds with a success message", async() => {
    const response = await request(app)
        .post("/messages")
        .send({ message: "testing with redis" });
    expect(response.statusCode).toBe(200);
    expect(response.text).toBe("Message added to list");
  })
})

describe("GET /messages", () => {
	it("responds with all messages", async () => {
        // 여기서 데이터를 넣어주고, 마지막에 toEqual로 검사해보자
        await client.lPush(LIST_KEY, ["msg1, msg2"]);
    	const response = await request(app).get("/messages")
        expect(response.statusCode).toBe(200);
        // expect(response.body).toEqual([]);
        expect(response.body).toEqual(["msg1, msg2"]);
    });
});
// index.ts
import * as redis from "redis";
import createApp from "./app";
const PORT = 4000;
const startServer = async() => {
const client = redis.createClient({ url: "redis://localhost:6379" });
await client.connect();
const app = createApp(client)
app.listen(PORT, () => {
console.log(`App listening at port ${PORT}...`);
});
}
startServer();// app.ts
import express from 'express';
import { RedisClientType } from 'redis';
export const LIST_KEY = 'messages'
export type RedisClient = RedisClientType<any, any, any>;
const createApp = (client: RedisClient) => {
const app = express();
// const client = redis.createClient({ url: "redis://localhost:6379" });
// await client.connect();
app.use(express.json());
app.get("/", (request, response) => {
response.status(200).send("hello from express");
});
// end point
app.post("/messages", async(request, response) => {
const { message } = request.body;
await client.lPush(LIST_KEY, message);
response.status(200).send("Message added to list");
});
app.get("/messages", async(request, response) => {
const messages = await client.lRange(LIST_KEY, 0, -1);
response.status(200).send(messages);
});
return app;
};
export default createApp;.env 파일로 환경변수 분리하기
- github 설정 시 .env 파일은 .gitignore 설정해줘야 함!!
PORT=4000
REDIS_URL=redis://localhost:6379
개발 환경과 테스트 환경의 Redis URL 분리하기
- 테스트 환경에서는 하드코딩하고, 비밀번호를 준 후 포트 번호도 다르게 해서 사용하기 (개발 환경에서 실수로 DB 초기화 등을 방지하기 위함)
- index.test.ts 수정 :
const REDIS_URL = "redis://default:test_env@localhost:6380"; - redis server를 shutdown 명령으로 끈 후,
redis-server --daemonize yes --port 6380 --requirepass test_env명령으로 다시 켜기 - redis-cli 접속시에도 디폴트는 6379이므로,
redis-cli -p 6380으로 접속해야 함!
그 후 다른 명령어를 입력하기 전에,auth test_env로 이전에 설정한 비밀번호를 입력하고 나면 OK가 뜸. 그 이후부터는 모든 명령어 입력이 다시 가능해짐.
Section 3 | 전통적인 가상서버(Virtual Machine)에 배포하기 - AWS Lightsail
Express App 최종 확인
npm i로 항상 package.json에 있는 애들을 다 설치하는 용으로 사용해왔는데, 만약 개발용으로 devdependency 버전으로 설치한 모듈이 있는 경우에는npm install -D로 싹 다 설치해줘야 함!redis-server --daemonize yes로 서버를 하나 시작하고, 그 뒤에는redis-server --daemonize yes --port 6380 --requirepass test_env

- npm run dev 로 시작
여기까지 완료하고 나면 local machine에서 node.js app이 redis 서버 위에서 돌아가고 있는데, github에 업로드한 후 VM server (AWS)에서 pull로 가져옴으로서 이제는 VM서버 위에서 돌려볼 예정이다.
VSCode로 Github에 업로드하기
- 2단계 인증(OTP) 반드시 활성화 할 것!
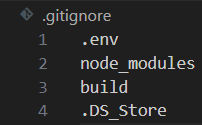
git init: .git 파일 생성git status: 현재 git에 올라가있는 파일들을 조회하고, 만약 node_modules 등 불필요한 것들이 올라가있는 경우 .gitignore라는 이름의 파일을 만들고 아래와 같이 불필요한 파일/폴더명을 적어준 후 다시git status명령어로 잘 제외되었는지 확인하기.
빨간색인 이유는 아직 git에 add가 되어있지 않기 때문임. git add . 이후 다시 git status로 확인해보면 초록색으로 바뀜.
git add .git commit -m "first commit"git remote add origin <깃허브레포HTTP주소>: push 전에 어디에 push해야할지, 레포지토리에 대한 정보를 줘야 함.git push origin main: 여기서 보안상 push할 권한이 없다고 나올 거임. 왜? 이건 private 으로 생성된 repository이니까. 아래에서 SSH로 보안처리를 해보자.
SSH Key 생성해서 Github에 코드 push하기
- SSH Key 생성하기:
ssh-keygen -t rsa -b 4096 -C "galaxybook pro"
이 때, rsa는 알고리즘명이고 b는 비트수인데 비트수가 높을 수록 더 복잡하게 암호화됨. 그러나 암호화가 복잡할 수록 복호화 과정에 소요되는 시간도 더 길어지므로 너무 큰 비트는 권장되지 않음. C는 어떤 기기에 대해 인증하는지를 명시함 ls ~/.ssh로 생성된 키 목록을 조회할 수 있으며 결과적으로,id_rsa,id_rsa.pub만 보면 되고,id_rsa.pub가 public key임.cat ~/.ssh/id_rsa.pub으로 public key 조회하기- github의 settings > SSH and GPC keys로 들어가서 New SSH Key 누르고 위에서 조회한 public key를 입력한 후 생성하기
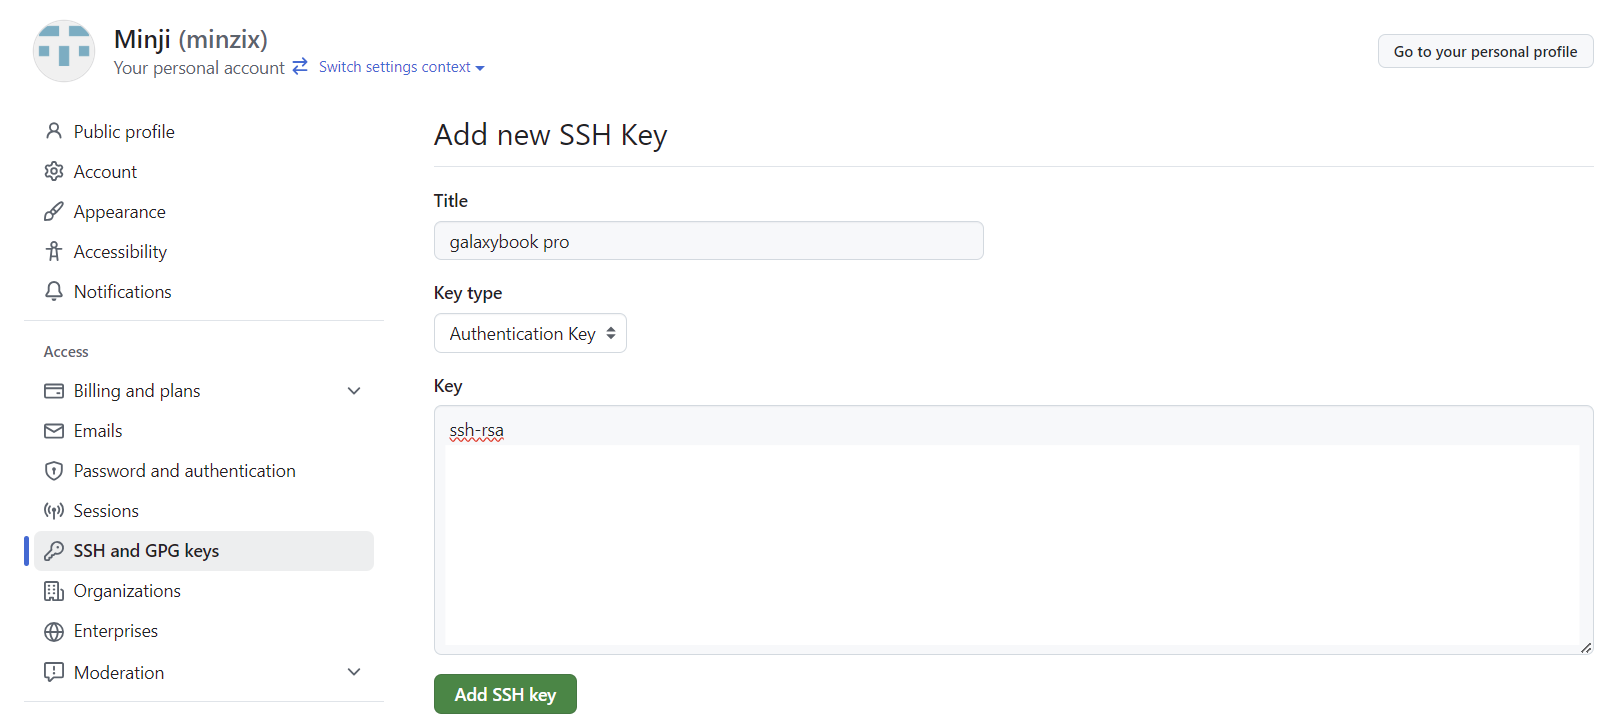
- 다시
git push --set-upstream origin master로 push 성공
AWS Lightsail Instance로 가상서버 생성하기
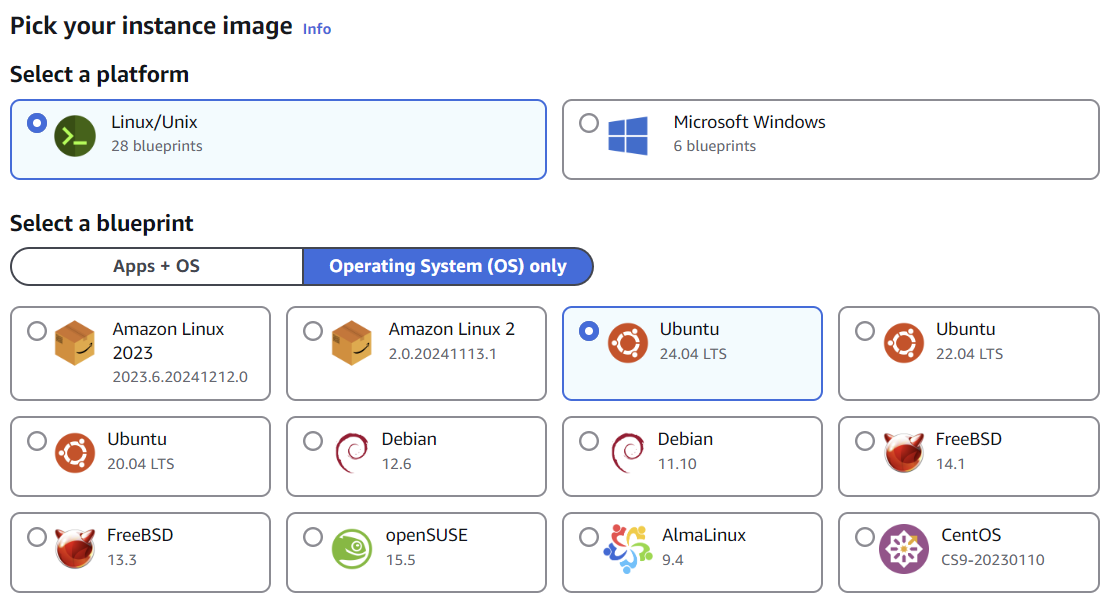
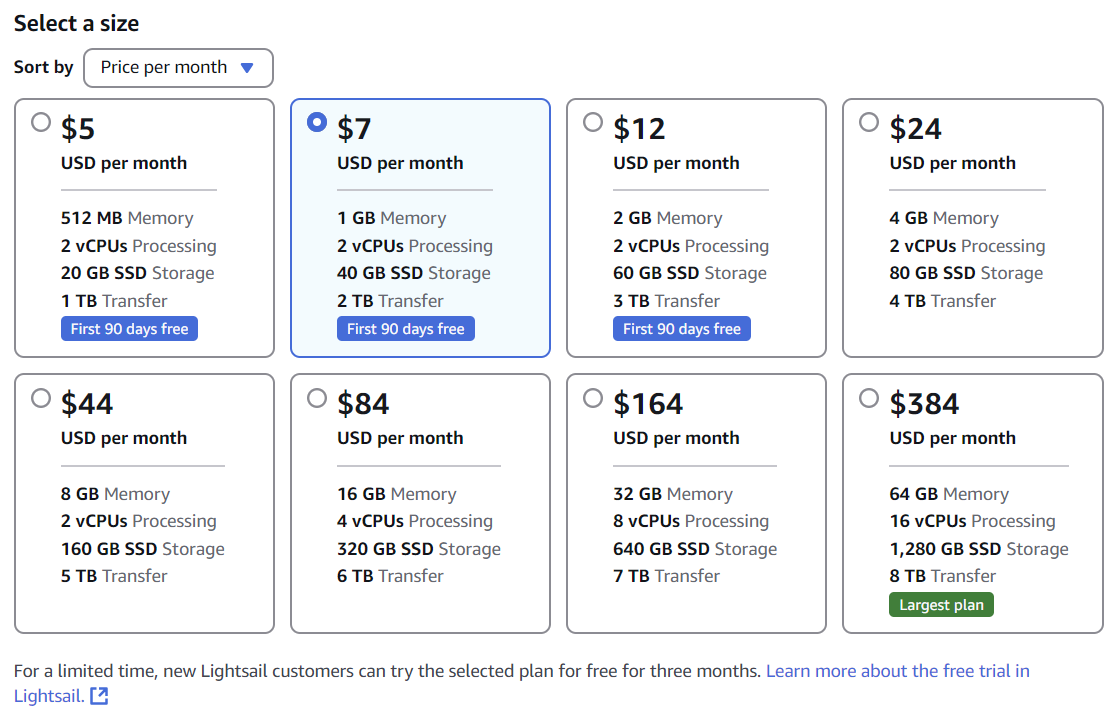
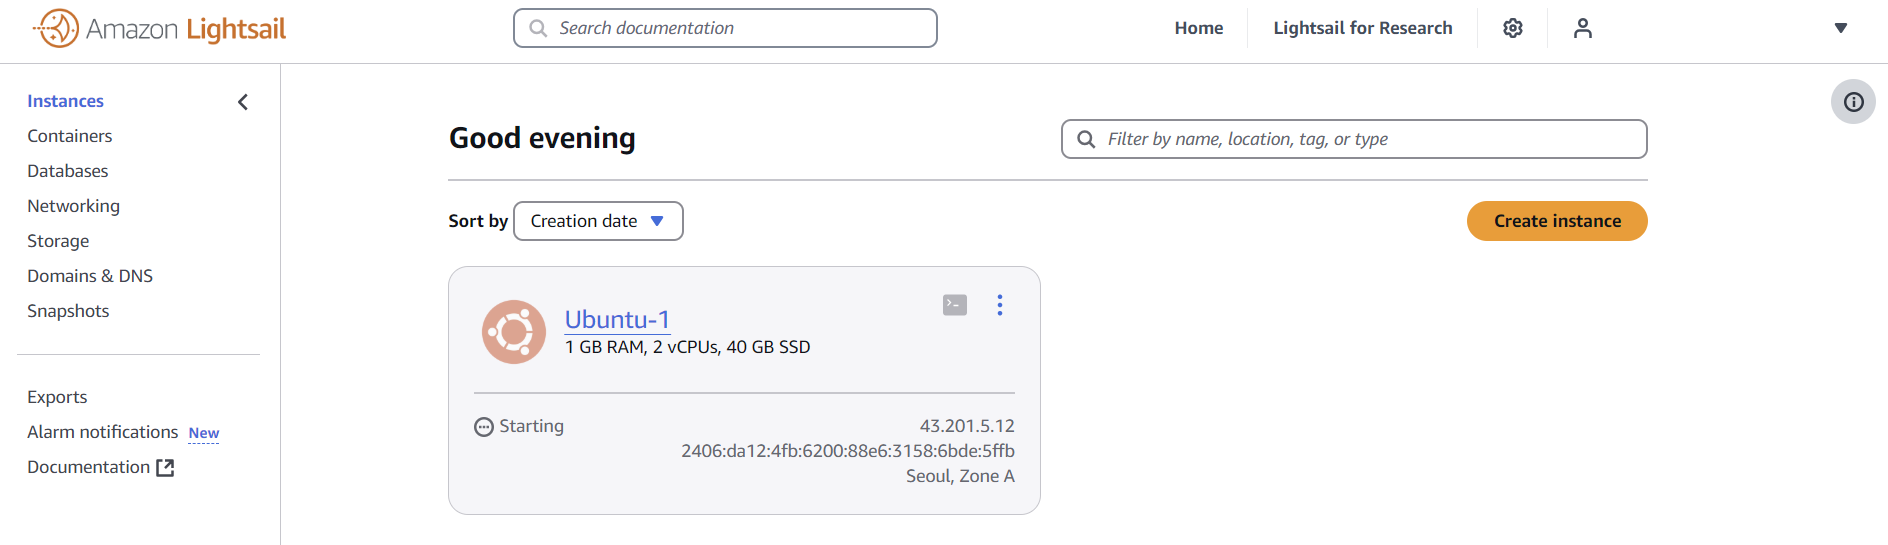
메모리가 1GB, CPU가 2개는 되었으면 해서 얘를 고름 (첫 3달은 무료라고 써있으니 그 전에 해제하면 과금되지는 않을 것임)
VM에 Node.js, Redis 설치하기
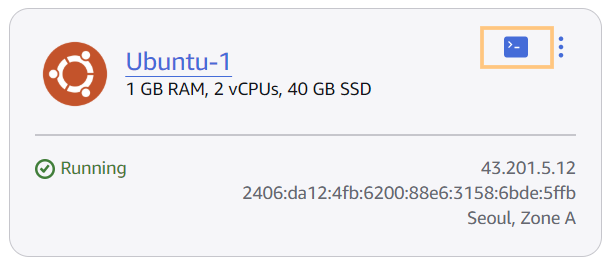
원래는 SSH 인증을 해서 로컬에서 접근해야 하지만, 우선은 좀 더 간편하게 주황색 네모로 표시된 터미널로 접근해보자.
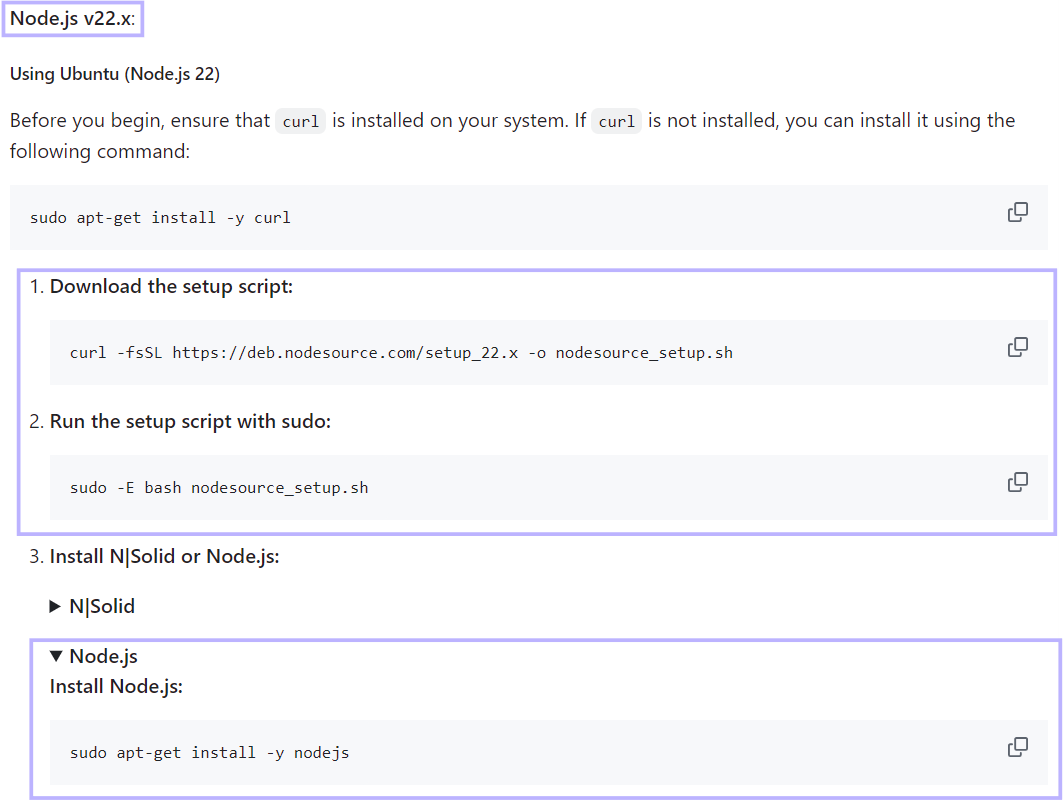
Node.js 설치 명령어 깃허브 링크: LTS가 지원되는 Node.js 버전을 찾아서 아래 사진의 명령어 세줄을 돌린 후node -v로 설치 확인하기 (해당 링크는 Node.js 공식 홈페이지의 '패키지 관리자를 통한 Node.js 설치' 섹션에서 찾을 수 있음)

Redis 설치 명령어 링크: install redis를 구글링한 후 Linux 선택, 아래의 명령어들 한줄씩 실행하면, 설치 후 바로 실행까지 되고 있음을 확인할 수 있음.
curl -fsSL https://packages.redis.io/gpg | sudo gpg --dearmor -o /usr/share/keyrings/redis-archive-keyring.gpg
sudo chmod 644 /usr/share/keyrings/redis-archive-keyring.gpg
echo "deb [signed-by=/usr/share/keyrings/redis-archive-keyring.gpg] https://packages.redis.io/deb $(lsb_release -cs) main" | sudo tee /etc/apt/sources.list.d/redis.list
sudo apt-get update
sudo apt-get install redis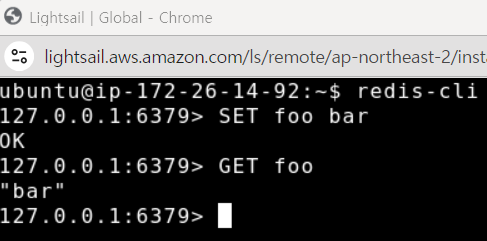
- shutdown 명령어로 죽여도 죽여도 계속 살아남,, ➡️ 실제 개발 상황에서 서버가 꺼지면 안되기 때문에 systemd 등의 서비스 매니저를 통해서 무조건 실행되도록 설정해둔 것!
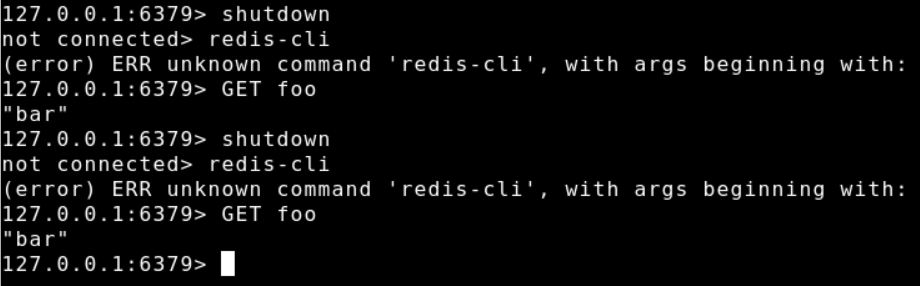
Ubuntu Service Manager: systemd & systemctl
sudo systemctl status redis-server
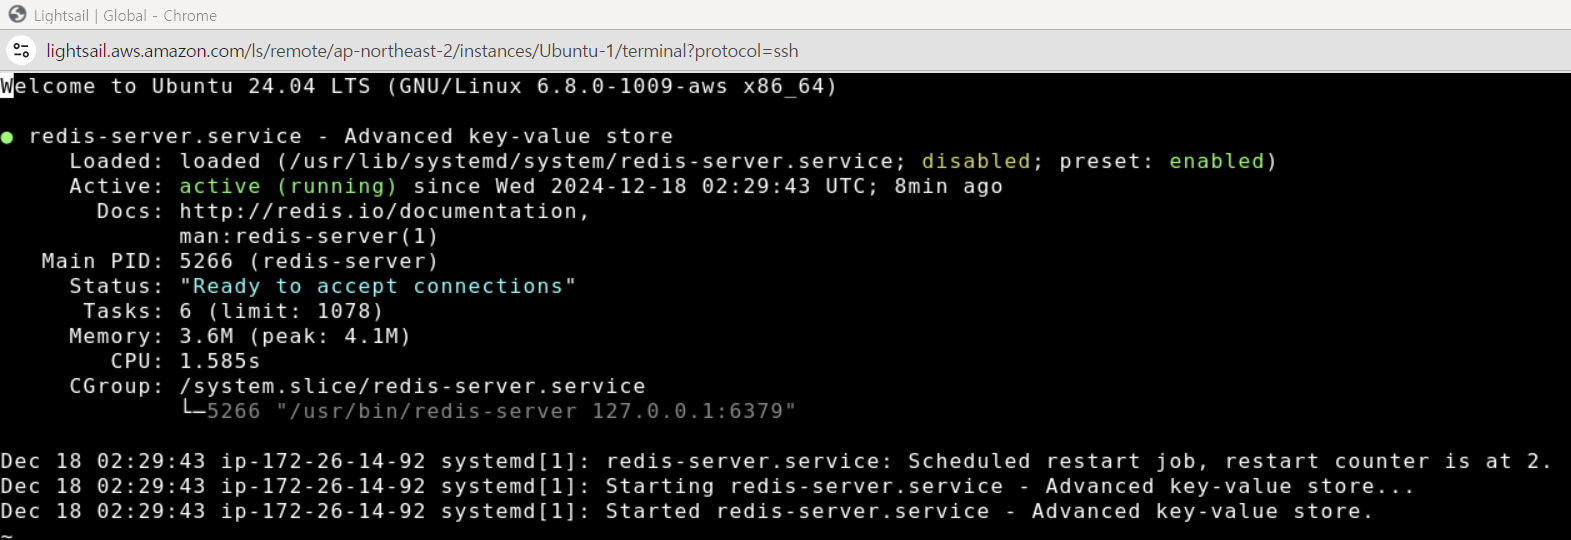
- 이미지에 있는 redis-server.service 파일도 열어보기:
cat /usr/lib/systemd/system/redis-server.service
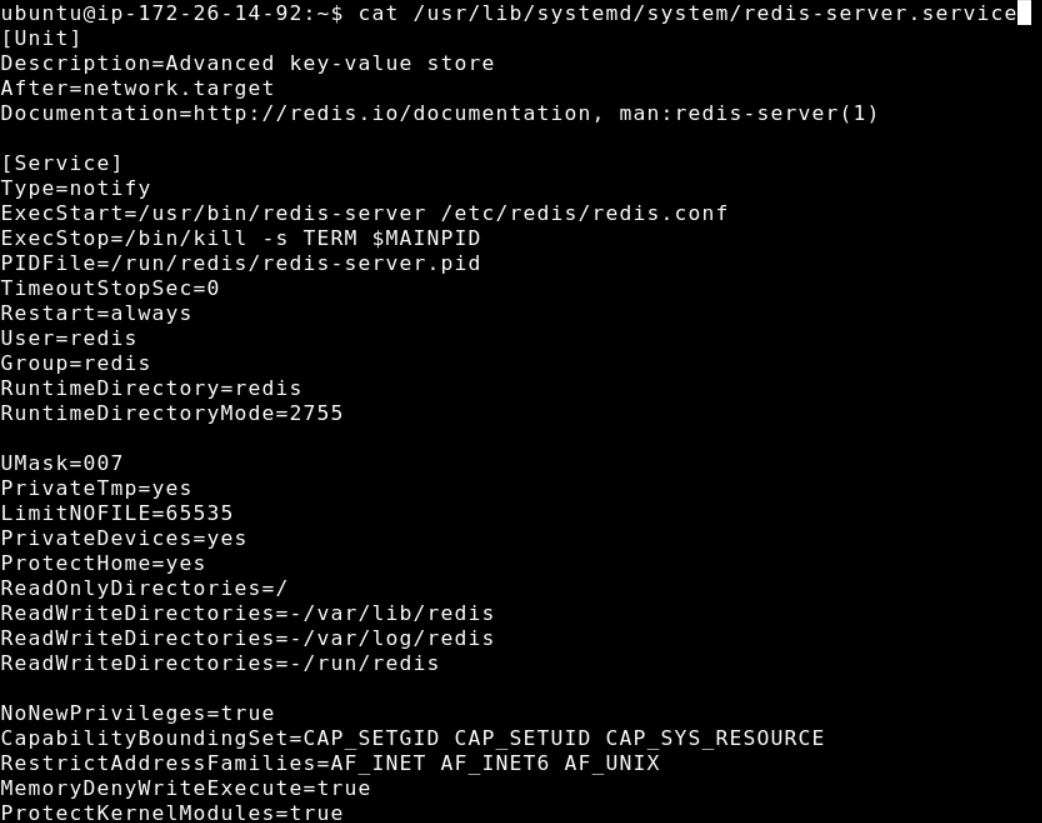
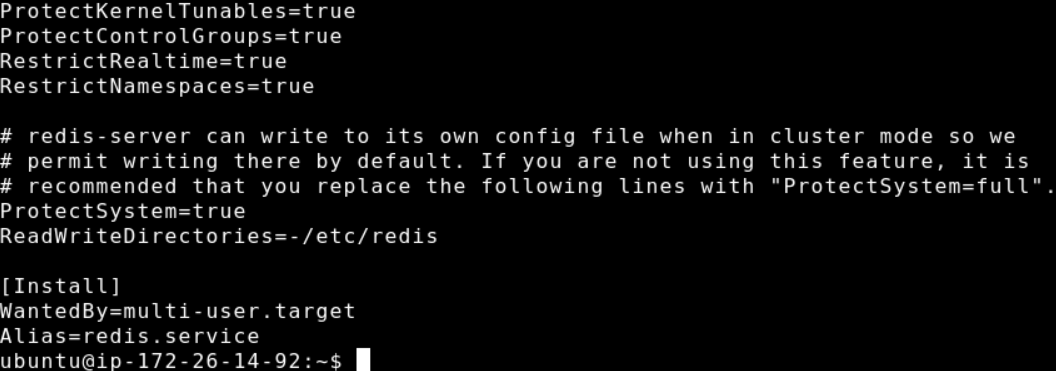
After=network.target: 네트워크에 연결되고 나면 실행해라Restart=always: 항상 재시작해라
Github Repository에서 VM으로 소스코드 Clone(Pull) 해주기
- VM에서 기존에 만든 private repository로부터 git pull(clone)을 시도하면 어떻게 될까?
access deny될 것 ← 당연하게도, 기존에 만든 SSH 인증키는 내 로컬 기기(노트북)과 깃허브 사이의 인증이었고 지금 돌리고 있는 가상서버는 전혀 별개의 제3의 서버이므로 보안상으로도 막혀야 맞음.
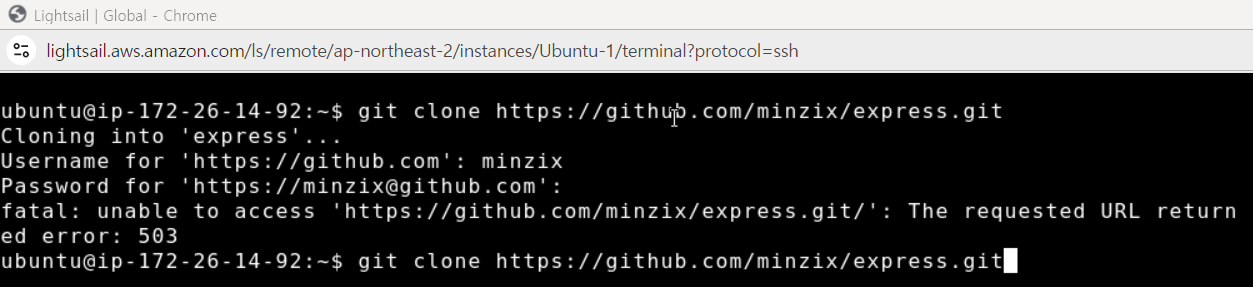
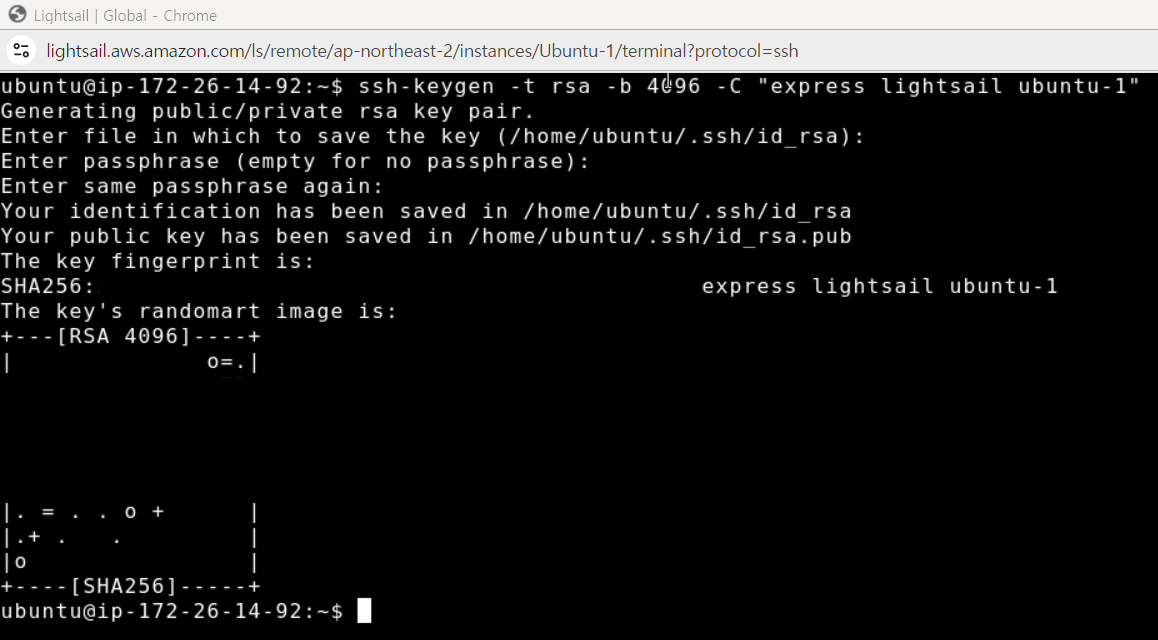
- 현재 ubuntu 서버를 위한 SSH 키를 다시 생성해보자!
ssh-keygen -t rsa -b 4096 -C "express lightsail ubuntu-1"
cat ~/.ssh/id_rsa.pub
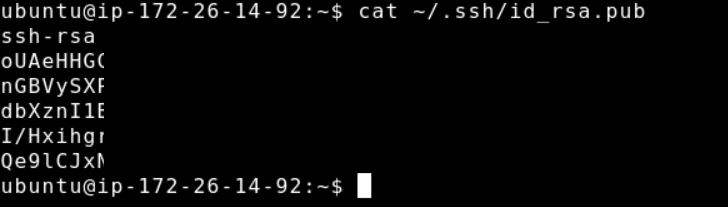
- 이후 깃허브 들어가서 동일하게 키 추가해주기

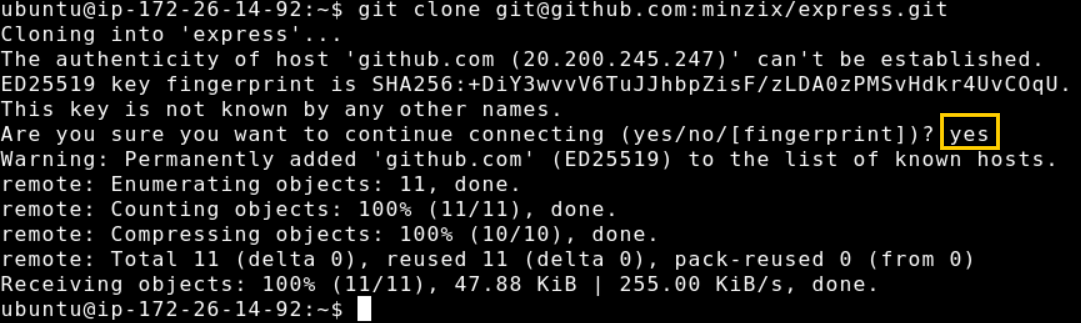
- 다시 git clone 시도: 이 때, 반드시 HTTP 링크가 아닌 SSH 링크로 시도해야 함!! 그리고 뭔 authentication 관련 문구 떠도
yes를 입력하자..y로는 안됨..
- 확인하기 위해서는
cd express,ls등의 명령어를 통해 github repo에 업로드되어있는 파일들이 그대로 clone된 것을 확인할 수 있다.

환경변수 세팅 및 백엔드 실행
- 로컬에서 git clone 후 해주는 작업들을 그대로 해준다고 생각하면 됨
cd express후npm install -D: node_modules 설치
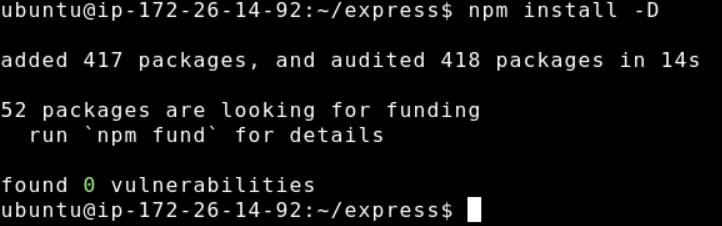
npm run build: 여기서 메모리를 1GB 이상으로 선택한 이유가 나옴! 그 이하의 메모리는 간혹 build 실패를 일으킴,, build가 메모리를 많이 소모하기 때문
➡️ 따라서 나중에 build는 CICD pipeline으로 빼주면 좋겠다! (이게 먼소리징,,)vim .env로 환경변수 파일 생성 후i를 눌러서 작성 모드로 바꾸고, 앞서 .env 파일에 넣었던 내용들을 입력해주기. 그 후 ESC로 insert 종료하고, :wq로 저장 후 에디터 종료시키기
아까 .env 파일을 gitignore로 빼주고 PORT 번호 없이는 실행되지 않도록 해뒀으니까 자연히 지금 실행하면npm run start가 안 먹힘
PORT=4000
REDIS_URL=redis://localhost:6379
생성된 파일을 확인하고 싶으면 cat .env로 확인
4. npm start로 실행하기
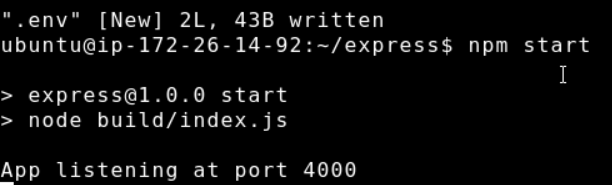
5. public ip를 복사해서 43.201.5.12:4000 이런 식으로 접근하면 접근이 될 거 같지만 안됨
Firewall 이해하기: 4000 PORT 노출하기
- 앞서 public ip
43.201.5.12:4000에 접근이 안됐던 이유: Firewall에 노출되지 않았기 때문! 현재 노출된 port 번호는 22, 80번 뿐임. 4000번은 노출되지 않음.
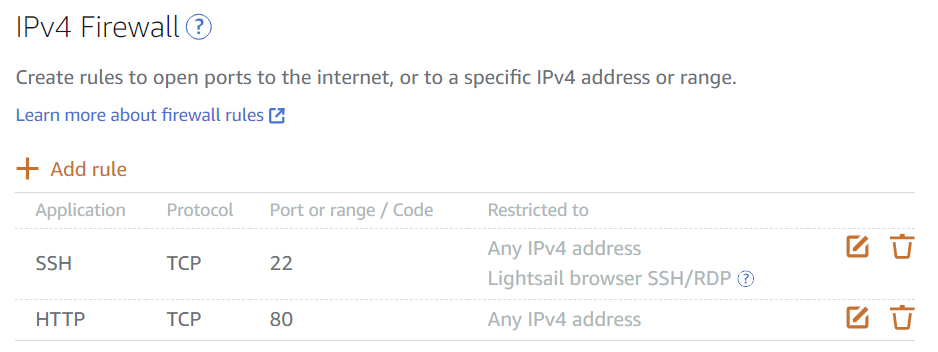
✨ 해결 방법 2가지
- 4000번을 노출시켜주는 방법
- restrict to IP address는 여기에 추가한 ip 주소에서만 접속할 수 있도록 하는 것임.
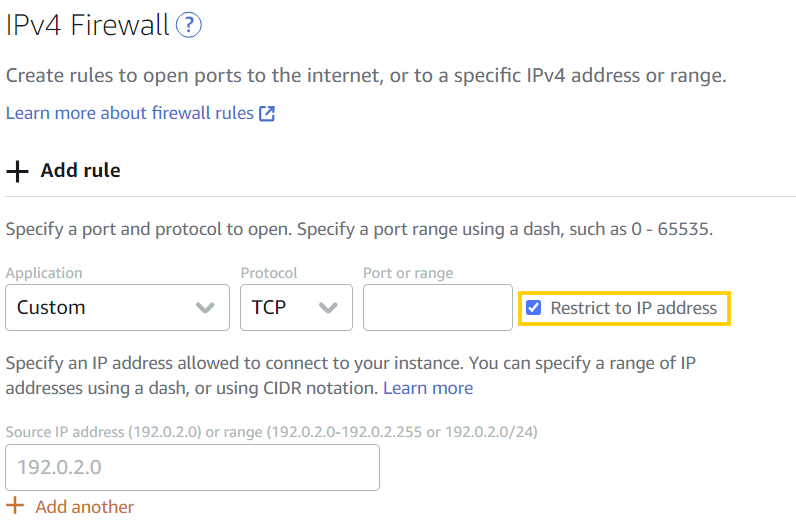
- 우선은 테스트용이니까 체크를 풀고 전체공개로 추가해보자.
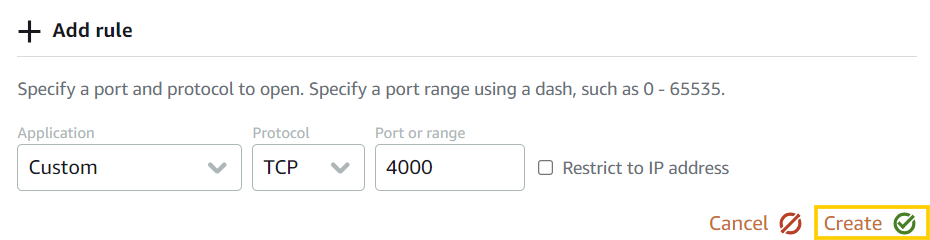
- 허용 후 접속되는 것 확인!
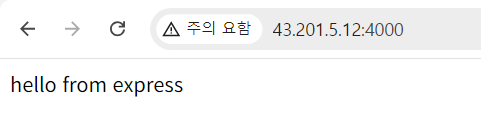
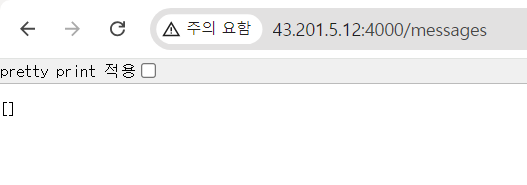
- 현재 고려되는 호출 권한들은 inbound (외부에서 내부(서버)를 호출하는 것)임
- outbound (서버(내부)에서 외부 API 등을 호출하는 것)은 기본적으로 모두 허용되어있음
.env파일에 정의해둔 환경변수파일을 수정해서 PORT 번호를 80번으로 바꾸기
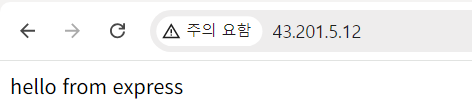
80번 선택 시 장점: 이후 접근 URL에서,43.201.5.12등<publicip>만으로 포트번호 기재 없이 접속 가능 (80이 디폴트 포트이므로)
- 앞서 임시로 열어둔 4000번 포트는 이제 필요없으니까 삭제해주기
cd express,vim .env로 다시 환경변수 파일 접근i, 수정,ESC,:wq순으로 입력cat .env로 확인- 실행시킬 때, 그냥
npm start로 실행하면 막힘 (80은 디폴트 포트이므로 실행에 권리자권한이 필요하기 때문에!)
sudo npm start로 실행해주기
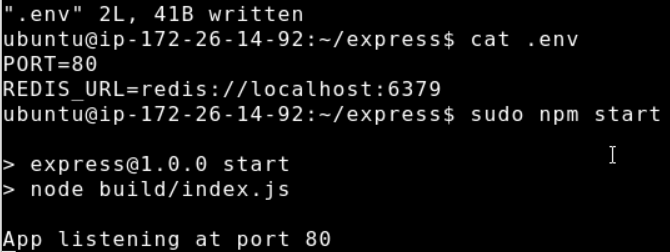
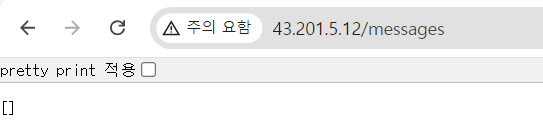
- public ip로 접속해서 접근 확인
Section 4 | Lightsail - Domain & HTTPS 적용하기
Public IP가 dynamic인 이유
- Public IP는 AWS 서버 reboot 시 dynamic하게 변경됨.
전 세계적으로 수많은 유저들이 가상머신을 만들었다가 버렸다가를 반복하는 와중에 ip로 사용할 수 있는 수는 유한하기 때문에 status가 running이 아닌 서버의 ip는 재활용함. - static IP를 발급받아서 사용할 수도 있지만, 이 또한 무제한은 아니므로 LoadBalancer를 생성하는 것이 권장됨.
LoadBalancer 생성해서 VM 연결하기 (유료,,)
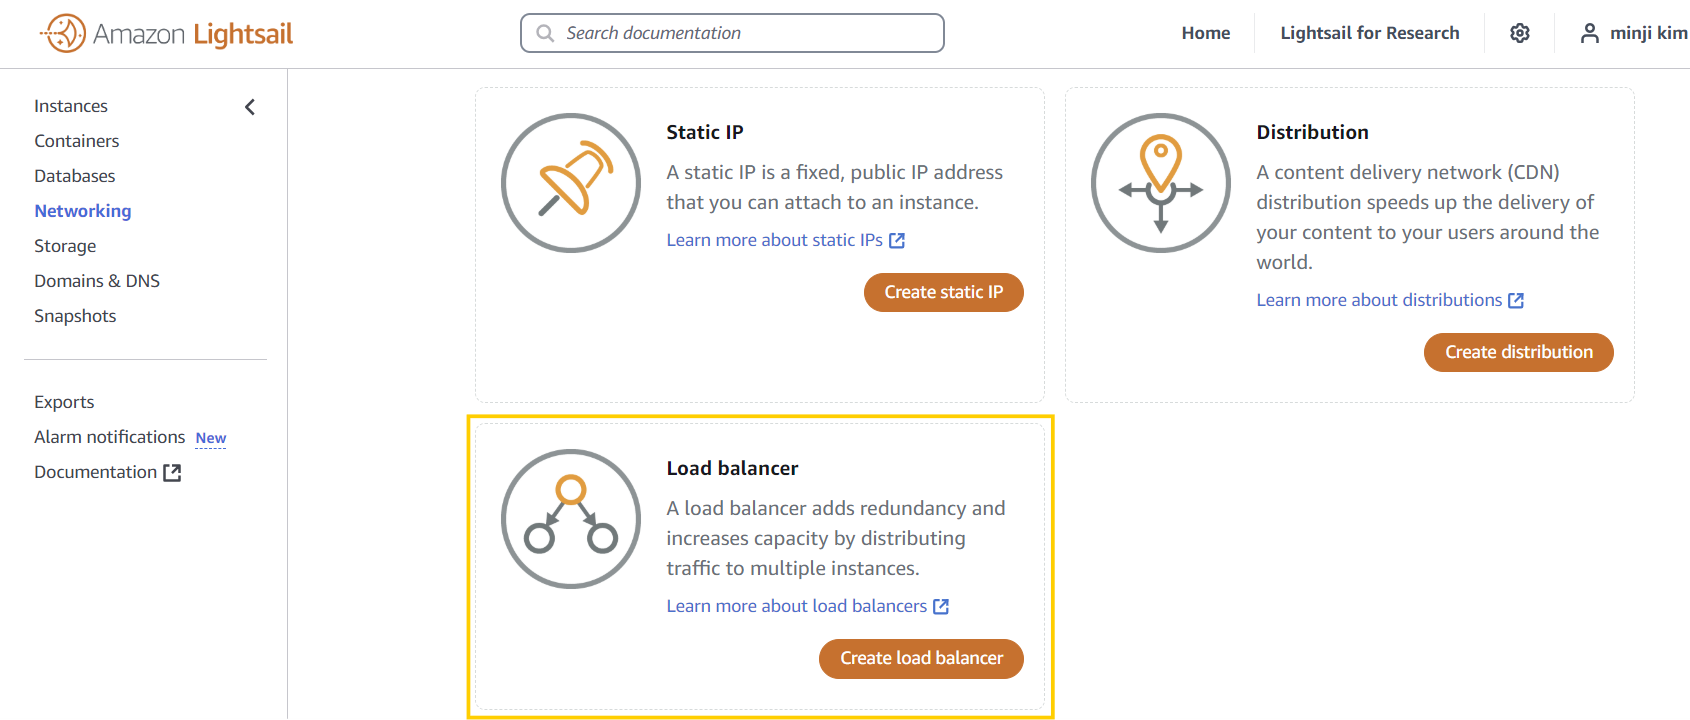
아예 URL이 생김
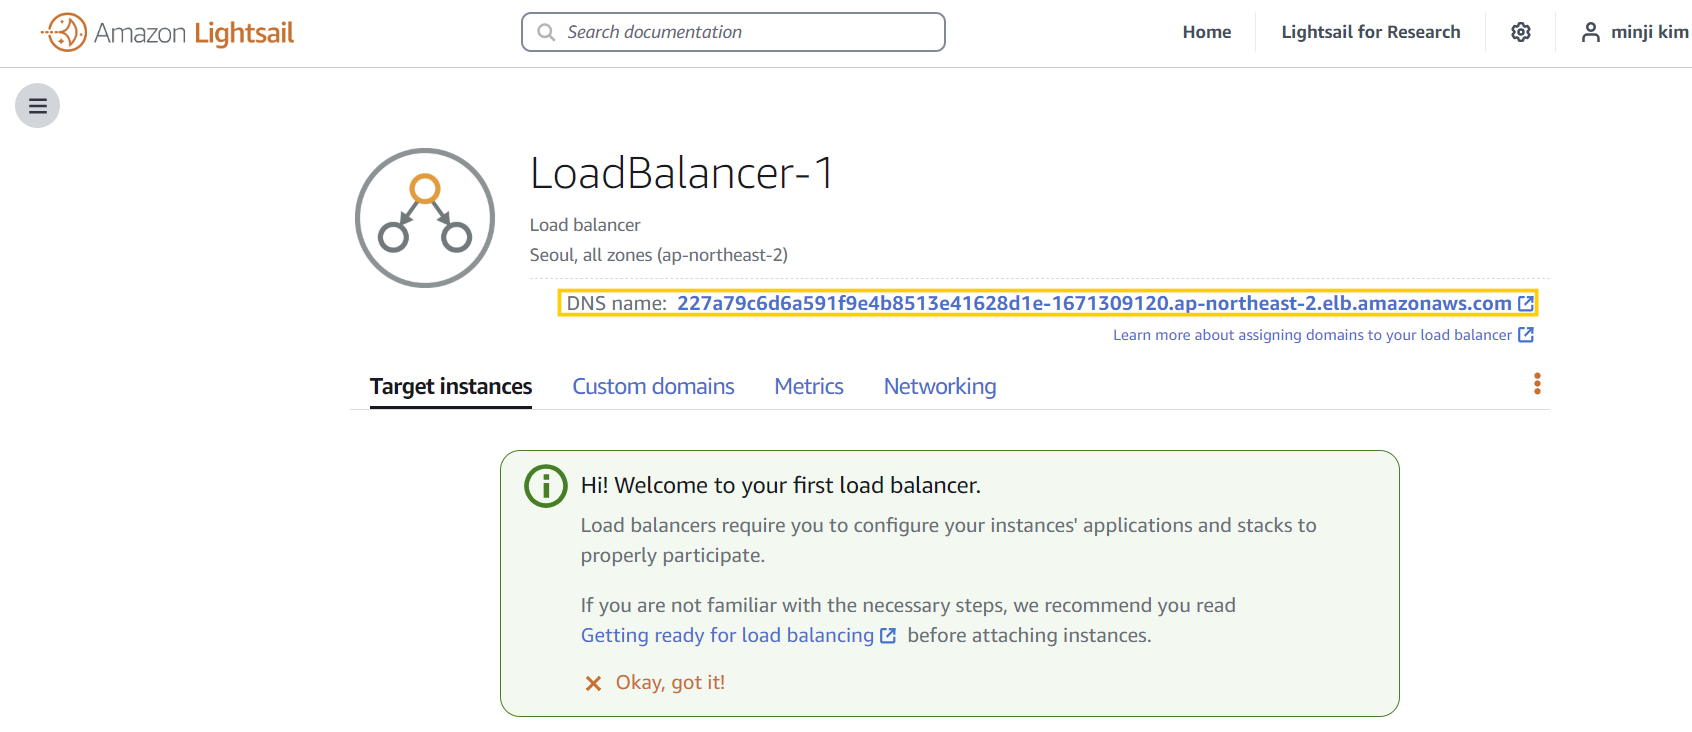
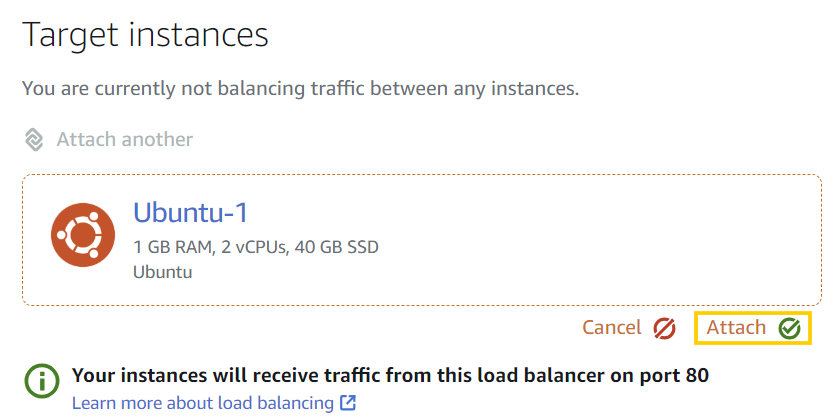
- Loadbalancer는 traffic을 받아서 아래에 연결된 인스턴스(VM)들에게 뿌려줌
- Health Checking: 연결된 인스턴스 연결이 적절히 잘 살아있는지를 확인하기 위해 일정 시간마다 지정된 API 엔드포인트로 요청을 날려서 200 OK를 확인함 (이 때, 만약 healthcheck 통과가 되지 않는 경우에는 다시 AWS 터미널로 접속해서 express가 켜져있는지 확인하고, 만약 켜져있지 않다면
sudo npm start명령어로 켜주기
요청 처리 시간도 확인 가능
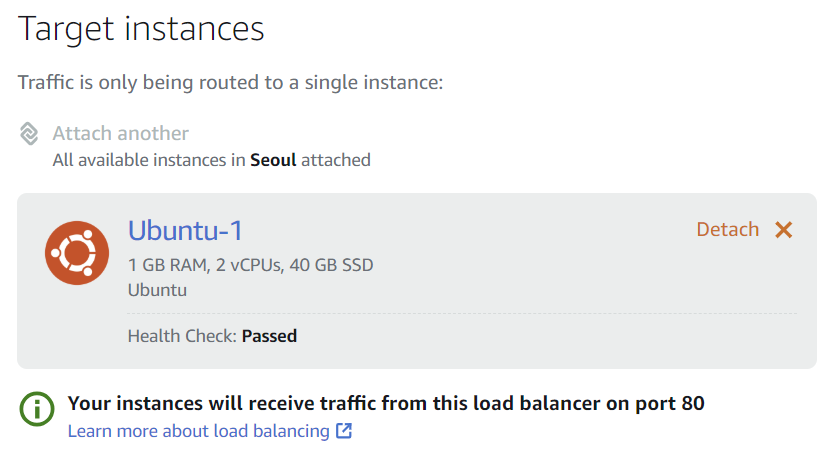
보안: LoadBalancer 우회해서 VM Public IP로 접근하지 못하도록 차단하기
- 아직까지는 LoadBalancer 에서 설정한 URL이 아닌, Public IP로도 접속이 가능함
- 이를 차단하기 위해, 80포트 삭제하기
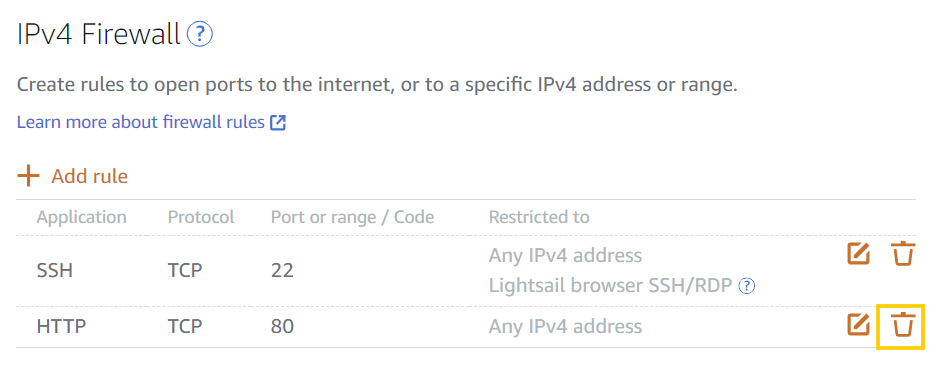
- 80포트를 삭제했을 때 LoadBalancer에서는 연결이 잘 되는 이유: LoadBalancer와 VM server는 내부망으로 private IP를 사용해서 통신하므로!

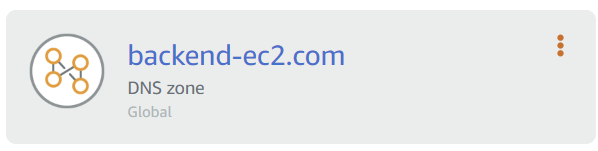
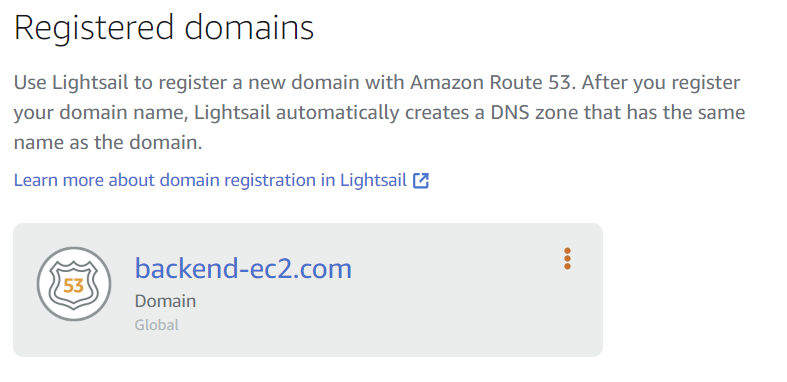
Domain 구입하기 (유료)
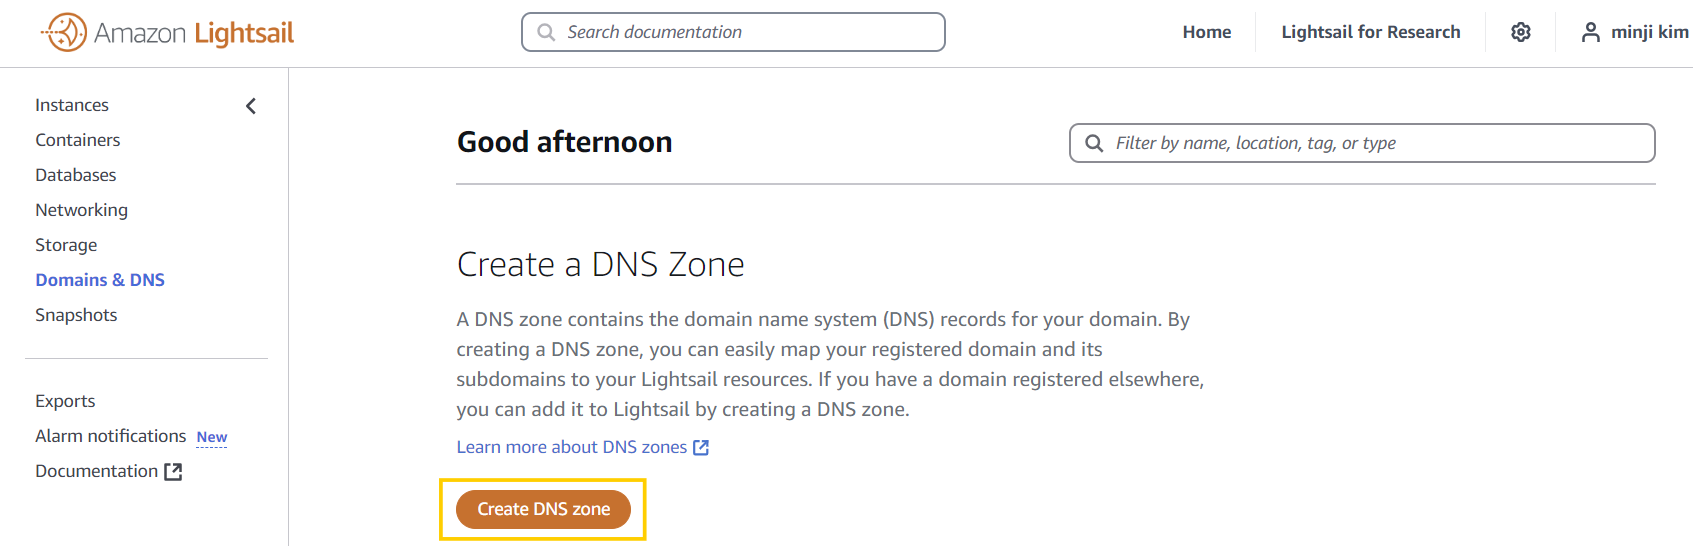
형광펜 부분 클릭해서 Domain 구입하기
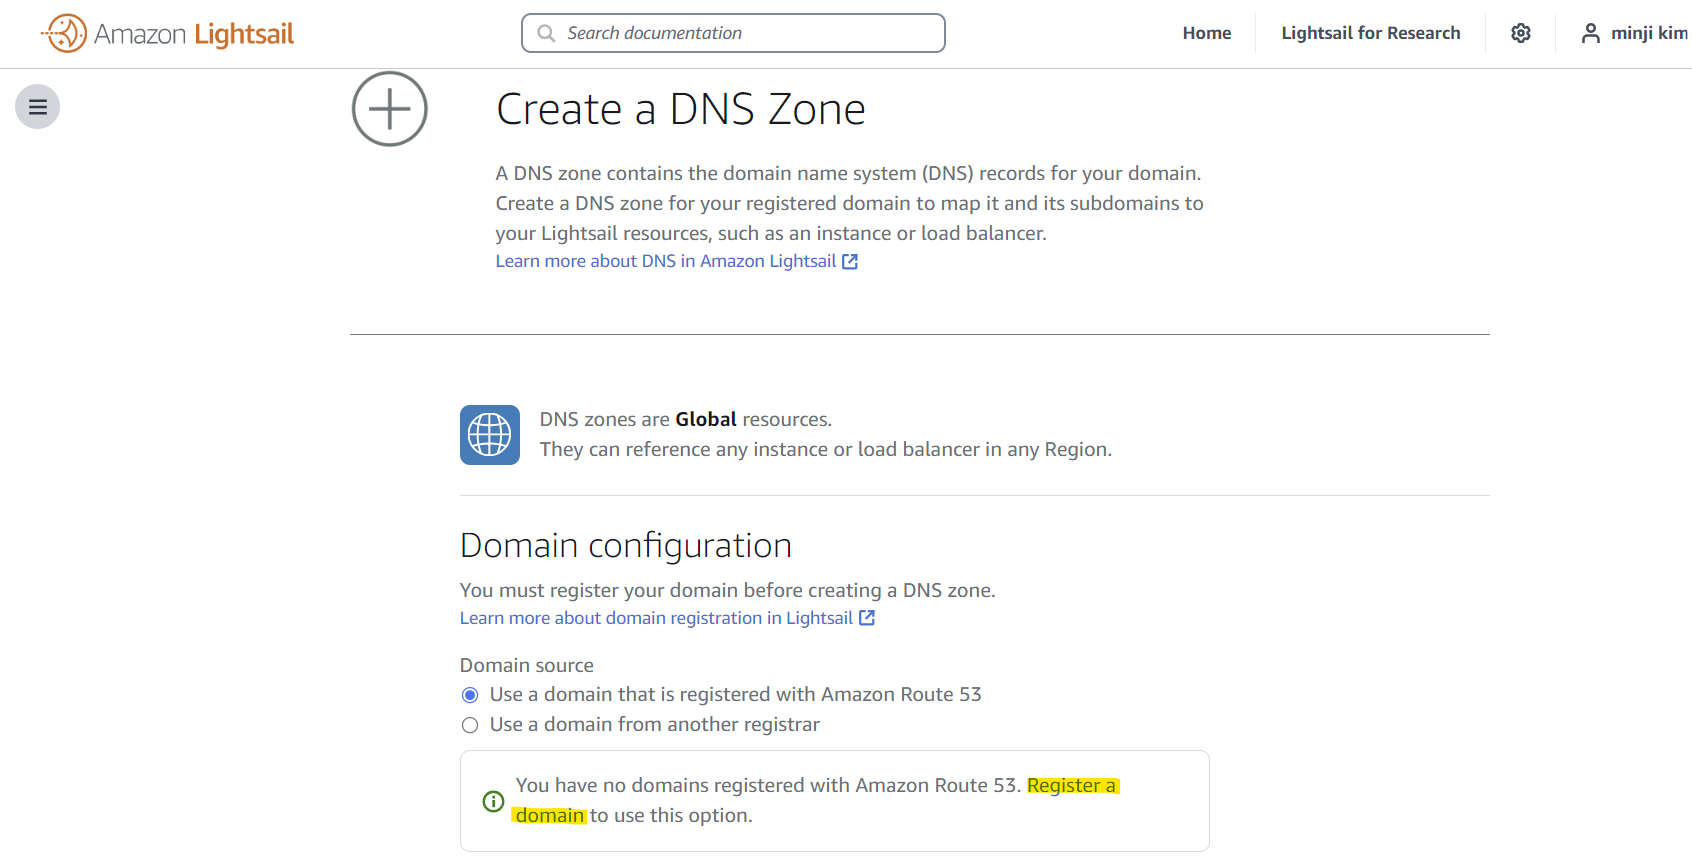
이메일 인증 전
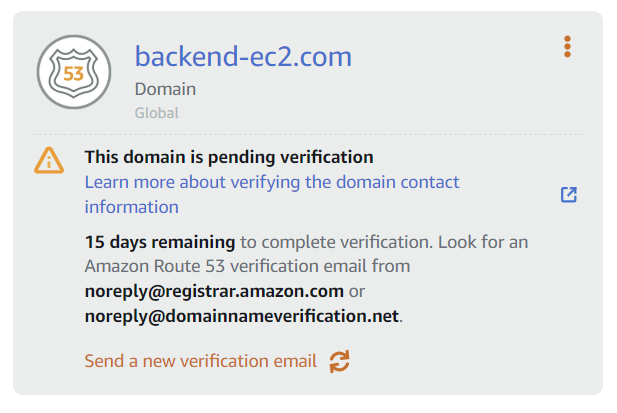
이메일 인증 후
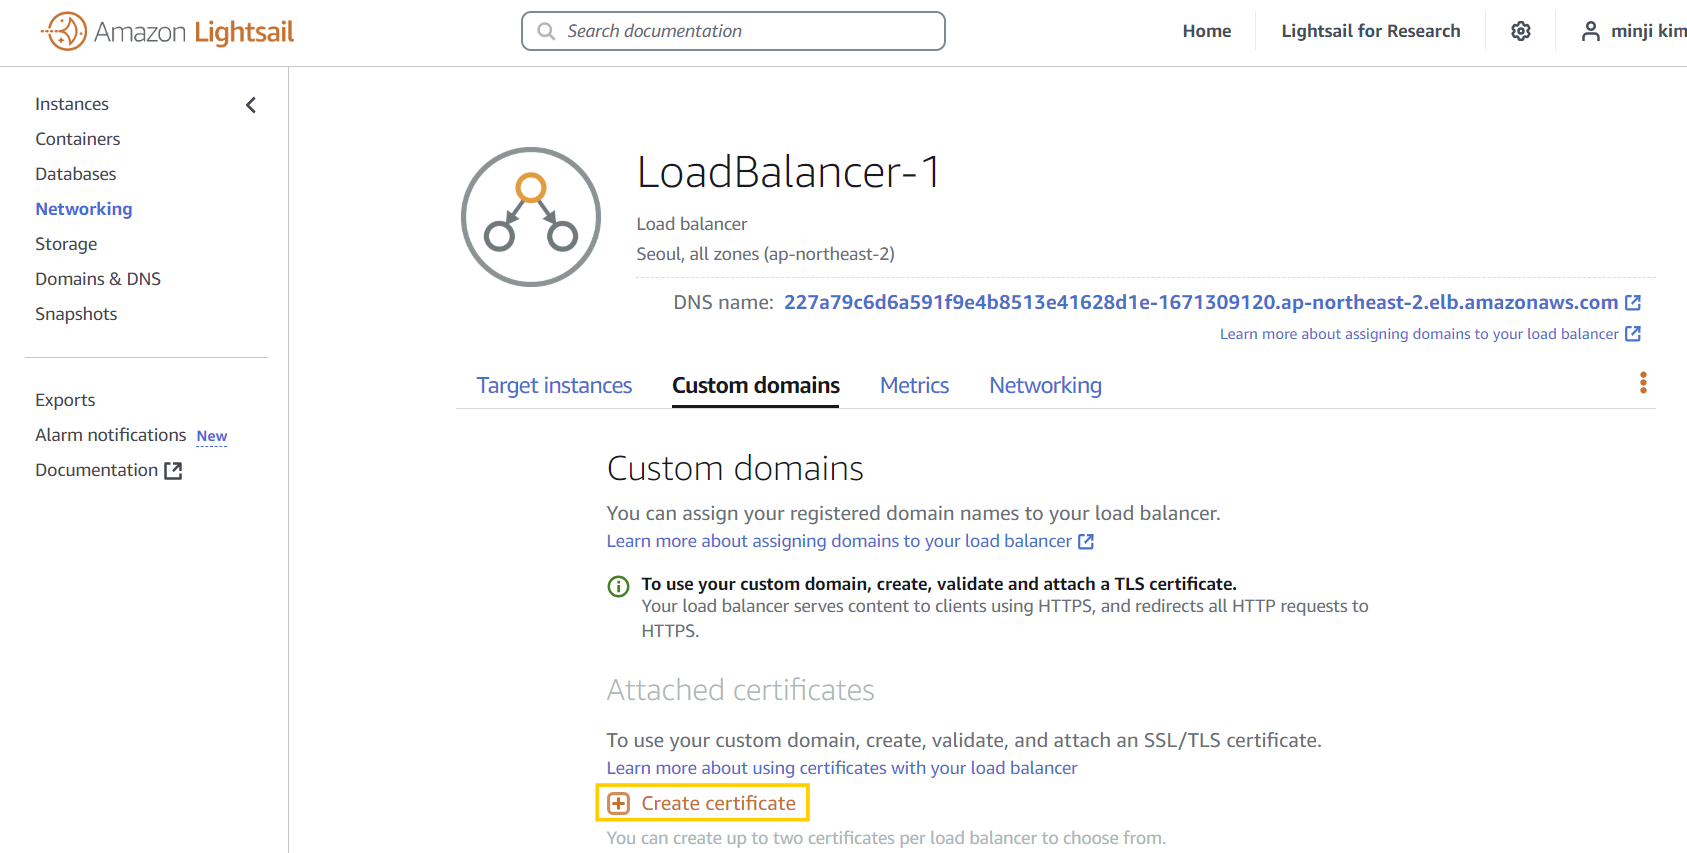
Loadbalancer랑 domain 연결하기 위한 certificate 생성하기
domain에 위에서 생성한 backend-ec2.com, www.backend-ec2.com 입력 후 생성
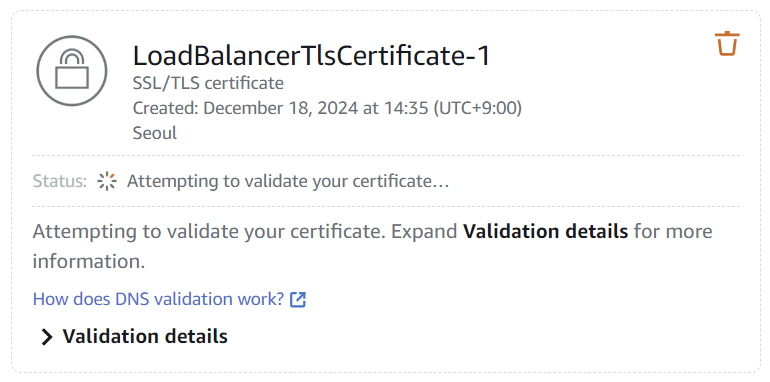
HTTPS 적용 후 Domain 연동
이제 연결!
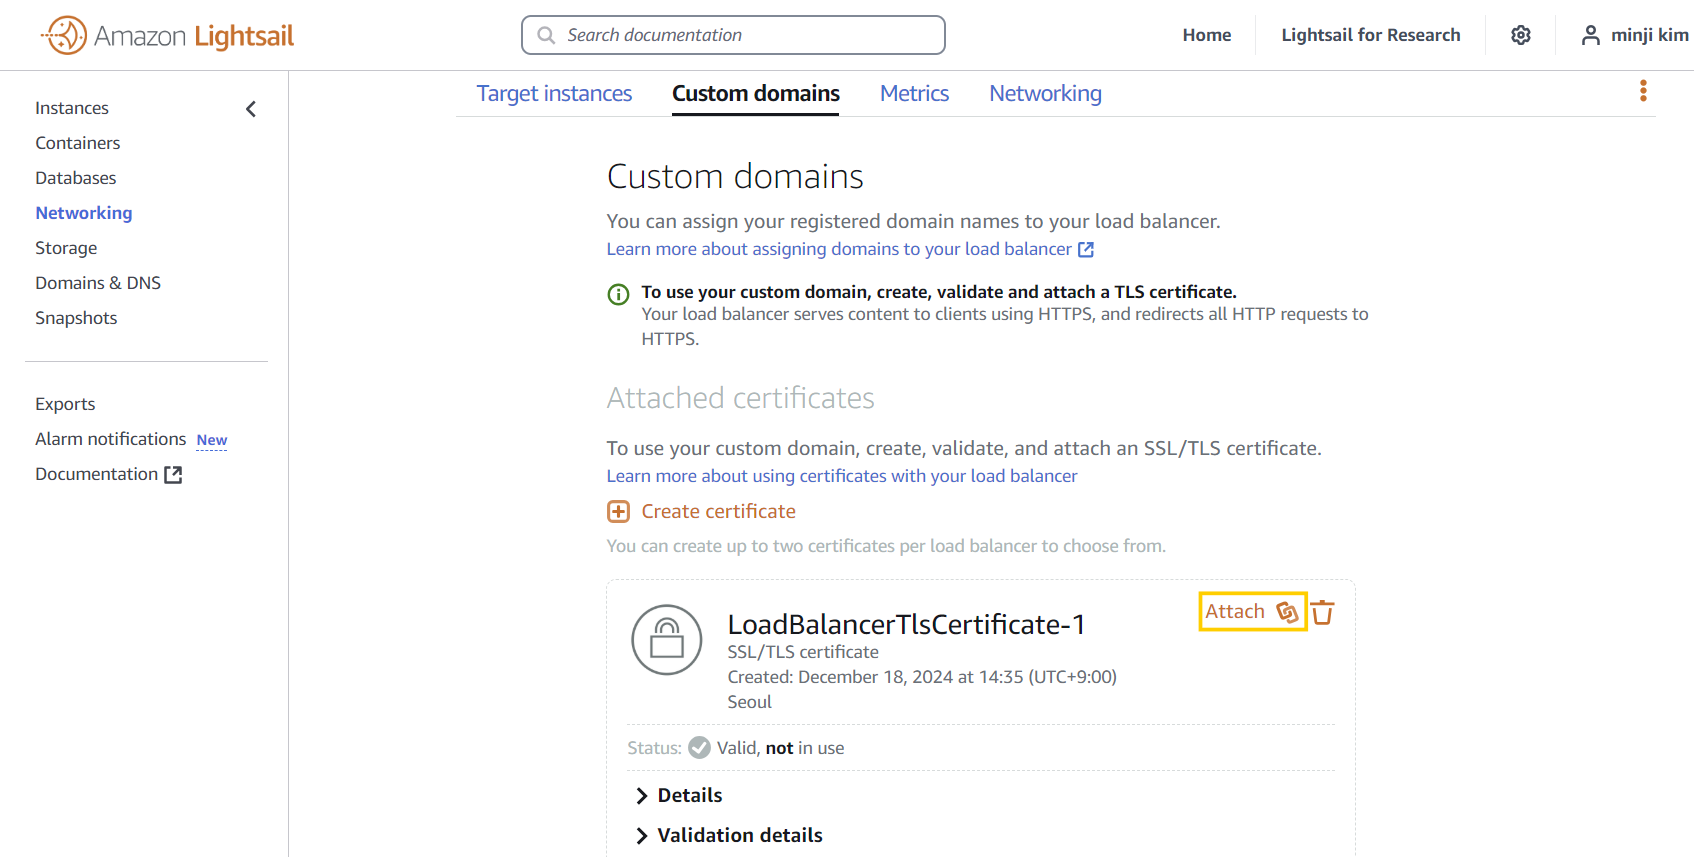
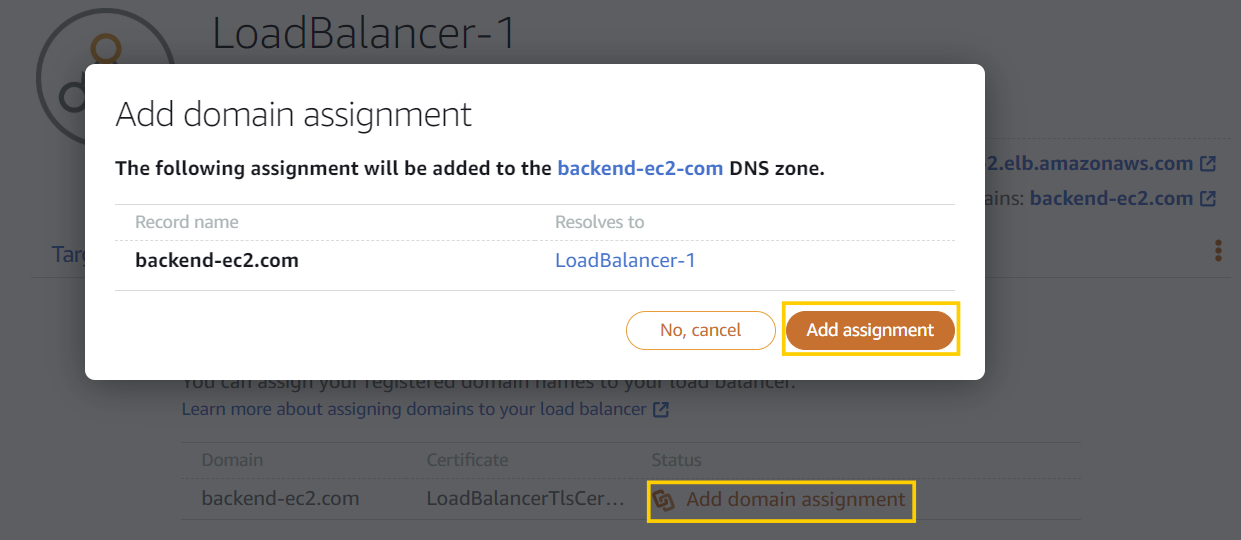
연결 확인
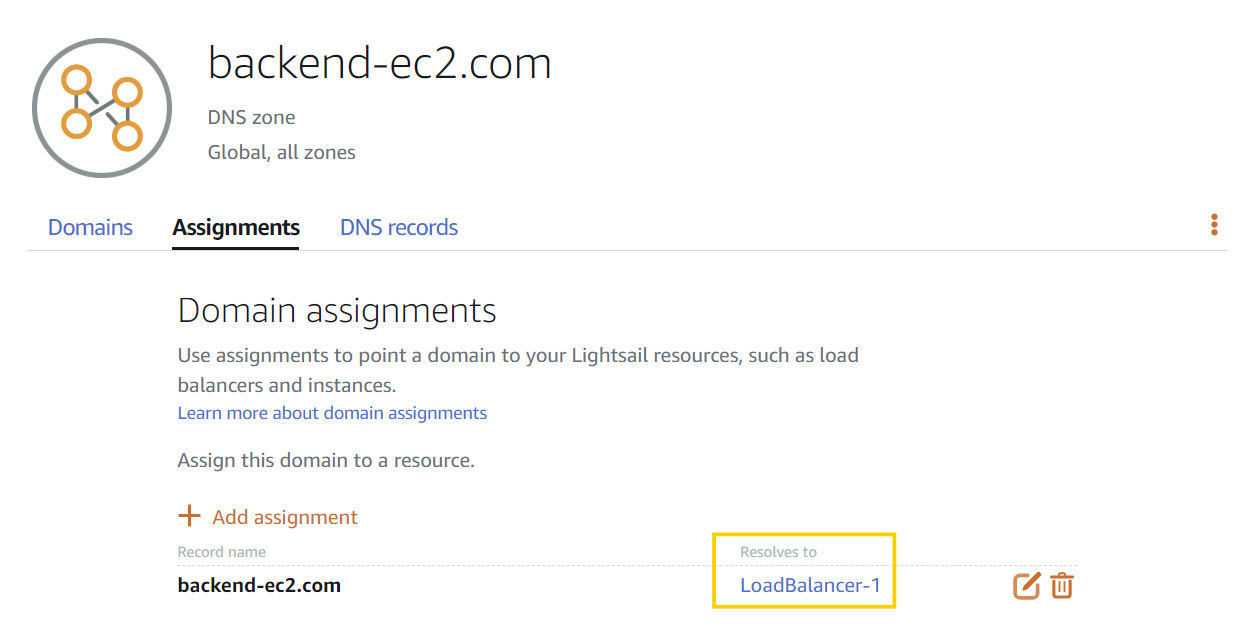
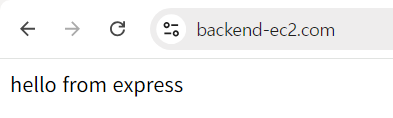
HTTPS도 추가
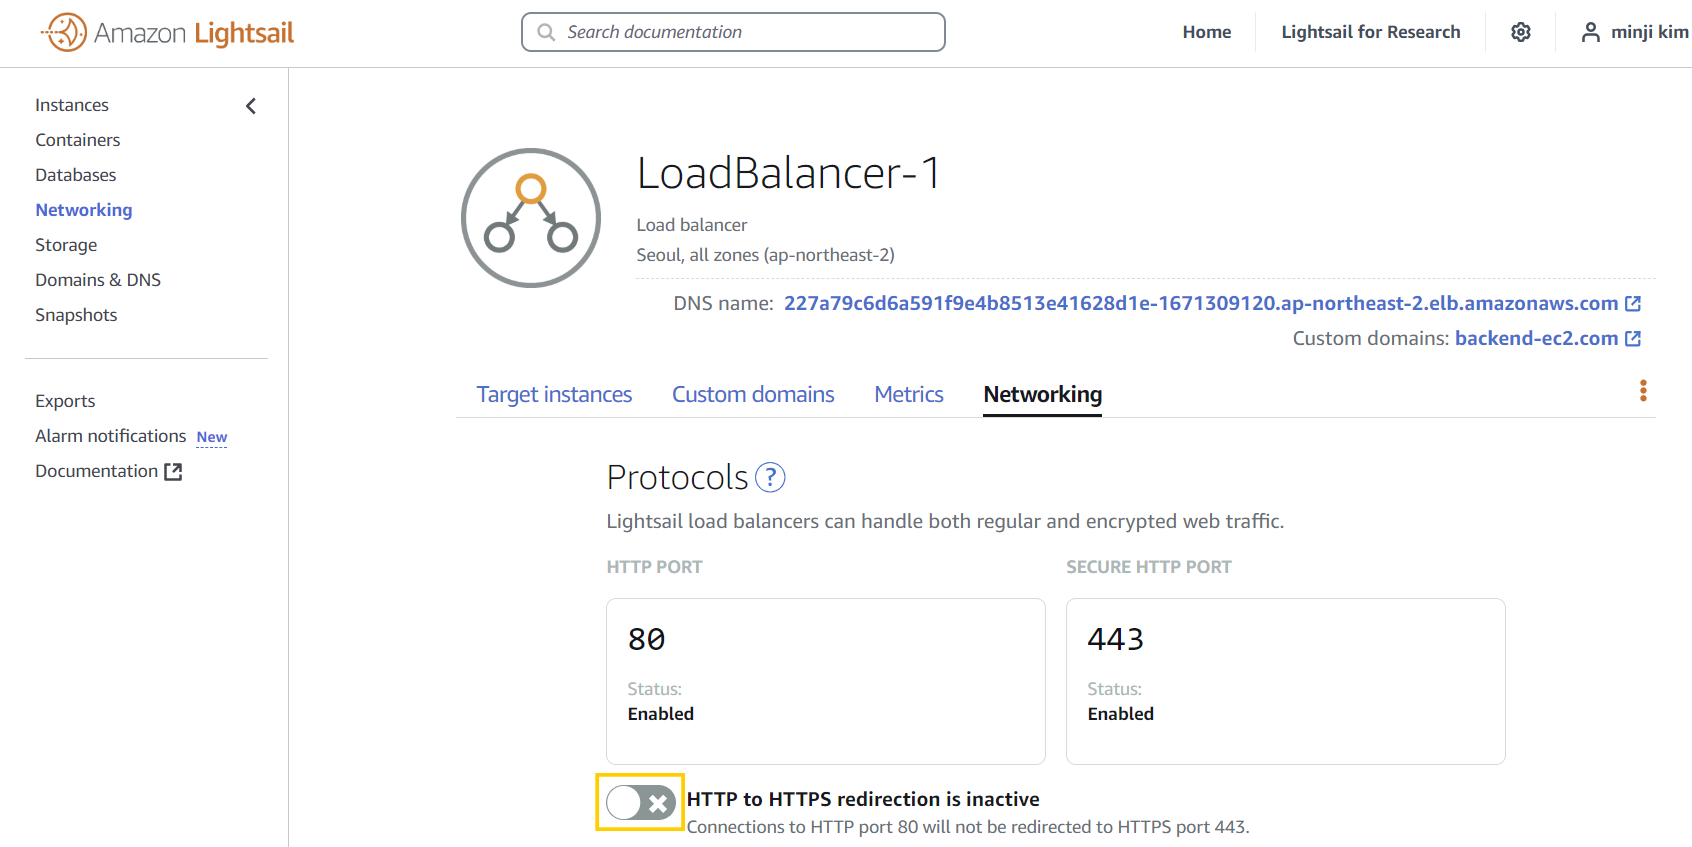
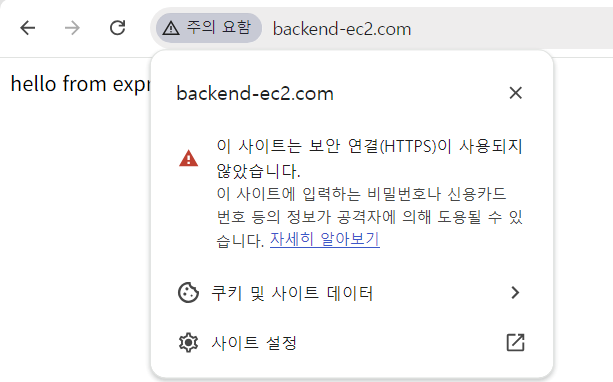
원래는 HTTP로 접속 시 아래와 같이 주의 요함으로 나왔는데,
적용 이후에는 HTTP로 접속해도 자동으로 HTTPS로 변경해서 접속시켜줌
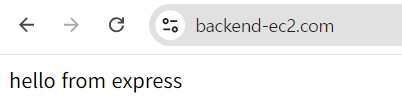
✅ 일단 여기까지 해도 대략적으로 배포는 가능!