Section 12 | AWS Application Load Balancer: Domain & HTTPS 적용하기
Lightsail에서 Route53으로 host zone 이전하기
- domain이 필요할 때마다 하나씩 사는 방법이 있고, 다른 곳에서 hosting하고 있던 미리 구입해둔 domain을 가져오는 방법이 있다. 비용 절감 차원에서 domain을 가져오는 방법으로 가보자.
-
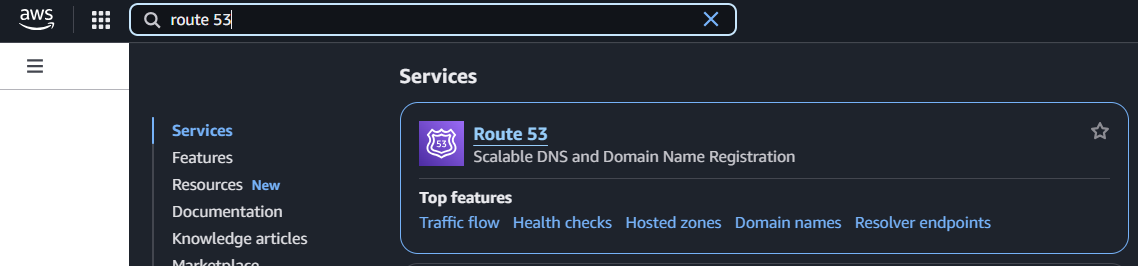
route 53 검색해서 들어가기
-
내 도메인 이름 확인:
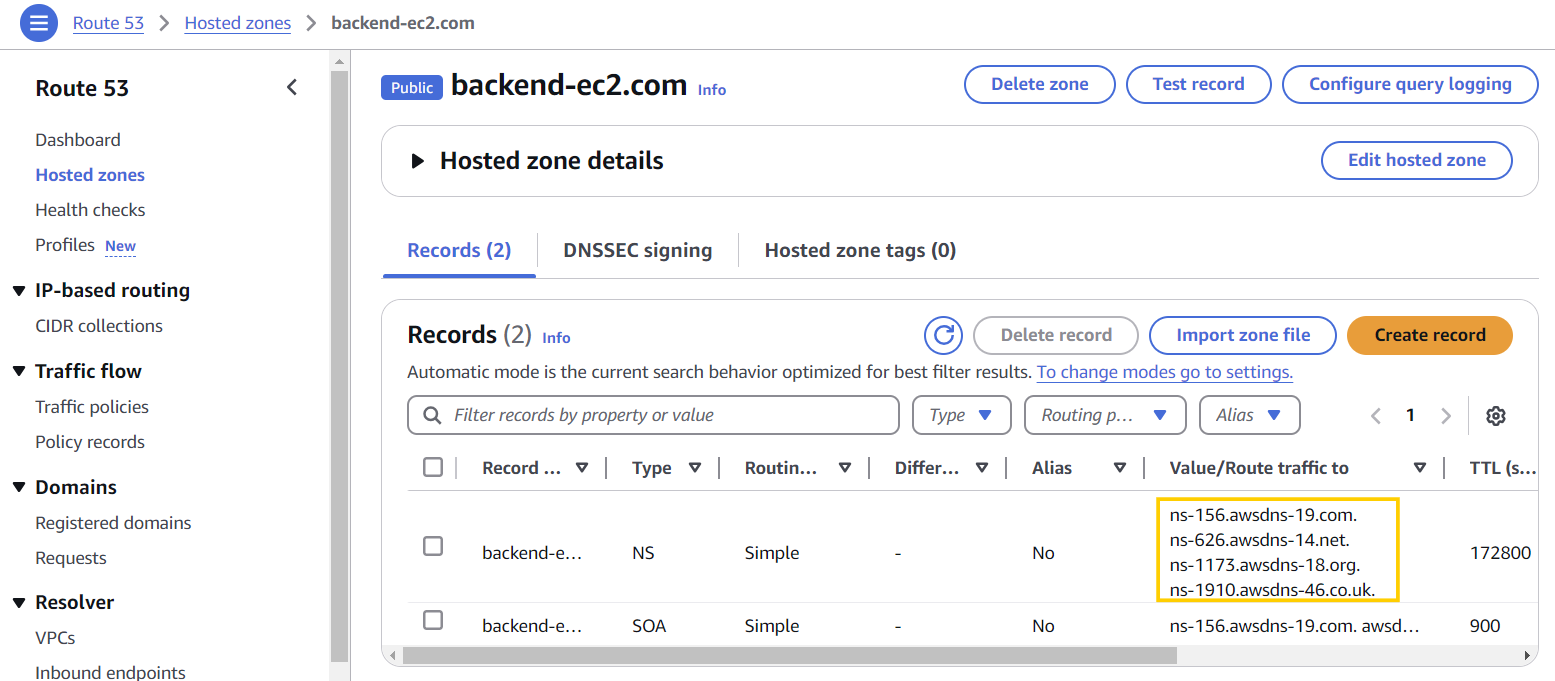
backend-ec2.com -
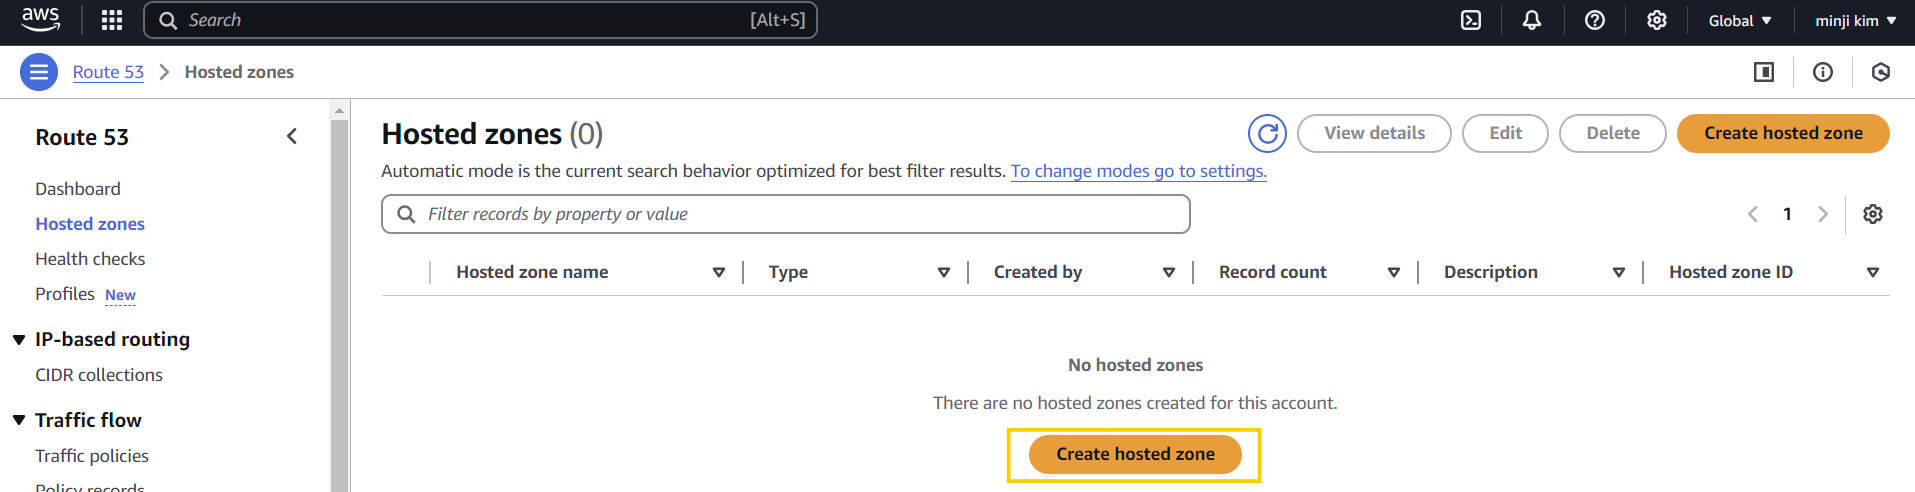
Hosted Zone 생성하기: 내 도메인 이름만 정확히 적어주고 생성하면 됨

하지만 여기까지 적용하면서 내가 이 도메인의 주인이라는걸 검증하는 절차가 전혀 없었음 .. 남의 도메인 가져다가 설정해도 가능하다는 말임.
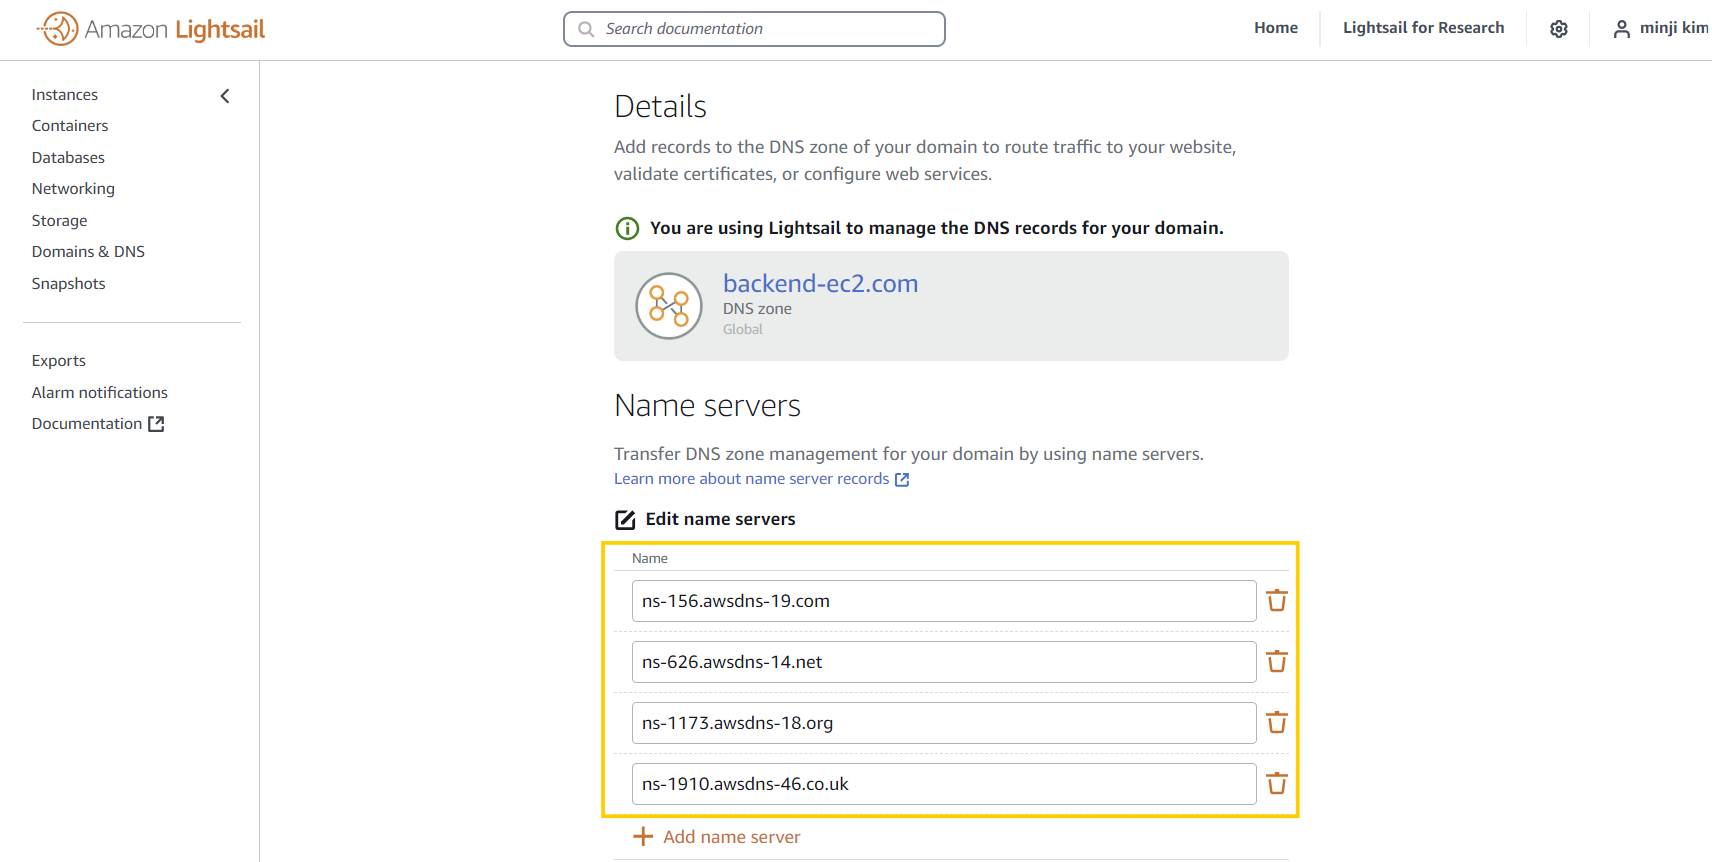
➡️ 따라서, 우리는 생성된 Hosted Zone의 네모칸 안에 있는 정보들을 기존 Lightsail의 domain (우리가 생성한 곳)으로 가서 Name server로 추가함으로서 우리가 이 domain의 주인임을 검증함 (만약 내 domain이면 아래와 같이 lightsail에서 name server를 수정할 수 있을 것이므로)
-
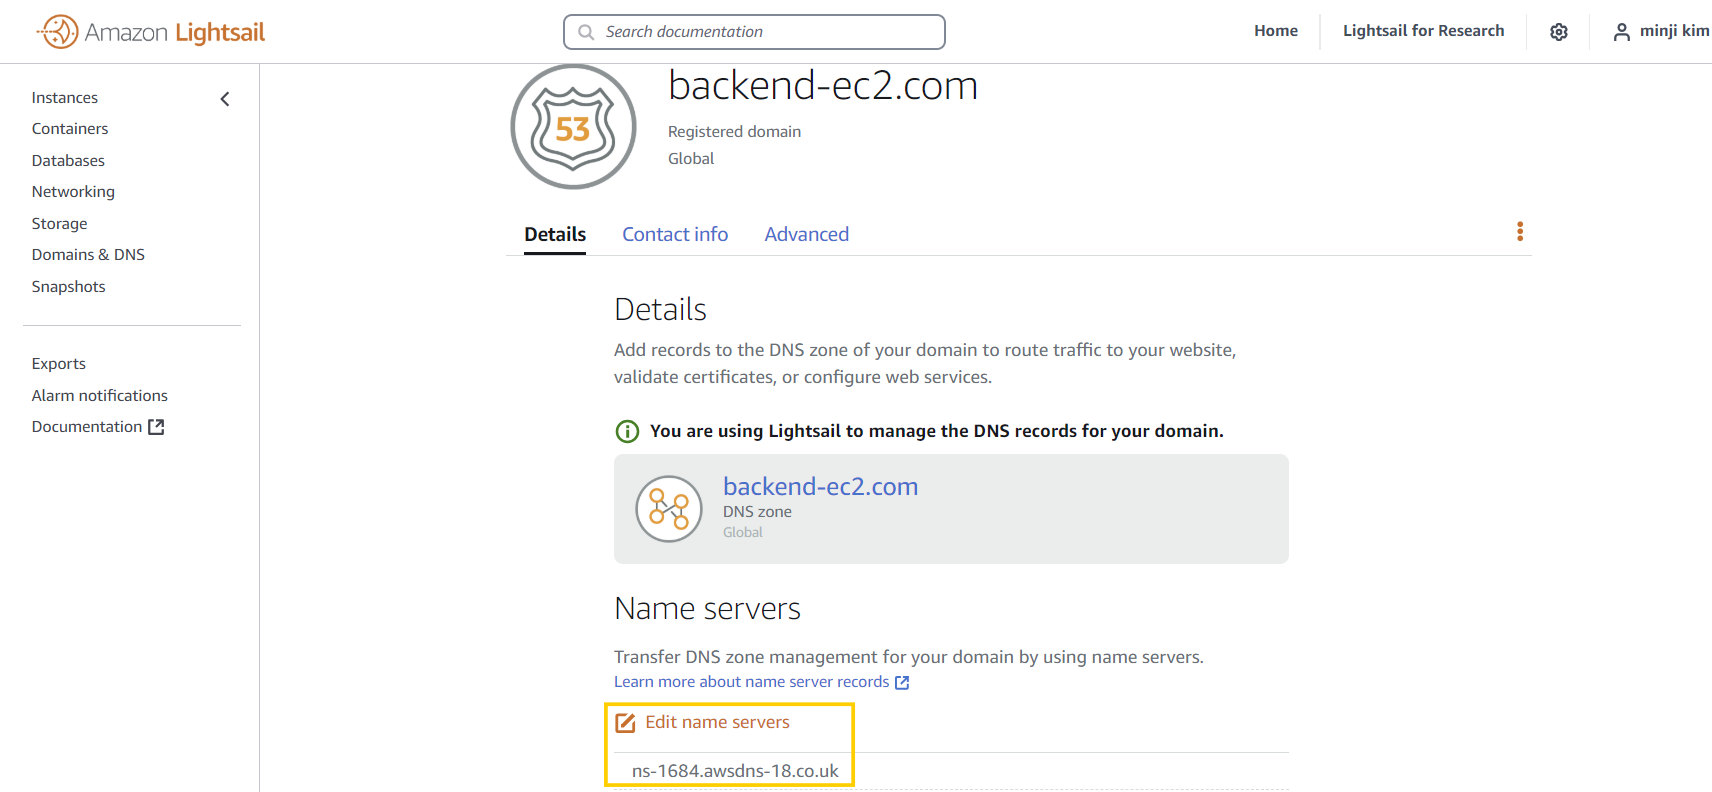
Lightsail의 Name server 추가하기
-
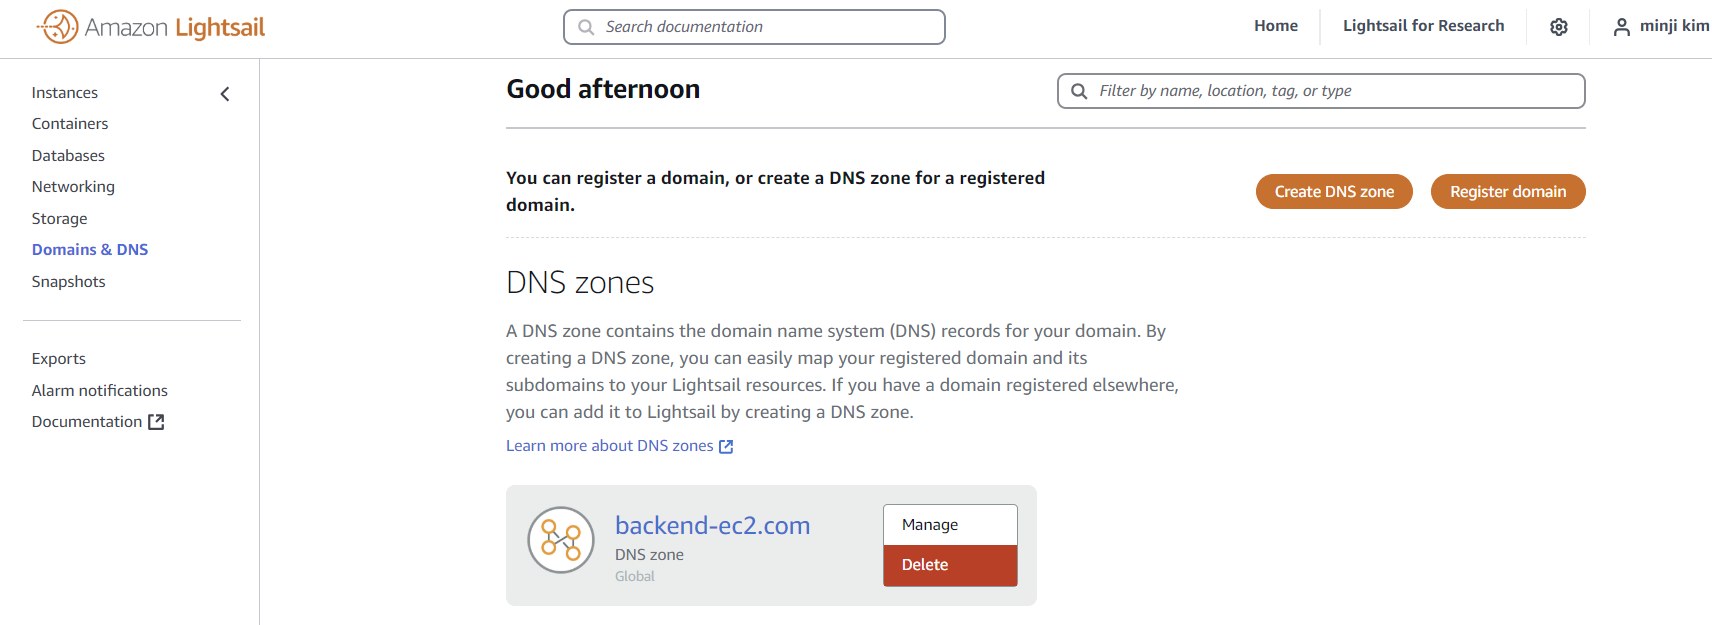
DNS Zone 삭제
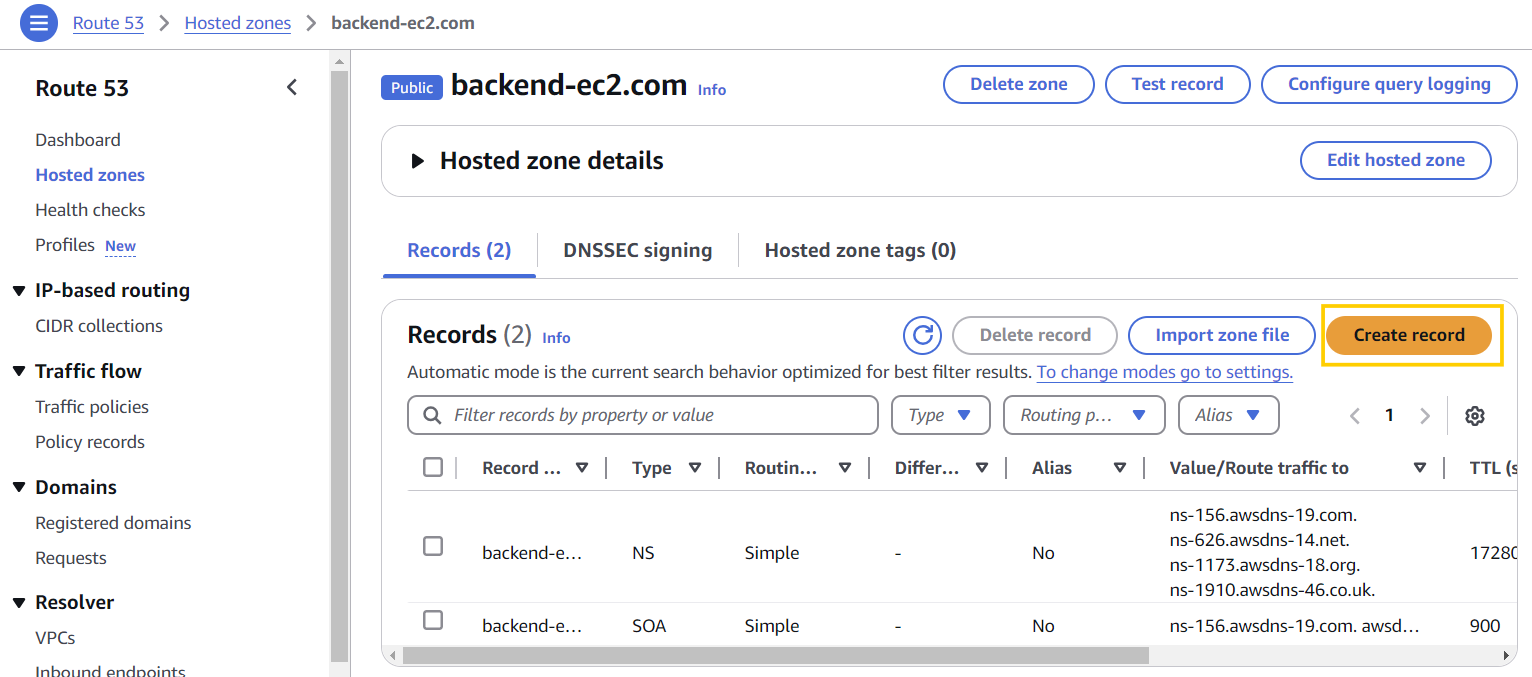
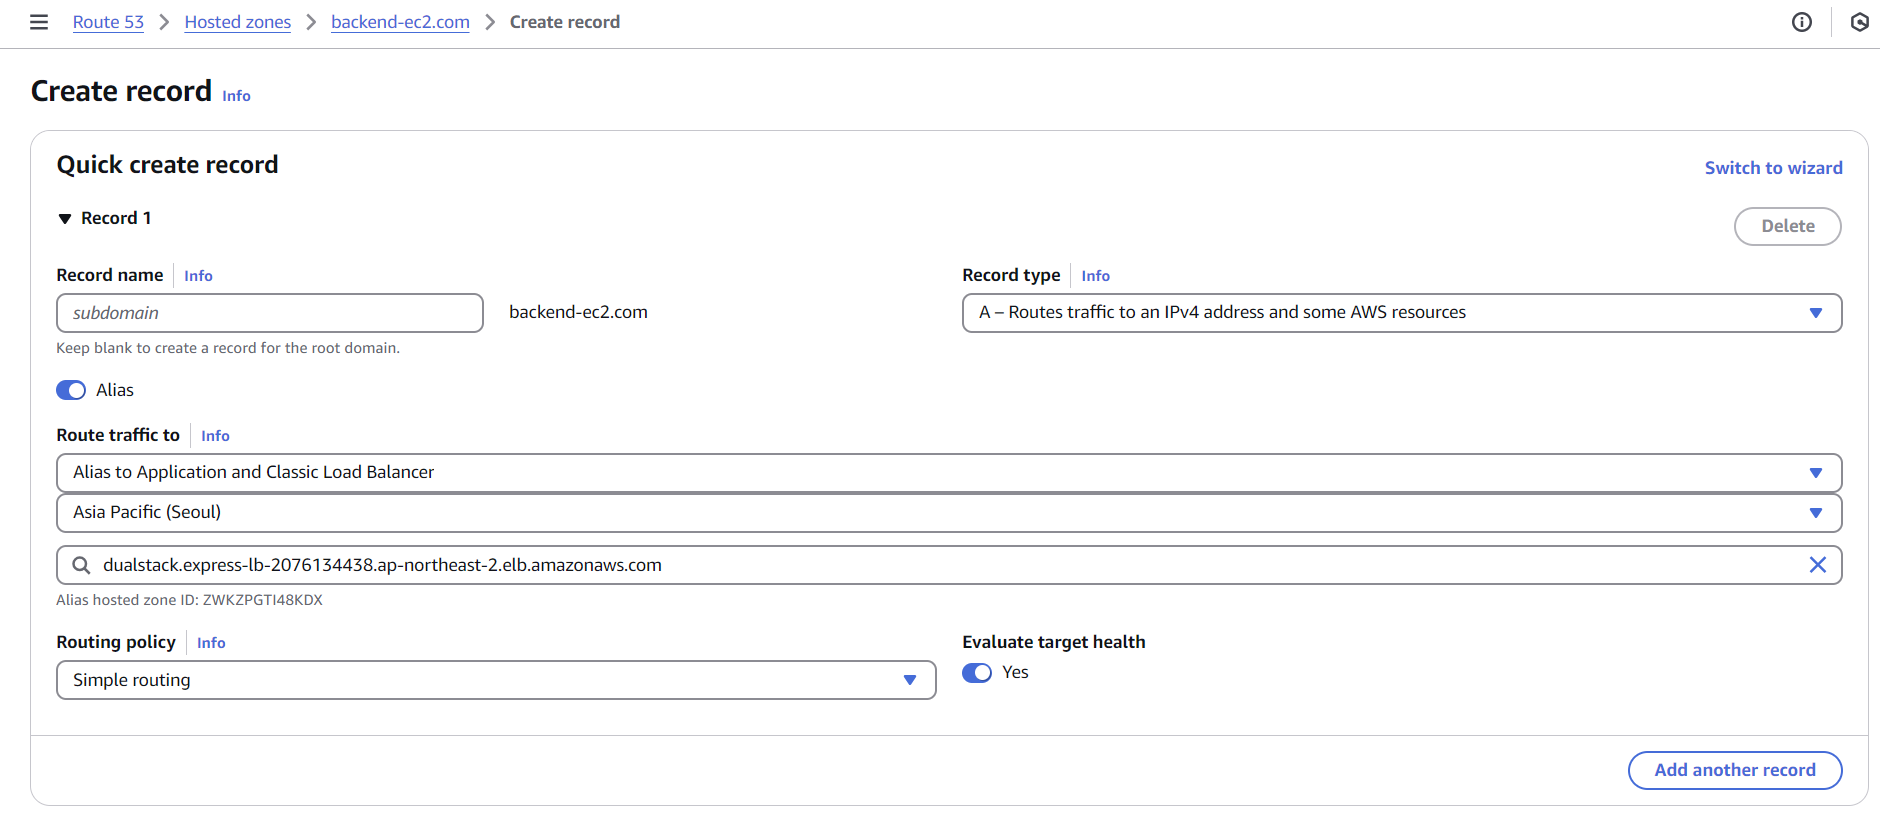
A record로 80포트 접근 허용하기
- name server 수정이 강사님은 30분 걸리셨다고 했는데 난 3분만에 되서 바로 진행..!
- Record 생성
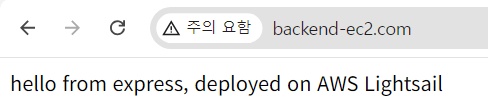
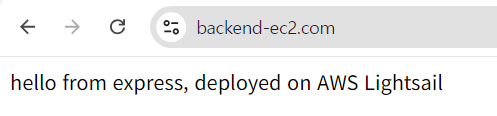
- 도메인 접속 확인:
http://backend-ec2.com
http로 연결해야 함!! 만약 무한로딩이 뜬다면 https인지 확인하자.
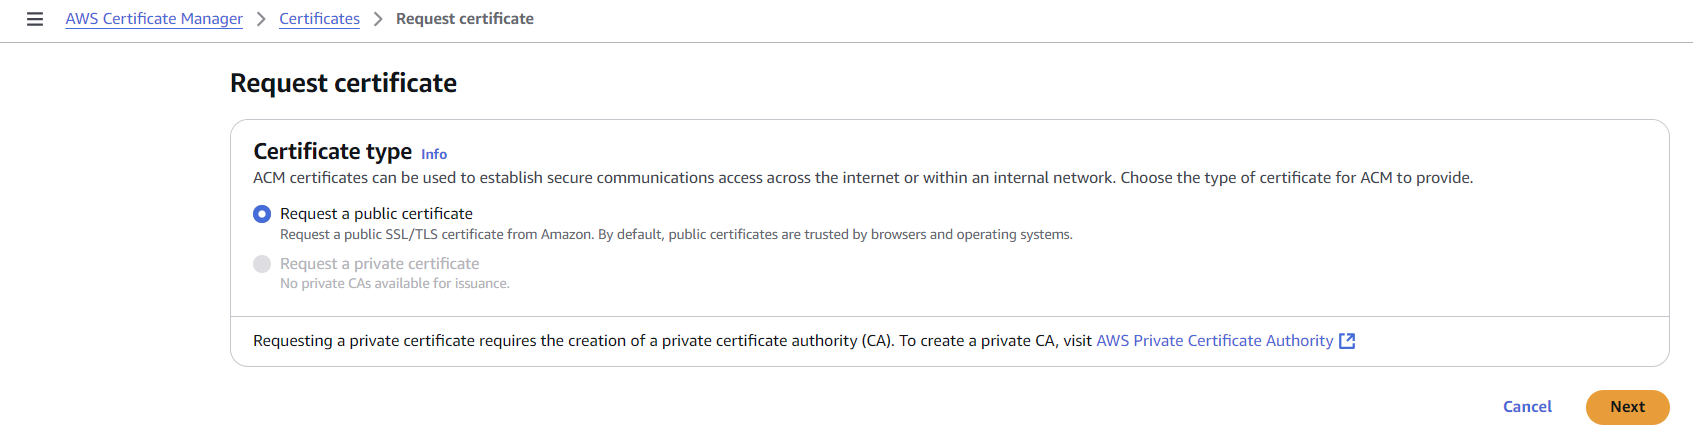
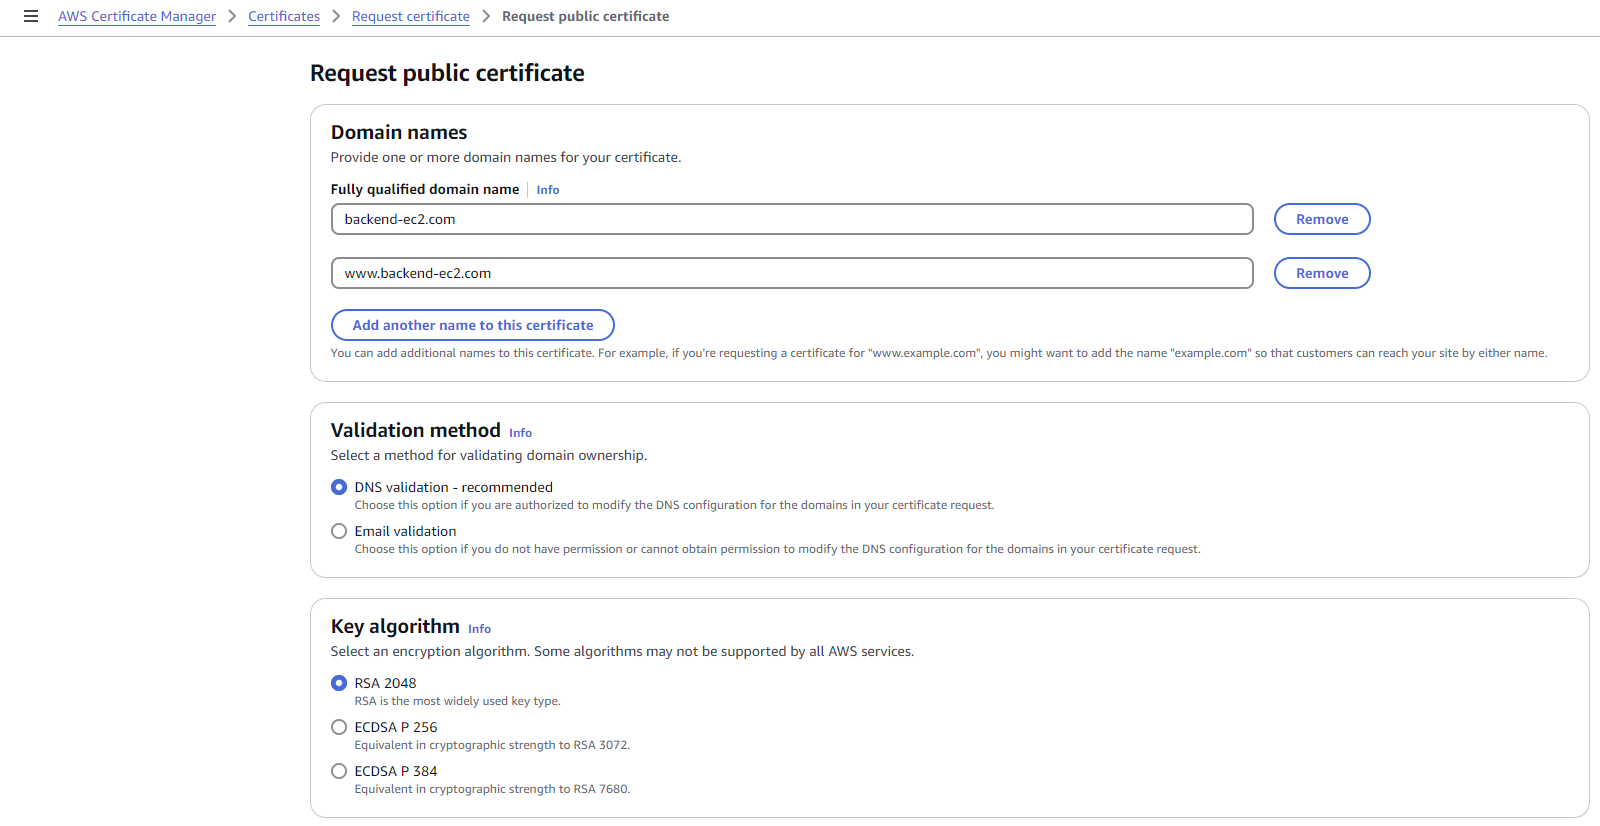
AWS Certificate Manager(ACM) 이용해서 Https를 위한 인증서 생성하기
- Certificate Manager에 검색해서 들어가서 Request a certificate 클릭 후 생성

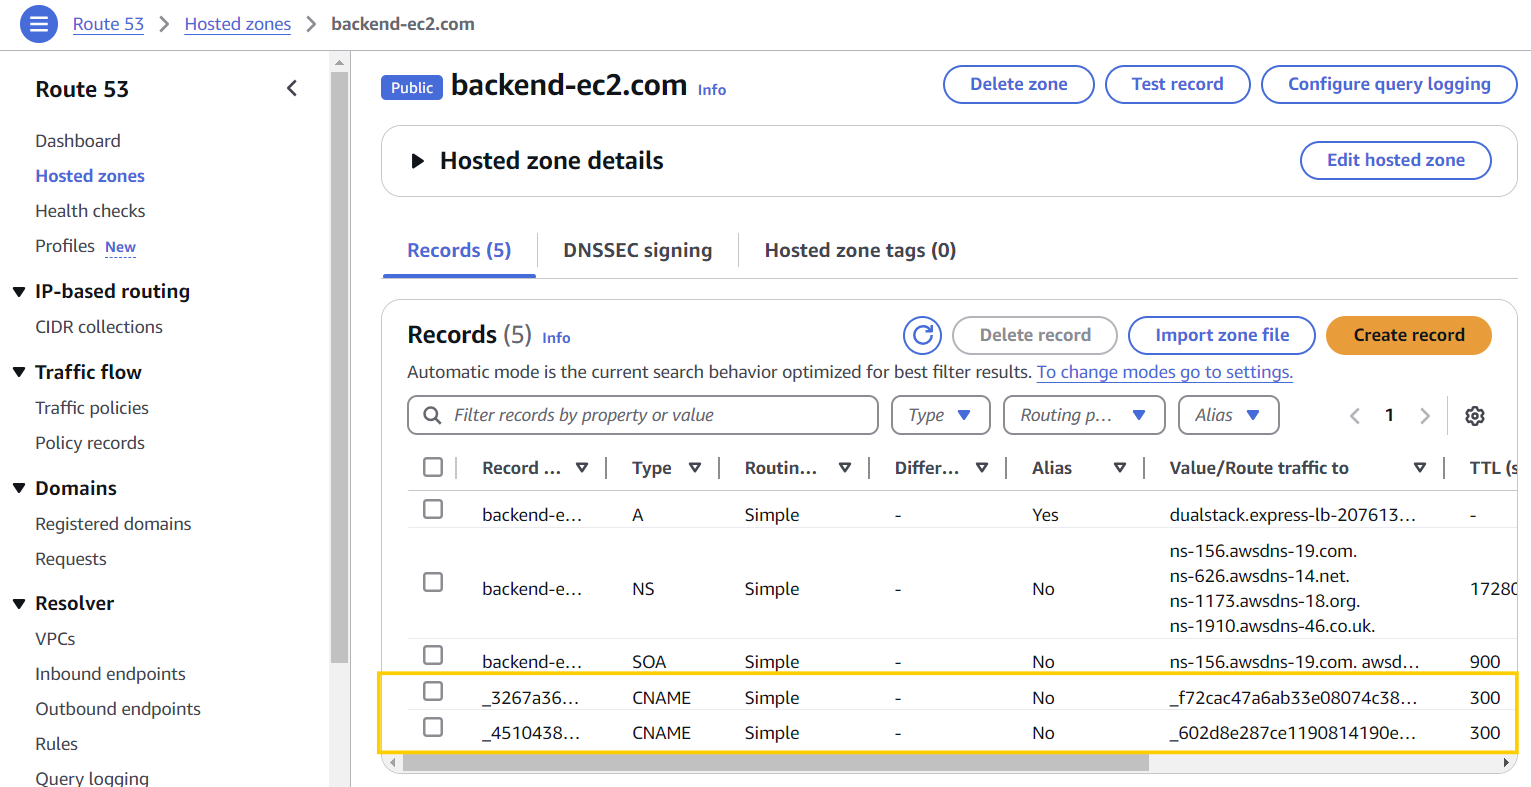
- 인증서 생성 후 Create Records in Route 53 클릭
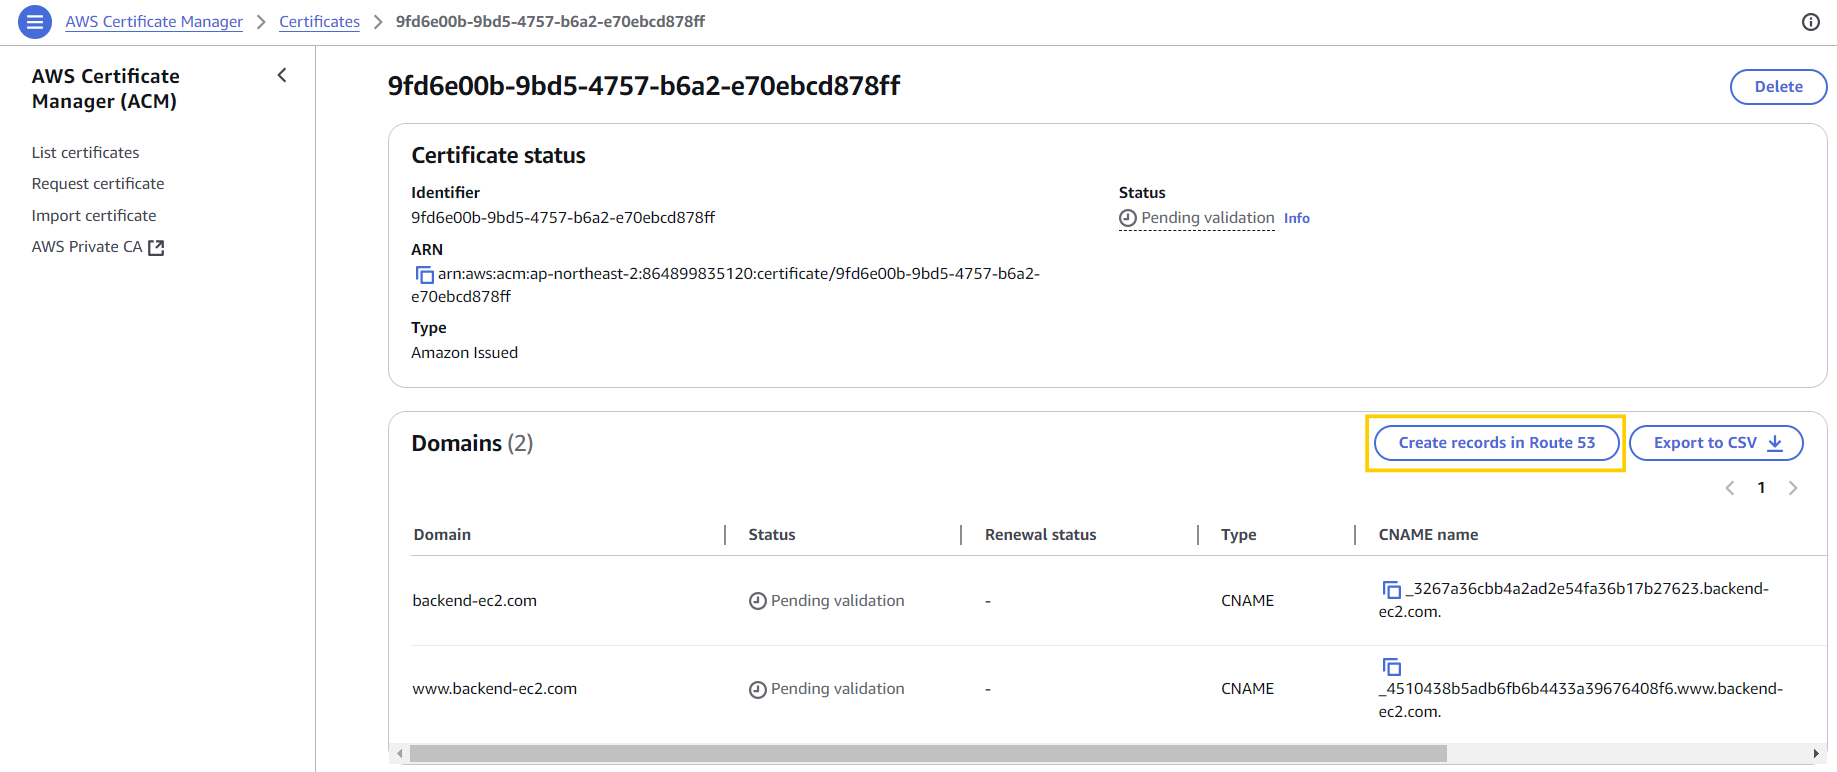
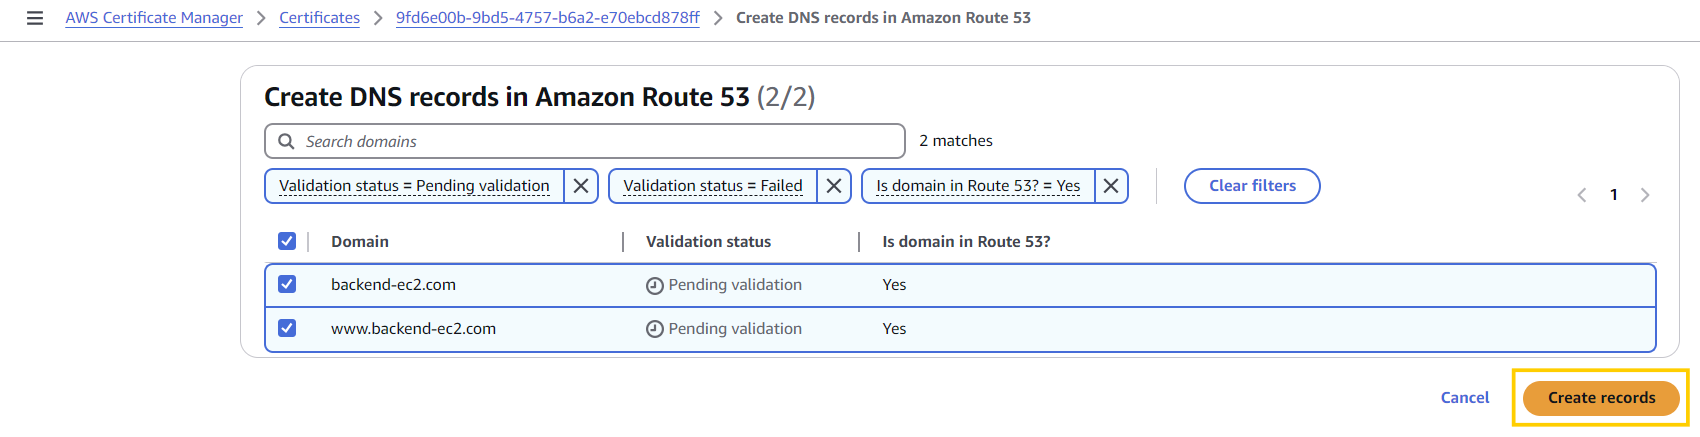
- C Record 생성 확인
Https 적용하고 http redirect 시켜주기
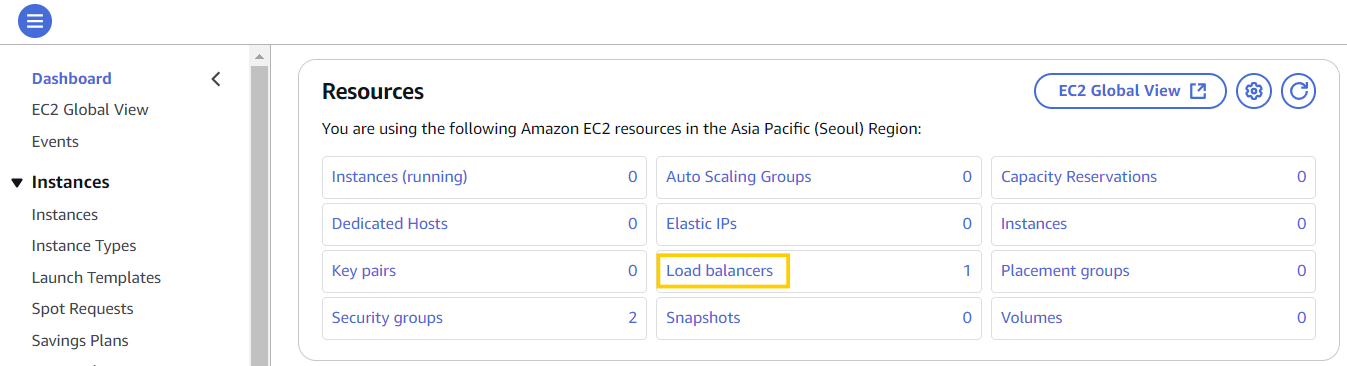
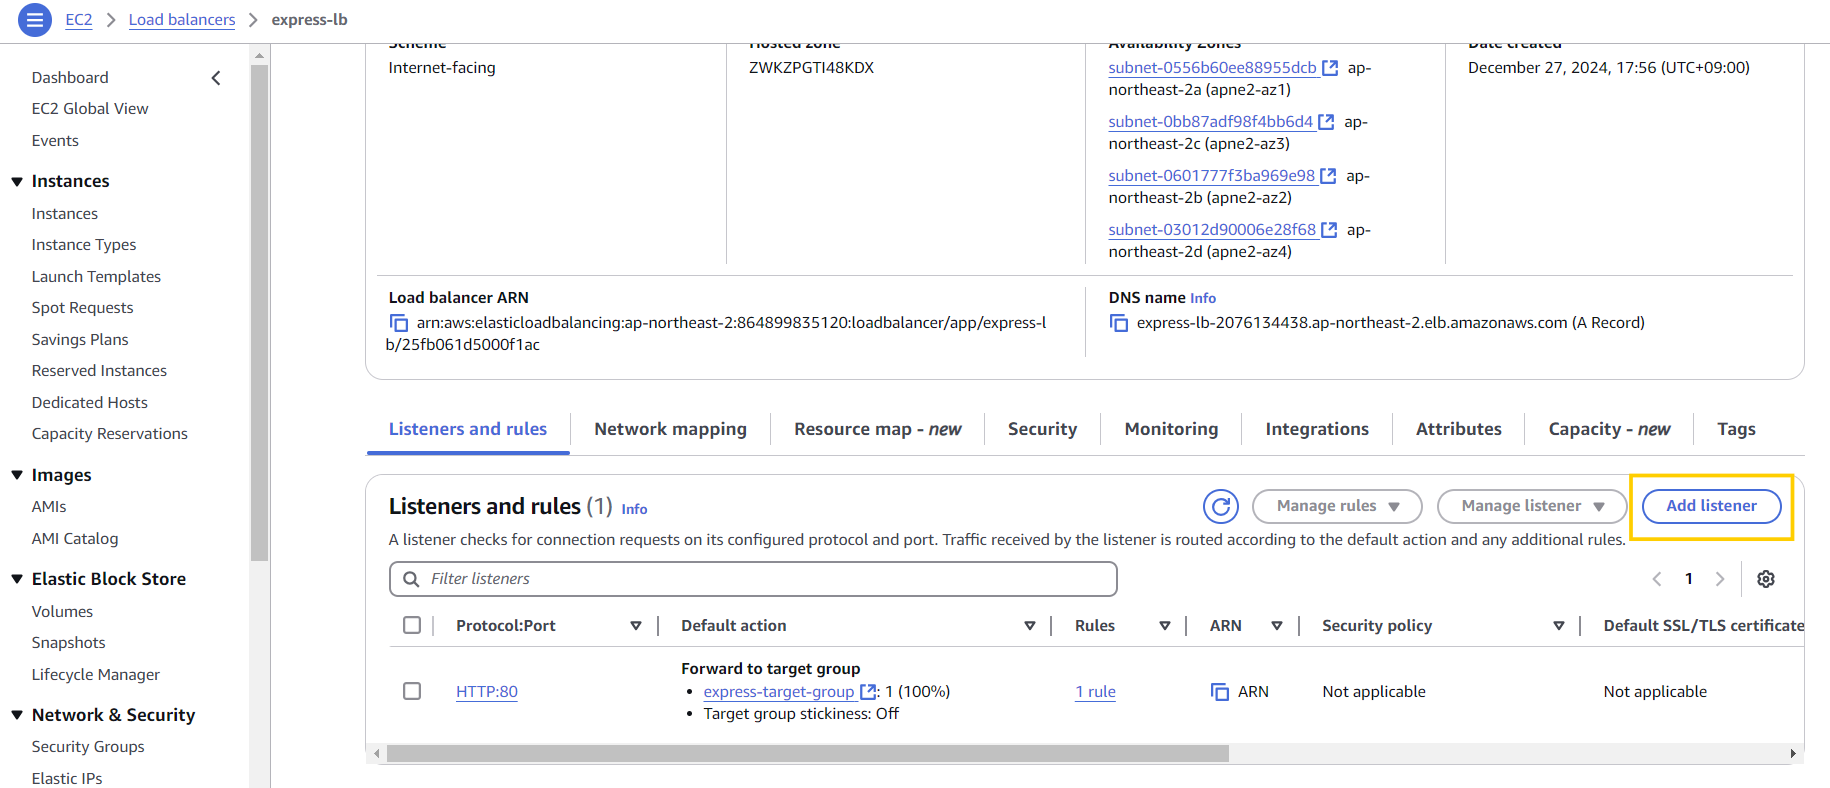
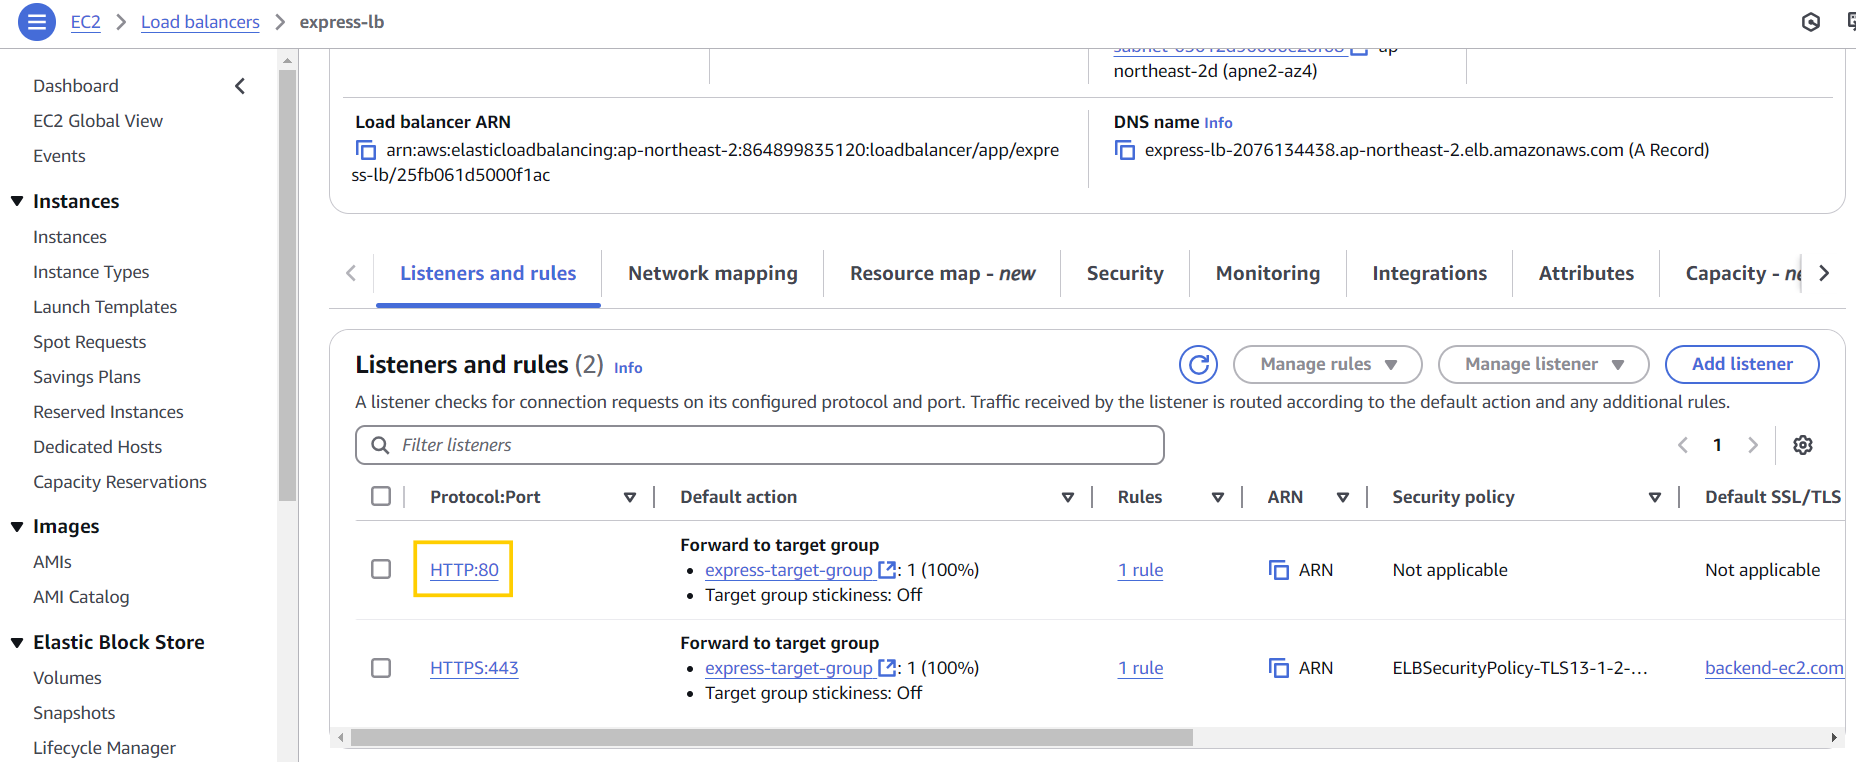
- Load Balancer에서 Listener 쪽을 수정해줘야 함
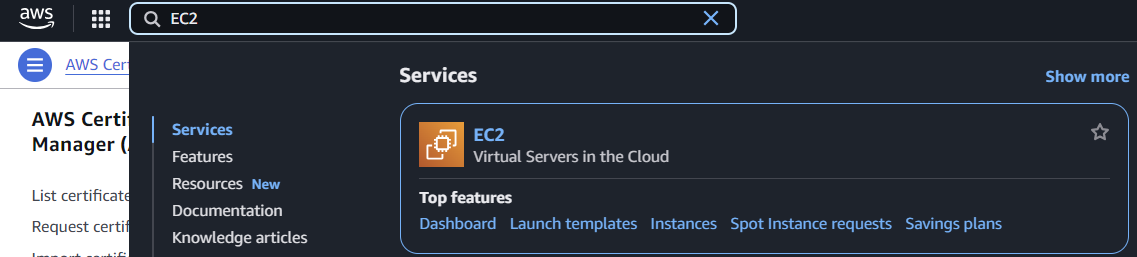
- EC2로 검색해서 들어가서 Load Balancer 선택
- Load Balancer에서 Add listener 클릭
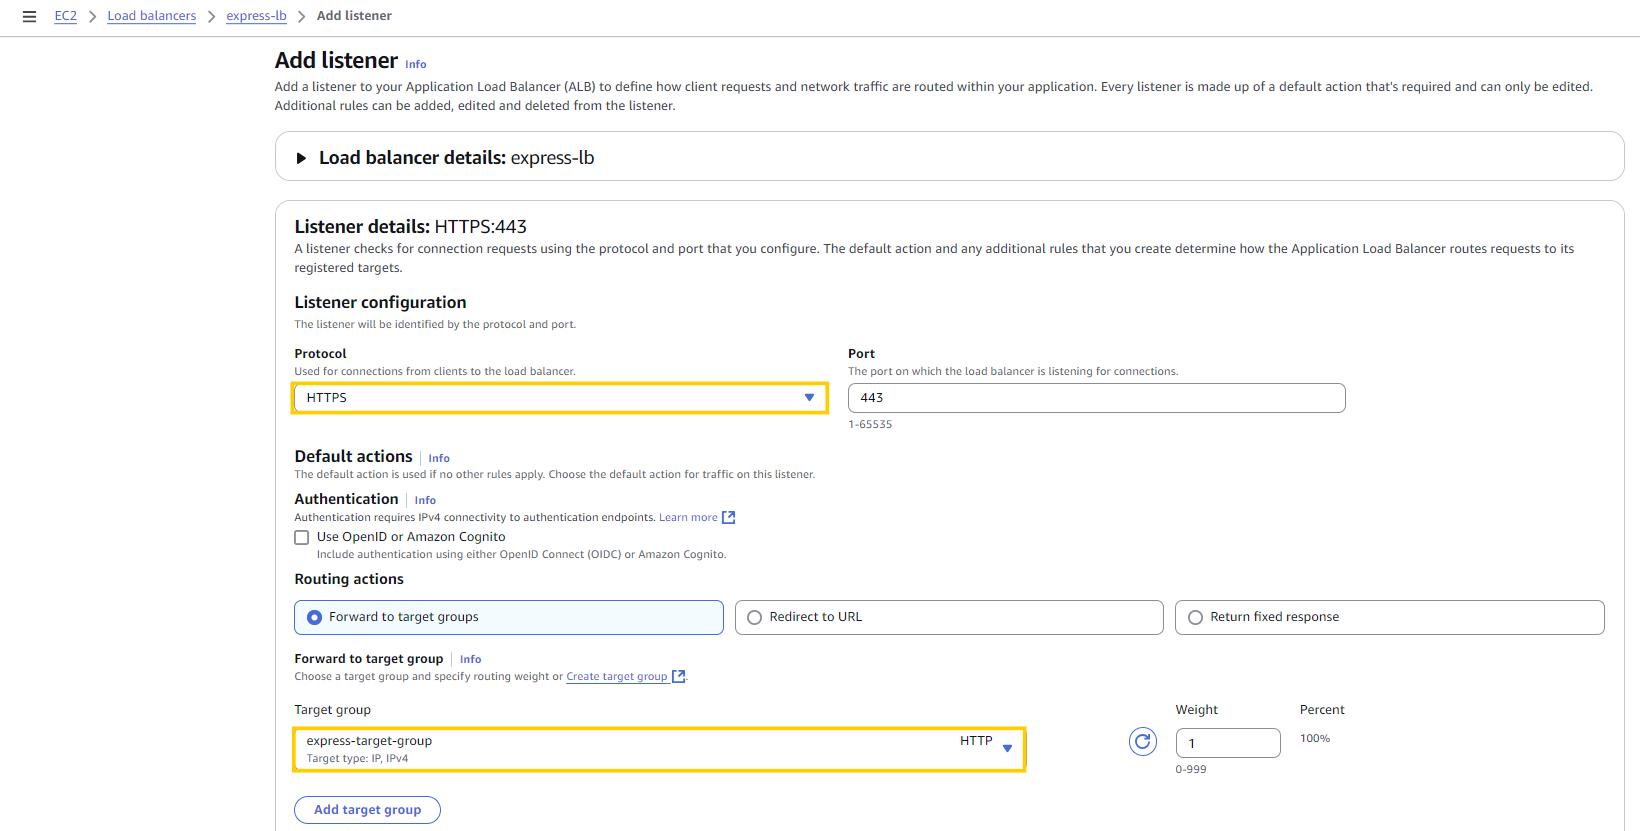
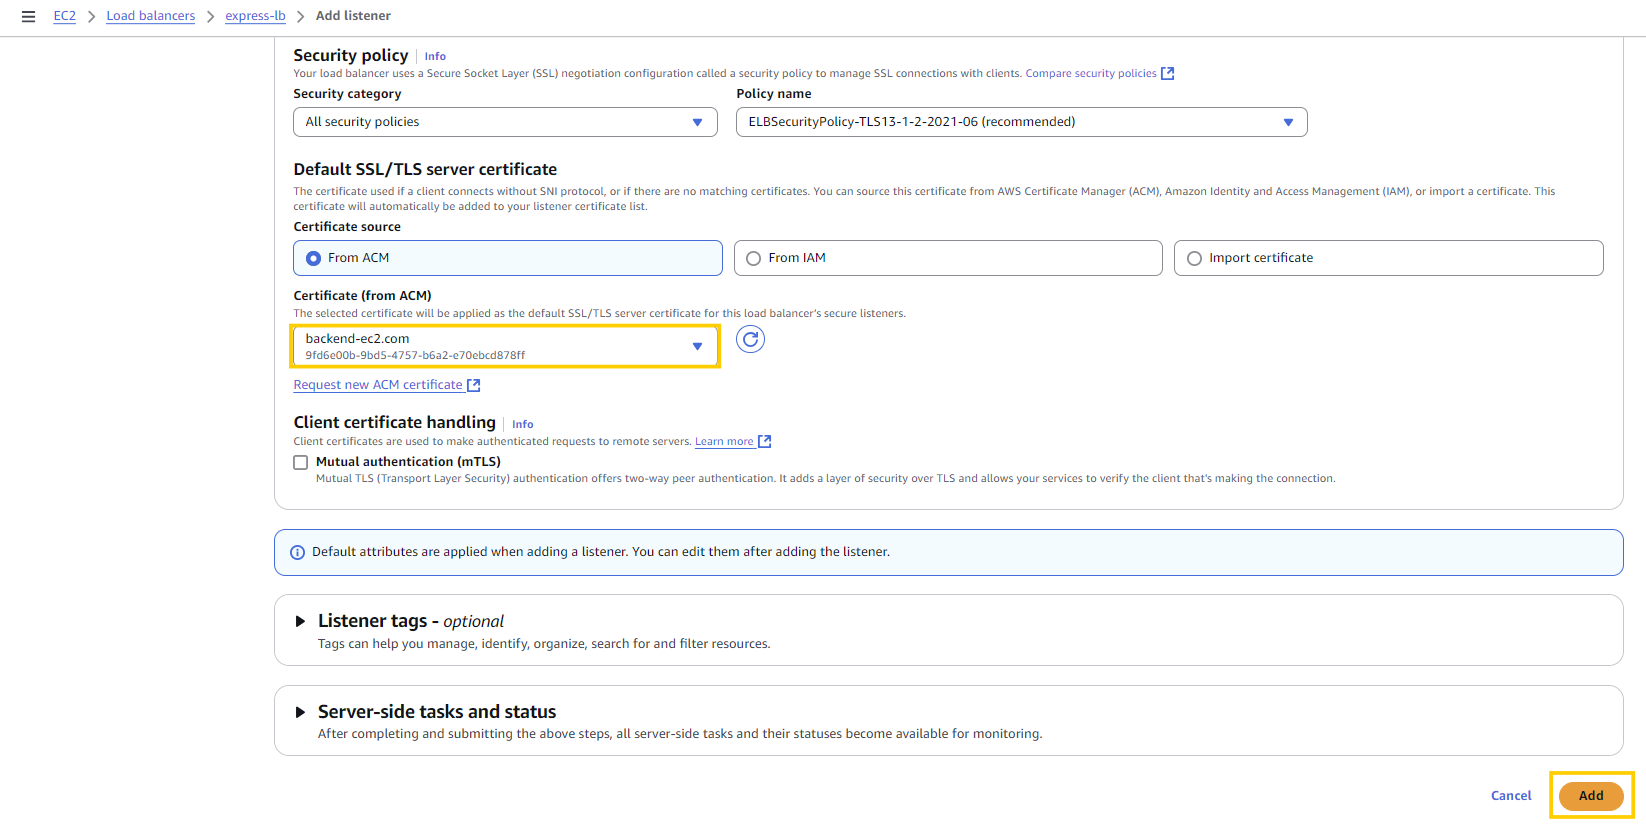
- 노란색으로 네모 친 부분만 수정 후 Add 클릭
하지만 여기까지 완료한 후https://backend-ec2.com로 접속하면 다시 무한로딩이 시작됨.
➡️ 이유는 Security Group! 이전에 Security Group 설정 시 80포트로만 가능하도록 해둬서 다른 접속을 차단하고 있는 것임.
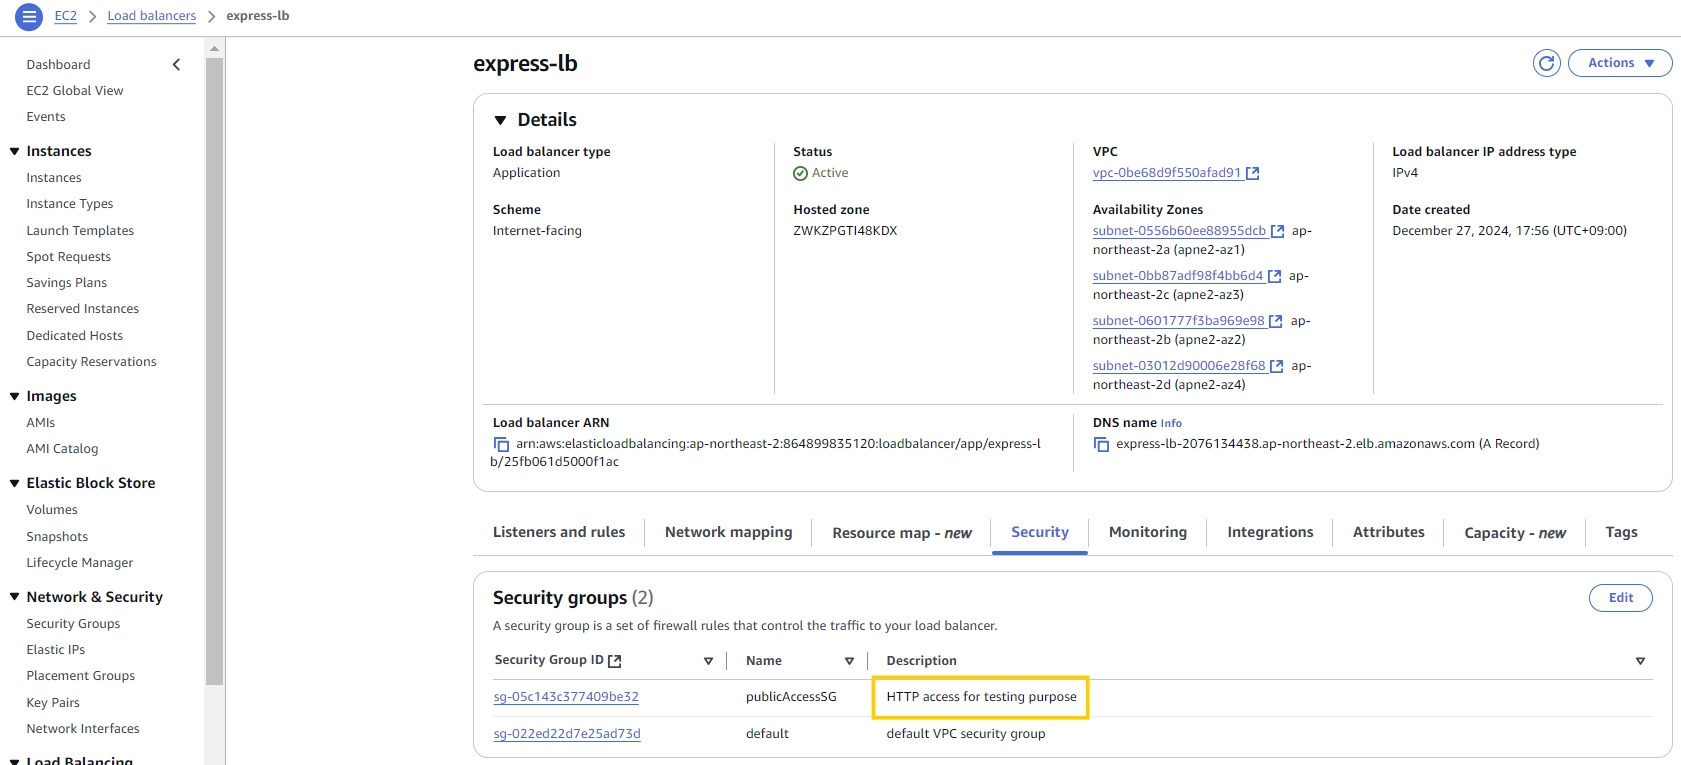
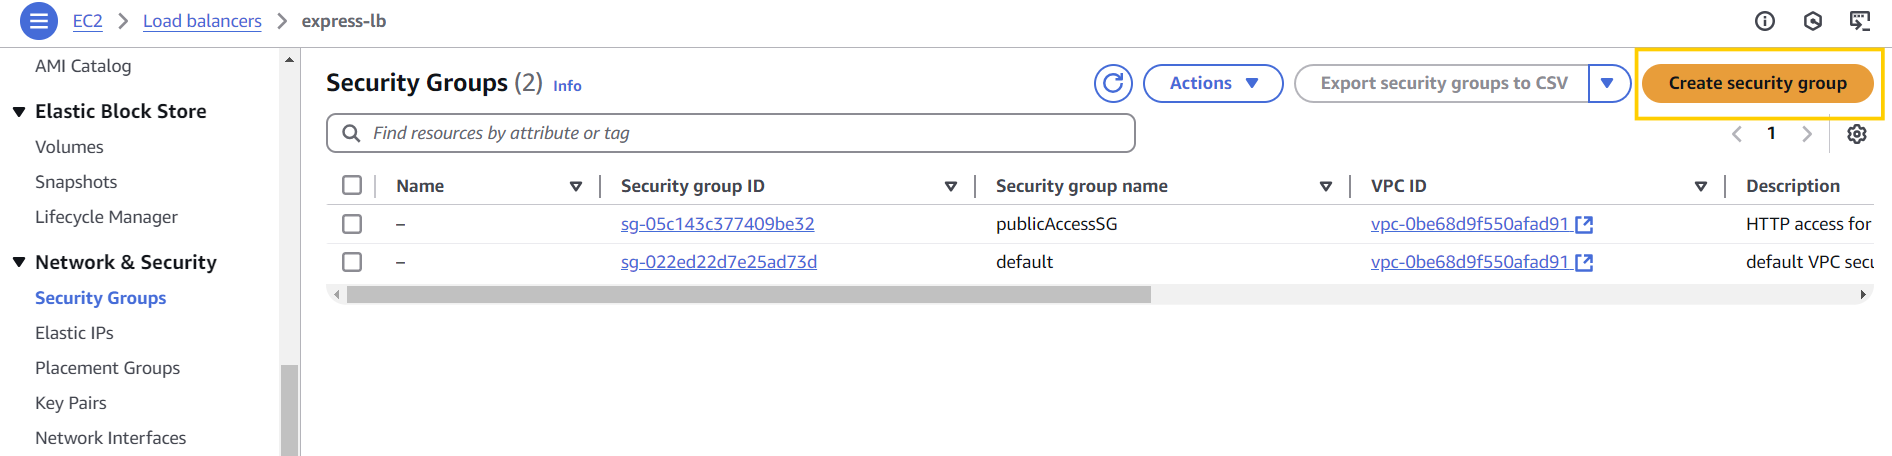
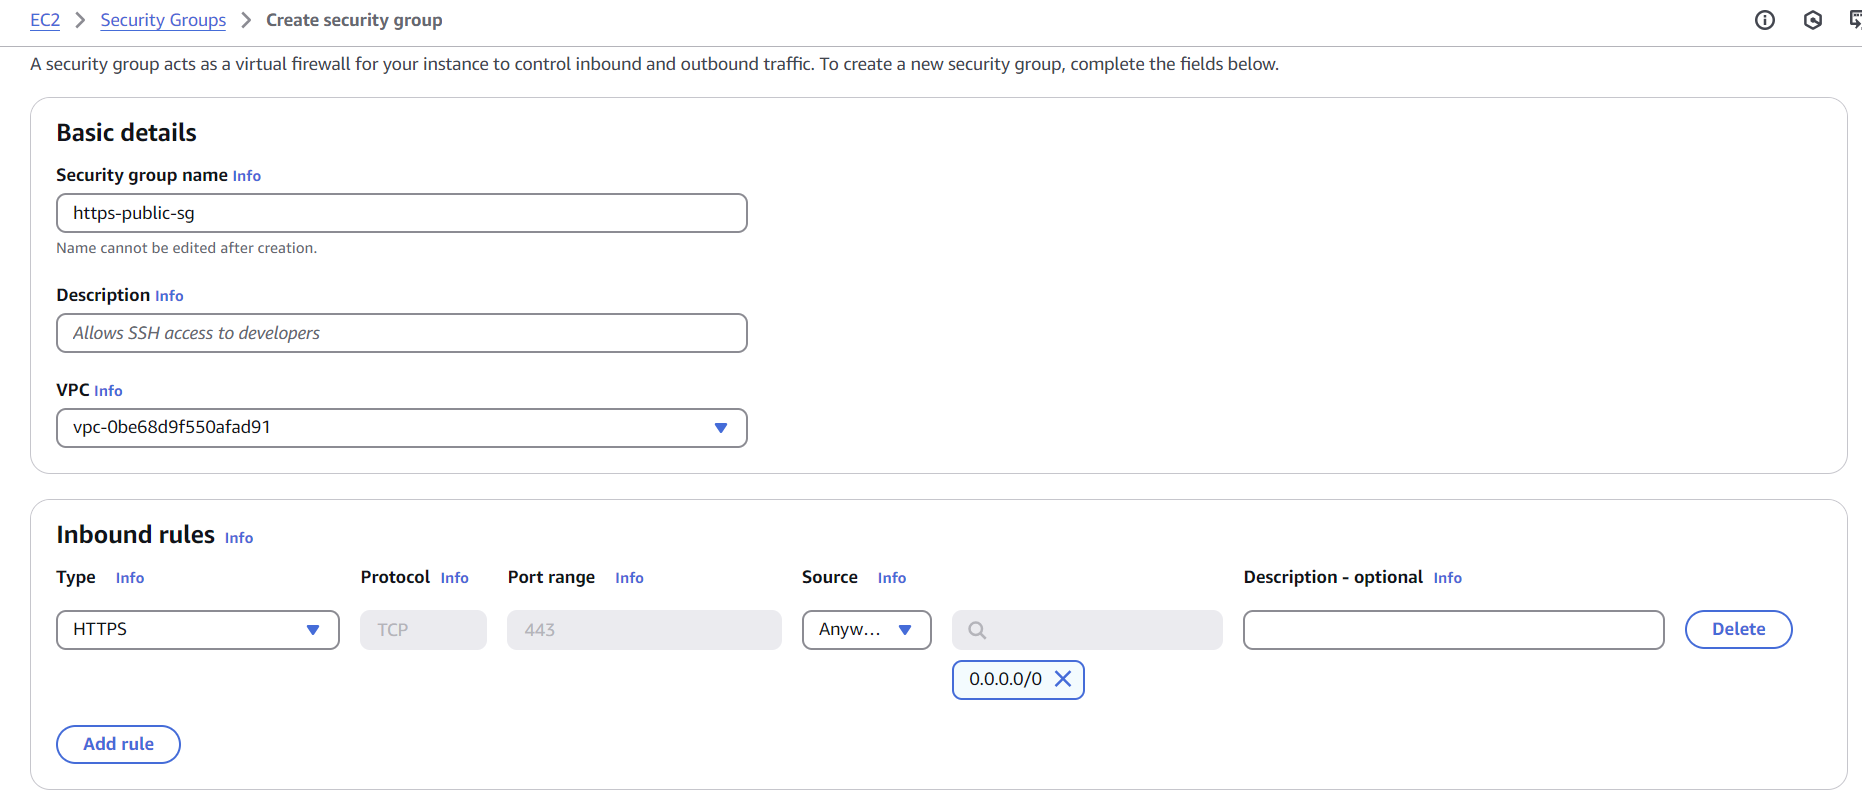
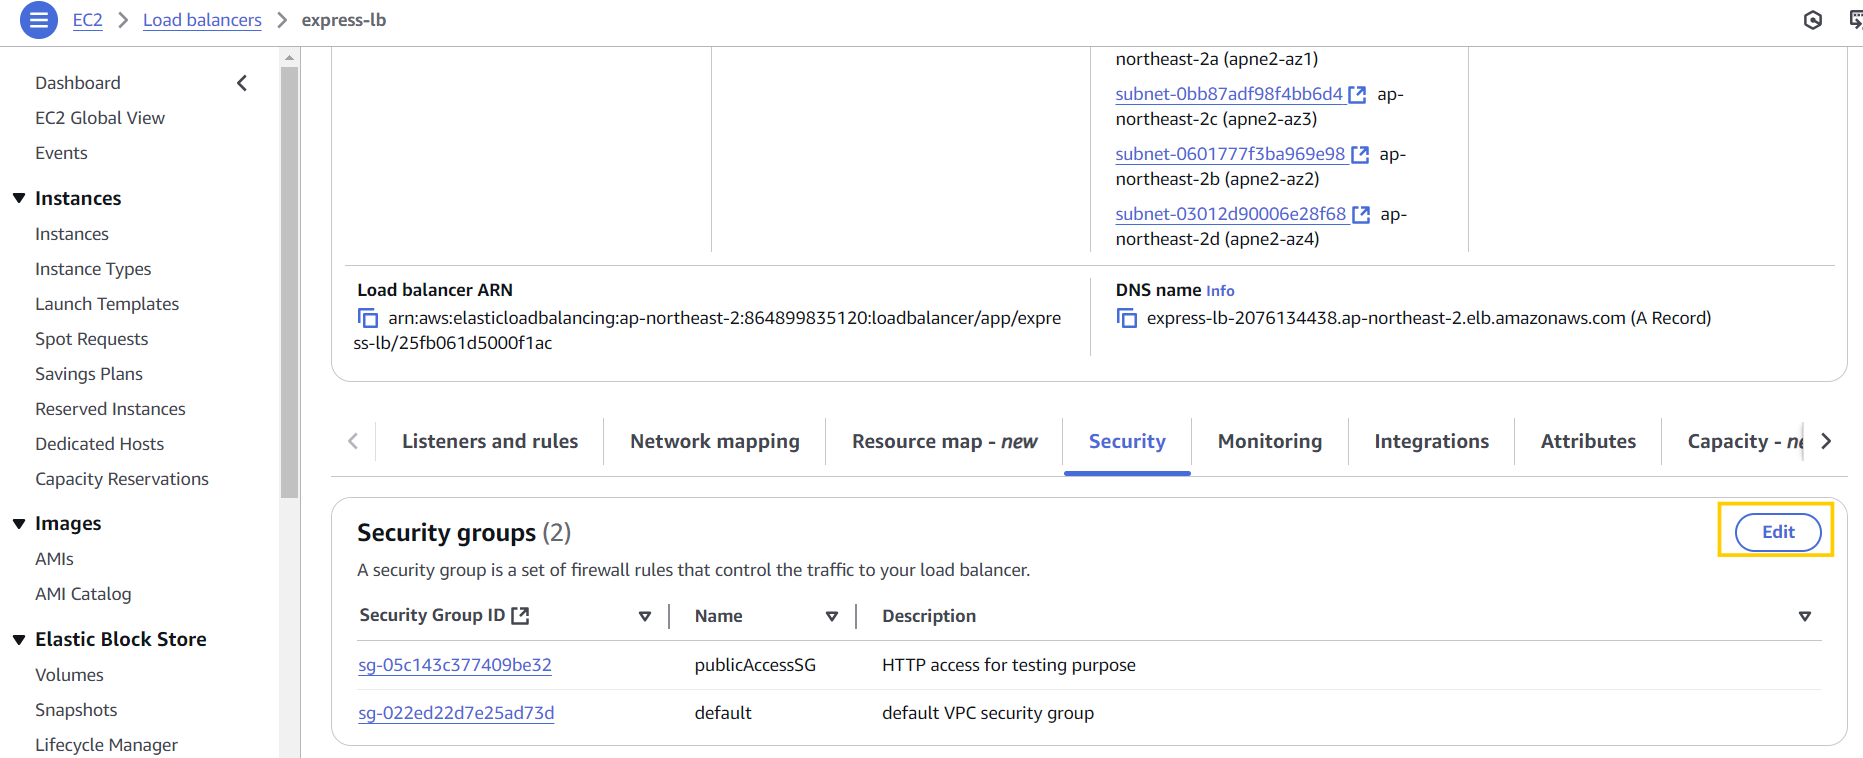
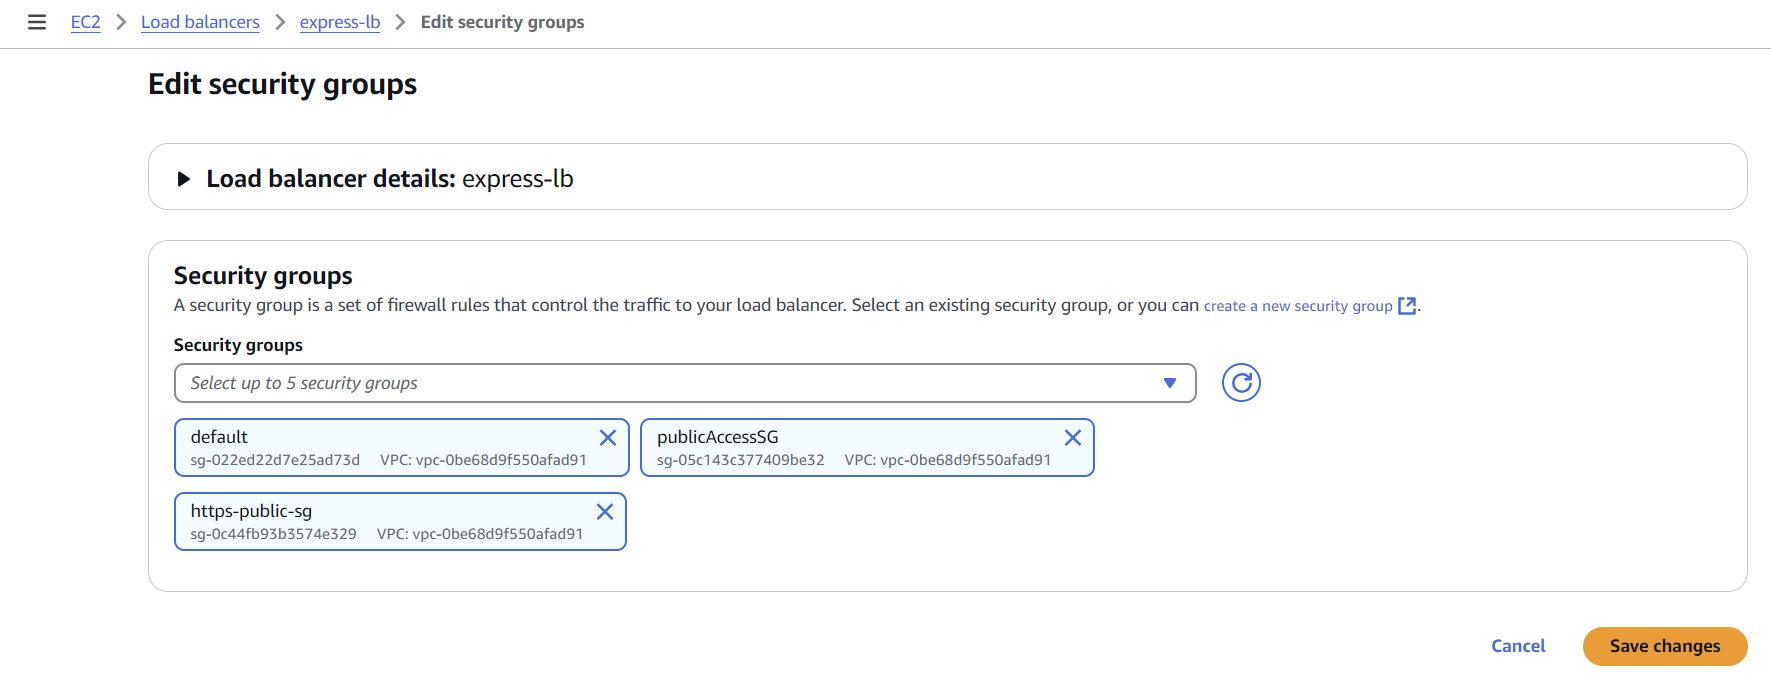
https-public-sg라는 이름으로 Security Group 하나 새로 만들기
- 생성 후 다시 Load Balancer에 들어가서 Security 를 수정하기
- HTTPS로 접속 확인:
https://backend-ec2.com
이번에는 HTTP로 접근하면 무한로딩에 걸림..
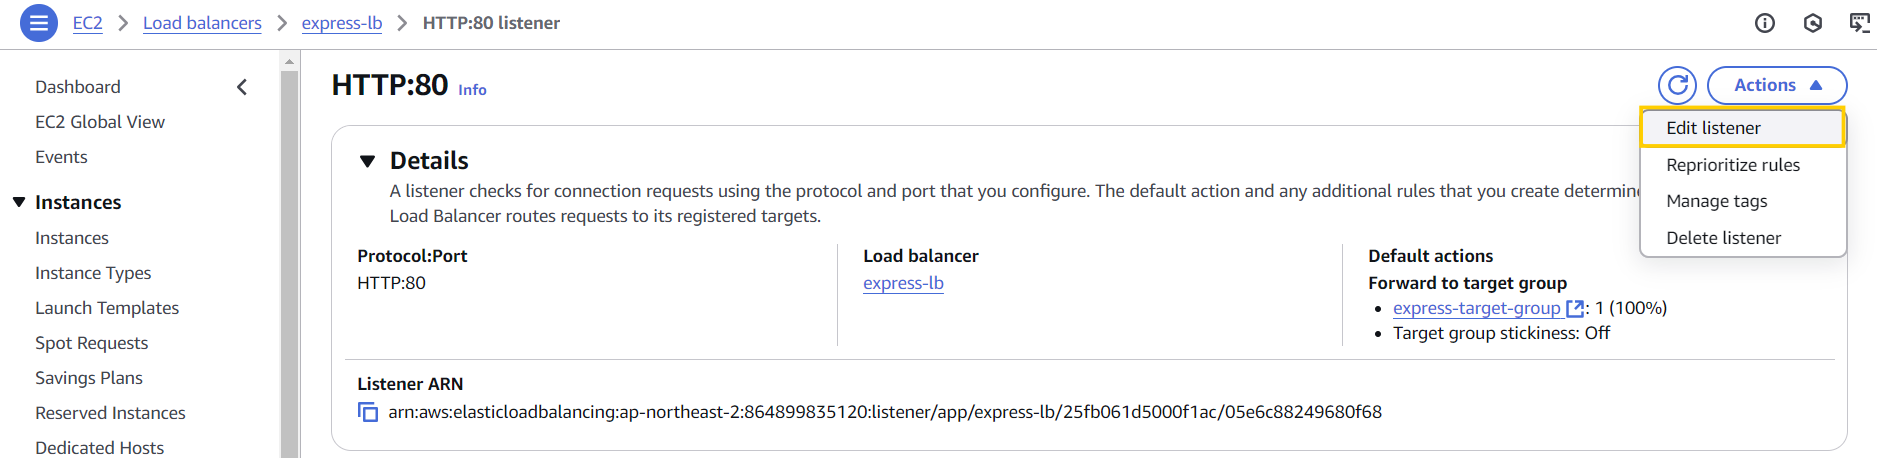
➡️ 이걸 방지하기 위해 redirect 설정을 해보자 - Listeners and Rules에서 80 포트 클릭
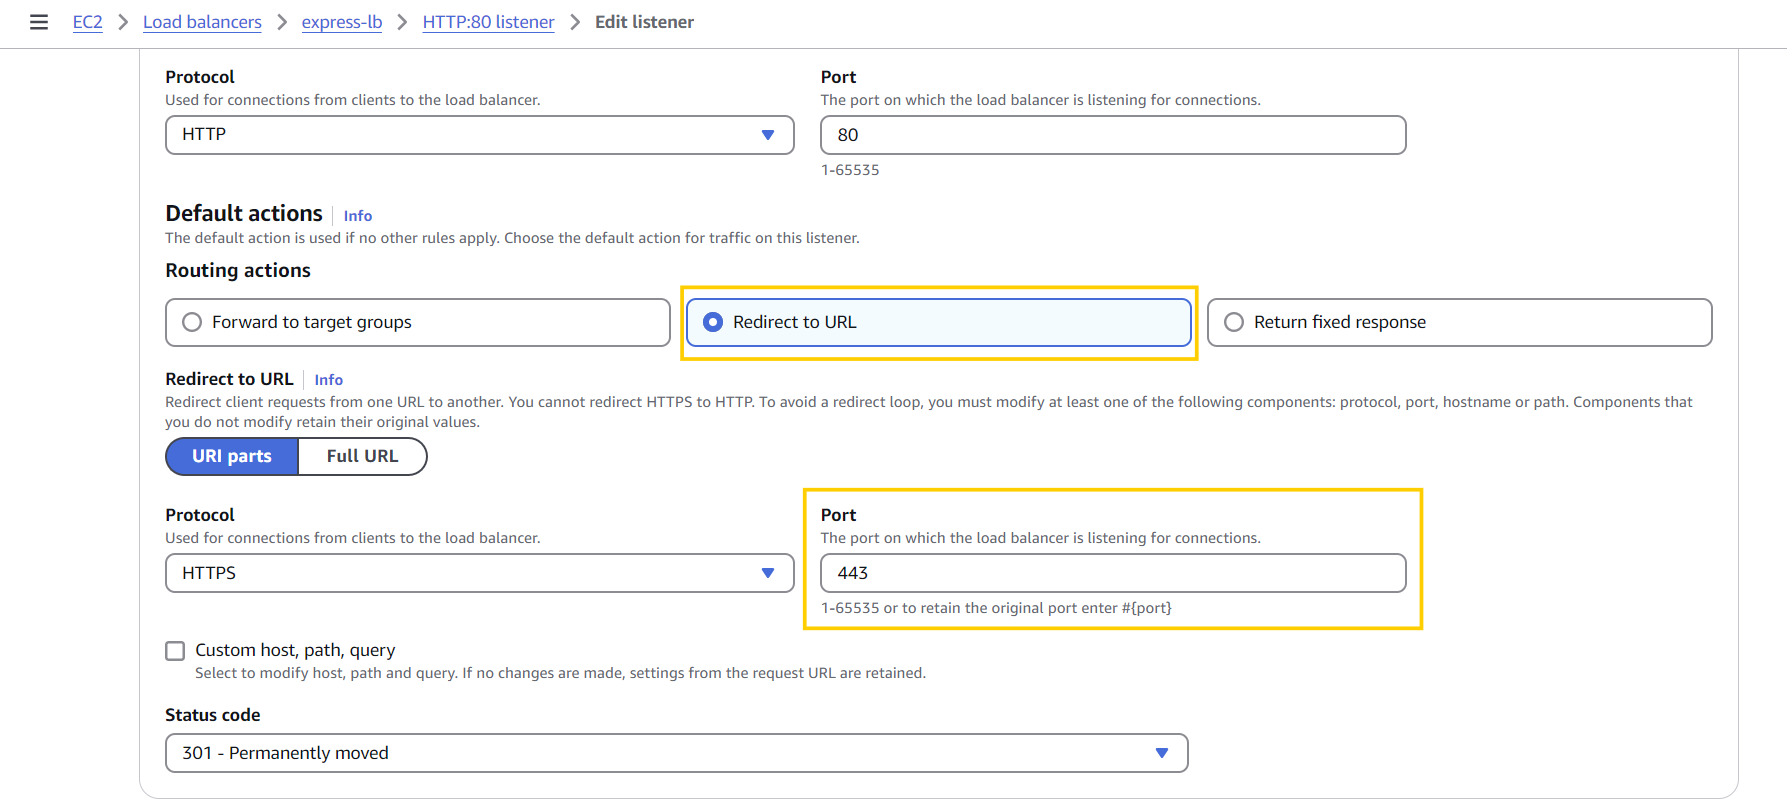
- Edit Listener 클릭 후 다음과 같이 수정하고 저장
Section 13 | Container를 활용한 CI/CD pipeline 구축하기
docker-compose로 Continuous Integration (CI) 완성하기
docker-compose.yml파일 생성
version: "3"

services:
  web:
    build:
      context: .
      dockerfile: Dockerfile.dev
    volumes:
      - ./app:/usr/src/my-app/app
    ports:
      - "4000:4000"
    environment:
      REDIS_URL: redis://redis:6379
      PORT: 4000
    depends_on:
      - redis
  redis:
image: "redis:alpine"docker-compose.test.yml파일 생성
version: "3"

services:
  web:
    build:
      context: .
      dockerfile: Dockerfile.dev
    environment:
      TEST_REDIS_URL: redis://redis:6379
    command: npm run test:ci
    depends_on:
      - redis
  redis:
image: "redis:alpine"index.test.ts파일 수정
// const REDIS_URL = "redis://default:test_env@localhost:6380";

beforeAll(async () => {
  client = redis.createClient({ url: process.env.TEST_REDIS_URL });
  await client.connect();
  app = createApp(client);
});
docker-compose -f docker-compose.test.yml up --build --abort-on-container-exit으로 테스트해보기
✨ 항상 테스트 하기 전에 docker Desktop이 실행중인지 확인 !

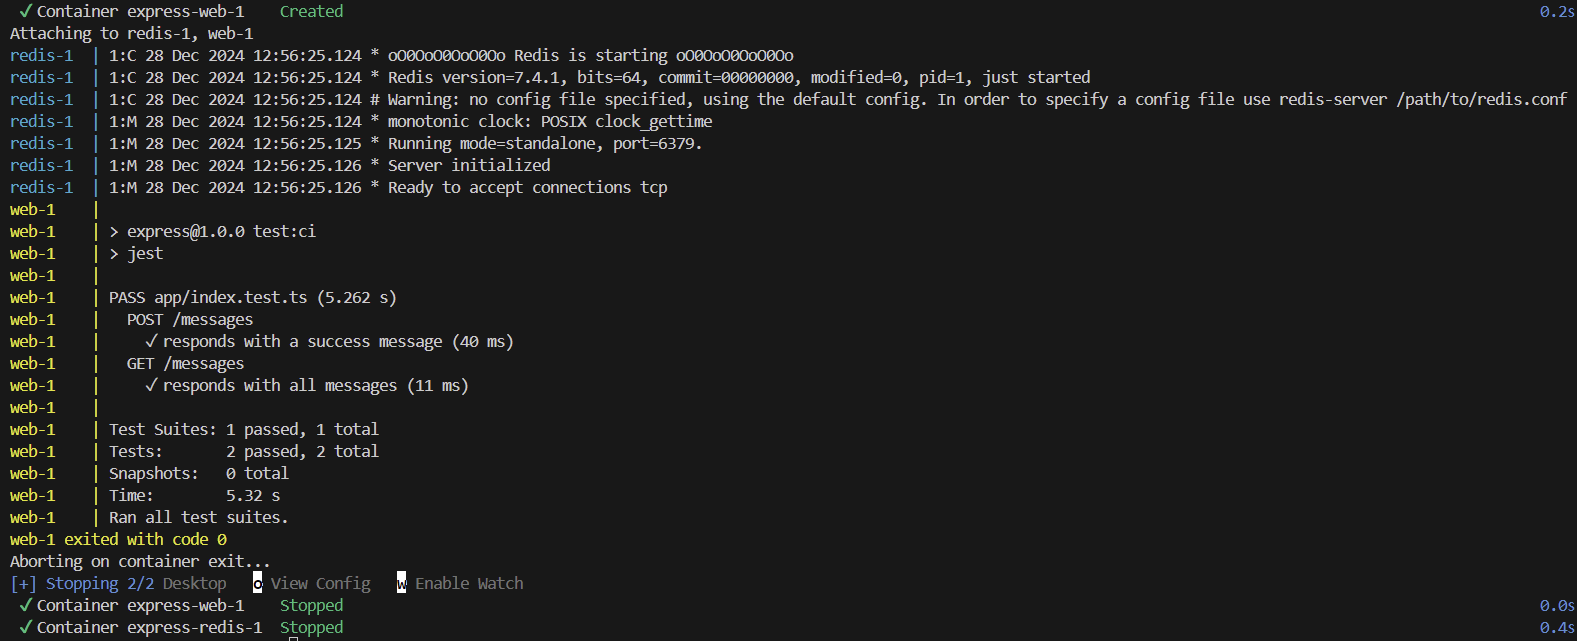
code 0로 멈추는 것까지 확인!
➡️ 코드 성공 시code 0, 코드 실패 시code 1으로 멈춤.github/workflows폴더 안에 있던 다른.yml파일들 꺼내고testAndDeploy.yml넣기
name: testAndDeploy

on:
    push:
        branches:
            - main

jobs:
    tests:
        runs-on: ubuntu-22.04
        steps:
            - name: Checkout repository
              uses: actions/checkout@v3
            - name: Build and test with Docker Compose
              run: docker-compose -f docker-compose.test.yml up --build --abort-on-container-exit
git add .,git commit -m "updated github action workflow",git push origin dev로 깃허브 업로드
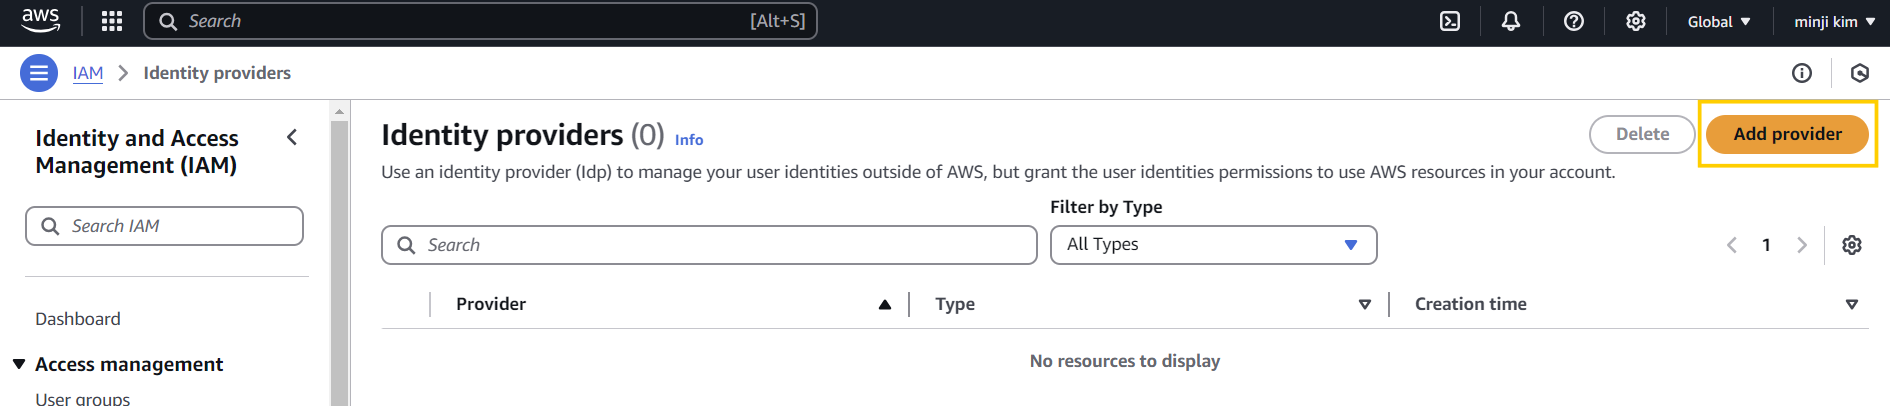
OpenID Connect (OIDC)로 안전하게 AWS CLI 로그인 해주기
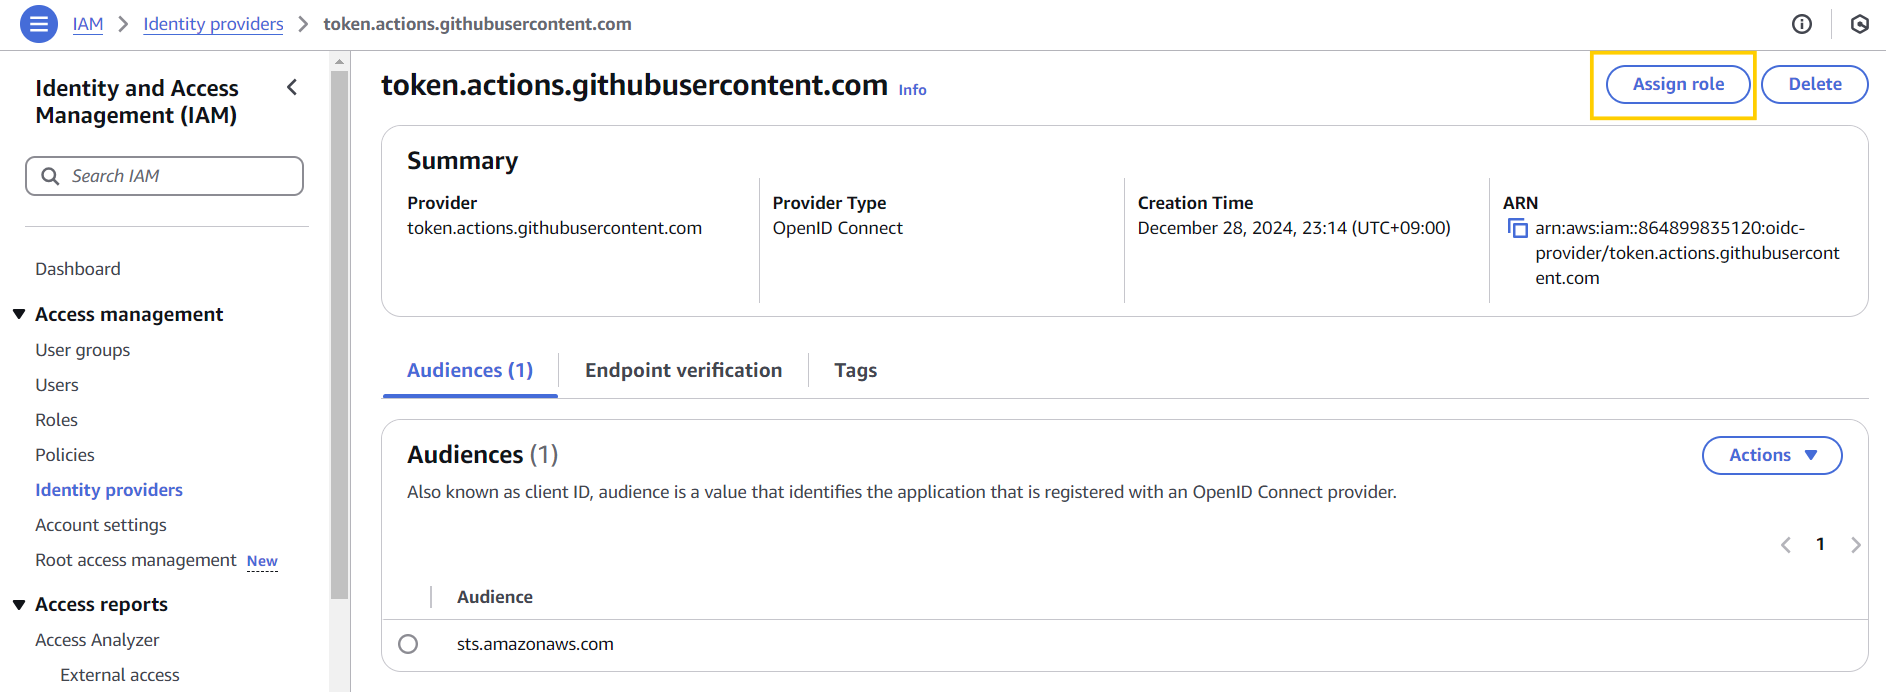
- IAM 검색해서 들어가고, Identity providers에 들어가서 Add provider 클릭
Github docs참고해서 ProviderURL, Audience 등 설정
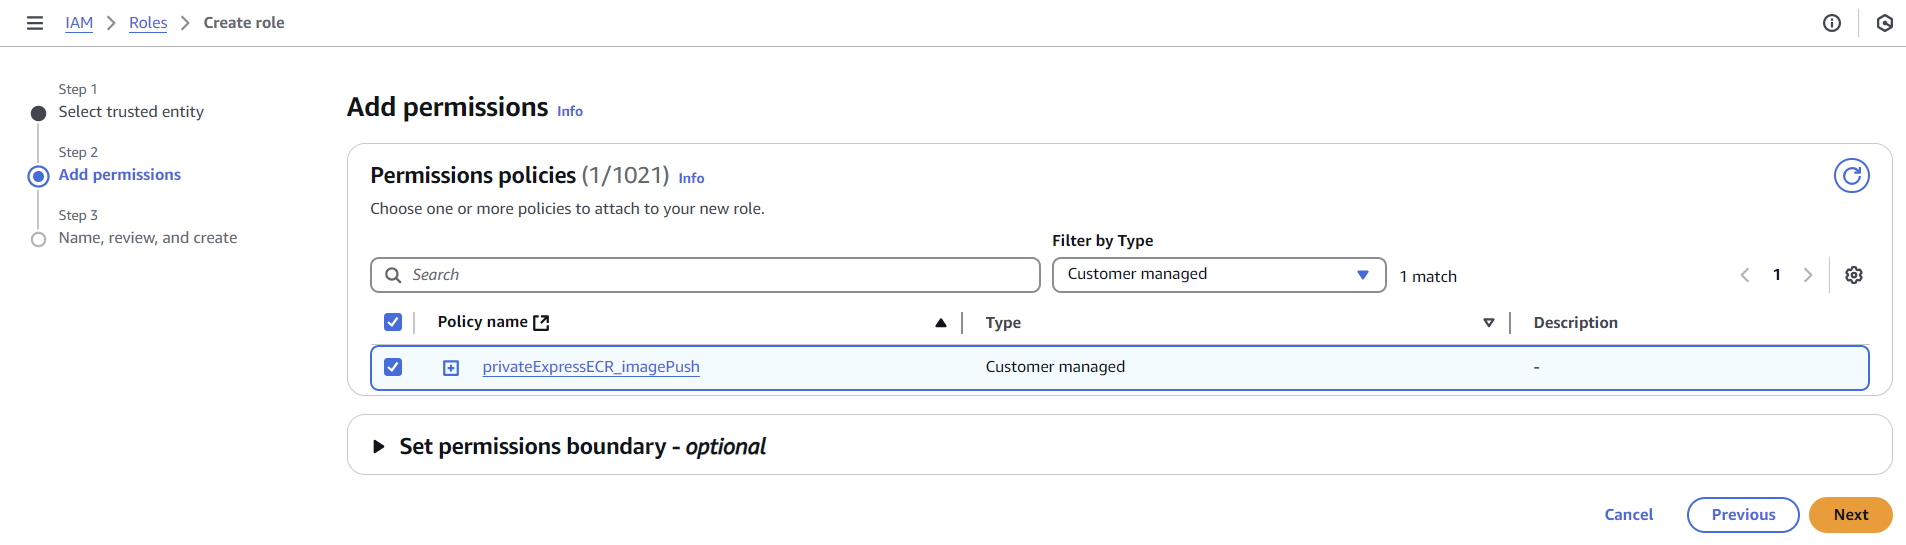
- 생성된 provider에 들어가서 role 추가하기

testAndDeploy.yml수정하기
name: testAndDeploy

on:
    push:
        branches:
            - main


permissions:
  id-token: write # This is required for requesting the JWT
  contents: read  # This is required for actions/checkout


jobs:
    tests:
        runs-on: ubuntu-22.04
        steps:
            - name: Checkout repository
              uses: actions/checkout@v3

            - name: Build and test with Docker Compose
              run: docker-compose -f docker-compose.test.yml up --build --abort-on-container-exit

    deploy:
        runs-on: ubuntu-latest
        needs: tests
        steps:
            - name: Configure AWS credentials
              uses: aws-actions/configure-aws-credentials@v4
              with:
                role-to-assume: arn:aws:iam::864899835120:role/github_minzix_express_OIDC
                role-session-name: sampleSessionName
aws-region: ${{ env.AWS_REGION }}- 그리고
.yml파일 하나로 변경 시, git dev 에서 checkout하고 git master로 브랜치 이동해서 pull 해야 함
git checkout master,git pull
aws 공식 actions 활용해서 CD 파이프라인 구축하기
- 가장 최신의 task definition JSON 파일 복사 후 VSCode에서
task_definition.json파일로 저장
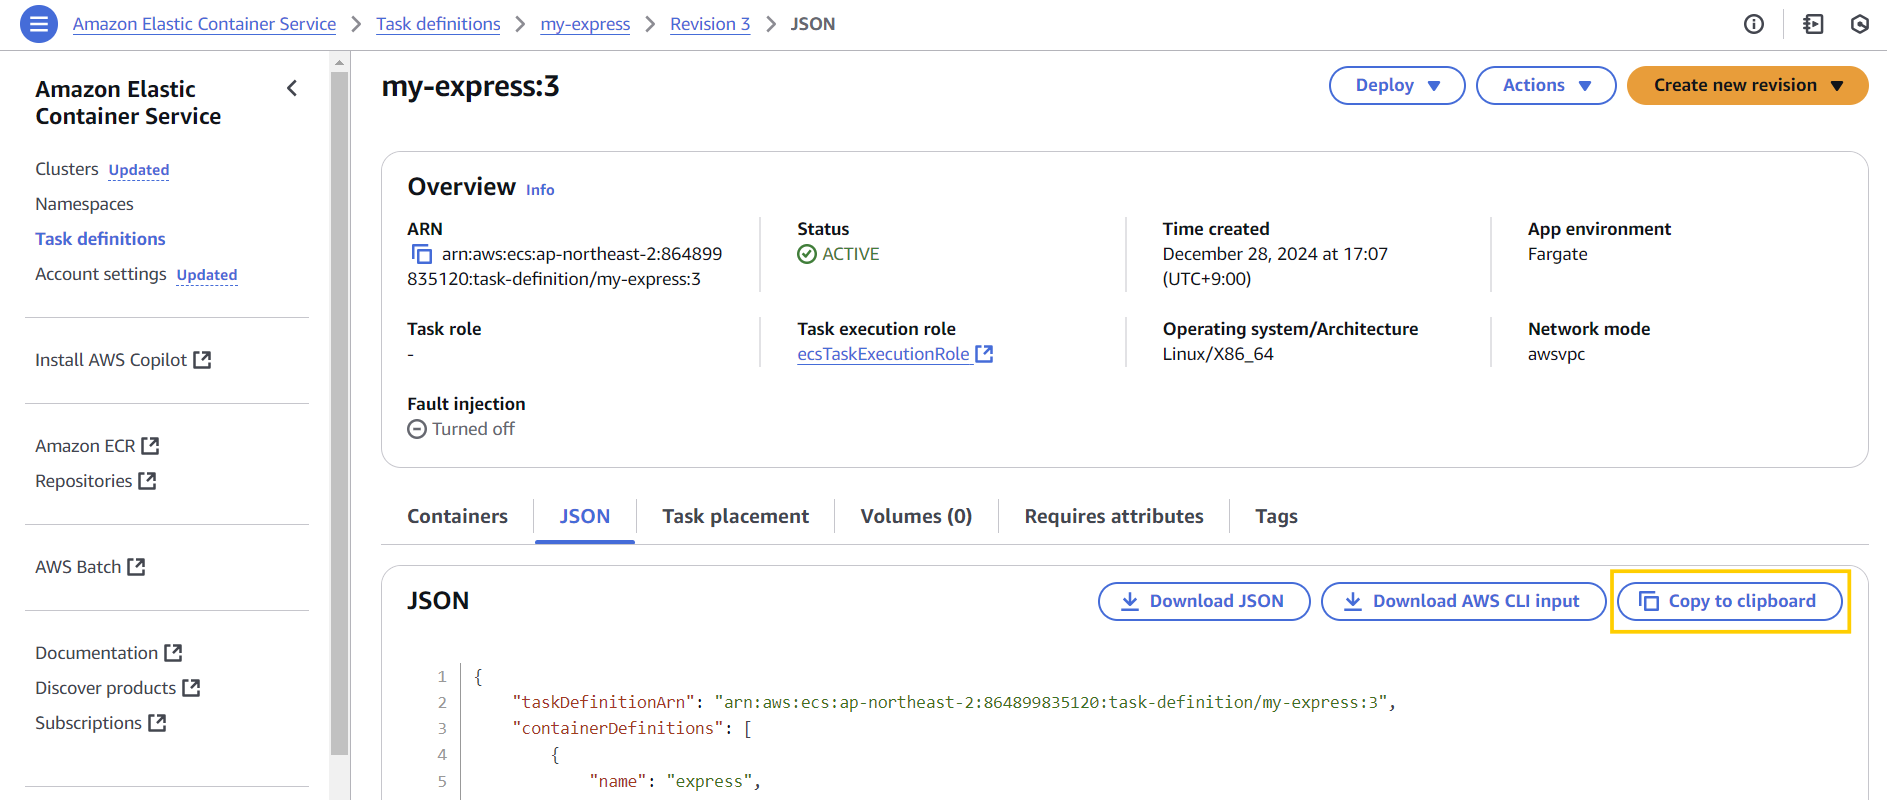
이 때,"image": "864899835120.dkr.ecr.ap-northeast-2.amazonaws.com/express:3",부분은 삭제! - 공식문서의 yml 파일에서 필요한 부분 복사해와서 붙여넣기
✨ VSCode 단축키
공백 생성: 드래그 후Tab
공백 제거: 드래그 후Shift+Tab
# 최종 testAndDeploy.yml 파일
name: testAndDeploy

on:
    push:
        branches:
            - main

# 공식문서 복붙
env:
  AWS_REGION: ap-northeast-2
  ECR_REPOSITORY: express
  ECS_SERVICE: express-service
  ECS_CLUSTER: my-express-cluster
  ECS_TASK_DEFINITION: ./task_definition.json

  CONTAINER_NAME: express


permissions:
  id-token: write # This is required for requesting the JWT
  contents: read  # This is required for actions/checkout


jobs:
    tests:
        runs-on: ubuntu-22.04
        steps:
            - name: Checkout repository
              uses: actions/checkout@v3

            - name: Build and test with Docker Compose
              run: docker-compose -f docker-compose.test.yml up --build --abort-on-container-exit

    deploy:
        runs-on: ubuntu-latest
        needs: tests
        steps:
            # 여기부터 공식문서 복붙
            - name: Checkout
              uses: actions/checkout@v4

            - name: Configure AWS credentials # 이 부분은 공식문서 update 가 되지 않아서 수정
              uses: aws-actions/configure-aws-credentials@v4
              with:
                role-to-assume: arn:aws:iam::864899835120:role/github_minzix_express_OIDC
                role-session-name: sampleSessionName
                aws-region: ${{ env.AWS_REGION }}

            - name: Login to Amazon ECR
              id: login-ecr
              uses: aws-actions/amazon-ecr-login@62f4f872db3836360b72999f4b87f1ff13310f3a

            - name: Build, tag, and push image to Amazon ECR
              id: build-image
              env:
                ECR_REGISTRY: ${{ steps.login-ecr.outputs.registry }}
                IMAGE_TAG: ${{ github.sha }}
              run: |
                # Build a docker container and
                # push it to ECR so that it can
                # be deployed to ECS.
                docker build -t $ECR_REGISTRY/$ECR_REPOSITORY:$IMAGE_TAG .
                docker push $ECR_REGISTRY/$ECR_REPOSITORY:$IMAGE_TAG
                echo "image=$ECR_REGISTRY/$ECR_REPOSITORY:$IMAGE_TAG" >> $GITHUB_OUTPUT

            - name: Fill in the new image ID in the Amazon ECS task definition
              id: task-def
              uses: aws-actions/amazon-ecs-render-task-definition@c804dfbdd57f713b6c079302a4c01db7017a36fc
              with:
                task-definition: ${{ env.ECS_TASK_DEFINITION }}
                container-name: ${{ env.CONTAINER_NAME }}
                image: ${{ steps.build-image.outputs.image }}

            - name: Deploy Amazon ECS task definition
              uses: aws-actions/amazon-ecs-deploy-task-definition@df9643053eda01f169e64a0e60233aacca83799a
              with:
                task-definition: ${{ steps.task-def.outputs.task-definition }}
                service: ${{ env.ECS_SERVICE }}
                cluster: ${{ env.ECS_CLUSTER }}
wait-for-service-stability: true- 배포:
git add .,git commit -m "updated github action deploy",git push
dev에서masterbranch로 checkout하는 과정에서 갑자기 github action이 trigger 되지 않아서 의아했는데, github action이 trigger 되기 위한 조건으로는testAndDeploy.yml파일이.github/workflows/디렉터리에 위치해야 한다고 한다.
내 문제는 main branch 이름이 master라서 인식이 안되는 거였다 .. yml 파일 수정 후 잘 인식됨 (이후 기본 branch 설정 수정함)