reference:
1) https://medium.com/@sanjanashivananda07/mastering-user-authentication-mern-stack-login-page-part-1-backend-107ef537f8e6
(Part 1 — Backend)
2) https://medium.com/@sanjanashivananda07/mastering-user-authentication-building-a-simple-login-page-using-mern-stack-part-2-frontend-ad6602f7351d
(Part 2 — Frontend)
✅ Problem Definition ❓

문제 정의부터 시작하자. 최근 일주일 간 react-hook-form 공식 문서를 읽고, 프로젝트 초기 설정에 관한 고민도 했으며, MERN stack 구현을 위해 CRUD를 통한 테스트도 진행했다. 그런데 이 좋은 세월, 왜 그렇게 열심히 공부했냐?
결국에는 프로젝트를 진행하기 위함이었고, 그 시작은 authentication일 수밖에 없다. 사용자 인증 처리가 진행되지 않고서는, 나머지 과정은 모두 의미가 없기 때문이다. 사용자가 없는데 기능이 무슨 지위를 가질 수 있을까. 문제는, 어디서부터 시작해야 할지 모르겠다.
그런데 잘못된 것이 아니다. 안 해봤으니 모르는 것이 당연하고, 산적해 있는 많은 과제들에 대해 쓸데없는 예상으로 에너지를 낭비할 필요도 없다.
결국에 '머리에 든 것이 없다는 것'이 현재의 문제이고, 문제 해결은 '머리에 무엇인가를 채우는 것'이 되겠다. 무엇부터 시작해야 할지 모른다는 말은, auth에 관한 전체적인 flow를 모른다는 말과 동치다. 그렇기에 나보다 먼저 이 문제를 겪은 선배님들이 작성한 혹은 촬영한 자료를 보고 학습하면 그만이다.
기적을 바라지 말자. 인풋이 없는데 아웃풋이 어떻게 나오나. 인풋 대비 10%만 구현되어도, 그날은 샷따 내려도 된다. 제법 강해졌음을 느낀다.
✅ Mastering User Authentication(Part 1 — Backend) 👨💻
Sanjana Shivananda 누님이 medium에 게시한 글을 토대로 Backend 파트를 공부해 보겠다.
1. File Structure 🚀

Backend 파트를 관통하는 파일 구조다. Backend라는 하나의 덩어리를 model, controller, route로 분리한다.

Models Directory에서는 프로젝트에서 사용할 data schema를 정의한다. 내가 사용할 데이터의 구조를 정의하는 영역이다.
Routes Directory에서는 다양한 endpoints를 작성한다. client의 요청을 어떠한 endpoints로 전송할 것인지에 관한 내용을 담고 있으며, 해당 routes는 후술하게 될 controllers와 연결된다.
Controllers Directory에서는 routes에 맞게 실제로 어떤 함수가 동작해야 하는지에 대해 논의한다. 각각의 controller 함수는 데이터 요청과 파싱, 모델과의 연결 등의 프로세스를 처리하게 된다.
2. Setting up and installing the libraries 🚀
2-1. Initializing the Project 🟢
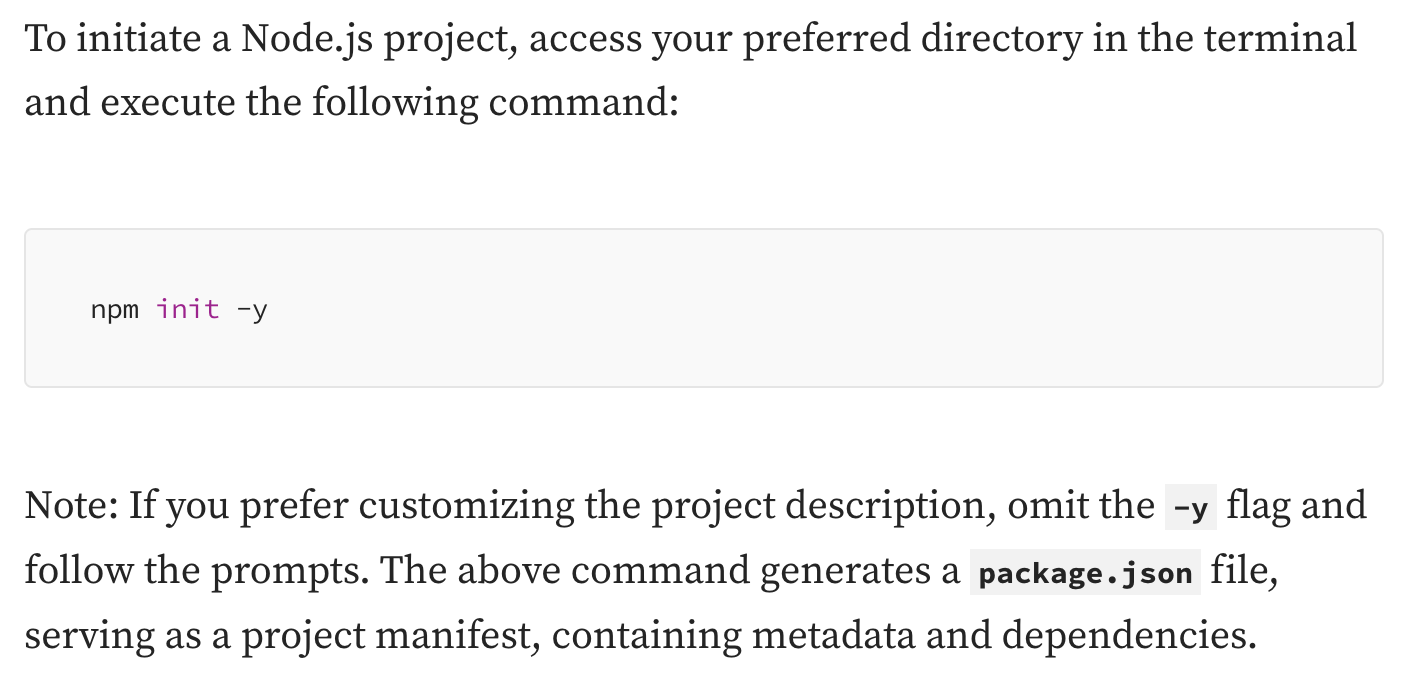
package.json 파일을 생성하기 위해 npm init -y command를 입력할 것. 단, 기본적인 setting 값을 이용하는 것이 아니라 customizing 하고 싶다면 -y를 생략할 것.
2-2. Library Installation 🟢
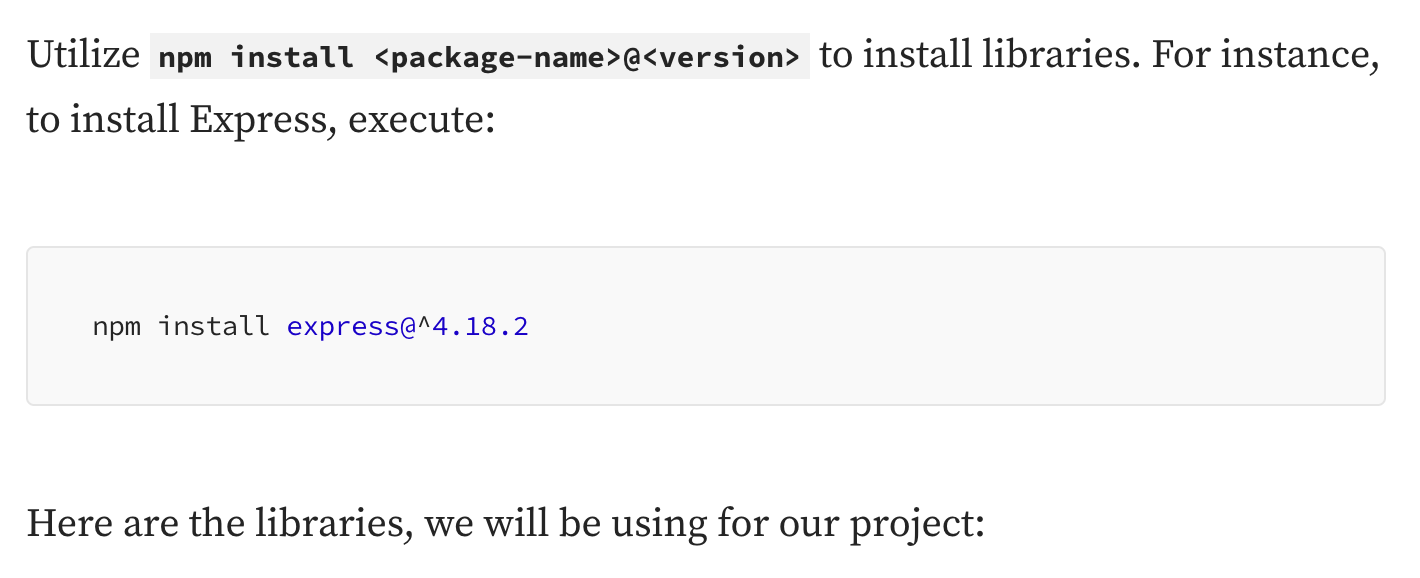
필요한 라이브러리를 설치하면 된다. 라이브러리에 대한 내용은 이전 글에서 상세하게 설명했으니, 본 글에서는 생략하도록 하겠다.
3. Creating a Database with MongoDB Atlas 🚀
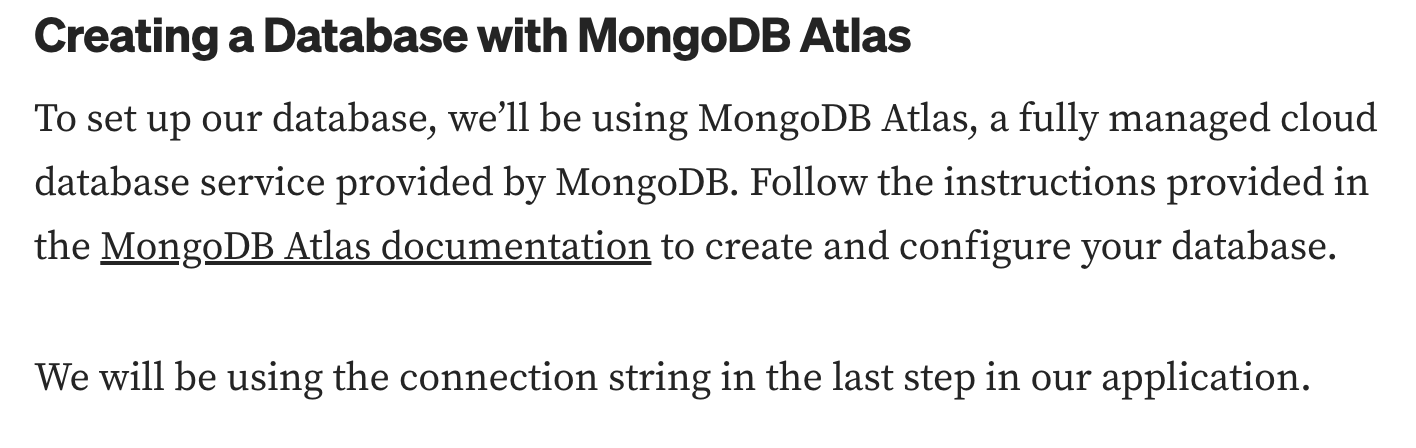
MongoDB database와 연결하는 과정도 이미 몇 번 반복했기에 생략하도록 한다. IP Address 설정을 잊지 말자는 것만 다시 체크하고 넘어간다.
4. Implementation 🚀
코드를 중심으로 학습하고자 한다.
4-1. Models 🟢
LoginPageApplication/Backend/Models/UserModel.js
// Importing necessary modules
const mongoose = require('mongoose')
var crypto = require("crypto");
const {v4: uuidv4} =  require('uuid')

//Defining the User Schema
const userSchema = new mongoose.Schema(
    {
        name: {
            type: String,
            required: true,
            trim: true,
            maxLength: 30,
            minLength: 2,
        },
        email: {
            type: String,
            trim: true,
            required: true,
            unique: true
        },
        encrypted_password: {
            type: String,
            required: true
        },
        salt: String,
    },
    {timestamps: true}
);
//Creating a "virtua" field that will take in password and encrypt it
userSchema.virtual("password")
    .set(function(password){
        this._password = password;
        this.salt = uuidv4();
        this.encrypted_password = this.securedPassword(password);
    })
    .get(function(){
        return this._password
    })
//Defining some methods associated with user schema
userSchema.method({

  //To check if the password is correct
    authenticate: function(plainpassword){
        return this.securedPassword(plainpassword) === this.encrypted_password
    },

  //To encrpty the password
    securedPassword: function(plainpassword){
        if(!plainpassword) return "";
        try{
            return crypto.createHmac('sha256', this.salt)
                    .update(plainpassword)
                    .digest('hex')
        }
        catch(err){
            return "Error in hashing the password";
        }
    },
})
//Export the userSchema as User
module.exports = mongoose.model("User", userSchema);
uuid라는 128비트 숫자를 식별자로 사용하고, crypto 라이브러리를 통해 SHA256 해싱 기법을 이용하여 비밀번호를 암호화하기 위해 위 과정을 수행한다. 잘 몰라도 된다. 지금은.

상식적인 개발자라면 salt가 궁금해야 한다. 짜증나게 "소금이요", 이러면 안 된다는 것이다. 소금은 맞는데, 소금이 아니다. 뭔소리여
킹무위키에 따르면, 암호문을 변조해서 더 '강려크한' 암호화를 가능하게 해주는 재료가 바로 salt인 것이다. 이 개념 역시 지금 다 알 필요는 없다.
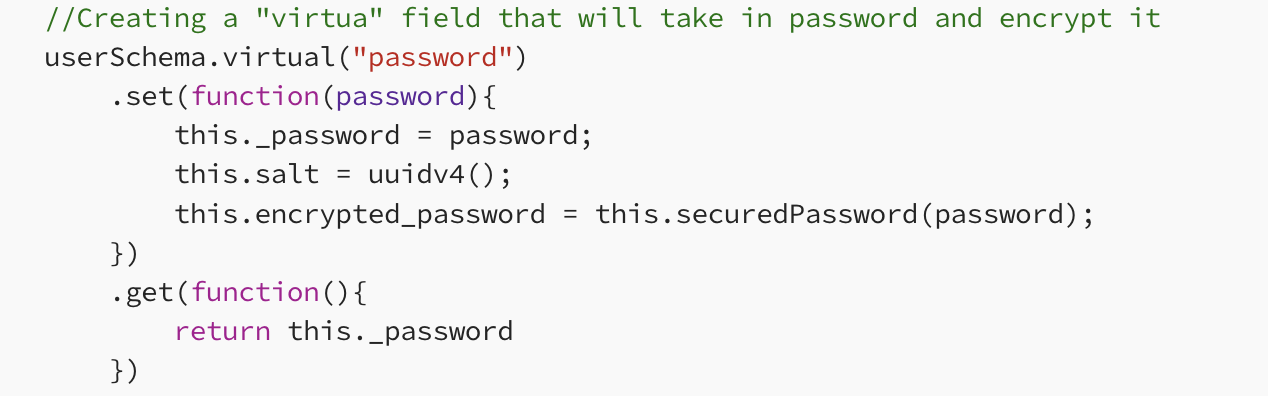
가장 먼저 virtual가 무엇이고 왜 사용하는지 궁금해야 한다.
userSchema.virtual("password")는 mongoose에서 가상 필드를 정의하는 메서드이다. 가상 필드는 실제로 MongoDB 문서에 저장되지는 않지만, 모델 객체에서 실제 필드처럼 사용할 수 있다. 가상 필드를 사용하는 핵심적인 이유에는 크게 두 가지가 있다.
1. 보안성
'가상' 필드를 사용하면 실제 데이터베이스에는 암호화된 비밀번호만 저장되고, 평문 비밀번호는 메모리에서만 처리되기에 보안성이 높아진다.
2. 추상화
비밀번호 관리를 추상화하여, 개발자가 쉽게 사용할 수 있다. 예를 들어, 'set' 메서드를 사용하여 비밀번호를 설정하고 암호화하는 과정을 간편하게 처리할 수 있다.
set을 통해 가상 필드의 값을 세팅하고, get을 통해 가상 필드의 값을 가져올 수 있게 된다.
핵심은 사용자의 비밀번호를 평문으로 저장하지 않고 암호화된 상태로 저장하기 위해, 가상 환경에서 관련 로직 처리를 진행하겠다는 것이다.
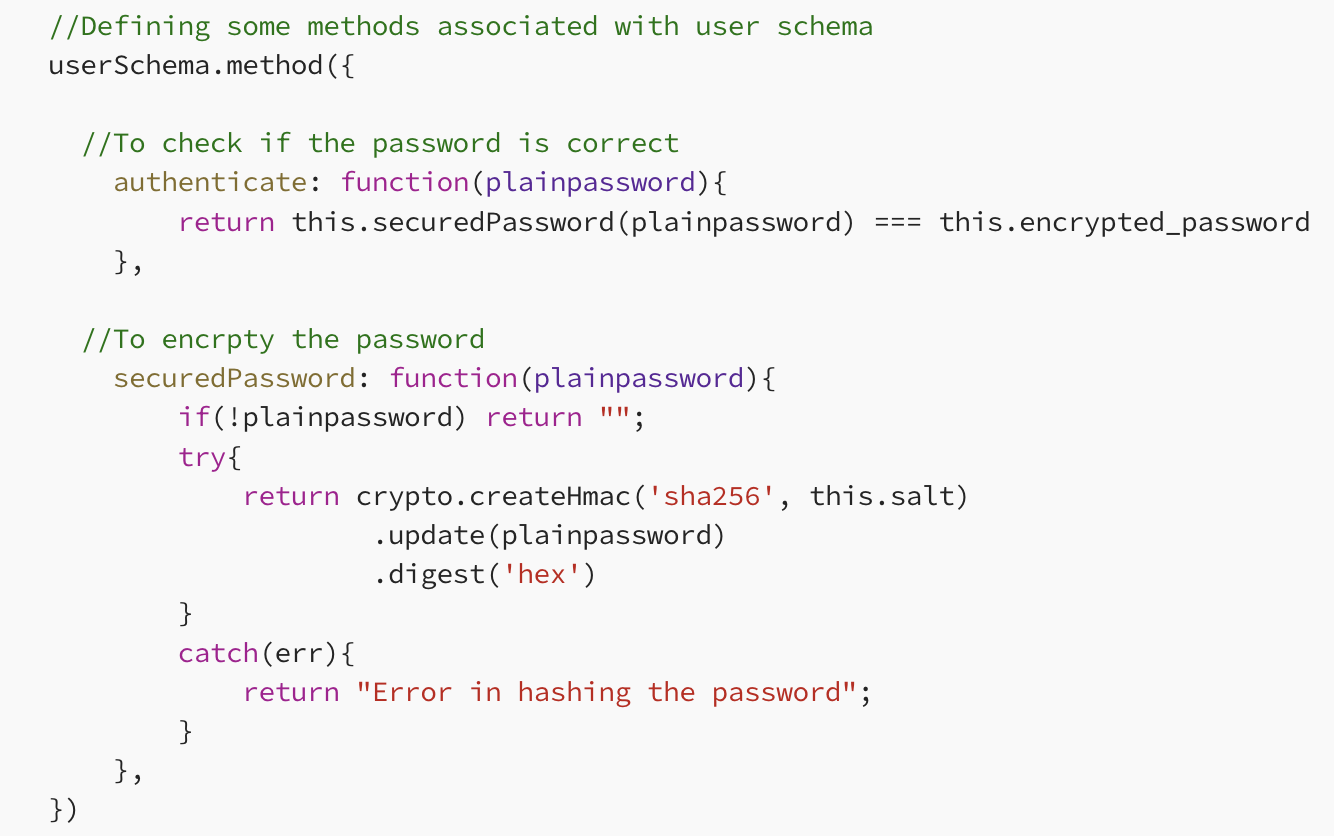
이후 userSchema.method({ ... })을 통해서 스키마의 메서드를 정의한다. 스키마 메서드는 모델의 인스턴스에서 호출할 수 있는 함수로, 일반적으로 데이터의 조작이나 유효성 검사 등의 기능을 구현할 때 사용된다.
위 코드에서는 authenticate를 통해 사용자 로그인 과정에서 비밀번호 일치 여부를 확인할 수 있고, securedPassword를 통해 사용자가 입력한 비밀번호를 암호화한다. securedPassword는 사용자가 입력한 비밀번호를 받아와 SHA-256 해시 함수를 사용하여 암호화하고, 이 과정에서 사용자마다 생성된 salt 값을 사용하여 비밀번호를 보안적으로 처리한다.
4-2. Controllers 🟢
LoginPageApplication/Backend/Models/AuthController.js
// Importing necessary modules and models
const User = require("../models/userModel");
const { check, validationResult } = require("express-validator");
const jwtToken = require('jsonwebtoken');
const { expressjwt: jwt } = require("express-jwt");

// SIGNUP: Registering a new user
exports.signup = (req, res) => {
    // Validate user input using express-validator
    const errors = validationResult(req);
    if (!errors.isEmpty()) {
        return res.status(422).json({
            error: errors.array()[0].msg,
        });
    }
    // Creating a new user instance and saving it to the database
    const user = new User(req.body);
    user.save()
        .then(user => {
            res.json({
                id: user._id,
                name: user.name,
                email: user.email,
            });
        })
        .catch(err => {
            let errorMessage = 'Something went wrong.';
            if (err.code === 11000) {
                errorMessage = 'User already exists, please signin';
            }
            return res.status(500).json({ error: errorMessage });
        });
};
// SIGNIN: Authenticating existing user
exports.signin = async (req, res) => {
    // Validate user input using express-validator
    const errors = validationResult(req);
    if (!errors.isEmpty()) {
        return res.status(422).json({
            error: errors.array()[0].msg,
        });
    }
    // Checking user credentials and generating JWT token for authentication
    const { email, password } = req.body;
    await User.findOne({ email: `${email}` })
        .then(user => {
            if (!user) {
                return res.status(400).json({
                    error: "User not found"
                });
            }
            if (!user.authenticate(password)) {
                return res.status(401).json({
                    error: "Email or Password does not exist"
                });
            }
            // Setting JWT token as a cookie in the browser
            const token = jwtToken.sign({ _id: user._id }, 'shhhhh');
            res.cookie("token", token, { expire: new Date() + 9999 });
            const { _id, name, email } = user;
            return res.json({ token, user: { _id, name, email } });
        });
};
// SIGNOUT: Clearing user token
exports.signout = (req, res) => {
    res.clearCookie("token");
    res.json({
        message: "User has signed out"
    });
};
// Protected Routes
exports.isSignedIn = jwt({
    secret: 'shhhhh',
    userProperty: "auth",
    algorithms: ['HS256']
});
exports.isAuthenticated = (req, res, next) => {
    let checker = req.profile && req.auth && req.profile._id == req.auth._id;
    if (!checker) {
        return res.status(403).json({
            error: "ACCESS DENIED"
        });
    }
    next();
};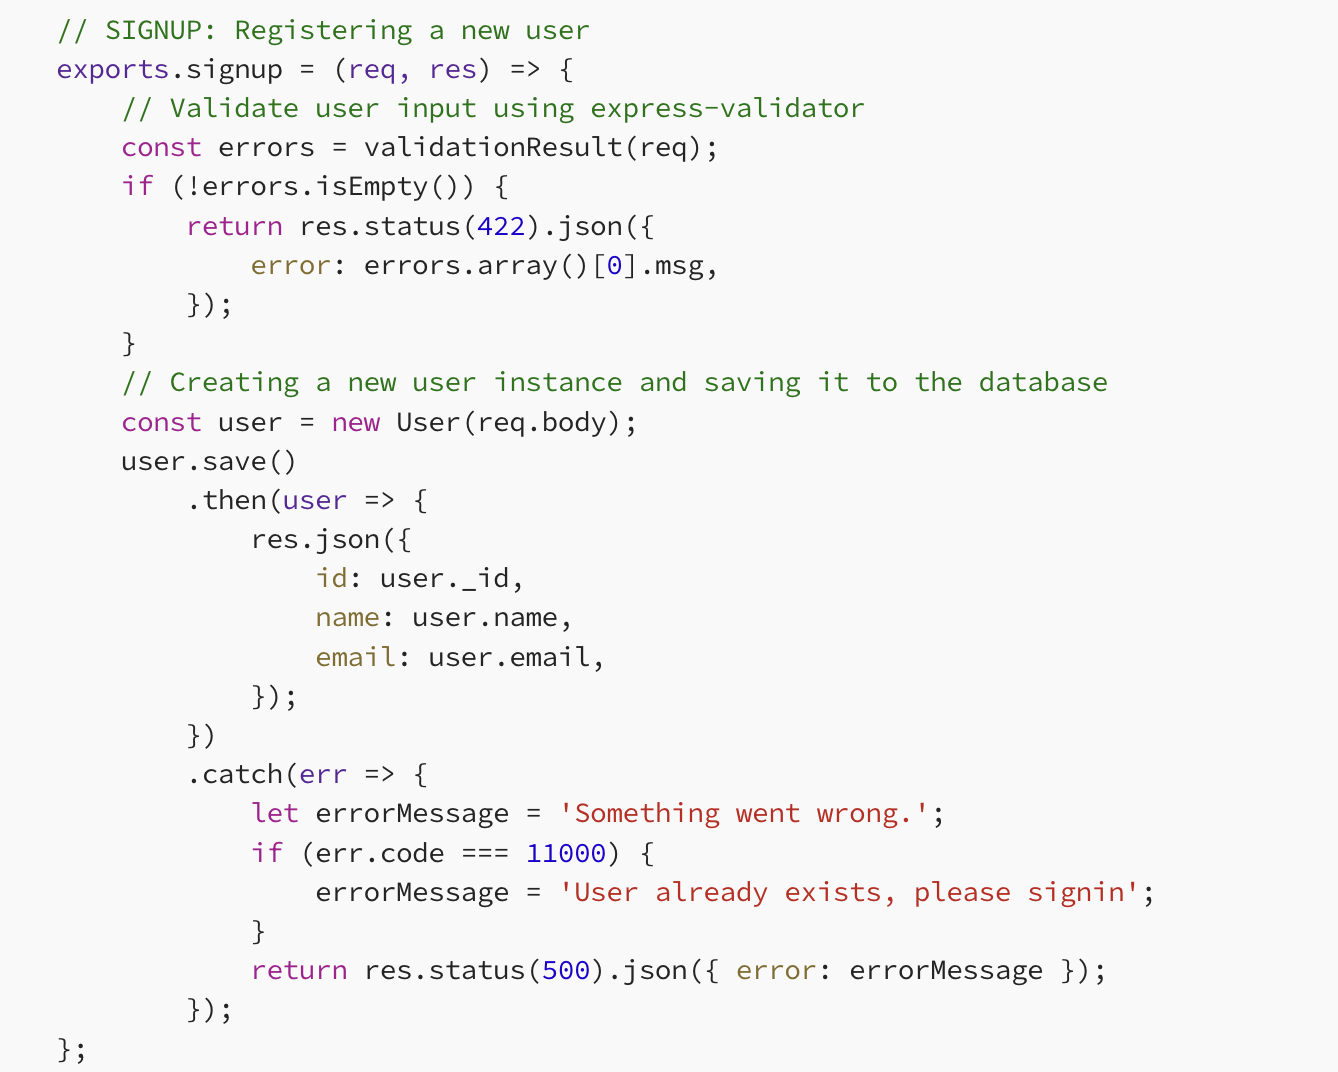
가장 먼저 Express-Validator를 통해 유효성 검사를 진행한다.
errors.isEmpty()는 오류가 있으면 true를 반환한다. 하단의 조건문이 실행된다는 것은 '!'에 의해, 오류가 있다는 것을 의미하고, 오류가 있으면 422 상태 코드와 함께 에러의 첫 번째 메시지를 return 하게 된다.
유효성 검사에 통과한 경우, req.body에서 사용자 데이터를 추출하여 User 스키마를 사용해 새로운 사용자 인스턴스를 생성한다. 이후 user.save()를 통해 MongoDB에 새로운 사용자 정보를 저장하고, 저장에 성공하면 새로운 사용자의 정보를 JSON 형식으로 클라이언트에 반환하게 된다.
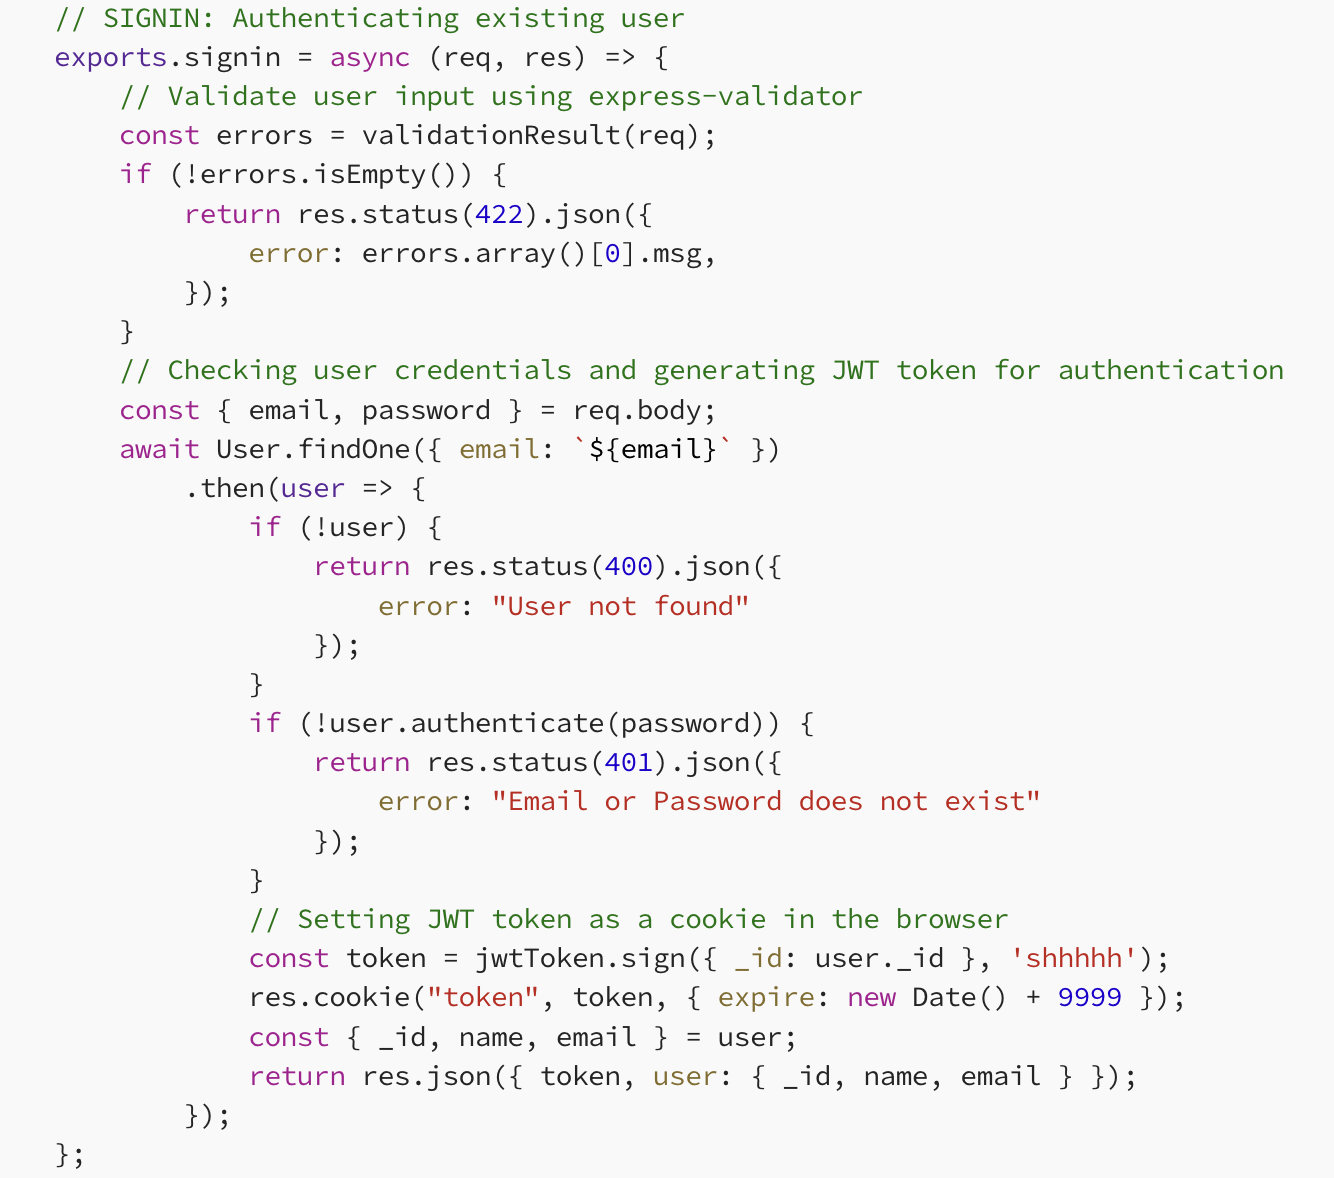
SIGNIN에서는 findOne을 통해 사용자 정보를 찾게 된다.
validation을 통과했을 경우 실행되는 코드는 const token = jwtToken.sign({ _id: user._id }, 'shhhhh');이다. JWT 토큰을 생성하는 코드로서, 사용자의 고유 식별자인 '_id'와 '시크릿 키'를 인자로 전달하여 JWT 토큰을 생성하게 된다.
그다음, res.cookie("token", token, { expire: new Date() + 9999 });를 실행하게 된다. 클라이언트의 쿠키에 JWT 토큰을 저장하는 과정이다. 쿠키의 이름, JWT 토큰, 쿠키의 만료 기한을 payload로 사용하게 된다.
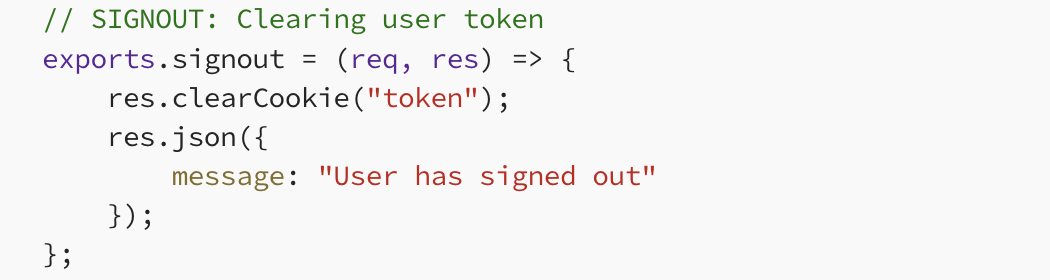
로그아웃을 진행하면, 쿠키를 clear 하고 로그아웃 되었다는 메시지를 response에 담게 된다.
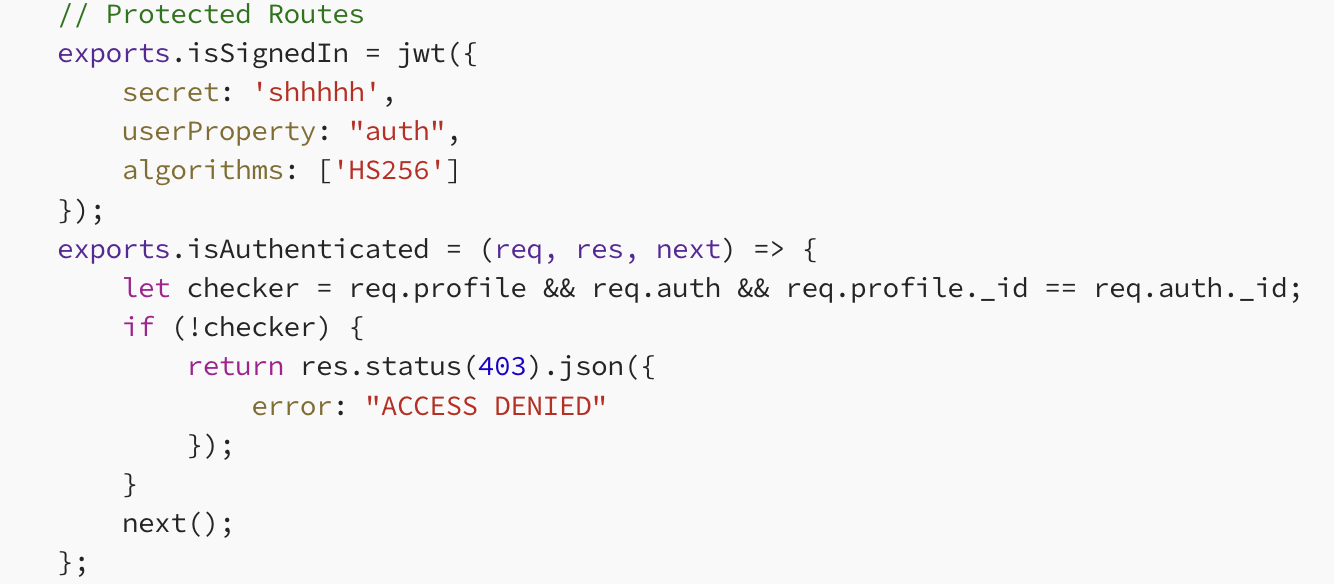
추가적으로, isSignedIn 함수를 통해 JWT를 사용하여 사용자가 로그인했는지를 확인한다. isAuthenticated를 통해서는, 사용자에 대한 인증을 진행한다.
두 함수를 조합해서, 보호된 라우트에서 사용자가 인증되었는지, 해당 자원에 접근할 권한이 있는지를 확인할 수 있다.
4-3. Routes 🟢
LoginPageApplication/Backend/Routes/AuthRoute.js
// Importing necessary modules and models
const express = require("express");
var router = express.Router();
const { check } = require('express-validator');
const { signin, signup, signout, isSignedIn } = require("../controllers/authController");

// POST request for user signup
router.post(
    "/signup",
    [
        // Validation for name, email, and password
        check("name", "Name must be 3+ chars long").isLength({ min: 3 }),
        check("email", "Email is required").isEmail(),
        check("password", "Password must contain 8+ chars").isLength({ min: 8 })
    ],
    signup // Call the signup function from the authController
);
// POST request for user signin
router.post(
    "/signin",
    [
        // Validation for email and password
        check("email", "Email is required").isEmail(),
        check("password", "Password is required").isLength({ min: 1 })
    ],
    signin // Call the signin function from the authController
);
// GET request for user signout
router.get("/signout", signout);
// Protected Route for testing
router.get("/testroute", isSignedIn, (req, res) => {
    res.send("A protected route");
});
module.exports = router; // Export the router module
엔드 포인트에 맞게, 해당하는 controller를 전달한다.
다만, 추가적으로 express-validator의 check 함수를 통해 validation까지 진행하는 모습이다.
4-4. Bringing it all together in index.js 🟢
index.js
//Importing necessary modules and models
const express = require('express');
const app = express();
const bodyParser = require('body-parser');
const cookieParser = require('cookie-parser');
const cors = require('cors');
const mongoose = require('mongoose');
const Authroute = require("./routes/authRoute")

// Database Connection
// Replace <username>, <password>, <cluster>, and <dbname> with your MongoDB Atlas credentials.
mongoose.connect("mongodb+srv://<username>:<password>@<cluster>/<dbname>?retryWrites=true&w=majority")
    .then(() => console.log("Database connected successfully"))
    .catch((err) => console.log("Database connection failed", err));
// Starting the Application
const port = 8000;
app.listen(port, () => {
    console.log(`App is running at ${port}`);
});
// Middleware Configuration
// Body-parser to parse incoming request bodies as JSON
app.use(bodyParser.json());
// Cookie-parser for handling cookies
app.use(cookieParser());
// CORS for enabling Cross-Origin Resource Sharing
app.use(cors());
// Routing
// Mounting authentication-related routes under the '/api' endpoint
app.use("/api", Authroute);
최종적으로 index.js에서는 필요한 모듈을 불러온 뒤, 네 가지 로직만 남게 된다.
- DB 연결
// Database Connection
// Replace <username>, <password>, <cluster>, and <dbname> with your MongoDB Atlas credentials.
mongoose.connect("mongodb+srv://<username>:<password>@<cluster>/<dbname>?retryWrites=true&w=majority")
    .then(() => console.log("Database connected successfully"))
.catch((err) => console.log("Database connection failed", err));- 애플리케이션 시작
// Starting the Application
const port = 8000;
app.listen(port, () => {
    console.log(`App is running at ${port}`);
});- 미들웨어
// Middleware Configuration
// Body-parser to parse incoming request bodies as JSON
app.use(bodyParser.json());
// Cookie-parser for handling cookies
app.use(cookieParser());
// CORS for enabling Cross-Origin Resource Sharing
app.use(cors());- 라우팅
// Routing
// Mounting authentication-related routes under the '/api' endpoint
app.use("/api", Authroute);
5. Conclusion 🚀
-
JWT(토큰 기반 인증): JSON Web Token(JWT)을 사용하여 사용자 인증을 구현한다. 이는 클라이언트와 서버 간의 안전한 정보 전달을 가능하게 하며, 토큰에는 사용자 식별 정보가 포함된다.
-
비밀번호 보안: 사용자의 비밀번호는 안전하게 관리되어야 한다. 일반적으로 bcrypt와 같은 해시 함수를 사용하여 비밀번호를 해싱하여 저장하며, salt를 사용하여 보안성을 더욱 강화한다.
-
사용자 모델: 데이터베이스에 저장되는 사용자 모델은 최소한 사용자 이름, 이메일, 해싱된 비밀번호 필드를 포함해야 한다. 추가적인 필드는 애플리케이션의 요구사항에 따라 결정된다.
-
라우팅 및 컨트롤러: 회원 가입, 로그인, 로그아웃과 같은 사용자 인증 관련 기능은 별도의 라우트와 컨트롤러로 구현된다. 라우트는 클라이언트의 요청을 받아 컨트롤러로 전달하며, 컨트롤러는 실제 비즈니스 로직을 수행한다.
-
JWT 검증: '클라이언트가 제공한 JWT'의 유효성을 검증하는 미들웨어를 사용하여 보호된 엔드포인트에 대한 접근을 제어한다. 이는 클라이언트가 로그인 상태인지를 판별하는 데 중요하다.
-
보안 주의 사항: IP 주소 제한 설정, HTTPS 사용 등의 추가적인 보안 설정을 통해 데이터의 안전성을 강화할 수 있다.
✅ next
https://medium.com/@sanjanashivananda07/mastering-user-authentication-building-a-simple-login-page-using-mern-stack-part-2-frontend-ad6602f7351d
(Part 2 — Frontend)