Complete Guide to Building NFC Reader and Writer Apps in Flutter Using NFC Manager Package – Step-by-Step Tutorial
Near Field Communication (NFC) is a short-range wireless technology that lets devices share data when they are close. You find it in contactless payments, smart business cards, and other daily tools that make life easy. For mobile developers, adding an NFC reader and writer to apps opens up many possibilities.
Flutter, Google’s UI toolkit, lets you build apps for mobile, web, and desktop from one codebase. It makes creating cross-platform apps with rich features more efficient. The NFC Manager Flutter package helps implement NFC reader writer features on both Android and iOS. This step-by-step tutorial will show how to build an NFC app in Flutter that can read from and write to NFC tags.
Businesses can also partner with professional Flutter app development services to streamline development and ensure robust NFC functionality.
Project Setup for Your Flutter NFC Project
Before we dive into the code, let’s get our project set up and ready.
Prerequisites for Implementing NFC in Flutter
Make sure you have the following installed and ready:
Flutter SDK: Install the Flutter SDK by following the official documentation.
Basic understanding of Dart and Flutter: You need to know the basics of the Dart language and the Flutter framework.
A physical device that supports NFC: You cannot test Flutter NFC reader writer apps on simulators or emulators. You need an Android or iOS device that supports NFC.
For scaling teams or projects, you can also consider working with dedicated Flutter developers for hire to speed up implementation.

Creating a New Flutter Project
To start, create a new Flutter project by running the following command in your terminal:
flutter create nfc_demo
This will create a new directory named nfc_demo with the basic Flutter project structure. Open this project in your favorite IDE, such as Visual Studio Code or Android Studio.
If you’re new, our Flutter BLoC state management tutorial is a good place to start learning about state handling in apps.
Adding Dependencies
Next, we need to add the nfc_manager package to our project. Open the pubspec.yaml file and add the following line under dependencies:
YAML
dependencies:
flutter:
sdk: flutter
The following adds the Cupertino Icons font to your application.
Use with the CupertinoIcons class for iOS style icons.
cupertino_icons: ^1.0.8
nfc_manager: ^4.0.2
nfc_manager_ndef: ^1.0.1
Code language: CSS (css)
After adding the dependency, run the following command in your terminal to install it:
Bash
flutter pub get
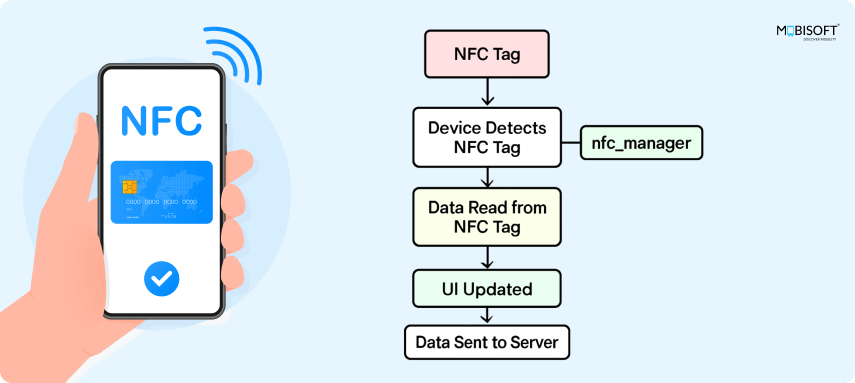
The nfc_manager Flutter package is the core dependency that provides the necessary APIs to interact with the device’s NFC hardware for reading and writing NFC tags.
**Implementing NFC Features
With the project set up, we can now start implementing NFC in Flutter.
Checking for NFC Availability
Before attempting any NFC operation, it’s crucial to check if the device hardware actually supports NFC. This prevents errors and allows you to provide a better user experience by, for example, disabling NFC-related UI elements.
Code Snippet:
import 'dart:io';
import 'dart:typed_data';
import 'package:flutter/material.dart';
import 'package:nfc_manager/ndef_record.dart';
import 'package:nfc_manager/nfc_manager.dart';
import 'package:nfc_manager_ndef/nfc_manager_ndef.dart';
import 'package:nfc_manager/src/nfc_manager_android/pigeon.g.dart';
import 'nfc_scan_result.dart';
// A boolean to check if NFC is available on the device.
bool isNfcAvailable = false;
Future _checkNfcAvailability() async {
setState(() async {
isNfcAvailable = await NfcManager.instance.isAvailable();
});
}
Code Explanation:
NfcManager.instance.isAvailable(): This asynchronous method returns a Future which resolves to true if the device has NFC hardware and it is enabled, and false otherwise.
Reading NFC Tags
To start reading an NFC tag, you need to initiate a session and listen for tag discovery. This is the first step in building a Flutter NFC reader app.