본글은 개발하는 남자님의 영상을 보고 공부하며 작성하는 글입니다.
코드는 제가 작성하며 다르게 작성한 부분이 있습니다.
기왕이면 본인스타일로 커스텀하면서 작성하는게 더 재밌잖아요?
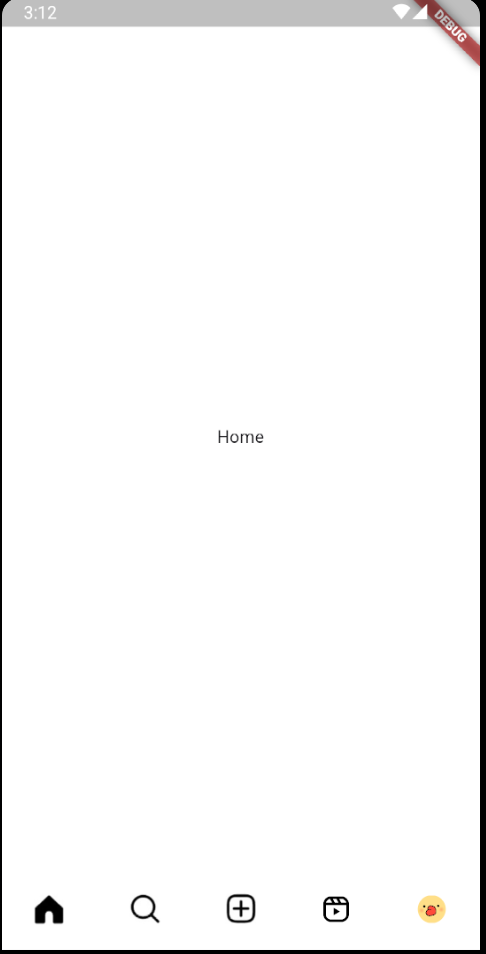
결과
프로젝트 생성
저는 vscode를 사용했습니다.
flutter create instagram
cd instagram
code .
프로젝트를 생성하고 sdk 오류가 발생한다면 pubspec.yaml 에서 해당부분을 수정해줍시다.

필요없는 코드는 전부 지워주고 GetX을 사용할 예정이기때문에 MaterialApp을 GetMaterialApp으로 변경해주고 테마를 설정해줍시다.
flutter pub add getimport 'package:flutter/material.dart';
import 'package:get/route_manager.dart';
import 'package:instagram/src/app.dart';
void main() {
runApp(const MyApp());
}
class MyApp extends StatelessWidget {
const MyApp({super.key});
// This widget is the root of your application.
Widget build(BuildContext context) {
return GetMaterialApp(
theme: ThemeData(
primaryColor: Colors.white,
scaffoldBackgroundColor: Colors.white,
appBarTheme: const AppBarTheme(
foregroundColor: Colors.black, backgroundColor: Colors.white),
),
home: const App(),
initialBinding: InitBinding(),
);
}
}
InitBinding은 일단 지금은 무시하고 app.dart파일에 화면을 만들어 볼겁니다.
IconPath
먼저 BottomNavigationBar에 아이콘들이 필요합니다.
해당 이미지들을 다운로드 받아서 사용해주시면 됩니다.(제가 임의로 수정한 이미지도 있어서 부자연스러울수 있음)
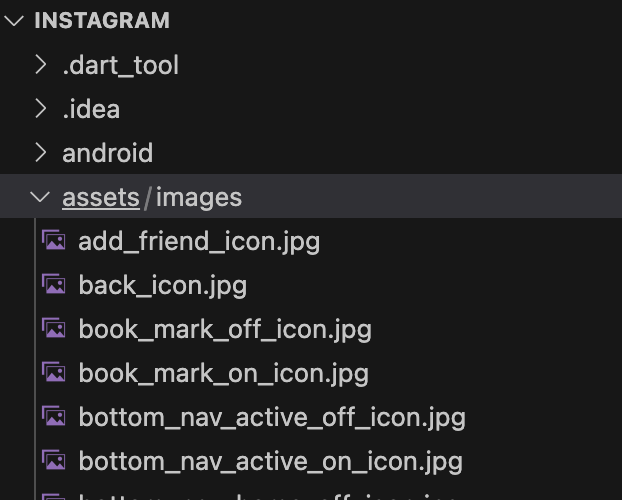
다운로드를 했다면 사진처럼 proj > assets > images 폴더를 생성하고 이미지를 넣어줍시다.
Flutter 에서 이미지를 사용하려면 하나의 작업이 더필요한데 pubspec.yaml에 경로를 입력해 주어야 합니다.
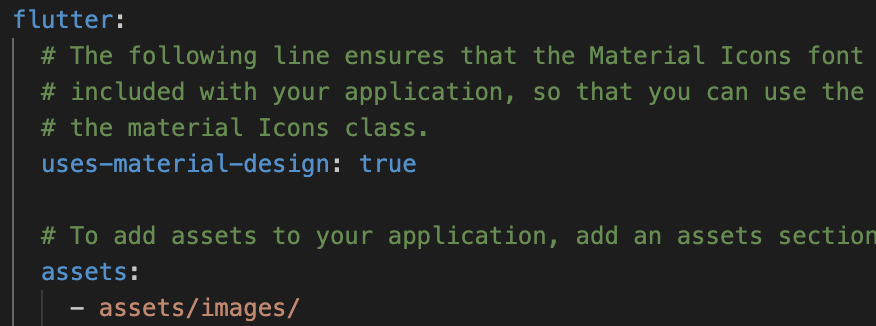
사진처럼 flutter>asstes에 경로를 입력해줍시다.
여기까지하면 충분히 이미지를 사용할 수 있지만 하나의 작업을 더해줍시다.
icon_path.dart
class IconsPath {
  static String get root => 'assets/images/';

  static String get homeOff => '${root}bottom_nav_home_off_icon.jpg';
  static String get homeOn => '${root}bottom_nav_home_on_icon.jpg';

  static String get searchOff => '${root}bottom_nav_search_off_icon.jpg';
  static String get searchOn => '${root}bottom_nav_search_on_icon.jpg';

  static String get upload => '${root}bottom_nav_upload_icon.jpg';

  static String get reelsOff => '${root}bottom_nav_reels_off_icon.jpg';
  static String get reelsOn => '${root}bottom_nav_reels_on_icon.jpg';

  static String get profile => '${root}profile_img.jpeg';
}
이미지 경로를 static getter로 관리해주면 코드의 가독성도 좋아지고 수정하기도 편리하겠죠. 귀찮더라도 IconPath를 하나 만들어줍시다.
image_data.dart
import 'package:flutter/material.dart';
import 'package:get/route_manager.dart';
class ImageData extends StatelessWidget {
final String path;
final double width;
const ImageData({super.key, required this.path, this.width = 70});
Widget build(BuildContext context) {
return Image.asset(
path,
width: width / Get.mediaQuery.devicePixelRatio,
);
}
}이미지들을 띄워줄 Widget도 하나 생성해줍시다. Get.mediaQuery로 화면크기에 맞는 비율을 설정해줄 수 있습니다.
image_avater.dart
import 'package:cached_network_image/cached_network_image.dart';
import 'package:flutter/material.dart';
enum Shape { ACTIVE, OFF }
class ImageAvatar extends StatelessWidget {
final String imgUrl;
final double size;
final Shape type;
const ImageAvatar(
{super.key,
required this.imgUrl,
required this.type,
required this.size});
Widget build(BuildContext context) {
return type == Shape.ACTIVE ? _activeAvatar() : _offAvatar();
}
Widget _basicAvatar() {
return Container(
padding: const EdgeInsets.all(1.0),
decoration:
const BoxDecoration(color: Colors.white, shape: BoxShape.circle),
child: CircleAvatar(
backgroundColor: Colors.white,
child: SizedBox(
width: size,
height: size,
child: ClipRRect(
borderRadius: BorderRadius.circular(65),
child: Image.asset(
imgUrl,
width: size,
),
),
),
),
);
}
Widget _activeAvatar() {
return Container(
height: size + 2,
width: size + 2,
padding: const EdgeInsets.all(1.0),
decoration:
const BoxDecoration(color: Colors.black, shape: BoxShape.circle),
child: _basicAvatar(),
);
}
Widget _offAvatar() {
return Container(
height: size + 2,
width: size + 2,
padding: const EdgeInsets.all(1.0),
decoration:
const BoxDecoration(color: Colors.white, shape: BoxShape.circle),
child: _basicAvatar(),
);
}
}프로필 아이콘에 사용될 Widget입니다. 활성화상태일때 이미지 테두리가 보이도록 작성해줍시다.
자 드디어 아이콘을 전부 만들었으니 이제 BottomNavigation을 만들어봅시다. 아까 위에서 봤던 App을 작성해줍시다.
App.dart
import 'package:flutter/material.dart';
import 'package:get/get.dart';
import 'package:get/get_core/src/get_main.dart';
import 'package:instagram/items/image_avater.dart';
import 'package:instagram/items/image_data.dart';
import 'package:instagram/paths/icons_path.dart';
import 'package:instagram/src/bottom_nav_controller.dart';
class App extends GetView<BottomNavController> {
const App({super.key});
Widget build(BuildContext context) {
return WillPopScope(
onWillPop: controller.willPopAction,
child: Obx(
() => Scaffold(
body: _body(),
bottomNavigationBar: Theme(
data: ThemeData(
splashColor: Colors.transparent,
highlightColor: Colors.transparent),
child: _bottomNavigationBar()),
),
),
);
}
Widget _body() {
return IndexedStack(
index: controller.pageIndex,
children: const [
Center(child: Text('Home')),
Center(child: Text('Search')),
Center(child: Text('Upload')),
Center(child: Text('Reels')),
Center(child: Text('Profile')),
],
);
}
Widget _bottomNavigationBar() {
return BottomNavigationBar(
type: BottomNavigationBarType.fixed,
elevation: 0.0,
backgroundColor: Colors.white,
showSelectedLabels: false,
showUnselectedLabels: false,
currentIndex: controller.pageIndex,
onTap: controller.changeIndex,
items: [
BottomNavigationBarItem(
icon: ImageData(path: IconsPath.homeOff),
activeIcon: ImageData(path: IconsPath.homeOn),
label: 'home'),
BottomNavigationBarItem(
icon: ImageData(path: IconsPath.searchOff),
activeIcon: ImageData(path: IconsPath.searchOn),
label: 'search'),
BottomNavigationBarItem(
icon: ImageData(path: IconsPath.upload),
activeIcon: ImageData(path: IconsPath.upload),
label: 'upload'),
BottomNavigationBarItem(
icon: ImageData(path: IconsPath.reelsOff),
activeIcon: ImageData(path: IconsPath.reelsOn),
label: 'reels'),
BottomNavigationBarItem(
icon: ImageAvatar(
imgUrl: IconsPath.profile, type: Shape.OFF, size: 25),
activeIcon: ImageAvatar(
imgUrl: IconsPath.profile, type: Shape.ACTIVE, size: 25),
label: 'profile'),
],
);
}
}
class InitBinding extends Bindings {
void dependencies() {
Get.put(BottomNavController(), permanent: true);
}
}
bottom_nav_controller.dart
import 'dart:io';

import 'package:flutter/material.dart';
import 'package:get/get.dart';
import 'package:get/get_state_manager/src/simple/get_controllers.dart';

enum Page { HOME, SEARCH, UPLOAD, REELS, PROFILE }

class BottomNavController extends GetxController {
  final RxInt _page = 0.obs;
  int get pageIndex => _page.value;

  List bottomHistory = [0];

  void changeIndex(int value) {
    var page = Page.values[value];
    switch (page) {
      case Page.UPLOAD:
      case Page.HOME:
      case Page.SEARCH:
      case Page.REELS:
      case Page.PROFILE:
        moveTo(value);
    }
  }

  void moveTo(int value) {
    _page(value);
    if (bottomHistory.last != value && Platform.isAndroid) {
      bottomHistory.add(value);
    }
  }

  Future<bool> willPopAction() async {
    if (bottomHistory.length == 1) {
      return true;
    }

    bottomHistory.removeLast();
    _page(bottomHistory.last);
    return false;
  }
}
하나하나 중요한부분들을 짚어봅시다. 먼저 Scaffold bottomNavigationBar로 _bottomNavigationBar()를 선언해줍니다.
ThemeData는 클릭 이벤트를 없애는 부분입니다.
Scaffold(
          body: _body(),
          bottomNavigationBar: Theme(
              data: ThemeData(
                  splashColor: Colors.transparent,
                  highlightColor: Colors.transparent),
              child: _bottomNavigationBar()),
        ),
_bottomNavigationBar()에서 label이 보이지않도록 설정 및 색상 설정을 해준뒤 items를 구성합니다.
Widget _bottomNavigationBar() {
    return BottomNavigationBar(
      type: BottomNavigationBarType.fixed,
      elevation: 0.0,
      backgroundColor: Colors.white,
      showSelectedLabels: false,
      showUnselectedLabels: false,
      currentIndex: controller.pageIndex,
      onTap: controller.changeIndex,
      items: [
        BottomNavigationBarItem(
            icon: ImageData(path: IconsPath.homeOff),
            activeIcon: ImageData(path: IconsPath.homeOn),
            label: 'home'),
        BottomNavigationBarItem(
            icon: ImageData(path: IconsPath.searchOff),
            activeIcon: ImageData(path: IconsPath.searchOn),
            label: 'search'),
        BottomNavigationBarItem(
            icon: ImageData(path: IconsPath.upload),
            activeIcon: ImageData(path: IconsPath.upload),
            label: 'upload'),
        BottomNavigationBarItem(
            icon: ImageData(path: IconsPath.reelsOff),
            activeIcon: ImageData(path: IconsPath.reelsOn),
            label: 'reels'),
        BottomNavigationBarItem(
            icon: ImageAvatar(
                imgUrl: IconsPath.profile, type: Shape.OFF, size: 25),
            activeIcon: ImageAvatar(
                imgUrl: IconsPath.profile, type: Shape.ACTIVE, size: 25),
            label: 'profile'),
      ],
    );
앞서 만들어둔 ImageData와 IconsPath를 사용해서 선언해줍시다.
Profile은 ImageAvatar를 사용합니다.
  Widget _body() {
    return IndexedStack(
      index: controller.pageIndex,
      children: const [
        Center(child: Text('Home')),
        Center(child: Text('Search')),
        Center(child: Text('Upload')),
        Center(child: Text('Reels')),
        Center(child: Text('Profile')),
      ],
    );
  }
body는 일단 텍스트로 구성해두었습니다.(이후에 수정할 예정)
  final RxInt _page = 0.obs;
  int get pageIndex => _page.value;

  List bottomHistory = [0];

  void changeIndex(int value) {
    var page = Page.values[value];
    switch (page) {
      case Page.UPLOAD:
      case Page.HOME:
      case Page.SEARCH:
      case Page.REELS:
      case Page.PROFILE:
        moveTo(value);
    }
  }

  void moveTo(int value) {
    _page(value);
    if (bottomHistory.last != value && Platform.isAndroid) {
      bottomHistory.add(value);
    }
  }
controlle에있는 page값을 통해 페이지가 이동됩니다.
뒤로가기시 페이지 이동
Widget build(BuildContext context) {
return WillPopScope(
onWillPop: controller.willPopAction,
child: Obx(
() => Scaffold(
body: _body(),
bottomNavigationBar: Theme(
data: ThemeData(
splashColor: Colors.transparent,
highlightColor: Colors.transparent),
child: _bottomNavigationBar()),
),
),
);
}WillPopScope는 뒤로가기시 액션을 지정할 수 있습니다.(안드로이드만 해당)
글을 작성한 날짜 기준 인스타그램 앱에서 뒤로가기시 이전탭으로 이동됩니다. 해당 기능을 위해 controller에 history 리스트를 생성하고 뒤로가기시 controller에서 해당 함수를 실행해줍시다.
  Future<bool> willPopAction() async {
    if (bottomHistory.length == 1) {
      return true;
    }

    bottomHistory.removeLast();
    _page(bottomHistory.last);
    return false;
  }